


|
DATE:0.2002. |
|
911 |
) |
P/N:.MMBB0064201(1 |
3 |
|
Usurio |
Manuald |
a |
el |
V X 1 0
U S E R
G U I D E
o i r a u s U
l e d
a í u G
0 1 X V
User Guide

Contents
LIMITED WARRANTY STATEMENT |
1 |
Subject |
4 |
Introduction |
6 |
Highlights |
6 |
Important Information |
7 |
Check Accessories |
7 |
Before You Start |
8 |
Safety Instructions |
8 |
Chapter 1. Getting Started |
11 |
Cautions |
11 |
Using the Battery Pack |
12 |
Phone Components |
16 |
Phone Overview |
17 |
Onscreen Icons |
19 |
Entering Information Using T9 Text Input |
20 |
Chapter 2. Basic Functions |
25 |
Turning the Phone On and Off |
25 |
Making a Call |
26 |
Correcting Dialing Mistakes |
27 |
Receiving Calls |
27 |
Using Manner & Lock Mode |
28 |
Call Waiting |
29 |
Mute |
29 |
Redialing Calls |
30 |
Adjusting the Volume |
30 |

Power Save Mode 


 31
31
Signal Strength 


 31
31
Caller ID Display 


 32
32
Speed Dialing 


 33
33
Caller ID 


 33
33
Phone Book Features


 34
34
Chapter 3. Menu Features 


 43
43
General Guidelines to MENU Access and
Settings 


 43
43
SOUND 


 44
44
DISPLAY 


 50
50
FEATURES 


 54
54
SYSTEM 


 59
59
SECURITY 


 62
62
Chapter 4. PIM Features 


 66
66
PHONE BOOK


 66
66
CALL HISTORY 


 70
70
SCHEDULER 


 73
73
WAKE UP 


 79
79
CALCULATOR 


 80
80
Chapter 5. Message Features 


 81
81
SMS 


 83
83
Voice 


 83
83
Send Msg


 84
84
Inbox 


 89
89
Outbox |
92 |
Erase Msgs |
94 |
Setting |
95 |
Chapter 6. Functions Used During a Call |
97 |
Mute |
97 |
Memo |
97 |
Key Tone |
97 |
Voice Privacy |
98 |
Chapter 7. MiniBrowser |
99 |
Overview |
101 |
Accessing the MiniBrowser |
102 |
Get It Now |
107 |
Chapter 8. Accessories |
111 |
Chapter 9. Appendix |
114 |
Chapter 10. Safety Guidelines |
115 |
TIA Safety Information |
115 |
FDA Consumer Update |
119 |
Consumer Information on SAR |
126 |
Index |
128 |
LIMITED WARRANTY STATEMENT
1. WHAT THIS WARRANTY COVERS:
LG offers you a limited warranty that the enclosed subscriber unit and its enclosed accessories will be free from defects in material and workmanship, according to the following terms and conditions:
(1)The limited warranty for the unit and enclosed accessories shall be a period of one (1) year from the date of original purchase. The remaining warranty period for the unit being repaired or replaced shall be determined by presentation of the original sales receipt for the purchase of the unit.
(2)The limited warranty extends only to the original purchaser of the product and is not assignable or transferable to any subsequent purchaser/end user.
(3)The limited warranty is good only to the original purchaser of the product during the warranty period as long as it is in the U. S., including Alaska, Hawaii, U. S. Territories, and all Canadian Provinces.
(4)The external housing and cosmetic parts shall be free of major defects at the time of shipment and, therefore, shall not be covered under these limited warranty terms.
(5)Upon request from LG, the consumer must provide information satisfactory to LG to prove the date of purchase or exchange.
(6)The customer shall bear the cost of shipping the product to the Customer Service Department of LG. LG shall bear the cost of shipping the product back to the consumer after the completion of service under this limited warranty.
2.WHAT THIS WARRANTY DOES NOT COVER:
(1)Defects or damage resulting from use of the product in other than its normal and customary manner.
(2)Defect or damage from abnormal use, abnormal conditions, improper storage, exposure to moisture or dampness, unauthorized modifications, unauthorized connections, unauthorized repair, misuse, neglect, abuse, accident, alteration, improper installation, or other acts which are not the fault of LG, including damage caused by shipping, blown fuses, or spills of food or liquid.
(3)Breakage or damage to antennas unless caused directly by defects in material or workmanship.
(4)Alleged defects or malfunctions of the product if the Customer Service Department at LG was not notified by the consumer during the applicable limited warranty period.
(5)Products, which have had the serial number, removed or made
illegible. |
1 |

(6)This limited warranty is in lieu of all other warranties, express or implied either in fact or by operations of law, statutory or otherwise, including but not limited to any implied warranty of marketability merchantability or fitness for a particular use.
(7)Damage resulting from use of non-LG approved accessories.
(8)All plastic surfaces and all other externally exposed parts that are scratched or damaged due to normal customer use.
(9)Products operated outside published maximum ratings.
(10)Products used or obtained in a rental program.
(11)Consumables (such as fuses).
3. STATE LAW RIGHTS:
No other express warranty is applicable to this product. THE DURATION OF ANY IMPLIED WARRANTIES, INCLUDING THE IMPLIED WARRANTY OF MARKETABILITY OR MERCHANTABILITY, IS LIMITED TO THE DURATION OF THE EXPRESS WARRANTY HEREIN. LG INFOCOMM U.S.A., INC. SHALL NOT BE LIABLE FOR THE LOSS OF THE USE OF THE PRODUCT, INCONVENIENCE, LOSS OR ANY OTHER DAMAGES, DIRECT OR CONSEQUENTIAL, ARISING OUT OF THE USE OF, OR INABILITY TO USE, THIS PRODUCT OR FOR ANY BREACH OF ANY EXPRESS OR IMPLIED WARRANTY, INCLUDING THE IMPLIED WARRANTY OF MARKETABILITY OR MERCHANTABILITY APPLICABLE TO THIS PRODUCT.
Some states do not allow the exclusive of limitation of incidental or consequential damages or limitations on how long an implied warranty lasts; so these limitations or exclusions may not apply to you. This warranty gives you specific legal rights and you may also have other rights, which vary from state to state.
4. HOW TO GET WARRANTY SERVICE:
To obtain warranty service, please call the following telephone number from anywhere in the continental United States:
Tel. 1-800-793-8896 www.lgeservice.com
Please call or write for the location of the LGE authorized service center nearest you and the procedures for obtaining warranty claims.

 Electronics Service
201 JAMES RECORD ROAD, HUNTSVILLE, AL 35824
2
How to Buy Accessories
LG mobile phones and accessories can be purchased via our web site at:
www.lgmobilephones.com or by visiting your local wireless retailer.
3

Subject
The VX10 phone has been designed to operate on the latest digital mobile communication technology, Code Division Multiple Access (CDMA). This CDMA digital technology has greatly enhanced voice clarity and can provide a variety of advanced features. Currently, CDMA mobile communication technology has been commercially used in Cellular and Personal Communication Service (PCS).
The difference between them is operating frequency spectrum. Cellular uses 800Mhz and PCS uses 1.9Ghz. The VX10 operates on both frequencies, this is called a dual-band phone. Also, the VX10 works on Advanced Mobile Phone Service (AMPS). We call it a trimode phone. If one of the Cellular, PCS or AMPS base stations is located nearby, call fail rate of a tri-mode phone is less than a dual-mode phone or a single-mode phone.
CDMA technology adopts DSSS (Direct Sequence Spread Spectrum). DSSS enables the phone to keep communication from being crossed and to use one frequency channel by multiple users in the same specific area, resulting in a 10 fold increase in capacity when compared with the analog mode currently used. Soft/Softer Handoff, Hard Handoff, and Dynamic RF power Control technologies are combined into this phone to reduce call interruptions.
The Cellular and PCS CDMA networks consist of MSO (Mobile Switching Office), BSC (Base Station Controller), BTS (Base station Transmission System), and MS (Mobile Station). The following table lists some major CDMA Standards.
CDMA Standard |
Designator |
Description |
|
|
|
|
|
Basic air interface |
TIA/EIA/IS-95-A |
Protocol between MS and BTS for Cellular & AMPS |
|
ANSI J-STD-008 |
Protocol between MS and BTS for PCS |
||
|
|||
|
|
|
|
|
TIA/EIA/IS-634 |
MAS-BS |
|
Network |
TIA/EIA/IS/651 |
PCSC-RS |
|
TIA/EIA/IS-41-C |
Intersystem operations |
||
|
|||
|
TIA/EIA/IS-124 |
Nom-signaling data comm. |
|
|
|
|
|
|
TIA/EIA/IS-96-B |
Speech CODEC |
|
Service |
TIA/EIA/IS-99 |
Assign data and fax |
|
TIA/EIA/IS-637 |
Short message service |
||
|
|||
|
TIA/EIA/IS-657 |
Packet data |
|
|
|
|
|
|
TIA/EIA/IS-97 |
Cellular base station |
|
|
TIA/EIA/IS-98 |
Cellular mobile station |
|
Performance |
ANSI J-STD-018 |
PCS personal station |
|
|
ANSI J-STD-019 |
PCS base station |
|
|
TIA/EIA/IS-125 |
Speech CODEC |
|
|
|
|
 TSB -74: Protocol between an IS-95A system and ANSI J-STD-008
1xRTT system receives subscribers in wireless section twice as much as IS-95. Its battery life is twice as long as IS-95. High-speed data transmission is also possible.
4 |
5 |

Introduction
Highlights
Congratulations! Your new mobile phone will change the way you communicate and is a compact, lightweight personal communication system with added features for the person on the go. Our advanced digital mobile communication technology features the following:
 Large, easy-to-read, 8-line, backlight LCD with status icons.
 Paging, messaging, voice mail, and caller ID.
 18-key keypad.
 Long battery standby and talk time.
 Menu-driven interface with prompt for easy operation and configuration.
 Any key answer, auto answer, auto retry, and one touch dialing and speed dialing with 199 memory locations.
 Bilingual (English and Spanish menu languages are available).
 Optional accessories. (see pages 111~113)
Important Information
This user guide provides important information on the use and operation of your VX10 phone. Please read all the information carefully prior to using the phone for best performance and to prevent any damage to or misuse of the phone. Any unapproved change or modification will void your warranty.
Check Accessories
Your mobile phone comes with the following accessories, a one-slot desktop charger and a rechargeable battery. Please verify your accessories are included.
6 |
7 |

Safety Instructions
WARNING! To reduce the possibility of electric shock, do not expose your phone to high humidity areas, such as the bathroom, swimming pool, etc.
Always store your phone away from heat. Never store your phone in settings that may expose it to temperatures less than 32 F or greater than 104 F, such as outside during a snowstorm or in your car on a hot day. Exposure to excessive cold or heat will result in malfunction, damage and/or catastrophic failure.
Use caution when using your phone near other electronic devices. RF emissions from your mobile phone may affect nearby inadequately shielded electronic equipment. You should consult with manufacturers of any personal medical devices such as pacemakers and hearing aides to determine if they are susceptible to interference from your mobile phone. Turn off your phone in a medical facility or at a gas station. Never place your phone in a microwave oven as this will cause the battery to explode.
IMPORTANT! Please read the TIA SAFETY INFORMATION on page 115 before using your phone.
FCC RF Exposure Information
WARNING! Read this information before operating the phone.
1996, the Federal Communications (FCC) of the States, with its action in Report and Order FCC 96an updated safety standard for human to radio frequency (RF) electromagnetic energy
FCC regulated transmitters. Those guidelines are with the safety standard previously set by both U.S.
standards bodies.
of this phone complies with the FCC guidelines international standards.
 CAUTION
only the supplied and approved antenna. Use of unauthorized or modifications could impair call quality, damage the void your warranty and/or result in violation of FCC
.
use the phone with a damaged antenna. If the damaged comes into contact with the skin, a minor burn may result. your local dealer for a replacement antenna.
-worn Operation
device was tested for typical body-worn operations with the of the phone kept  inch (2
 ) from the body. To comply with RF exposure requirements, a minimum separation distance of
 inches (2
 ) must be maintained between the user’s body and back of the phone, including the antenna, whether extended or
. Third-party belt-clips, holsters, and similar accessories metallic components should not be used. Body-worn that cannot maintain  inch (2
 ) separation distance the user’s body and the back of the phone, and have not
tested for typical body-worn operations may not comply with RF exposure limits and should be avoided.
Vehicle Mounted External Antenna (optional, if available)
minimum separation distance of 8 inches (20  ) must be between the user/bystander and the vehicle mounted
antenna to satisfy FCC RF exposure requirements.
more information about RF exposure, visit the FCC website at fcc.gov
8 |
9 |

FCC Part 15 Class B Compliance
This device and its accessories comply with part 15 of FCC rules. Operation is subject to the following two conditions: (1) This device and its accessories may not cause harmful interference, and (2) this device and its accessories must accept any interference received, including interference that cause undesired operation.
Cautions for Battery
Do not disassemble. Do not short-circuit.
Do not expose to high temperature : 60 C (140 F) Do not incinerate.
Battery Disposal
 Please dispose of your battery properly or bring to your local wireless carrier for recycling.
 Do not dispose in fire or with hazardous or flammable materials.
Adapter (CHARGER) Cautions
 Using the wrong battery charger could damage your phone and void your warranty.
 The charger or adapter is intended for indoor use only.
Do not expose the battery charger or adapter to direct sunlight or use it in places with high humidity, such as the bathroom.
10

Chapter 1. Getting Started
Cautions
 Using the phone near receiving equipment (i.e., TV or radio) may cause interference.
 Keep your phone in a safe place when not in use.
 Only use the batteries, antennas and chargers provided by LG. Using unauthorized accessories could void your warranty.
 Only authorized personnel should service the phone and its accessories. Faulty installation or service may result in accidents and consequently void the warranty.
 Do not hold the antenna while the phone is in use.
 Do not use the phone in designated no cellular phone use areas.
 Do not expose the phone to high temperature or humidity.
 Avoid getting your phone wet. If the phone gets wet, turn the power off immediately and remove the battery. If the phone is non-functional, return it to the dealer for service.
 Avoid shock or impact on the phone.
ed art St ing t Get
11
Using the Battery Pack
Charge the battery fully before the initial use of the phone.
The phone comes with a rechargeable battery. Keep the battery charged while not in use in order to maximize talk and standby time when using the phone.
Installing the Battery
To install the battery, insert the bottom of the battery into the opening on the back of the phone. Then, push the battery down until the latch clicks.
Removing the Battery
Turn the power off. (If power is on, a loss of stored numbers and messages may occur.)
By lifting removal button the battery will become detached.
Battery Charge Level
The battery charge level is shown at the top right of the LCD screen.
When the battery charge level becomes low, the low battery sensor will alert you in three ways: sounding an audible tone, blinking the battery icon outline, and displaying LOW BATTERY WARNING! If the battery charge level becomes exceedingly low, the phone will automatically switch off and any function in progress will not be saved.
ed art St ing t Get
12 |
13 |
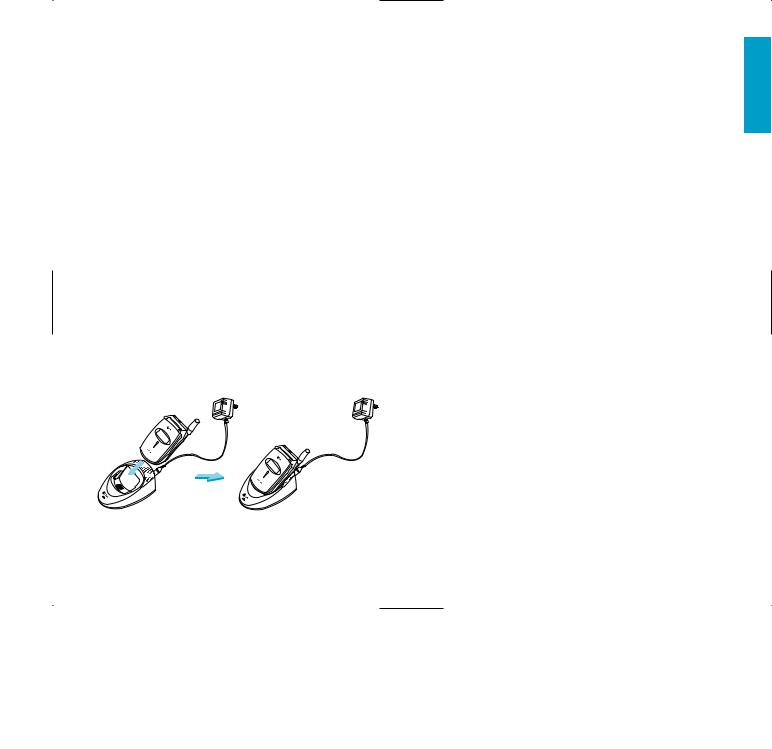
Using the Desktop Charger
The Desktop charger has a slot for recharging batteries. The slot accommodates phone and battery for charging.
Warning! Use only the Desktop charger provided with the phone. Using an unauthorized charger may cause damage to your phone or battery.
1.Plug the charger into a wall outlet.
 The phone must be charged from a 110 V power source only.
2.Insert the phone with an installed battery or a battery into the slot of the charger.
 Red light indicates the battery is being charged.
 Green light indicates the battery is fully charged.
Charge time will vary depending upon battery level. Maximum charge time for a fully discharged battery will not exceed 3 hours.
Caring for the Battery
1.To recharge the battery, you do not need to wait until the battery is completely discharged.
2.Use only LG batteries and chargers specific to your model of phone. LG’s chargers are designed to maximize the battery life.
3.Do not disassemble or short-circuit the battery.
4.Keep the metal contacts of the battery clean.
5. Replace the battery when it no longer provides acceptable performance. The battery may be recharged several hundred times before it needs replacing.
6.Recharge the battery if it has not been used for a long time to maximize battery life.
7.Do not expose the battery charger to direct sunlight or use it in areas of high humidity, such as the bathroom.
8.Do not leave the battery in hot or cold places, this may deteriorate battery performance.
9.Your battery life may vary by location, use patterns, etc.
10.Long backlight settings, searching for service, MiniBrowser, data connectivity and synchronization all may affect battery life, talk and standby time.
ed art St ing t Get
14 |
15 |
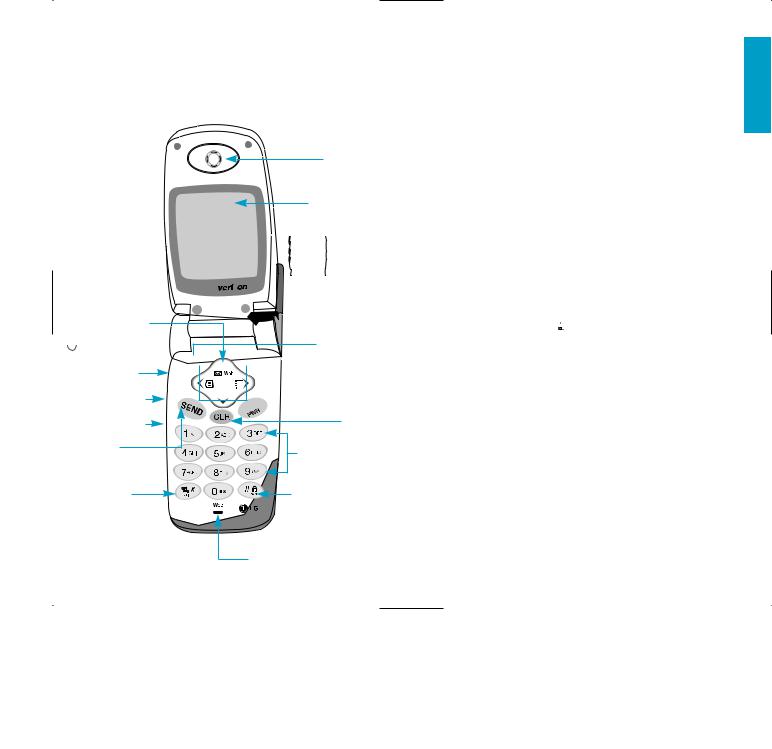
Phone components
The following shows key components of your mobile phone.
1. Cellcase 
2. Message Key
 3. Headset Jack
4.Get It Now Key
5.Side Keys 
6.SEND
8. Earpiece
9. LCD Screen
 Caller LCD

 10. Lamp
 11. Antenna
12. Soft Key 1


 12. Soft Key 2


 13. Navigation Key


 14. END/PWR
15. CLR
16. Alphanumeric
Keypad
7. Manner |
17. Lock mode Key |
mode Key |
|
|
18. Microphone |
16
Phone Overview
1.Cellcase Open the cellcase to answer an incoming call and close to end the call.
2.Message Key
3.Headset Jack
4.Get It Now Key
5.Side Keys Enables you to adjust key beep volume (in standby mode) and earpiece volume (during a call).
When your phone rings press either side key to mute the ringer or vibration for that call only.
6.SEND Allows a user to place or answer calls.
7.Manner Mode Key
-In standby mode, set the manner mode by pressing and holding the  key about 3 seconds. Selecting Manner mode will allow you to maintain your phone under Manner mode even when you turn it off and turn it back on.
8.Earpiece
9.LCD screen Displays messages and indicator icons.
10.Lamp The red light shows when you turn the power on and when you have incoming calls and messages.
11.Antenna
17
ed art St ing t Get

12.Soft Keys
-Soft Key 1 
Used to display the function setting menu.
-Soft Key 2 
Press this key once in a menu, to go back one level.
13.Navigation Key This Navigation key allows quick
access to  text and voice mail notification messages.
 Calendar,
  Outgoing Call list,
Name .
14.END/PWR Used to turn power on/off and to end a call. Using this key, you can return to the main menu display screen.
15.Clear Key Press to delete a single space or character. Press and hold to delete entire words.
16.Alphanumeric keypad Enables you to enter numbers and characters and to choose menu items.
17.Lock Mode Key
-In standby mode, set the lock function by pressing and holding the  key about 3 seconds.
18.Microphone
Onscreen Icons
The phone screen displays several onscreen icons which appear when the phone is powered on.
Displays the strength of the signal received by the phone and current signal strength is indicated by the number of bars displayed on the screen.
No service
The phone is not receiving a system signal.
In use
A call is in progress.
 No icon indicates the phone is in standby mode.
DDigital indicator
Digital service is available.
Analog indicator
Analog service is available.
Indicates that a text message or voice mail has been received.
Roaming
The phone is outside of its home service area.
In Vibration mode
In Alarm mode
Charge level
Indicates battery charge level.
ed art St ing t Get
18 |
19 |
Entering Information Using T9 Text
Input
You can edit the Banner, Scheduler, Short Message and Phone Book using T9 Text Input.
Key Functions
Soft Key 2 : Press to scroll and select a mode through menus.
-You can scroll through the modes using Soft Key 2
in the following order : Abc  123
123  Symbol
  Help
Help  T9En
T9En
-SHIFT Key ( ): Used to change the letter case.
 ~
~  (Type Text): In T9 mode, press one key per letter to enter text.
 ~
~  (Type Numbers): In 123 (Numbers) mode, press once to enter numbers.
 (Next): In T9 mode, press to display other matching words.
 (Punctuation): In T9 mode, press to insert punctuation in a word and complete a sentence.
 (Space): Press to complete a word or insert a space.
 (Clear): Press to delete a single space or character. Press and hold to delete entire words.
Input mode
T9 Text Input provides five modes for entering text, numbers, special characters, and punctuation.
T9En (T9) Mode
Type text using one keystroke per letter. The default is T9 mode.
ABC (Multi-tap) Mode
Use ABC mode to add words to the T9 database.
123 (Numbers) Mode
Type numbers using one keystroke per number.
To change to 123 mode in a text entry field, press Soft Key 2 until 123 mode is displayed.
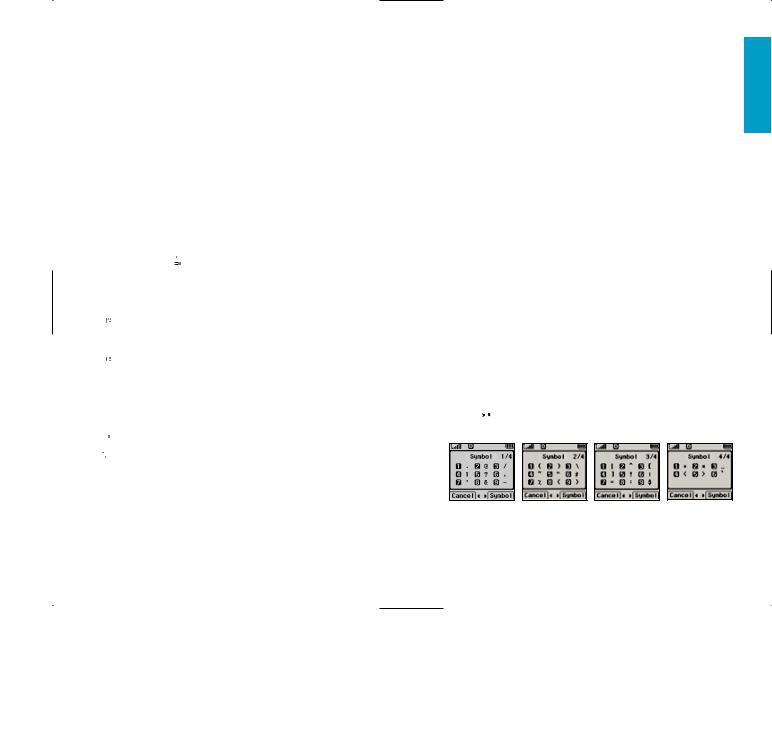
SYMBOL Mode
Insert special characters and punctuation.
You may use any of the 33 special characters. When the cursor is located where you want the special character, switch to SYMBOL mode. Press Navigation Key  to cycle through and select from the following characters:
ed art St ing t Get
20 |
21 |

T9Help Mode
Display T9 Help Text.
Changing Letter Case
There are three options for selecting letter cases:
Initial Cap (T9En/Abc)
Only the first letter is capitalized.
Caps Lock (T9EN/ABC)
Press  to change letter case to Caps Lock. All subsequent letters are capitalized.
Lowercase (T9en/abc)
Press  again to change letter case to lowercase.
Examples Using T9 Text Input
Typing In T9 Mode
To type a new message, follow these steps:
1.Press: Soft Key 2  to change letter case to T9En mode.
2.Press: 


 .
.
3.Press:  to complete the word and add a space.
4.Press: 


 .
.
5.Display: Call the office.
Using the NEXT Key
After you have finished typing a word, if the word displayed is not the word you want, press  to display additional choices.
For example, follow these steps :
1.Press: 


 .
.
2.Display: Good
3.Press:  .
.
4.Display: Home, Gone, Hood......
Adding Words to the T9 Database
If a word is not in the T9 database, add it by using ABC (Multi-tap) mode text entry. The word is automatically added to the T9 database when you return to T9 mode. For example, follow these steps:
1.Press: Soft Key 2  to change letter case to ABC (multi-tap) mode.
2.Press: 


 .
.
3.Display: Imt
4.Press: Soft Key 2  to change letter case to T9 mode and then the word Imt will be added to the T9 database
5.Press:  to erase the existing word.
6.Press: 

 .
.
7.Display: got
8.Press: 
 .
.
9.Display: Imt
ed art St ing t Get
22 |
23 |

Examples Using ABC (Multi-tap) Text Input
Typing In ABC (Multi-tap) Mode
To type a new message, follow these steps:
1.Press: Soft Key 2  to change letter case to ABC mode
2.Press:  to change to ABC Caps Lock mode
3.Press: 


 .
.
4.Display: LG
24
Chapter 2. Basic Functions
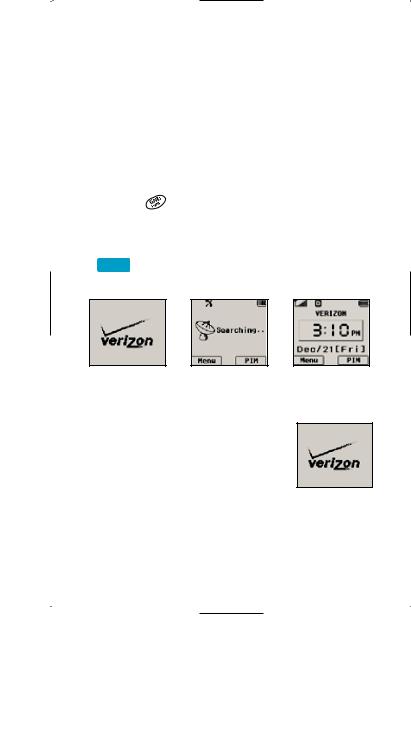
Turning the Phone On and Off
Turning the Phone On
1. |
Install a charged battery pack or connect the |
Basic |
|
|
|||
|
phone to an external power source such as the |
Funct |
|
|
cigarette lighter adapter or car kit. |
||
|
|
||
2. |
Press |
for a few seconds until the red light |
ions |
|
in the middle of the phone flashes. |
||
|
|
||
|
|
|
|
 Fully extend the antenna for the best performance.
 Like any other radio device, avoid any unnecessary contact with the antenna while your phone is on.
Turning the Phone Off
1. Press and hold  until display screen turns off, then release the key.
2.Protect the antenna by pushing it back into the phone, if extended.
25
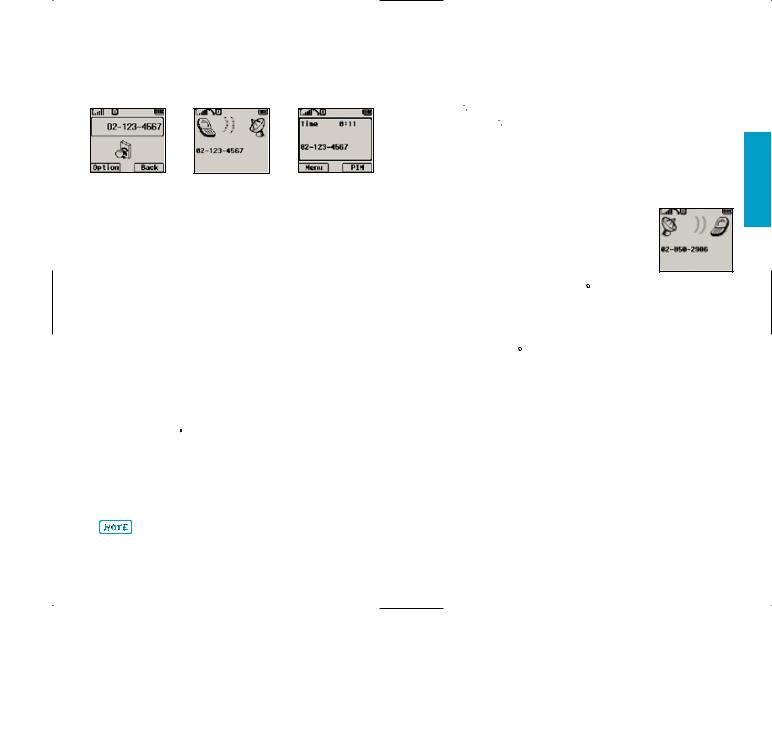
Making a Call
When you make a call, follow these simple steps:
1.Make sure the phone is turned on.
 If not, press
  .
.
2.Enter the phone number, with area code (if needed).
3.Press  .
.
 If the phone is locked, enter the lock code.
 Call Failed indicates that the call did not go through.
4.Press to  the call.
5.This phone has been restricted If this message displays on your screen, then outgoing calls are in restricted mode. You can only dial phone numbers saved in Emergency or Phone Book list.
 If you want to turn off this function, take the following step.
Menu 
 (Press four times) SECURITY
 Restrict
  Enter Lock Code
  No
No  Ok
Ok
6.When one - touch is enabled, type in the phone book entry number and hold the last digit until the call is made.
Phone number and entry name appear on the display when you type in the entry number and hold the last digit.
Correcting Dialing Mistakes
If you make mistakes while dialing a number, press  once to erase the last digit entered or hold down
  for at least two seconds to delete all digits, or simply press Soft Key 2 Back to exit the
dialing state.
Receiving Calls
1.When the phone rings, open the
cellcase or if the cellcase is open,
press any key (except  ,
, 
 or
or  ) to answer.
 If you press the
  or Side Keys (
 ,
,  ) while the phone is ringing, the ringing or vibration
is muted for that call.
2.Press  ,
, 
 or
or  twice to end the call.
ions Funct Basic
26 |
27 |
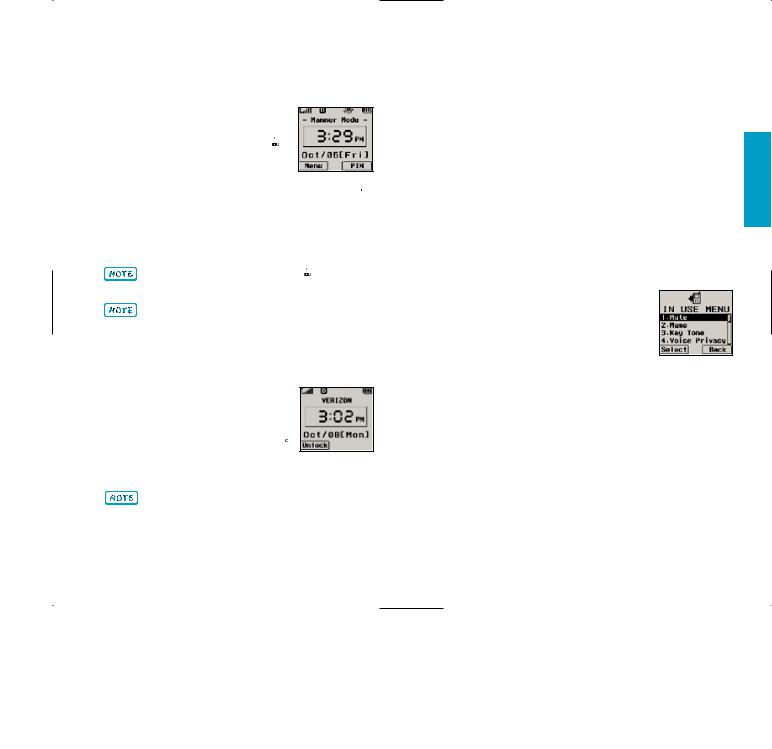
Using Manner & Lock Mode
Manner Mode (Quick)
Use Manner Mode in a public place.
1.In standby mode, activate Manner Mode quickly by pressing the  . (for 3 seconds) instead of using the Menu function.
 When Manner Mode is set, -Manner Mode- (
  ) is displayed on the LCD screen.
 When Manner Mode is set, Key tone does not sound and Vibration is selected as the ringer.
To cancel Manner Mode, press  again until
Normal Mode Entered! is displayed.
Selecting Manner mode will allow you to maintain your phone under Manner mode even when you turn it off and turn it back on.
Lock Mode (Quick)
Use to prevent others from using your phone.
1.In standby mode, to activate the
Lock Mode quickly, press the  (for 3 seconds).
Lock mode Setting! will be displayed.
To cancel the Lock Mode, Press Soft Key 1 Unlock, then enter your password (4 digits).
The lock code (password) is commonly the last 4 digits of your phone number.
Call Waiting
Your cellular service may offer a call waiting function. While a call is in progress, you may hear two beeps indicating another incoming call. When call waiting is enabled, you may put the active call on hold while you answer the other incoming call. Check with your cellular service provider for information about this function.
1.Press  to receive a waiting call.
2.Press  again to switch between calls.
Mute
The mute function prevents the other party from hearing your voice, but allows you to hear the other party.
1.Press Soft Key 1 Menu and  during a call.
2.To cancel Mute, press Soft Key 1 Menu and  again.
ions Funct Basic
28 |
29 |
Redialing Calls
1.Press  to redial the last number in call history.
 You can also redial any of the last 30 numbers you have dialed. The last 30 numbers are stored in the call history list. (See the Call History List on page 71.)
Adjusting the Volume
The volume keys on the left side (Side Keys) of the phone can be used to adjust the earpiece, ringer, and key beep volumes. The upper key is used to increase and the lower key is used to decrease the volume.
 You may adjust the earpiece volume during a call.
 The ringer volume can be adjusted through the Menu feature.
 If you adjust the ringer volume to minimum or set the lamp in ringer type, the LCD displays -Ringer Off- and you will not hear the ringer sound.
 The key beep volume is adjusted through Menu feature.
Power Save Mode
When the phone is in an area without service for about 15 minutes, it stops searching for service and enters into Power Save Mode. When your phone activates this feature, Power Save is displayed on the screen. The phone automatically checks for service periodically or you can check manually by pressing any key.
Signal Strength
The call quality depends on the signal strength in your area. The current signal strength is displayed on the screen as the number of bars next to the signal strength icon: The more bars, the better the signal strength. If the signal quality is poor, move to an open area. If you are in a building, the reception may be better near a window. For maximum reception, make sure that the antenna is fully extended.
ions Funct Basic
30 |
31 |
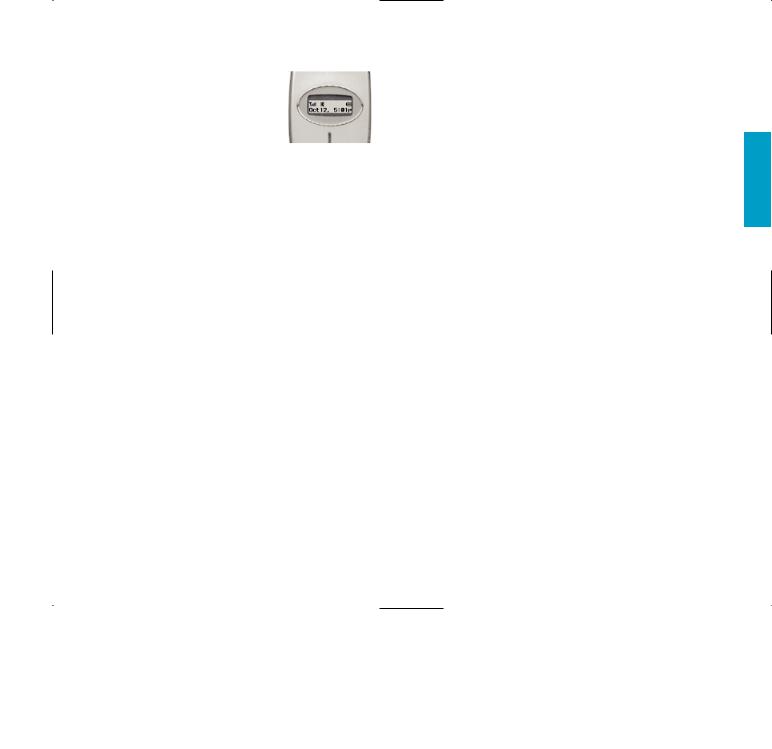
Caller ID Display
The small LCD on the outside of the phone displays information such as:
 Date and Time.
 Caller ID (caller’s information[name and/or number])
 Number of missed calls.
 Number of new messages.
 No service status and Power Save Mode.
  Wake up and scheduler message.
The phone will display most recent information until the cellcase is opened, then the information will appear on the main display.
Speed Dialing (see Making a call from Phone Book on page 38.)
Speed dialing is a convenient feature, which allows you to make phone calls quickly and easily. Your phone recalls the phone number from your personal directory, displays it briefly and then dials it.
1.Enter memory location number 001 to 199 .
2.Press  .
.
Caller ID
Caller ID lets you know who is calling by displaying the number of the person calling when your phone rings. If the caller’s name and number are already stored in your phone book, the corresponding name appears with the number.
You should check with your service provider to ensure they offer this feature.
ions Funct Basic
32 |
33 |
Phone Book Features
You can store up to 199 entries in your phone book with easy access to your most frequently dialed phone numbers.
Personal Phone Book Memory
The phone has 199 personal phone book memory locations where you can store up to 5 phone numbers with 32 digit capacity for each phone number.
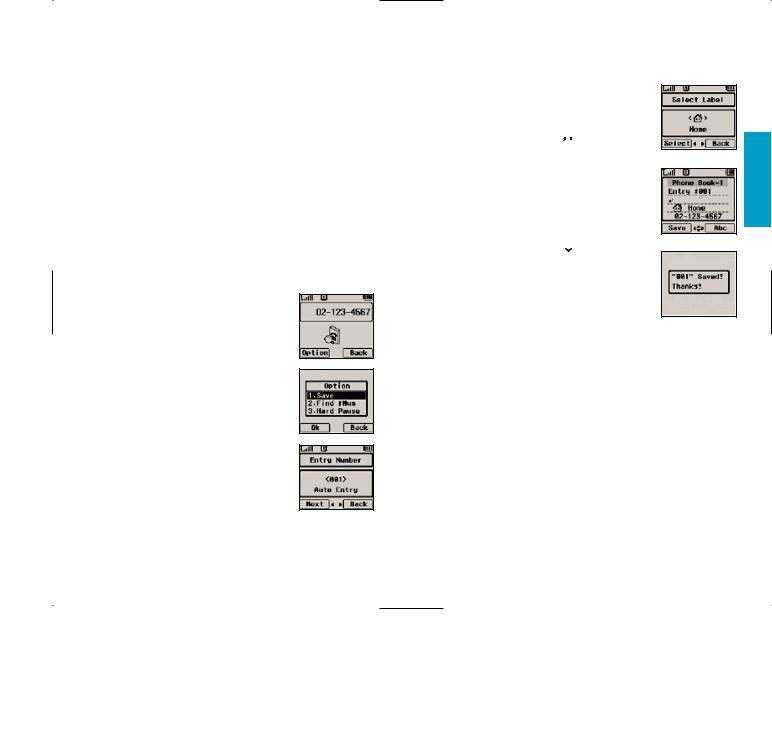
Saving Numbers in Your Personal Phone Book
Memory locations 1 through 9 should be used for onetouch dialing for your most frequently used phone numbers.
1.Input the phone number that you want to save (up to 32 digits).
2.Press Soft Key 1Option, the submenu appears.
3.Select Save on the sub-menu.
4.The phone will prompt you for the
memory location where the number will be saved. Press Soft Key 1 Next
to automatically store the number in the first available memory location.
You also have the option to enter a specific threedigit memory location number.
5.Select your desired label types
Home, Office, Mobile, Pager, Data /Fax using  .
.
6.Enter a name for the phone number (up to 16 characters). If you do not want to enter a name, go to the next step.
7.You may select the desired ID ring type, secret and  .
.
8.Press Soft Key 1 Save.
A confirmation prompt Saved! Thanks! displays on the phone.
ions Funct Basic
34 |
35 |
 Loading...