


K-3607
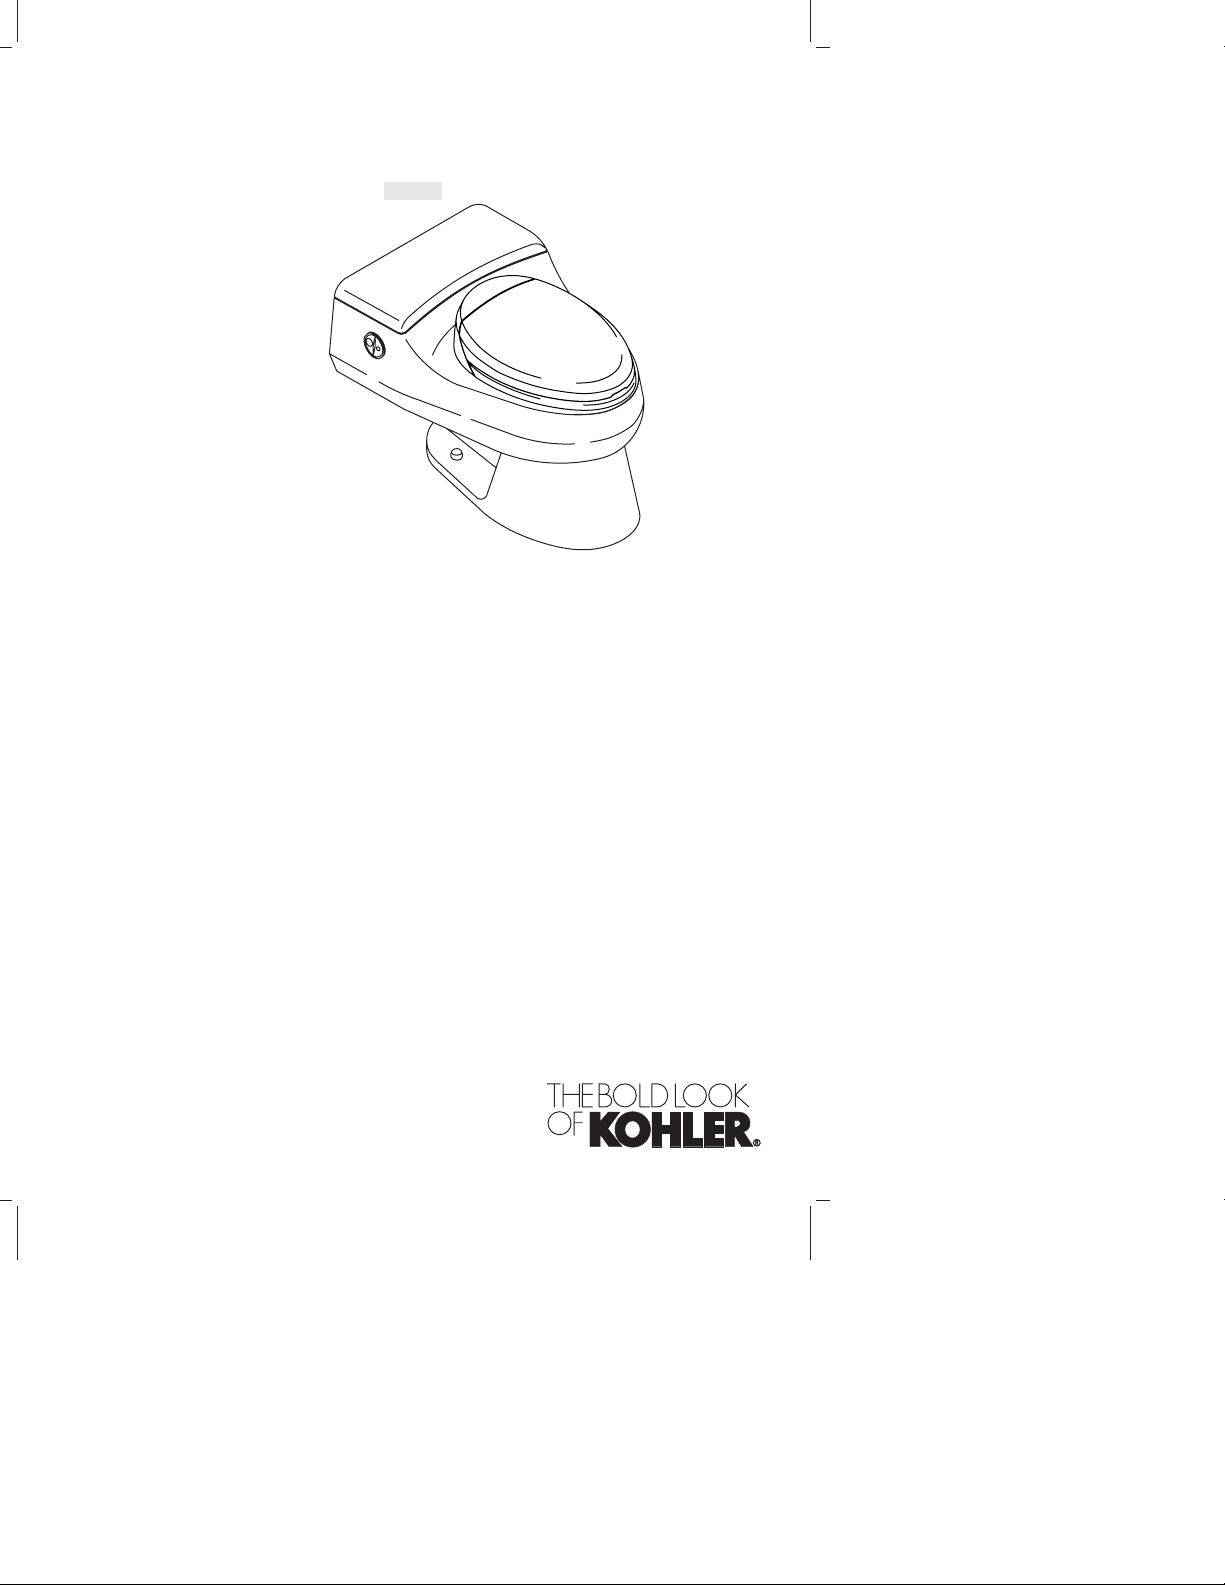
Homeowners Guide
Toilet and Bidet Seat
K-3607
M product numbers are for Mexico (i.e. K-12345M)
Los números de productos seguidos de
M corresponden a México (Ej.
K-12345M)
Français, page “Français-1”
Español, página “Español-1”
1092035-5-A

Thank You For Choosing Kohler Company
Thank you for choosing Kohler Company. Your Kohler Company
product reflects the true passion for design, craftsmanship, artistry, and
innovation Kohler Company stands for. We are confident its
dependability and beauty will surpass your highest expectations,
satisfying you for years to come.
All information in this guide is based upon the latest product
information available at the time of publication. At Kohler Company,
we strive to fulfill our mission of improving the level of gracious living
for each person who is touched by our products and services. We
reserve the right to make changes in product characteristics, packaging,
or availability at any time without notice.
Please take a few minutes to review this guide. Pay special attention to
the care and cleaning instructions.
1092035-5-A 2 Kohler Co.
Long Flush
Short Flush
Trip
Button
Water Flow
Fill Valve
Refill Tube
Trip Button
Fill Valve
Assembly
Water Flow
Pump Flush
Assembly
Bowl Supply
Hose
Rim Supply
Hose
Float
Water Line
Water Flow
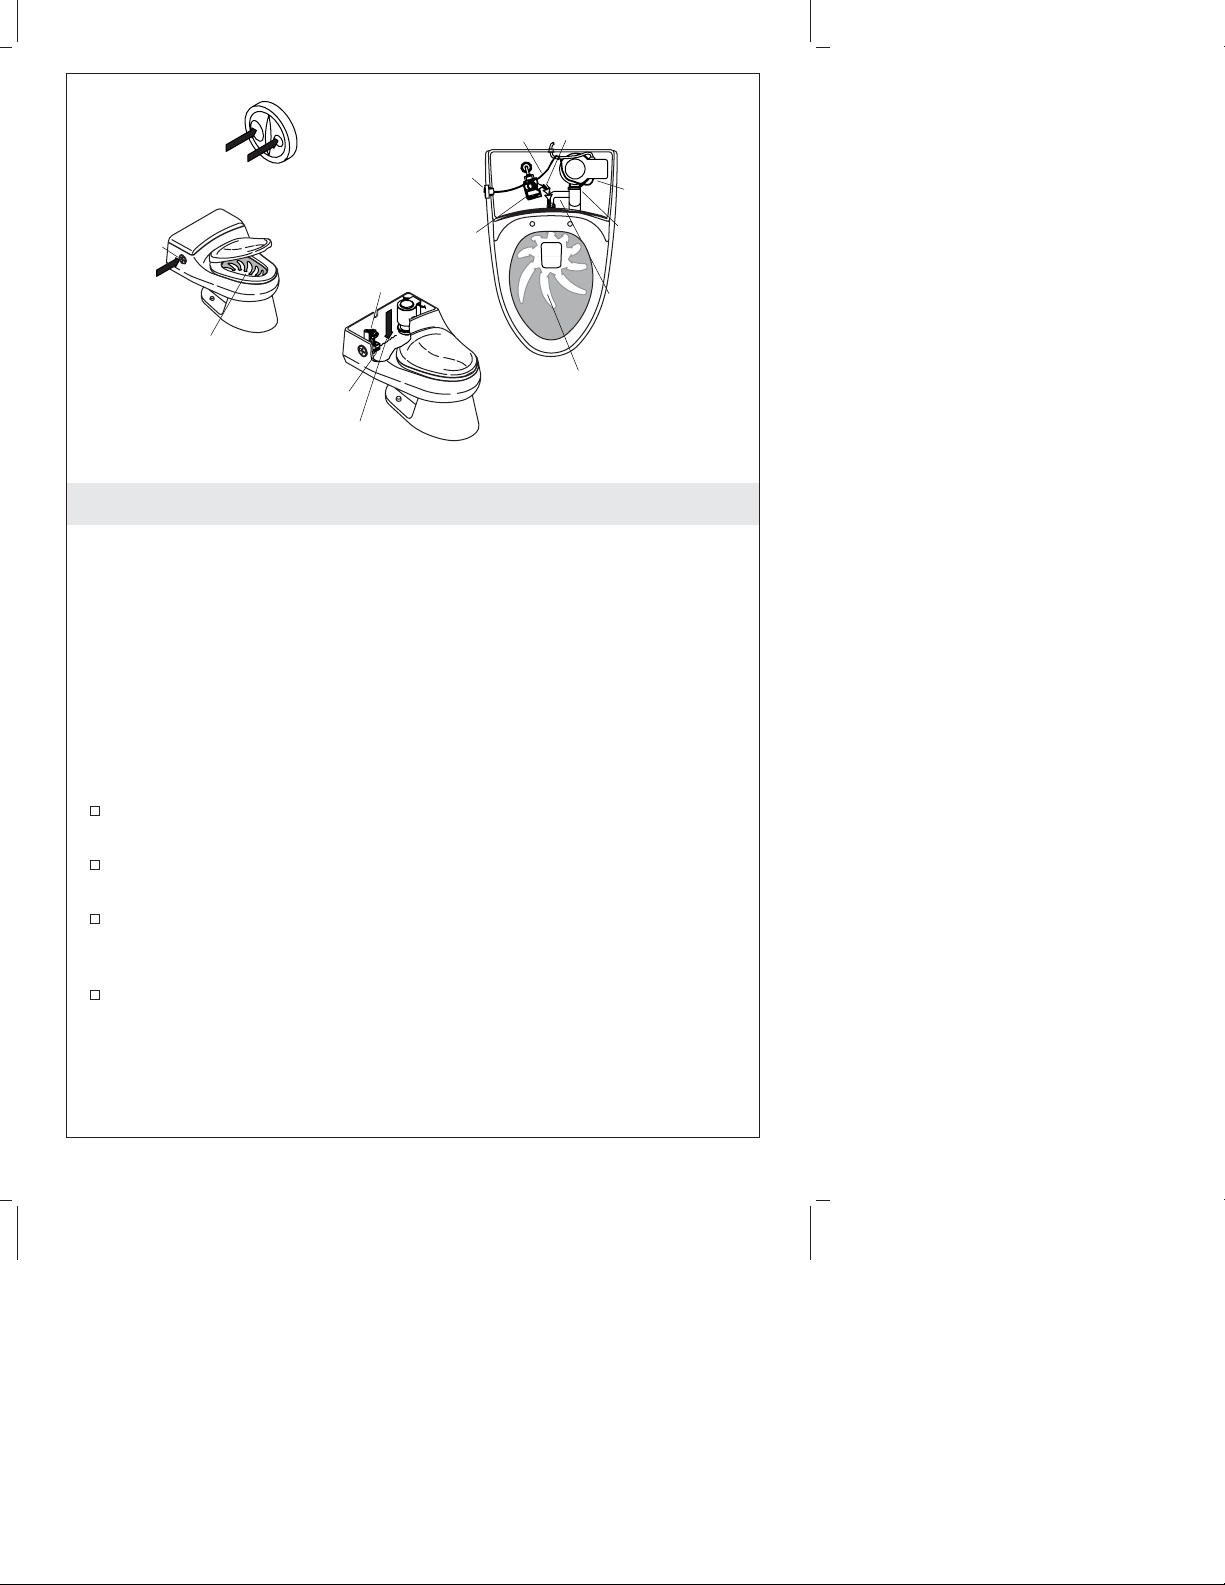
Theory of Operation
Operating Features
Your Kohler toilet is a one-piece toilet that flushes completely and
efficiently using only a small quantity of water. The operating system
uses an electric, motorized pump to create a thorough flush. The long
trip button selects a trip time that is adequate for heavy loads. An even
shorter flush, and less quantity of water is used when the short trip
button is used for light loads.
The operating system consists of the following basic component
groups:
The vitreous china bowl and tank, which directs the flushing
water flow and houses the system.
The pump, which houses the motor, electronic controls, and
impeller.
The fill valve, which refills the tank to the correct water line and
sends water to the bowl to establish proper trap seal depth after
each flush.
The trip button which initiates the flush and refill process. The
selected button determines how much water is flushed through
the bowl.
Kohler Co. 3 1092035-5-A

Theory of Operation (cont.)
Flush Cycle
The flush cycle consists of the following steps:
When either trip button is pressed, an electronic signal is sent to
the circuit board (which is safely housed within the pump).
This triggers a timing sequence that turns on the pump motor for
a specific length of time. The length of time depends upon which
trip button was pressed. The pump runs longer for a long flush.
The pump sends pressurized water to the front jet and rim
through the connecting hoses.
This initiates the siphon action in the bowl, and thoroughly
flushes the side walls.
As the water in the tank lowers during the pumping action, the
fill valve float drops.
This turns on the fill valve to refill the tank.
While the tank is filling, water is also sent through the refill tube
to return the bowl to the proper trap seal level.
After the pump turns off, the fill valve continues sending water to
both the tank and bowl (through the refill tube).
The fill valve turns off when water reaches the proper water line
in the tank.
Safety Features
Your Kohler toilet combines outstanding function, comfort, and
performance with remarkable style and class. It contains the following
specific safety features:
Your toilet exceeds ASME performance standards for
low-consumption toilets.
It was designed with a large glazed trapway to keep waste
moving without blockage.
Your Kohler toilet is scratch and abrasion-resistant. It is crafted
from a clay mixture that is fired at an intense heat to vitrify the
clay and fuse the glaze. Its surface won’t stain, discolor, rust, or
fade. Every component in your Kohler toilet is specifically
designed to increase the toilet’s useful life.
1092035-5-A 4 Kohler Co.
Safety Features (cont.)
The pump and toilets are listed by Underwriter’s Laboratory (UL)
for safety. The fill valve is approved by International Association
of Plumbing and Mechanical Officials (IAPMO) for use in this
system.
The pump motor and circuit board are sealed in a housing
separate from the impeller (which propels the water). The motor
turns the impeller by a magnetic coupling. This ensures a
separation between the impeller and the motor with electronic
controls. There are no gaskets or O-rings that can wear out and
allow water to leak into the motor compartment.
Your new toilet is designed to be flushed once every 70 seconds.
This feature assures adequate time for the tank to fill with water
and provides consistent operation of the motor. However, a
second flush can be made 35 seconds after the first flush. If you
activate the second flush at this interval, you must wait 105
seconds to activate a third flush. If you attempt a third flush
before the 105 seconds have elapsed, the toilet will not flush. This
is normal operation.
An overflow slot between the tank and bowl allows water to
drain into the bowl and out the trapway if the water level in the
tank becomes too high.
Care and Cleaning
WARNING: Risk of property or product damage. Do not use
in-tank cleaners in your toilet. Products containing chlorine
(calcium hypochlorite) can seriously damage fittings in the
tank. This damage can cause leakage and property damage.
Kohler Co. shall not be responsible or liable for any tank fitting
damage caused by the use of cleaners containing chlorine (calcium
hypochlorite).
For best results, keep the following in mind when caring for your
KOHLER product:
•
Use a mild detergent such as liquid dishwashing soap and warm
water for cleaning. Do not use abrasive cleaners that may scratch
or dull the surface.
•
Carefully read the cleaner product label to ensure the cleaner is
safe for use on the material.
•
Always test your cleaning solution on an inconspicuous area
before applying to the entire surface.
Kohler Co. 5 1092035-5-A

Care and Cleaning (cont.)
•
Do not allow cleaners to sit or soak on the surface.
•
Wipe surfaces clean and rinse completely with water immediately
after cleaner application. Rinse and dry any overspray that lands
on nearby surfaces.
•
Use a soft, dampened sponge or cloth. Never use an abrasive
material such as a brush or scouring pad to clean surfaces.
•
For Artist Edition Toilets: Gold and Platinum used on decorative
products are like fine jewelry. Use only warm water to clean, and
dry with a soft cloth.
For detailed cleaning information and products to consider, visit
www.kohler.com/clean. To order Care & Cleaning information, call
1-800-456-4537.
1092035-5-A 6 Kohler Co.
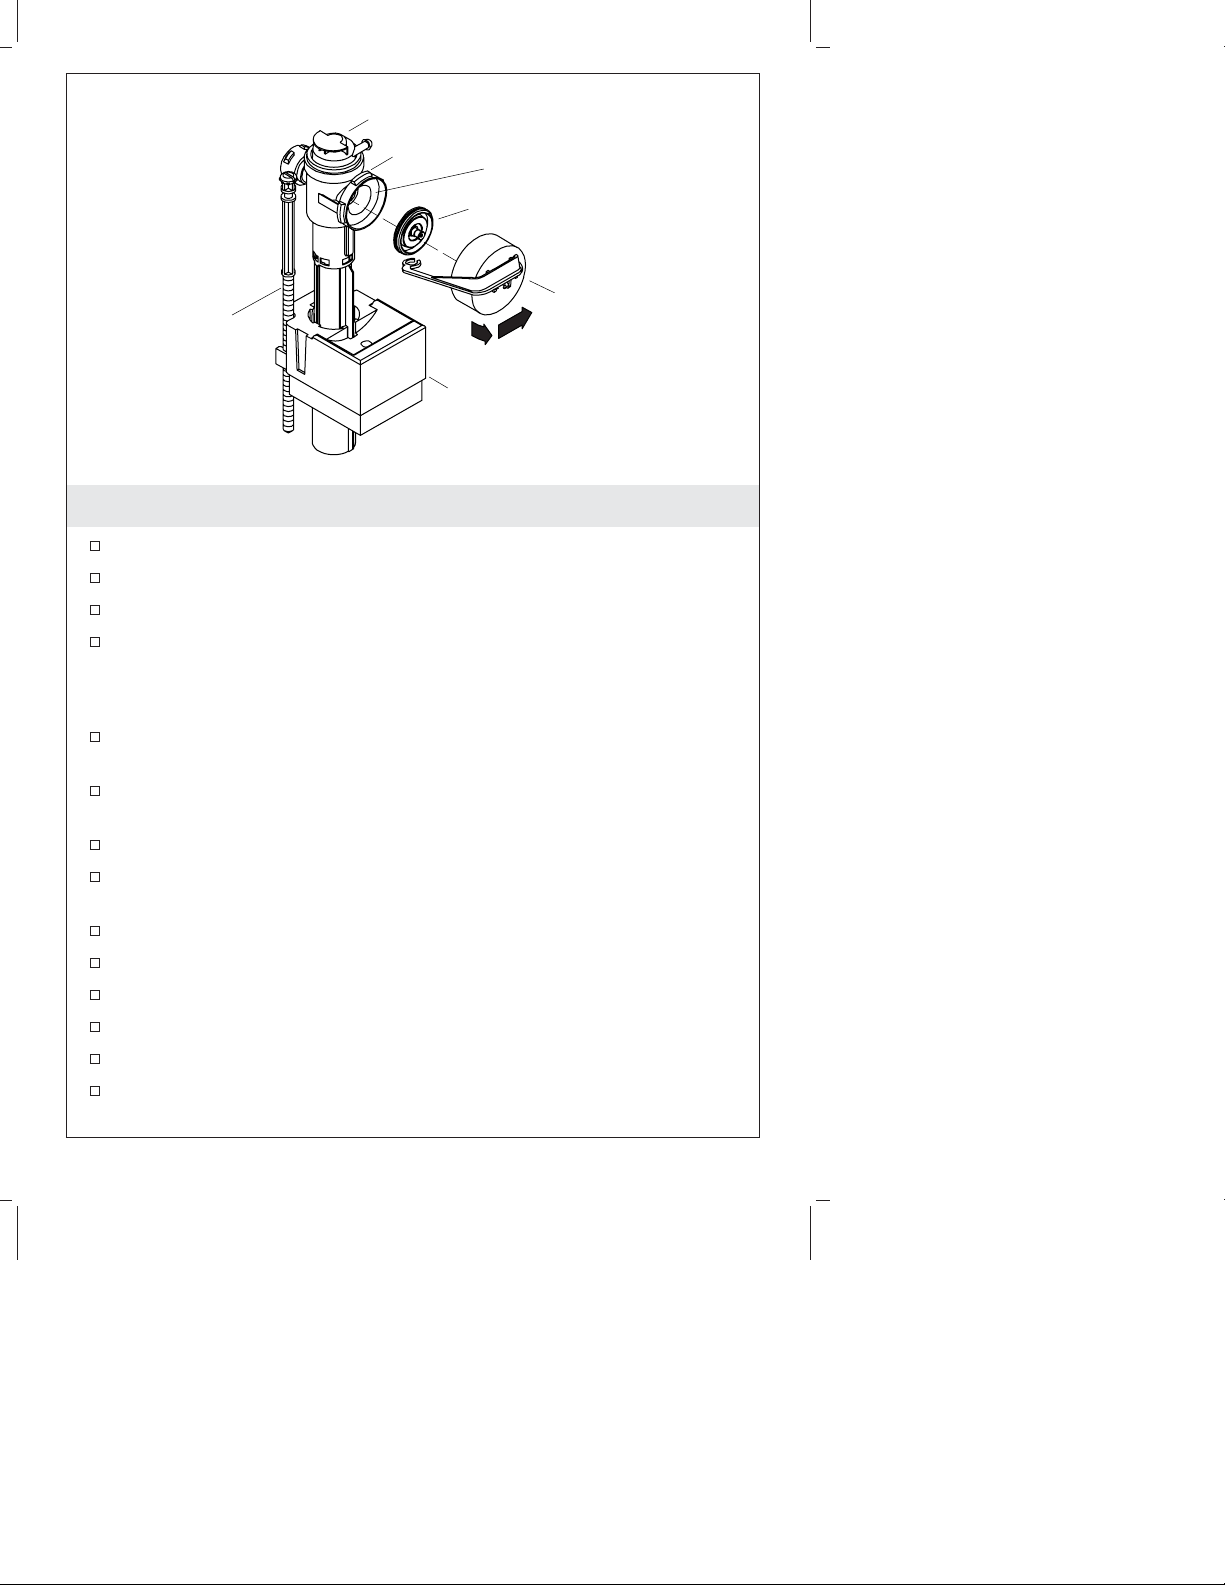
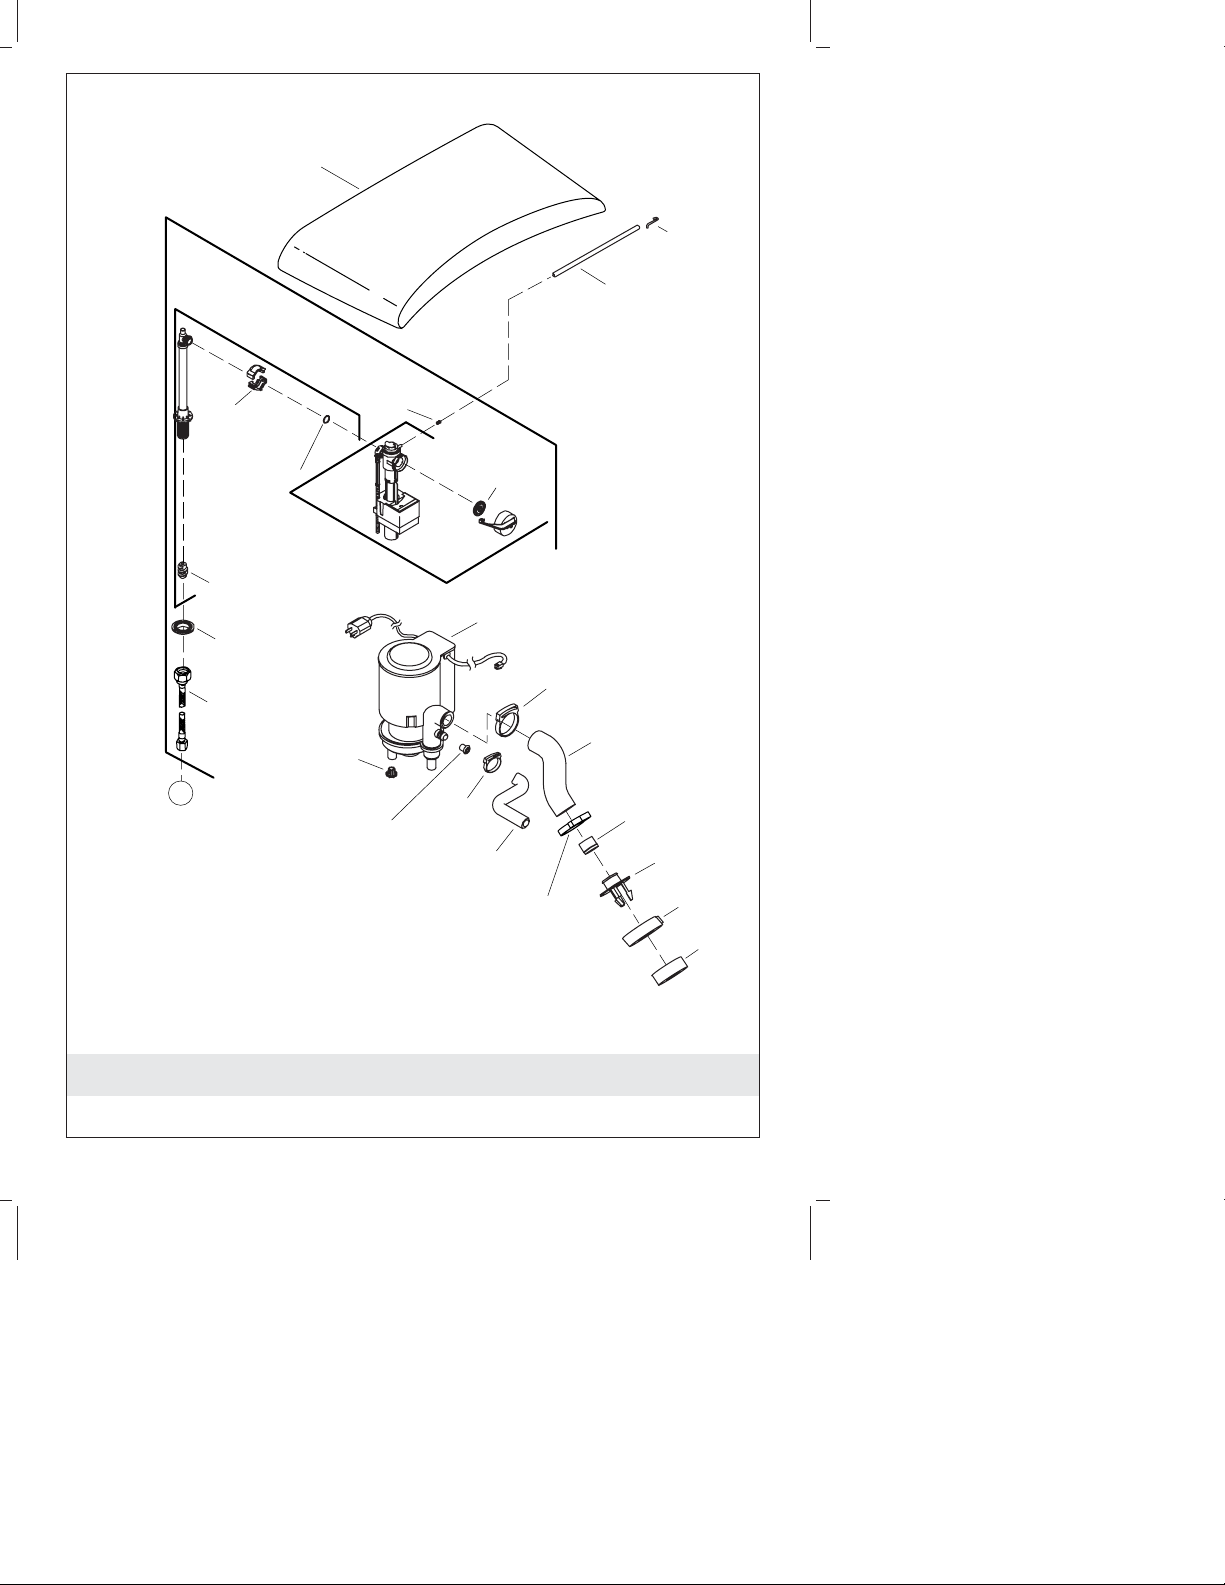
Fill Valve Body
Lug
Float
Elevation
Screw
Cover here to
prevent overspray.
Seal Diaphragm
Fill Valve Arm
Assembly
Float
Unplugging the Fill Valve
Shut off the water supply.
Unplug the electrical plug for the toilet from the outlet.
Remove the tank cover.
Remove the fill valve arm assembly by rotating it 1/8 turn
counterclockwise.
NOTE: Hold the cup firmly as the water pressure may be high.
Cover the uncapped fill valve body opening with an inverted cup
in order to prevent water spray.
Turn the water supply on and off a few times in order to flush
out any blockage.
Shut off the water supply.
Use a damp cloth or sponge to remove any residue on the seal
diaphragm.
Replace the fill valve arm assembly and engage the lugs.
Rotate 1/8 turn clockwise.
Replace the tank cover.
Turn the water on.
Plug the electrical cord for the toilet into the outlet.
Test the toilet for proper operation.
Kohler Co. 7 1092035-5-A
Fill Valve
Riser
Coupling
Fill Valve
Riser
Coupling
Tube
Tube
Refill
Tube
Fill Valve
Assembly
Refill
Tube
Fill Valve
Assembly
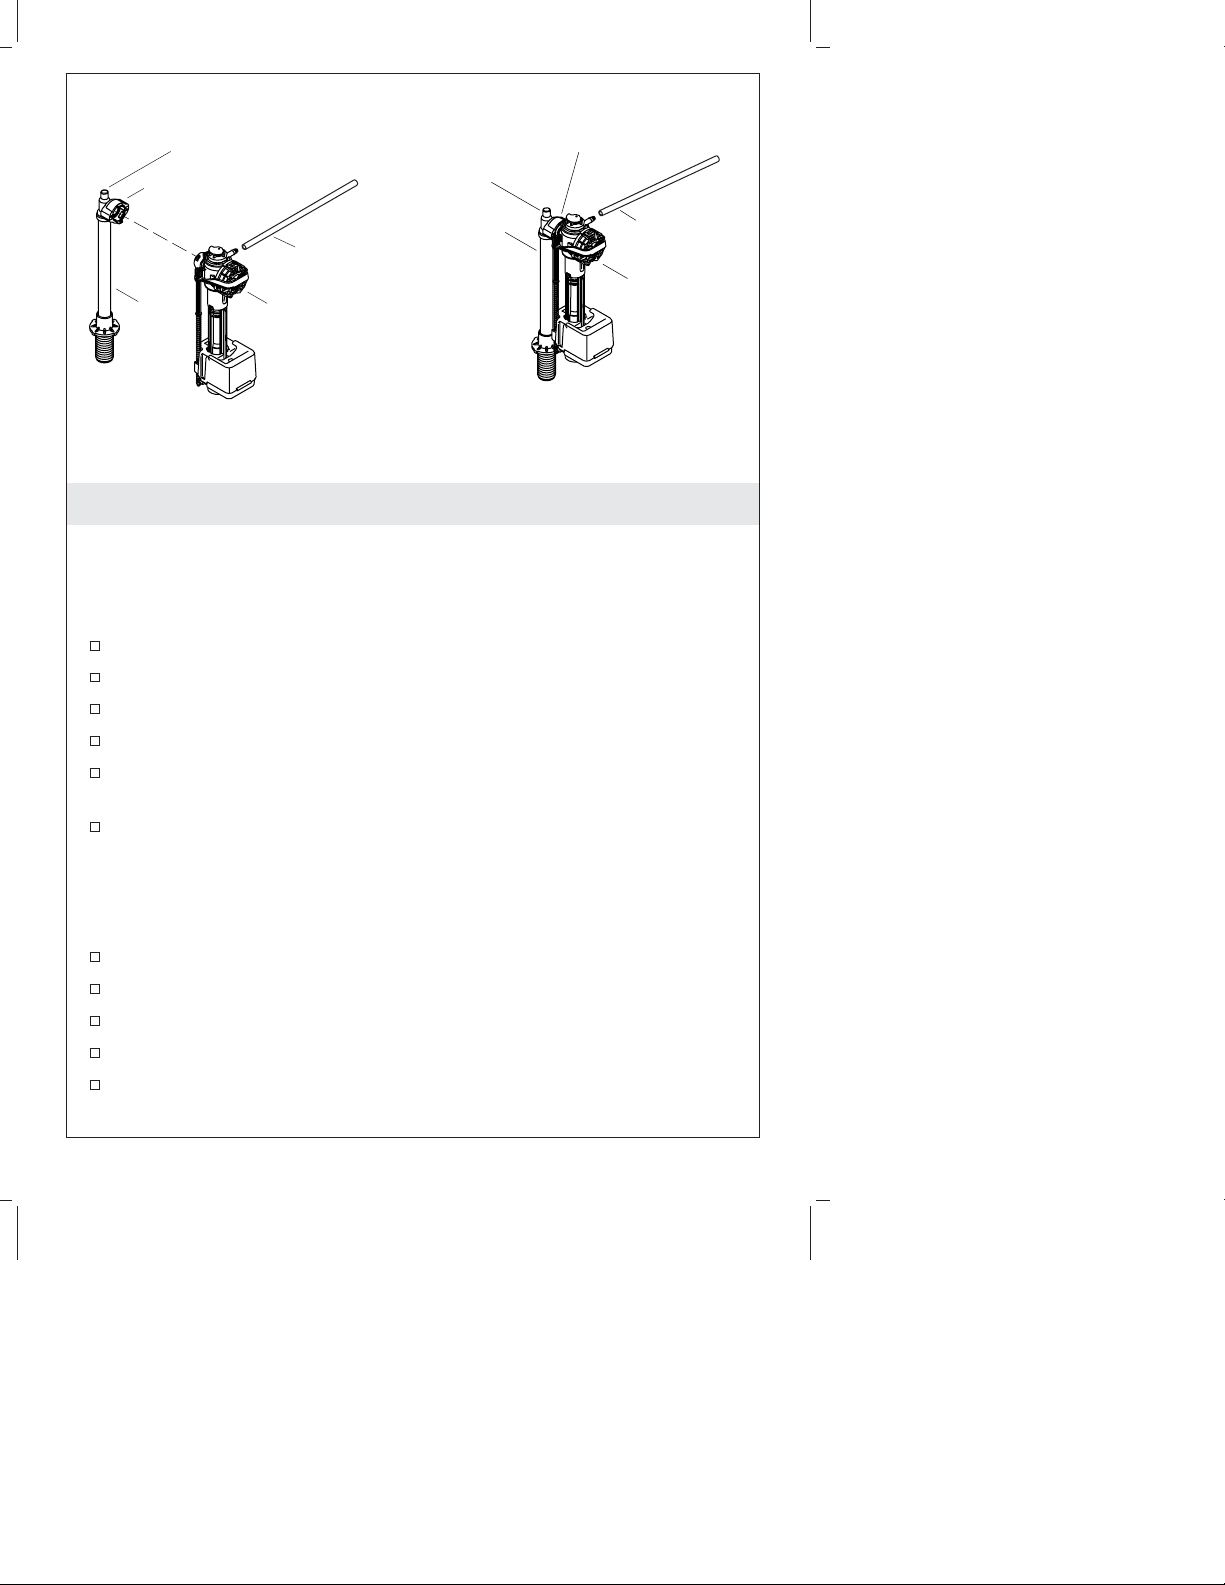
Removing Fill Valve Components
Remove the Fill Valve Assembly Leaving Fill Valve Riser in Place
Perform the following steps in order to remove only the fill valve
assembly:
Shut off the water supply.
Unplug the electrical plug for the toilet from the outlet.
Remove the tank cover.
Remove the refill tube from the fill valve assembly.
Grasp the blue coupling at the riser and turn it counterclockwise
1/8 turn.
Gently pull the fill valve assembly clear of the coupling.
Remove the Fill Valve Assembly Including the Fill Valve Riser
Perform the following steps to remove the fill valve including the riser:
Shut off the water supply.
Unplug the electrical plug for the toilet from the outlet.
Remove the tank cover.
Remove the refill tube from the fill valve assembly.
Remove the supply tubing, supply nut, washer, and locknut from
below the tank.
1092035-5-A 8 Kohler Co.

Removing Fill Valve Components (cont.)
Gently remove the fill valve and fill valve riser assembly.
If required, remove the washer from the bottom of the tank.
Kohler Co. 9 1092035-5-A
Fill Valve
Riser
Coupling
Fill Valve
Riser
Coupling
Tube
Tube
Refill
Tube
Fill Valve
Assembly
Refill
Tube
Fill Valve
Assembly
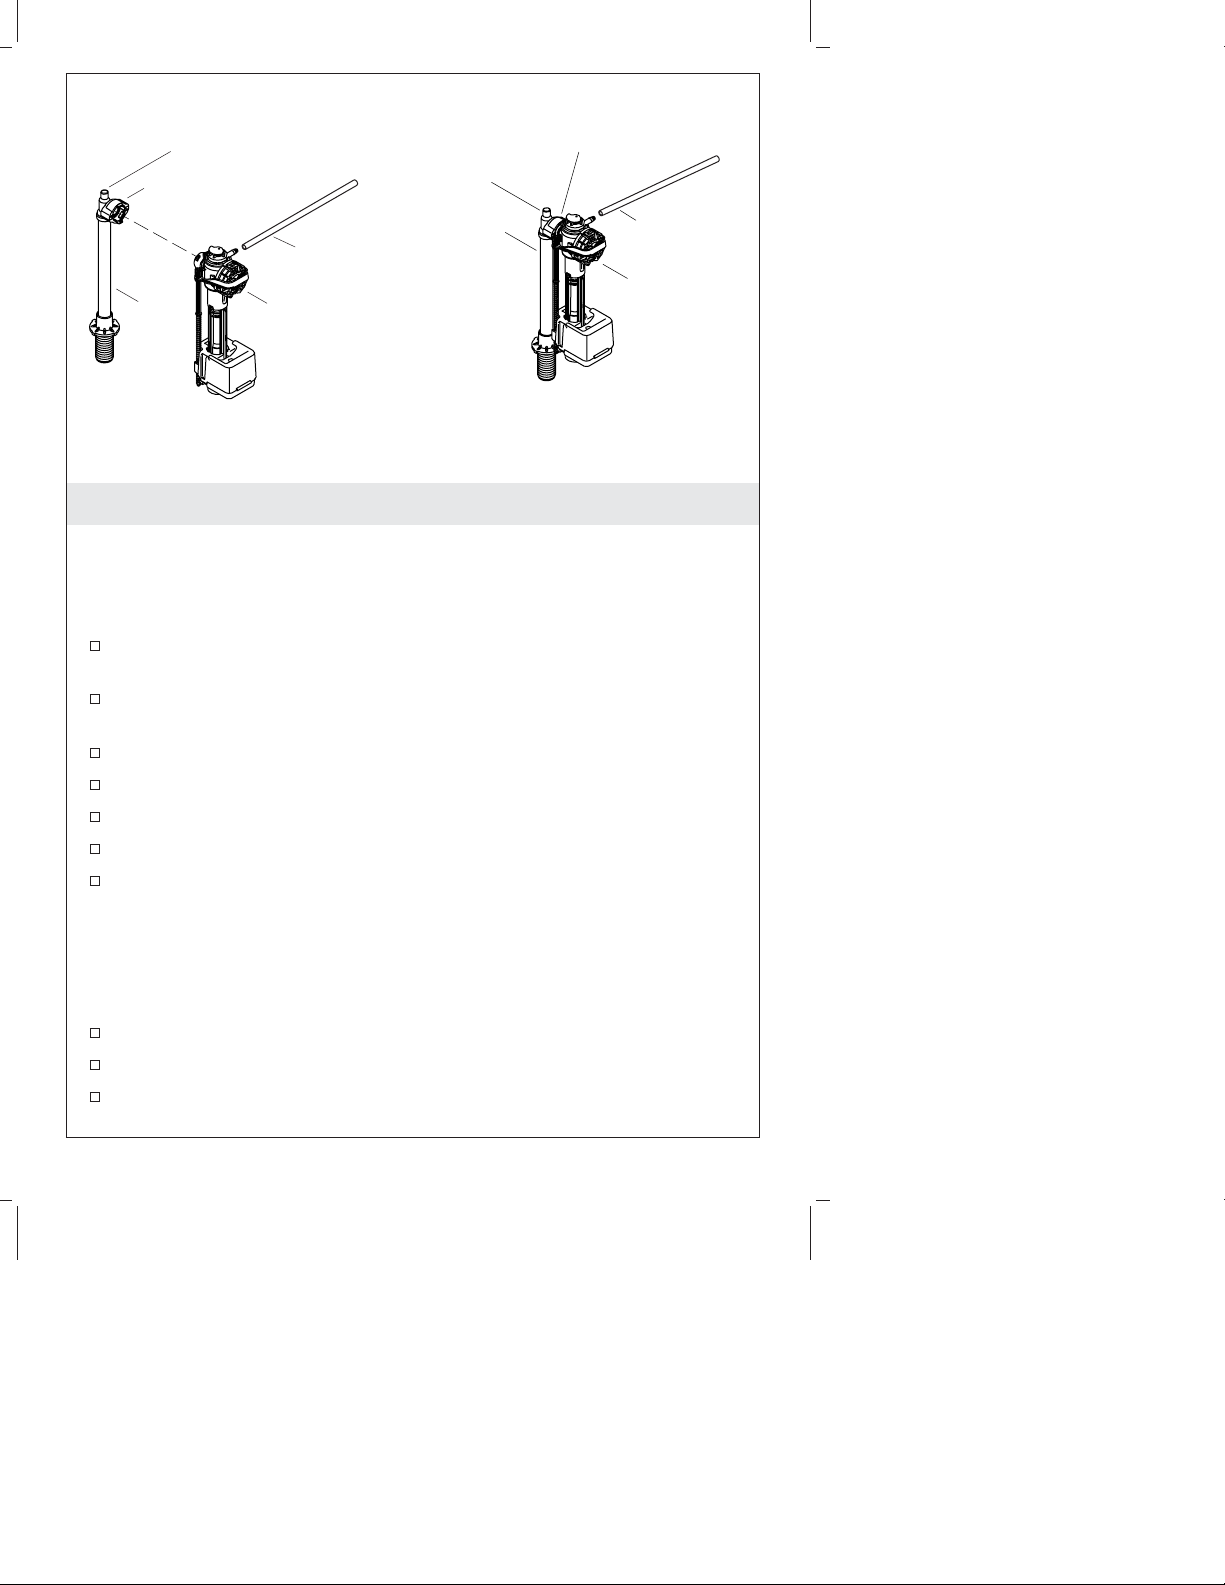
Replacing Fill Valve Components
Install the Fill Valve Assembly on the Riser
Perform the following steps in order to reassemble the fill valve
assembly on the fill valve body:
Carefully align the fill valve assembly with the coupling on the
riser.
Rotate the fill valve assembly clockwise 1/8 turn to fully engage
it.
Connect the refill tube to the fill valve assembly.
Replace the tank cover.
Turn the water on.
Plug the electrical cord for the toilet into the outlet.
Test the toilet for proper operation.
Install the Fill Valve Assembly and Fill Valve Riser Assembly
Perform the following steps to install the fill valve assembly in the
toilet:
If required, install or replace the washer at the bottom of the tank.
Insert the fill valve riser assembly into the hole in the tank.
Assemble the locknut, washer, and supply nut below the tank.
1092035-5-A 10 Kohler Co.

Replacing Fill Valve Components (cont.)
Insert the refill tube with the tube restrictor into the valve.
Turn the water on.
NOTE: The level in the tank may require adjustment in order to
provide enough water for the pump to operate for the flush
duration but not too much water to overflow into the bowl. If
required, adjust the float elevation by turning the long plastic screw.
Plug the electrical cord for the toilet into the outlet.
Test the toilet for proper operation.
Ensure that the tank refills to the proper level.
Install the tank cover.
Kohler Co. 11 1092035-5-A
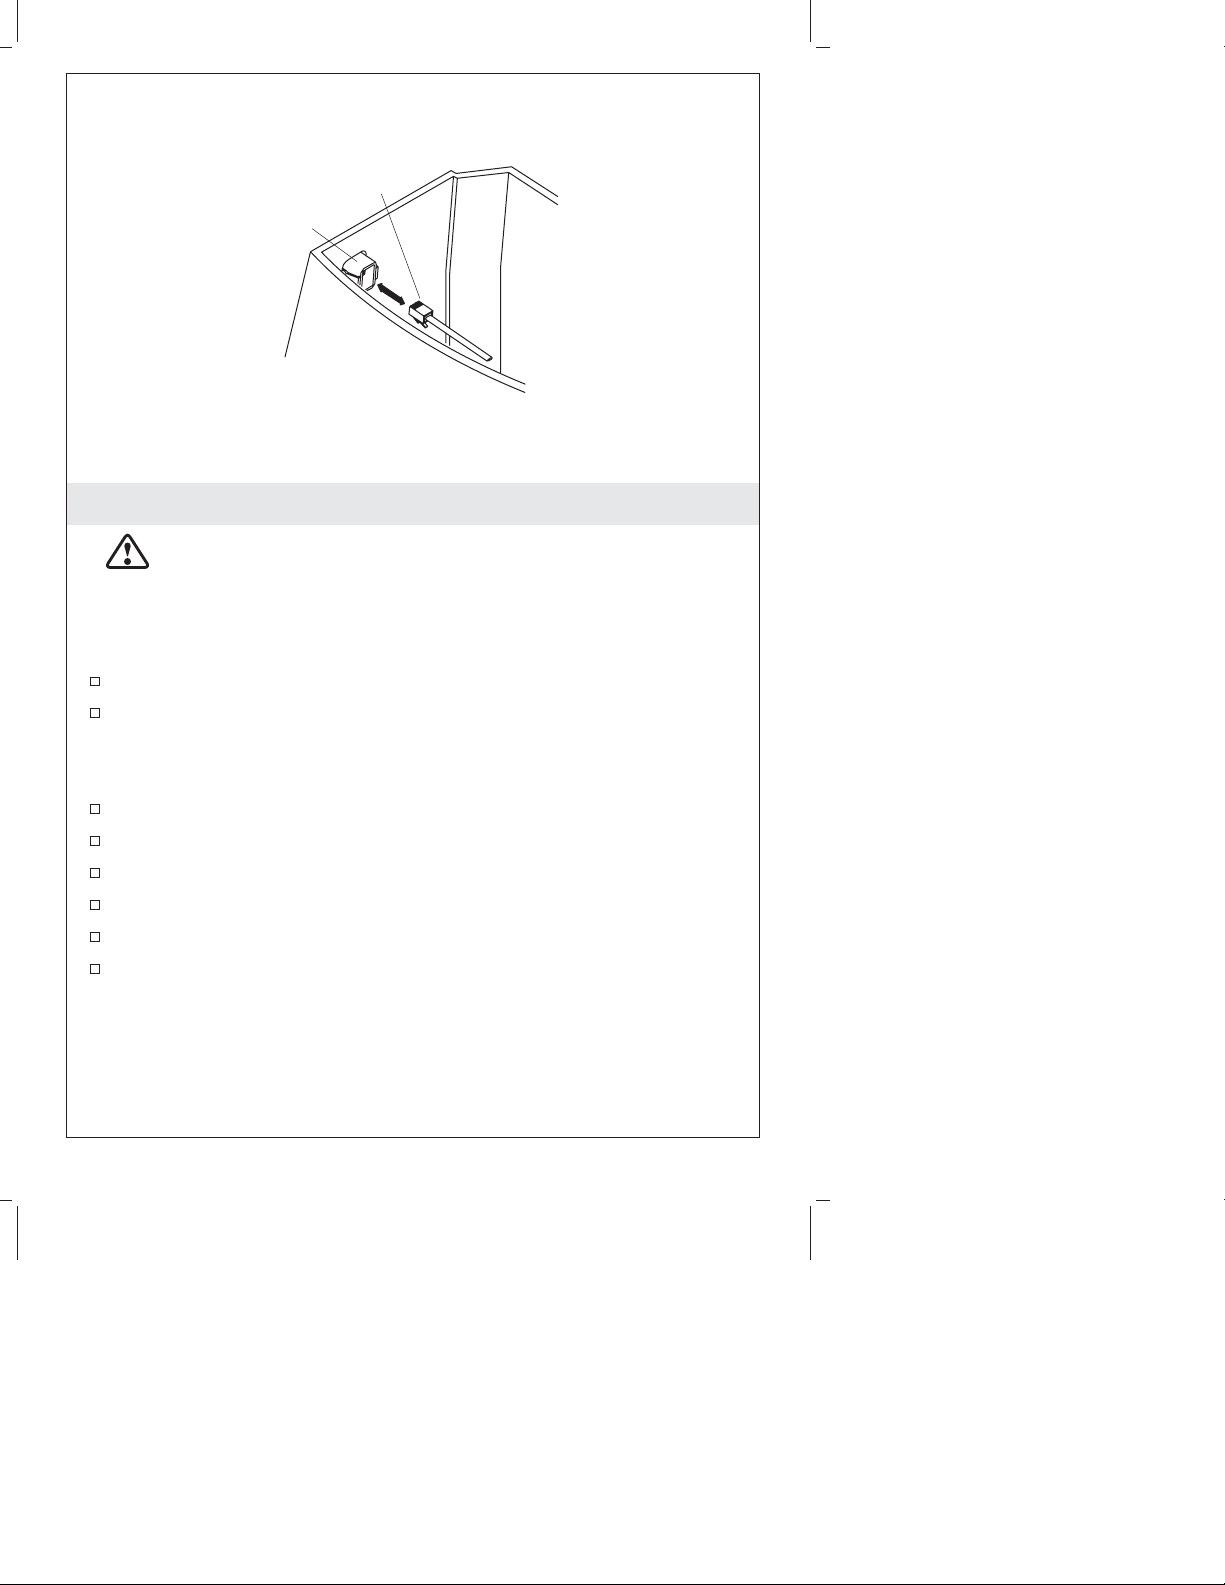
Modular Plug
Trip Button
Trip Button Wire Plug-In
CAUTION: Risk of property damage. Ensure that the
modular plug is completely dry before reconnecting. If it has
been submersed, wipe it down with a dry rag and let it dry.
Perform the following steps to reconnect the trip button wire to the
trip button:
Unplug the electrical plug for the toilet from the outlet.
Remove the tank cover.
NOTE: The modular jack and plug are similar to a modular
telephone jack and plug.
Align the modular plug into the modular jack of the trip button.
Push the plug into the jack until it snaps into place.
Position the wire so it is above the full water level in the tank.
Plug the electrical cord for the toilet into the outlet.
Test the toilet for proper operation.
Replace the tank cover.
1092035-5-A 12 Kohler Co.
Snap-Fit Fingers
Trip Button
Trip Button
Modular Plug
Replacing the Trip Button
Remove the Trip Button
CAUTION: Risk of injury or product damage. Do not let the
plug get wet.
CAUTION: Risk of injury or product damage. Handle
vitreous china very carefully.
Use the following steps to remove the trip button from the toilet:
Observe and note the outward orientation of the trip button.
Unplug the modular plug for the toilet from the outlet.
Remove the tank cover from the tank.
NOTE: The plug operates just like a modular telephone plug.
Press the tab on the modular plug at the trip button connection to
release the internal latch.
Unplug the modular plug from the back of the trip button.
Squeeze the snap-fit fingers on the trip button inside the tank.
While squeezing, push the trip button from inside the tank
outward until it is free.
Install the Trip Button
Kohler Co. 13 1092035-5-A
CAUTION: Risk of injury or product damage. Handle
vitreous china very carefully.

Replacing the Trip Button (cont.)
Use the following steps to install the trip button on the toilet:
NOTE: The trip button must be aligned before it can be reinstalled.
Align the button to the correct orientation at the hole in the tank.
Push the button gently into the tank until it snaps into place.
NOTE: The plug operates just like a modular telephone plug.
Align the tank wiring modular plug into the modular jack of the
trip button and snap it into place.
Ensure that the trip button wiring is supported above the water
level.
Place the cover on the tank.
Insert the electrical plug for the toilet into the outlet.
Test the toilet for proper operation.
1092035-5-A 14 Kohler Co.
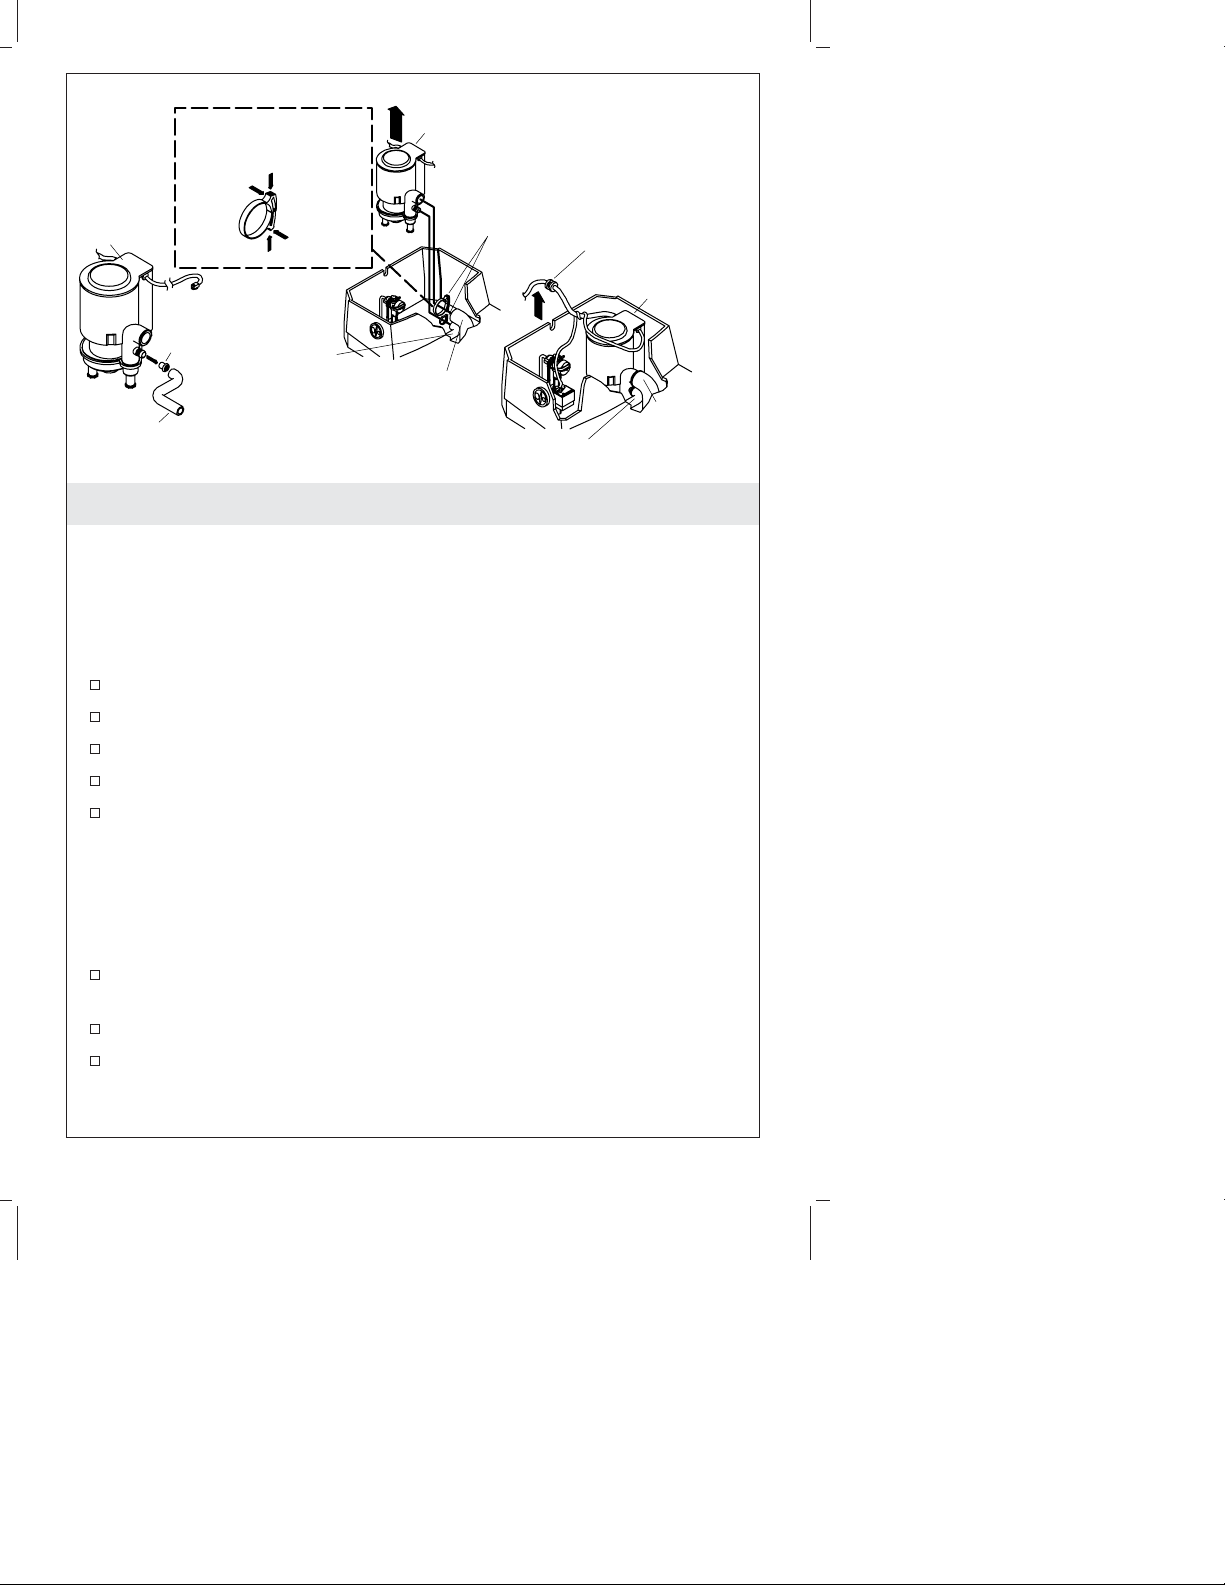
Pump Flush Assembly
Hose Clamps
Strain Relief
Pump Flush
Assembly
Rim Supply Hose
Pump
Flush
Assembly
Rim
Supply Hose
To Open
Clamp
Flow
Restrictor
To Close
Clamp
To Open
Clamp
Rim
Supply
Hose
Jet Supply
Hose
Replacing the Pump
Remove the Pump
NOTE: The pump has no serviceable parts. It is replaced as an
assembly. Retain all parts for reuse unless otherwise directed.
Should replacement ever be necessary, perform the following steps:
Turn off the water.
Drain the tank by flushing.
Unplug the electrical cord for the toilet from the outlet.
Remove the tank cover.
Unplug the modular plug and cord from the back of the trip
button.
Jet Supply
Hose
NOTE: The larger upper hose is the jet hose and the lower smaller
hose is the rim hose. Both hoses are attached to the pump by
clamps. The upper hose is held in place in the tank by a fitting. The
lower hose slides into a hole and is held in place by friction.
Loosen and remove the upper hose clamp by sliding the
clamping heads apart.
Pull the lower rim supply hose out of the vitreous china hole.
Remove the upper jet rim hose from the pump and remove the
pump with the lower rim hose attached.
Kohler Co. 15 1092035-5-A

Replacing the Pump (cont.)
Remove the lower rim hose clamp by sliding the clamping heads
apart.
Work the rim hose off the pump.
NOTE: The flow restrictor slip fits into the rim opening in the pump
and is held in place by the rim hose. When the hose is removed
from the pump, the restrictor may remain in the hose or on the
pump. Save the restrictor for reuse.
Use needle-nosed pliers to remove the flow restrictor from the
rim hose or from the hose connection at the pump.
Inspect the lower rim hose for any damage. Replace if necessary.
Inspect the upper jet hose for any damage. Replace if necessary.
Install the Pump
Perform the following steps in order to install a new pump:
NOTE: The flow restrictor slip fits into the rim opening in the
pump, and is held in place by the rim hose.
Use needle-nosed pliers to insert the flow restrictor in the rim
opening on the pump as shown.
Position the lower rim hose clamp on the rim hose.
Install the low rim hose on the pump.
Install the rim hose clamp by sliding the clamping heads together.
Position the upper jet hose clamp on the jet hose.
Position the pump in the tank and align it with the hose
connections.
Push the lower rim supply hose into the vitreous china hole.
Install the upper jet hose onto the pump.
Install the upper hose clamp by sliding the clamping heads
together.
Plug the modular plug and cord into the back of the flush button.
Plug the electrical cord for the toilet into the outlet.
NOTE: Use the proper termination devices as required by any local
electrical codes.
Turn on the water.
Observe that the tank refills.
1092035-5-A 16 Kohler Co.

Replacing the Pump (cont.)
Test the toilet for proper operation.
Place the tank cover on the tank.
Troubleshooting Guide
Troubleshooting Tips
The troubleshooting guide below is meant for general aid only. The
manufacturer has preset all adjustments in this toilet. The only
adjustments that may be required will be part of a replacement
procedure.
For bidet seat troubleshooting, refer to the troubleshooting guide
packed with the bidet seat.
Ensure that electrical power is available to the toilet while it is in
use.
Disconnect power to the toilet before servicing.
Perform checks as listed in the troubleshooting table for the
identified symptom.
Any problems not covered in this chart should be referred to
your installer or dealer.
For warranty service, contact your dealer or wholesale distributor.
If you need to locate a Kohler Authorized Service Representative in the
United States, call our Customer Service Department at
1-800-4-KOHLER (1-800-456-4537).
For general information, call one of the following numbers:
In the USA, call 1-800-4-KOHLER (1-800-456-4537)
In Mexico, call 001-877-680-1310
In Canada, call 1-800-964-5590
To make fixing the situation easier for both you and us, be sure to
provide all the pertinent information. This could include a complete
description of the problem, the product name, the model number, the
color or finish, and the date the product was purchased.
Kohler Co. 17 1092035-5-A

Troubleshooting Guide (cont.)
Troubleshooting Table
Symptoms Recommended Action
1. Poor flush. A. If poor flush occurred for heavy waste while
2. Long fill
cycle. Fill
valve does
not refill
the tank.
using the short trip button, use the long trip
button.
B. If poor flush occurred soon after the toilet was
previously used, the tank may not have refilled
completely. Check the position of the water
supply shut-off valve. If required, fully open the
valve or wait longer between flushes.
C. Check for clogged trapway or rim holes. Clean if
necessary.
D. Check for clogged soil pipe or vents. Clean if
necessary.
E. If poor flushes occur with full tanks and clean
trapway, rim holes, soil pipes, and vents, then the
pump may be the problem. Check that the pump
hoses are undamaged and are properly installed.
F. Power interruptions or extreme low voltage
conditions can prevent pump operations. Check
that the proper electrical power is applied to the
pump.
G. If the problem persists, replace the pump.
A. Remove dirt or obstructions from the valve head.
Flush the lines.
B. The valve inlet or supply line may be plugged.
Clear particles from valve seat.
C. The supply stop may be closed. Fully open the
supply stop valve.
D. The fill valve may be clogged. Unclog the fill
valve. If the fill valve was clogged, install a filter
in the supply line to prevent recurring problems.
E. The float valve seal may be cracked or split.
Replace the valve assembly.
1092035-5-A 18 Kohler Co.

Troubleshooting Guide (cont.)
Symptoms Recommended Action
3. The fill
valve turns
A. Clean the fill valve seat/seat washer. If no debris
is found, replace the piston/seat washer assembly.
on and off
by itself
without the
toilet being
flushed.
B. Replace the fill valve if the valve float sinks.
C. The float operates the fill valve at too high a level.
Adjust the tank water level if it is too high.
D. Clean the valve inlet, valve head, or supply line.
Flush the lines.
E. Either pump discharge hose may be loose
allowing water to drain from the tank into the
toilet. Ensure that both hoses are properly
connected. Contact a Kohler Service
Representative if necessary.
F. The water line height may be incorrectly set. Set
the correct water line height.
G. Water may be leaking past the jet hose spud
gasket into bowl. Replace spud unit (see
installer/dealer for instructions).
4. The fill
A. Replace the fill valve if the valve float sinks.
valve runs
continuously.
B. Adjust the tank water level if it is too high.
C. Clean the valve inlet, valve head, or supply line.
Flush the lines.
D. An excessively high water supply pressure may
force the water through the fill valve. If required,
reduce external water pressure.
E. Foreign particles may be lodged under the float
valve seal. Clear particles from valve seat.
F. The float valve seal may be cracked or split.
Replace valve assembly.
5. The fill
cycle is
noisy.
A. Partially close the water supply shut-off valve if
the water pressure to the toilet is too high. Check
the toilet performance following any such
adjustment.
B. Remove dirt or obstructions from the valve head.
Flush the lines.
Kohler Co. 19 1092035-5-A

Troubleshooting Guide (cont.)
Symptoms Recommended Action
6. Pump
draws air
during
flush.
7. No flush.
The pump
does not
operate.
8. Circuit
breaker
trips
frequently.
A. The water line height may be incorrectly set. Set
the correct water line height. Adjust the screw
clockwise in order to raise the elevation of the
float and the full water line.
A. The pump is not plugged in or the electrical
power is not on. Plug the three-prong plug from
the pump into Class A GFCI, or turn on power to
toilet.
B. The pump has locked out through its internal
thermal overload switch. Wait two minutes and
retry.
C. The trip button is not plugged in. Plug modular
plug of the trip button wire into jack in trip
button housing.
D. The trip button has failed. Replace the flush
button.
E. The pump has failed. Replace the pump.
A. Check that the circuit breaker is properly sized
and has no other electrical loads.
B. If the circuit breaker trips while the pump is
disconnected, have an electrician correct the fault
in the wiring to the toilet.
One-Year Limited Warranty
KOHLER plumbing products are warranted to be free of defects in
material and workmanship for one year from date of installation.
Kohler Co. will, at its election, repair, replace or make appropriate
adjustment where Kohler Co. inspection discloses any such defects
occurring in normal usage within one (1) year after installation. Kohler
Co. is not responsible for removal or installation costs. Use of in-tank
toilet cleaners will void the warranty.
To obtain warranty service contact Kohler Co. either through your
Dealer, Plumbing Contractor, Home Center or E-tailer, or by writing
Kohler Co., Attn.: Customer Service Department, 444 Highland Drive,
Kohler, WI 53044, USA, or by calling 1-800-4-KOHLER from within the
USA, 1-800-964-5590 from within Canada and 001-877-680-1310 from
within Mexico.
Implied warranties including that of merchantability and fitness for
1092035-5-A 20 Kohler Co.

One-Year Limited Warranty (cont.)
a particular purpose are expressly limited in duration to the duration
of this warranty. Kohler Co. and/or seller disclaims any liability for
special, incidental or consequential damages.
Some states/provinces do not allow limitations on how long an
implied warranty lasts, or the exclusion or limitation of special,
incidental or consequential damages so these limitations and exclusions
may not apply to you. This warranty gives you specific legal rights.
You may also have other rights which vary from state/province to
state/province.
This is Kohler Co.’s exclusive written warranty.
Kohler Co. 21 1092035-5-A
1055954**
Tank Cover
1048377
Riser
1006734
Nut (Order 2)
1069395
O-Ring
82963
Hanger
85796
Refill Tube
85544
Insert
1001958
Seal
Diaphragm
1068034
Fill Valve
1071510
Flow Regulator
85307
Washer
1068389
Hose
A
**Finish/color code must be specified when ordering.
Service Parts
1007523
Valve
81760
Bushing
83034
Restrictor
87378
Clamp
83821
Hose
84153
Pump
83040
Clamp
83040
Clamp
81891
Hose
81788
Ring
81787
Spud
83427
Strap
83433
Gasket
1092035-5-A 22 Kohler Co.
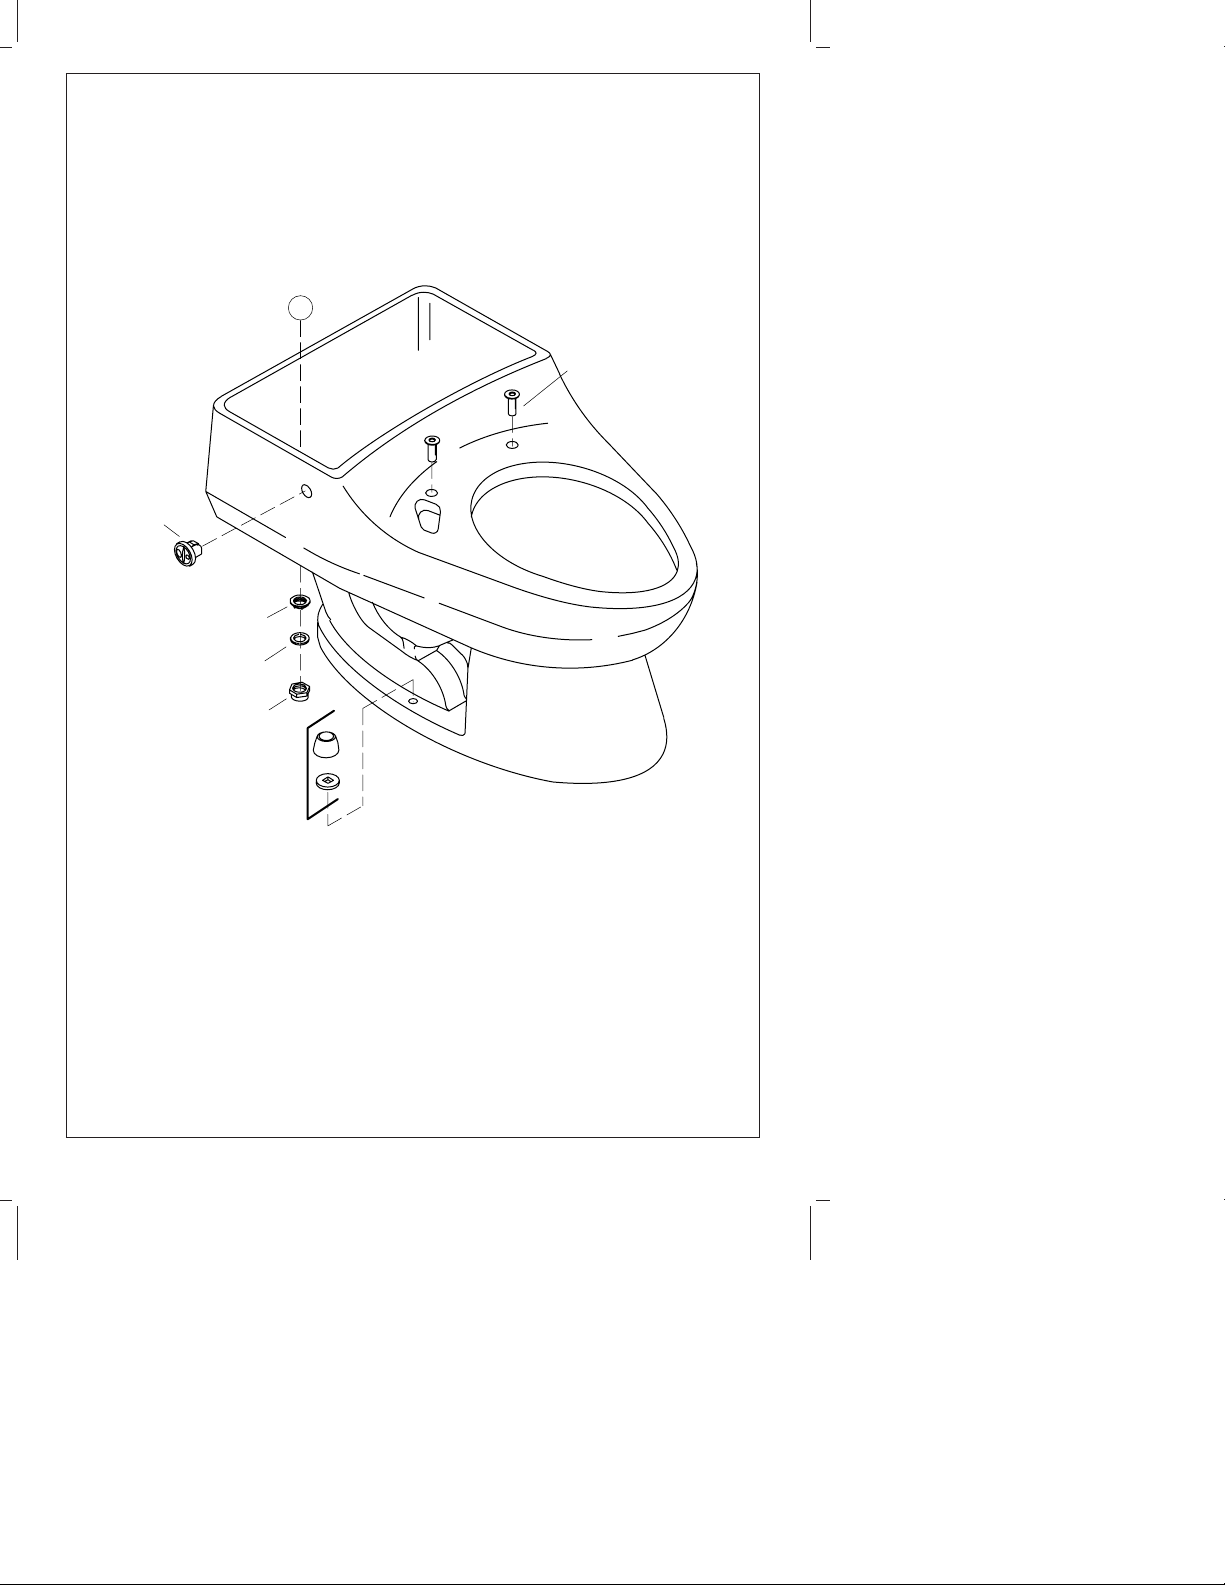
81996**
Switch
A
84999
Anchor (2 ea.)
1057941
Nut
42398
Washer
42397
Nut
1013092**
Bolt Caps (2 ea.)
**Finish/color code must be specified when ordering.
Kohler Co. 23 1092035-5-A
 Loading...