


OWNER'S
MANUAL
MODEL NOS. 625.3483400
Standard Capacity SST
625.3483500
Standard Capacity SST 

Caution:
Read and Follow
All Safety Rules and
Operating Instructions
Before First Use of
This Product.
If you have questions when installing, operating or maintaining your softener, and when setting the timer, call this toll±free number...
1±800±426±9345
SAVE THIS MANUAL
Water Softeners
Warranty
Start Up / Setting Timer
How It Works
Care Of
Specifications
Repair Parts
Use plastic bag and tie provided, to hang manuals nearby the softener for future reference.
C I A
PRINTED IN U.S.A.
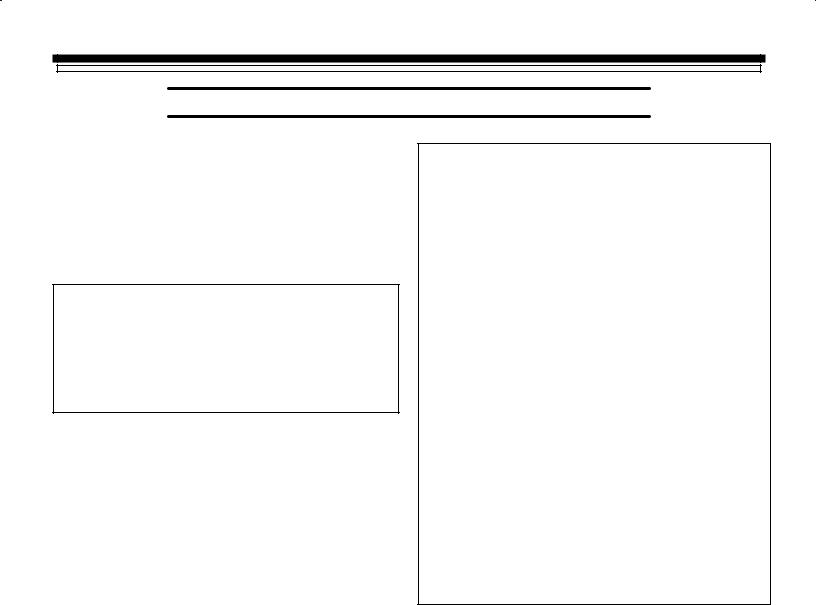
WARRANTY
SEARS RESIDENTIAL WATER SOFTENER
FULL ONE YEAR WARRANTY ON WATER SOFTENER
For one year from the date of purchase, when this water softener is installed and maintained in accordance with our instructions, Sears will repair, free of charge, defects in material or workmanship in this water softener.
FULL TEN YEAR WARRANTY AGAINST LEAKS
For ten years from the date of purchase, Sears will furnish and install a new current model water softener tank or salt storage drum, free of charge, if either the tank or drum develop a leak.
TO OBTAIN WARRANTY SERVICE, SIMPLY CONTACT THE NEAREST SEARS SER-
VICE CENTER THROUGHOUT THE UNITED STATES. This warranty applies only while this product is in use in the United States.
This warranty gives you specific legal rights, and you may have other rights which vary from state to state.
Sears, Roebuck and Co., D/817 WA, Hoffman Estates, IL 60179
I & " $! & " $! ! |
& ! ! ! & " S S H $ |
|||
! " !& ! ! & S |
"! ' I ! |
|
|
|
SEARS INSTALLATION POLICY |
|
SEARS INSTALLATION WARRANTY |
||
! ! & S |
I ! ! & $!& %! ! & " ! |
|||
! $ |
S |
# # $ $!& |
||
$! & ! ! ! ( |
|
! # ! ! ! |
||
" ! ! ! & $! |
! |
" ! $ & S |
||
$ " ! |
! ! # " !& $! & |
|||
" ! ! ! " ! ( |
S |
$ " ! & " " " " ! |
||
! & " ! ! !& |
! ! ! ! ! ! & " |
|||
! " !& |
|
|
|
|
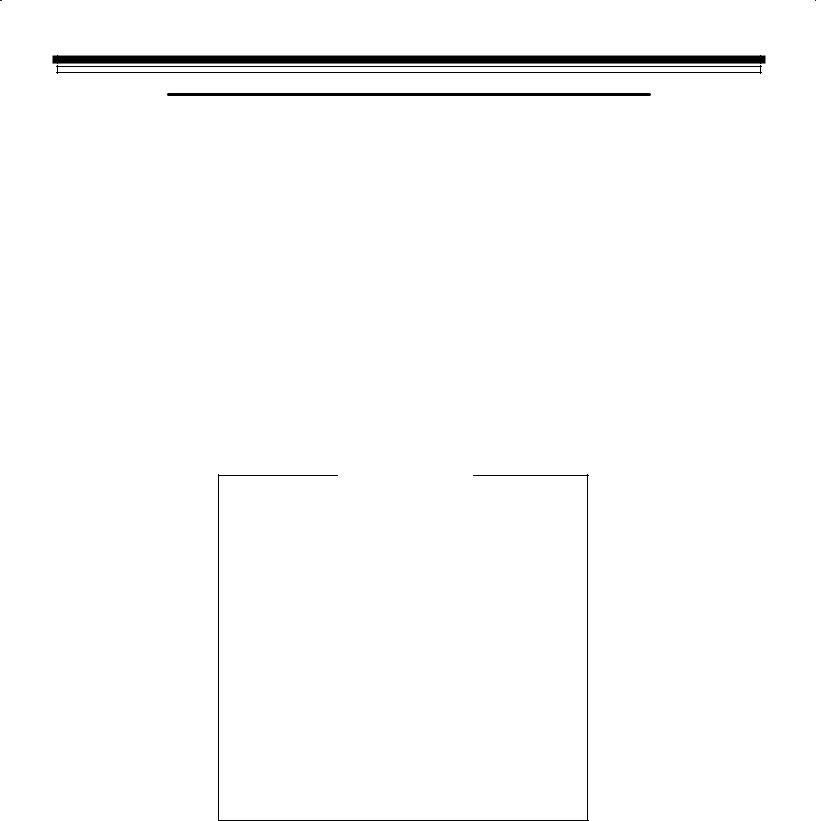
FACTS AND FIGURES TO KEEP
Fill in the blanks below and keep this book in a safe place so you always have these facts.
Water Softener Model No.²
Serial Number
Date Installed
Water Hardness |
|
|
|
Grains Per Gallon |
|||||||
Iron Content |
|
|
|
|
|
|
|
Parts Per Million |
|||
*pH |
|
Taste And/Or Odor |
|
||||||||
Water Pressure |
|
Pounds/Square Inch |
|||||||||
Water Flow Rate |
|
|
|
|
Gallons Per Minute |
||||||
² The model number is on the rating decal, located on the rim, under the salt hole cover.
2

TABLE OF CONTENTS
|
|
|
PAGE |
|
|
|
NO. |
SECTION 1 |
SOFTENER START UP |
|
|
A. |
SAFETY GUIDES |
|
4 |
B. CHECK LIST OF STEP-BY-STEP GUIDES TO INSTALL |
5 |
||
C. |
PROGRAM THE TIMER |
6 |
|
D. SANITIZING THE WATER SOFTENER |
7 |
||
E. FILL THE STORAGE TANK WITH SALT |
8 |
||
SECTION 2 |
HOW YOUR WATER SOFTENER WORKS |
||
A. FACE PLATE TIMER FEATURES |
9-10 |
||
B. SOFT WATER SERVICE AND REGENERATION |
11-13 |
||
SECTION 3 |
CARE OF YOUR SOFTENER |
|
|
A. SALT: REFILLING STORAGE TANK, SALT BRIDGE |
14 |
||
B. KEEPING THE WATER SOFTENER CLEAN |
15 |
||
C. KEEP THE SOFTENER FROM FREEZING |
16 |
||
D. |
HELPFUL HINTS CHECKLIST |
17 |
|
SECTION 4 |
OTHER THINGS TO KNOW |
|
|
A. HOW TO ªFINE-TUNEº YOUR WATER SOFTENER |
18-20 |
||
B. |
DIMENSIONS/SPECIFICATIONS |
21 |
|
SECTION 5 |
SERVICE TECH INFORMATION |
|
|
A. |
ELECTRICAL CONNECTIONS |
22 |
|
B. |
REGENERATION CYCLE TIMES |
23 |
|
C. |
TROUBLESHOOTING |
24-26 |
|
D. |
ROTARY VALVE SERVICE |
27 |
|
E. WATER FLOW THROUGH THE SOFTENER VALVE |
28-30 |
||
SECTION 6 |
REPAIR PARTS |
32-35 |
|
3
SECTION 1
WATER SOFTENER START-UP
1A. |
SAFETY GUIDES |
▲Read all steps, guides and rules carefully before installing and using your new water softener. Follow all steps exactly to correctly install. Failure to follow them could cause personal injury or property damage. Reading this book will also help you to get all of the benefits from your water softener.
▲Your water softener will remove hardness minerals and ªclear waterº iron from water, up to the limits shown on page 21. It will not remove other types of iron, acids, tastes and odors, etc. It will not purify polluted water or make it safe to drink.
▲Protect the softener and piping from freezing. Damage from freezing voids the softener warranty. See page 16.
CAUTIONS
PLEASE READ AND COMPLY WITH THE FOL-
LOWING GUIDES TO PREVENT DAMAGE TO
THE SOFTENER OR OTHER PROPERTY,
PERSONAL INJURY, OR POSSIBLE FATAL
SHOCK.
▲THIS SOFTENER WORKS ON 24 VOLTS ONLY. BE SURE TO USE THE TRANSFORMER INCLUDED, AND PLUG IT INTO A 120V OUTLET.
▲Unplug the transformer right away if the power cable should become damaged or frayed. Make repairs before plugging back into the power outlet.
▲Always unplug the softener from electrical power before removing outer valve covers.
4
SECTION 1
WATER SOFTENER START-UP
1B. CHECK LIST OF ALL STEP-BY-STEP GUIDES TO INSTALL
Refer to the Installation Manual, part no. 7141417, for step4by4step guides.
To be sure you have done all the steps to install the softener, read the following list. Page numbers referred to are in the s o
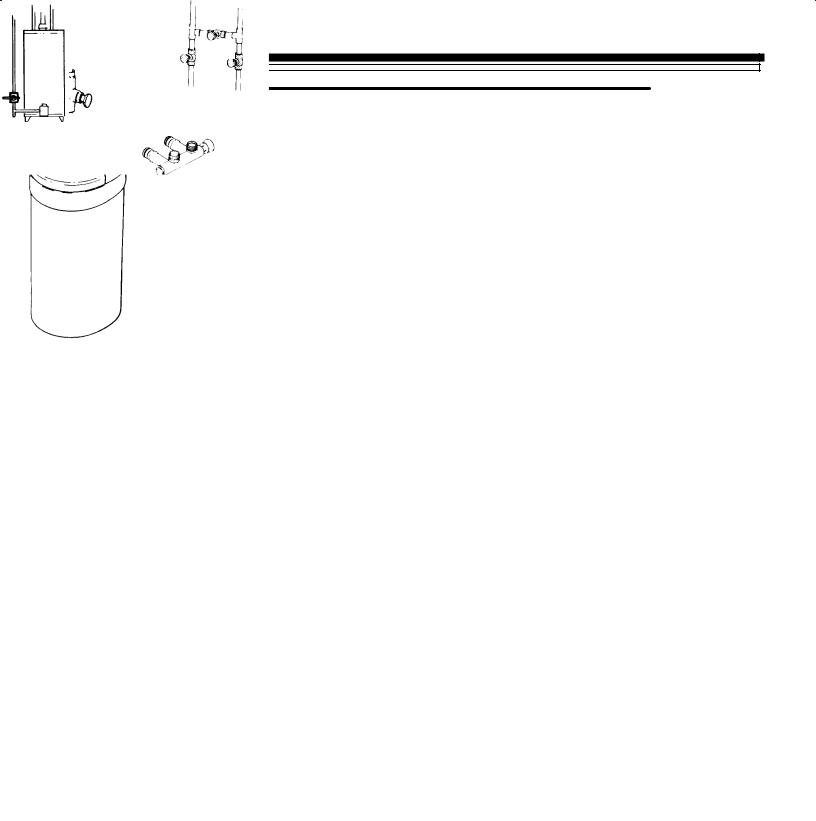
Is the house water flow going INTO the soften4 er valve INLET? Trace piping to be sure. See pages 10 and 11.
Is the plumbing bypass valve (or 3 valves) set for SERVICE? See page 18.
Is the valve drain hose connected the right way, and without sharp bends or kinks that could stop or reduce water flow? See page 16.
Is the softener power cable connected to the transformer, and is the transformer plugged into 120V460Hz electrical outlet? See page 20.
|
Be sure to restart the water heater. See page 20. |
3±valve |
|
brass |
|||
|
|
||
|
|
Bypass |
|
|
|
Valves |
|
|
|
plastic |
Water
Heater
5
SECTION 1
WATER SOFTENER START-UP
|
1C. |
PROGRAM THE TIMER |
||||
|
|
|
|
|
|
|
FIG. 1 |
|
|
|
|
|
|
|
|
|
PRESENT TIME AND DAY |
|
||
|
|
|
RECHARGE TIME |
|
||
|
|
|
RECHARGE DAY |
|
||
|
|
Standard Capacity |
|
SET / CLEAR |
Solid State Water Softener |
|
|
|
|
|
|
||
|
|
|
|
|
|
|
|
|
|
HOLD |
|
||
|
|
|
display |
buttons |
|
|
1. SET THE TIMER |
|
NOTE: |
|
|||
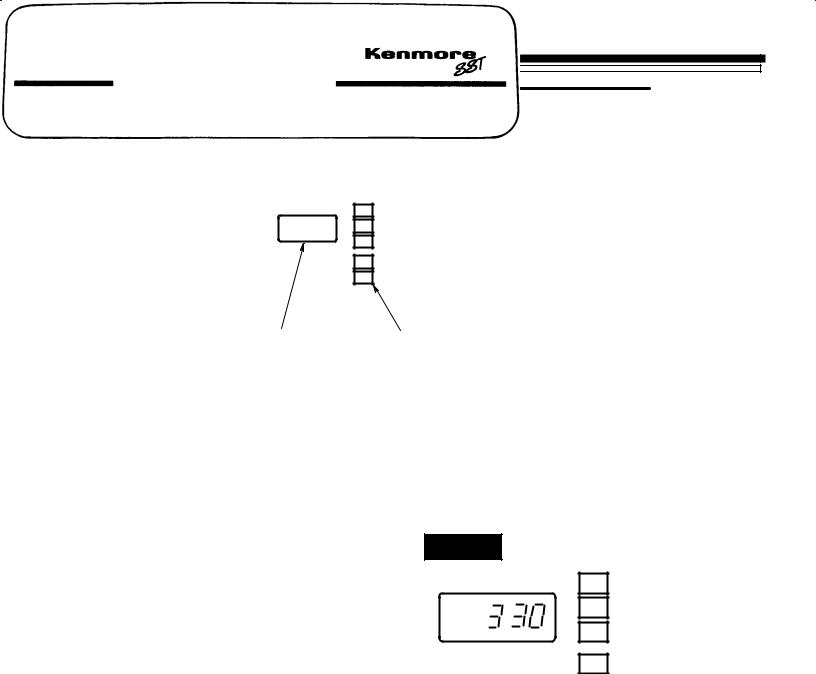
When the transformer is plugged into the elec5 trical outlet, 12:00 AM, SUnday began to flash in the time display. Set the time of day and present day of week as follows:
a. SET TIME OF DAY
1.Press the PRESENT TIME AND DAY button once. The hour display continues to flash.
Press SET/CLEAR and quickly release to move the day display 1 at a time. Or, hold the SET/CLEAR button to move the day display ahead 2 days each second.
2.Press the PRESENT TIME AND DAY button again to steady the entire display. Figure 2 shows the timer set at TUesday.
2.Press the SET/CLEAR button until the pres5 ent hour of the day shows in the display. Be sure AM for morning hours, or PM for after5 noon and evening hours shows.
NOTE:
Press SET/CLEAR and quickly release to move the hour display ahead 1 at a time to the correct hour. Or, hold the SET/CLEAR button to move the display ahead 2 hours each second, to the correct hour.
3.Press button once to steady the hour dis5 play, and minutes begin to flash. Repeat step a2 to set the correct minutes.
4.Press button again to steady the minute dis5 play (day will begin flashing). Figure 2 shows the timer set at 3:30 PM. See step b to set the present day.
b. SET PRESENT DAY OF WEEK
1.Press the SET/CLEAR button to set the pres5 ent day of the week in the display.
FIG. 2
PM ..
TU
EXAMPLE: This drawing shows 3:30 PM as the present time of day, and
TUesday is the current day of the week.
D D
C G
C G D
C
|
|
|
C |
|
|
|
|
|
|
D |
C G |
|||
No other settings are needed after installing your water softener. The softener is factory set to regenerate every Monday, Wednesday and Satur5 day (beginning at 2:00 AM). For most families, this gives enough soft water for their needs. However, if you want the softener to regenerate at a different time, or on different days, or to set for the most efficiency, see •Fine&Tuning Your Water Softener," page 18.
SEE PAGE 9 FOR OTHER TIMER CONTROLS AND FEATURES.
6
SECTION 1
WATER SOFTENER START-UP
1D. SANITIZING THE WATER SOFTENER
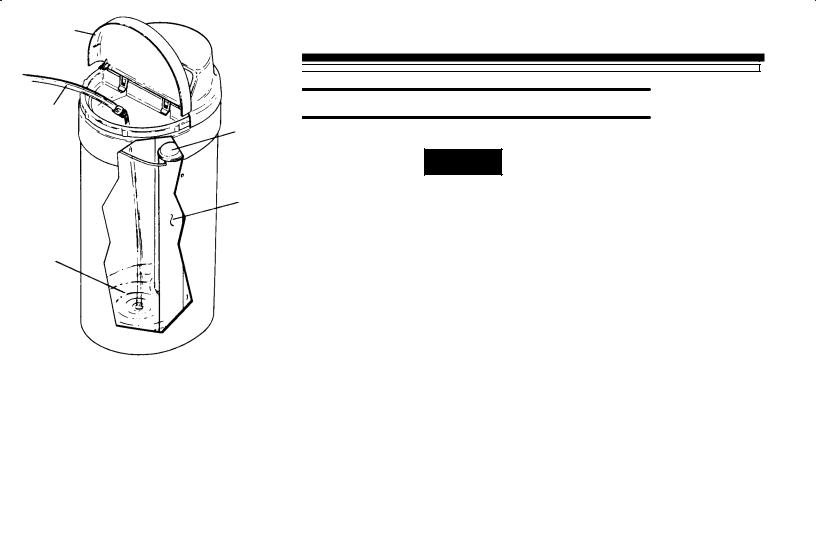
Care is taken at the factory to keep your water softener clean and sanitary. Materials used to make the softener will not infect or contaminate your water supply, and will not cause bacteria to form or grow. However, during shipping, storage, installing and operating, bacteria could get into the softener. For this reason, sanitizing as follows is suggested when installing.
1.Lift the salt hole cover and use a pail or hose to fill the salt storage tank with at least 3 gallons of water.
2.Remove the brinewell cover (FIG. 3) and pour about 3/4 ounce of common 5.25% household bleach (Clorox, Linco, BoPeep, White Sail, Eagle, etc.) in the softener brinewell.
3.Press the ON/OFF HOLD button and o o
on to start a recharge. This first recharge does several things.
4It draws the bleach into and through the softener to sanitize it.
4It fills the salt tank to the water level need3 ed.
4 It gets all the air out of the resin tank.
4It makes the resin bed (see page 11) ready for service.
NOTES:
This recharge takes about 2 hours.
You can sanitize the softener with or with out salt in the storage tank.
FIG. 3
Salt Hole
Cover
hose
Brinewell
Cover
(remove and add about 3/4 oz. bleach)
Brinewell
Water,
About 3 Gallons
Recommended by the Water Quality Association. On some water supplies, the water softener may need periodic disinfecting. Sanitize with or without salt in the storage tank.
7
SECTION 1
WATER SOFTENER START-UP
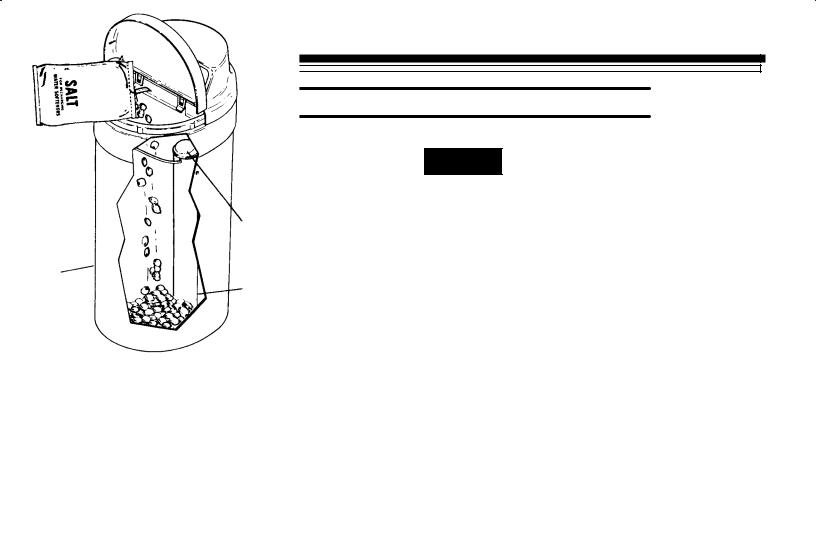
1E. FILL THE STORAGE TANK WITH SALT
Brine (salt dissolved in water) is needed for each and every regeneration. The water for making brine is metered into the salt storage tank by the softener. However, you must keep the tank filled with salt.
Fill the tank with NUGGET or PELLET water softener salt. DO NOT use rock salts, as they have dirt and sediments that will stop the softener from working.
Before filling, be sure the brinewell cover is in place on the top of the brinewell. Salt storage capacity is shown on page 21.
NOTE:
In humid areas, it is best to fill the storage tank half<full, and to refill it more often. Salt bridging (see page 14) occurs more often when conditions are humid.
WATER SOFTENING SALT WITH IRON REMOVING ADDITIVES Ð Some salts have an additive to help the softener handle iron in the water supply. Although this additive may help to keep the softener resin clean, it may also release corrosive fumes that will weaken and shorten the life of some softener parts.
FIG. 4
|
Brinewell |
|
Cover |
Salt |
|
Storage |
|
Tank |
Brinewell |
SODIUM INFORMATION: Water softeners using sodium chloride for regeneration add sodium to the water. Persons who are on sodium restricted diets should consider the added sodium as part of their overall sodium intake.
For example, if your water supply is 15 grains hard, you would have to drink 3 quarts of softened water to consume 335 milligrams of sodium. That is equivalent to eating 2<1/2 slices of white bread.
Persons who are concerned about their drinking water should consider a Sears Drinking Water System that will remove or reduce in excess of 90% of the sodium and other drinking water contaminants.
You have now finished the water softener start up. After the sanitizing recharge, on page 7, the softener will be giving you soft water.
8
SECTION 2
HOW YOUR WATER SOFTENER WORKS
|
2A. |
FACE PLATE TIMER FEATURES |
|
|
|
|
|
|
||||||||
|
|
|
|
|
|
|
|
|
|
|
|
|
|
|
||
RECHARGE NOW Ð If you have guests visiting, |
FIG. 5 |
|
|
|
|
|
|
|
|
|
|
|
|
|||
or other times when you use more water than |
|
|
|
|
|
|
|
|
|
|
|
|
|
|||
usual, you could begin to run out of soft water. If |
|
|
|
|
|
|
|
|
D D |
|||||||
the softener is not scheduled to regenerate for |
|
. |
|
|
|
|
|
|
|
|
|
|
|
|||
|
|
|
|
|
|
|
|
|
|
|
|
|||||
another day or 2, you would get hard water until |
PM |
|
|
|
|
|
|
C G |
||||||||
RCHG . |
|
|
|
|
|
|
|
|
|
|||||||
|
|
|
|
|
|
|
|
|
|
|||||||
then. If this happens, or you think it might |
|
|
|
|
|
|
|
|
C G D |
|||||||
happen, press and hold in the HOLD5RECHARGE |
|
|
|
|
|
|
|
|
|
|
|
|
|
|||
NOW button for 3 seconds until RCHG shows. |
|
|
|
|
|
|
|
|
C |
|||||||
|
|
|
|
|
|
|
|
|
|
|
|
|
||||
RCHG will flash in |
the display during the |
|
|
|
|
|
|
|
|
|
|
C |
||||
|
|
|
|
|
|
|
|
|||||||||
regeneration, which lasts under 2 hours. |
|
|
|
|
|
|
|
|
|
D |
C G |
|||||
|
|
|
|
|
|
|
|
|
|
|
|
|
||||
NOTE: |
|
|
|
|
|
|
|
|
|
|
|
|
|
|
||
Avoid using HOT water while the softener |
|
|
|
|
|
|
|
|
|
|
|
|
|
|||
regenerates, because bypass hard water will refill |
|
|
|
|
|
|
|
|
|
|
|
|
|
|||
the water heater (see •Automatic Bypass," page |
|
|
|
|
|
|
|
|
|
|
|
|
|
|||
13). |
|
|
|
|
|
|
|
|
|
|
|
|
|
|
|
|
|
|
|
|
|
|
|||||||||||
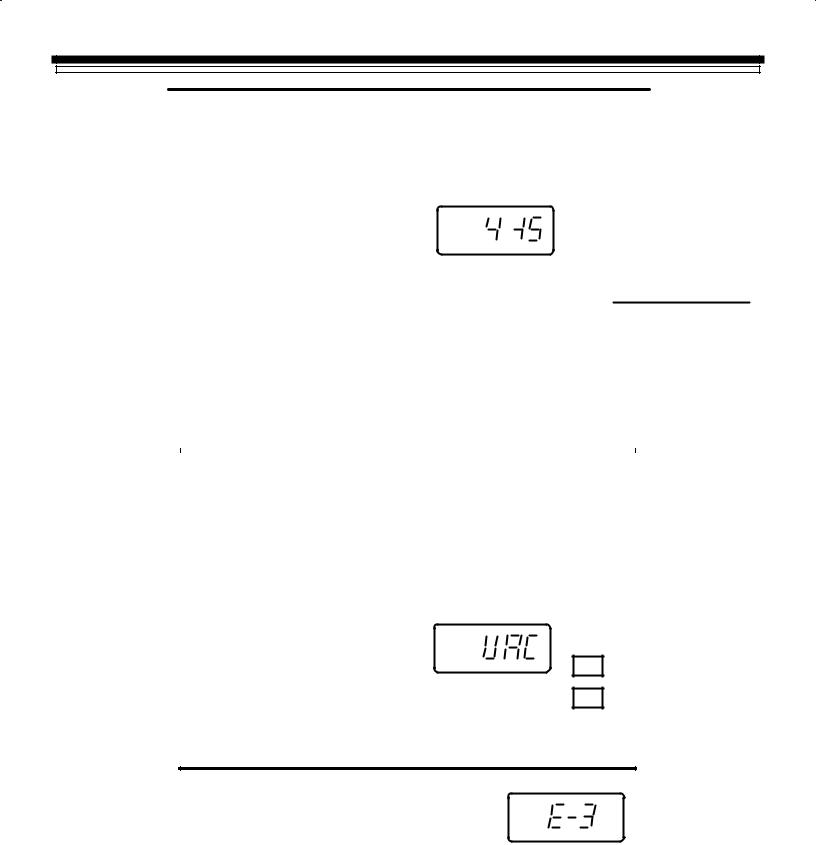
VACATION Ð The day you leave on vacation, or |
WHEN YOU RETURN, press the VACATION, |
|||||||||||||||
other long absence, press (DO NOT HOLD IN) the |
button again to return the softener to service, and |
|||||||||||||||
ON/OFF VACATION button . VAC begins to |
the correct time of day in the display. Remember |
|||||||||||||||
flash in the display (FIG. 6). The timer will keep |
to do this or the softener will not regenerate |
|||||||||||||||
time, but the softener will not regenerate to waste |
and you will soon have hard water. |
|||||||||||||||
water and salt. |
|
|
|
|
|
|
|
|
|
|
|
|
|
|
||
|
FIG. 6 |
|
|
|
|
|
|
|
|
|
|
|
|
|||
NOTE: |
|
|
|
|
|
|
|
|
|
|
|
|
|
|||
|
|
|
|
|
|
|
|
|
|
|
|
|
|
|||
Whie in VACATION, the softener will go through a |
|
|
|
|
|
|
|
|
D D |
|||||||
regeneration if the RECHARGE NOW feature is |
|
|
|
|
|
|
|
|
|
|
|
|
|
|||
|
|
|
|
|
|
|
|
|
|
|
|
|
||||
|
|
|
|
|
|
|
|
|
C G |
|||||||
used (see above). |
|
|
|
|
|
|
|
|
|
|||||||
|
|
|
|
|
|
|
|
|
|
|
|
|
|
|||
|
|
|
|
|
|
|
|
|
|
|
|
|
|
|||
To shut off the water supply to the softener, use the plumbing bypass valve(s), FIG. 16, page 21.
C G D
C
|
|
|
C |
|
|
|
|
|
|
D |
C G |
|||
ERROR CODE |
|
An error code could appear in the face plate |
|
display if a problem occurs in the softener |
Continued |
electronics. If you see an error code instead of the |
|
present time of day, please call you local Sears |
|
Service Department for service. |
|
9
SECTION 2
HOW YOUR WATER SOFTENER WORKS
2A. FACE PLATE TIMER FEATURES
TIMER ªPOWER-OUTAGE MEMORYº Ð If electrical power to the timer goes off, the •memory" built into timer circuitry keeps all settings for 6 hours (minimum) or more. The display is blank and the softener will not regenerate. When electrical power comes on, 1 of 2 things will happen.
1.The present time of day will show, meaning the timer memory has kept all settings.
NOTE:
If the softener was in a regeneration when power was lost, it will now finish the cycle.
2.The display will show a time, but it will be flashing. The timer memory did not keep the time settings and they must be reset (page 6).
The flashing display is to remind you to reset the timer.
NOTE:
When power comes on, the flashing display returns to a time of 12:00 AM Sunday, then begins to keep time again. If you do not reset all time settings, the softener will regenerate 3 days each week. However, regeneration will most likely be on the wrong days and at the wrong time.
If the softener was in a regeneration when power went off, the valve will return to service position without finishing the regeneration cycle. If your water tastes salty:
--use RECHARGE NOW (see page 9) to start another regeneration, or
--open 1 or more soft water faucets and allow to run until the salt taste is gone.
10
SECTION 2
HOW YOUR WATER SOFTENER WORKS
2B. SOFT WATER SERVICE AND REGENERATION
SERVICE |
REGENERATION |
When the softener is giving you soft water, it is called •Service". During service, hard water comes from the house main water pipe into the softener. Inside the softener resin tank is a bed made up of thousands of tiny, plastic resin beads (FIG. 7). As hard water passes through the bed, each bead attracts and holds the hardness minerals. This is called ion1exchanging. It is much like a magnet attracting and holding metals. Water without the hardness minerals (soft water) flows out of the softener and into the house soft water pipes.
After a period of time, the resin beads become coated with hardness minerals and they have to be cleaned. This cleaning is called recharge, or regeneration.
Regeneration is started at about 2:00 a.m. (factory setting) by the timer. It takes place in 5 stages or cycles. These are:
1 |
FILL |
4 |
BACKWASH |
2 |
BRINING |
5 |
FAST RINSE |
3 |
BRINE RINSE |
|
|
FIG. 7 WATER FLOW THROUGH THE SOFTENER IN SERVICE
Hard Water
IN
Soft Water
OUT
Resin Tank
Resin Bed
Salt Storage
Tank
FILL: Salt, dissolved in water, is called brine. Brine is needed to clean the hardness minerals from the resin beads. To make the brine, soft water flows into the salt storage area during the fill cycle as shown in FIG. 8.
The length of the fill cycle is factory set to provide softening capacity for an average family. You can reset this time when •fine1tuning" the water softener, pages 18 through 20.
FIG. 8 WATER FLOW THROUGH THE
SOFTENER IN FILL
Hard Water
IN
Soft Water
OUT
Salt
Storage Tank
(salt not shown)
Fill Water
11
 Loading...