


10651532101
Kenmore 10651532101, 10651562104, 10651262102, 10651274200, 10651264103 User Manual
...
®
Side by Side Refrigerator
Use & OsageGuide
Refrigerador de dos puertas
Manua_ de uso y cu_dado
R6frig6rateur c6te & c6te
Guideo___,,:_0c_ut_saSon et d°ent:tx_:tien
\
Sears Roebuck and Co., Hoffman Estates, IL 60179 U.S.A. www.sears.com
2220695 Sears Canada, Inc., Toronto, Ontario, Canada M5B 2B8 www.sears.ca
OF CONTENTS WARRANTY
WARRANTY ..................................................................................... 2
REFRIGERATOR SAFETY .............................................................. 3
REFRIGERATOR INSTALLATION ................................................. 4
Unpacking .................................................................................... 4
Location Requirements ................................................................ 4
Electrical Requirements ................................................................ 5
Base Grille .................................................................................... 5
Door Removal ............................................................................... 6
Door Closing and Alignment ........................................................ 8
Water Supply Connection ............................................................ 8
Water System Preparation ........................................................... 9
Normal Sounds ............................................................................. 9
REFRIGERATOR USE .................................................................... 9
Ensuring Proper Air Circulation .................................................... 9
Using the Controls ..................................................................... 10
Water and Ice Dispensers ......................................................... 10
Water Filtration System ............................................................. 11
Ice Maker and Storage Bin/Bucket ........................................... 12
REFRIGERATOR FEATURES ..................................................... 13
Refrigerator Shelves .................................................................. 13
Flip-up Shelf .............................................................................. 14
Adjustable Flip-up Shelf ............................................................ 14
Dell Drawer ................................................................................ 14
Convertible Vegetable/Meat Drawer, Crisper and Covers ....... 14
Convertible Vegetable/Meat Drawer Temperature Control ...... 14
Crisper Humidity Control ........................................................... 15
Wine or Can/Bottle Rack ........................................................... 15
Utility Bin .................................................................................... 15
FREEZER FEATURES ................................................................. 15
Freezer Shelf .............................................................................. 15
Freezer Basket or Bin ................................................................ 16
DOOR FEATURES ....................................................................... 16
Door Rails .................................................................................. 16
Can Racks and Door Bins ......................................................... 16
REFRIGERATOR CARE ............................................................... 16
Cleaning ..................................................................................... 16
Changing the Light Bulbs .......................................................... 17
Power Interruptions ................................................................... 18
Vacation and Moving Care........................................................ 18
TROUBLESHOOTING .................................................................. 18
SERVICE ....................................................................................... 21
Inthe U.S.A ................................................................................ 21
In Canada .................................................................................. 22
Accessories ............................................................................... 22
WATER FILTER CERTIFICATIONS ............................................ 22
PRODUCT DATA SHEETS .......................................................... 23
ONE-YEAR FULL WARRANTY ON REFRIGERATOR
For one year from the date of purchase, when this refrigerator is
operated and maintained according to instructions attached to or
furnished with the product, Sears will repair this refrigerator, free
of charge, if defective in material or workmanship.
FIVE-YEAR FULL WARRANTY ON SEALED REFRIGERATION
SYSTEM
For five years from the date of purchase, when this refrigerator is
operated and maintained according to owner's instructions
attached to or furnished with the product, Sears will repair the
sealed system (consisting of refrigeration, connecting tubing, and
compressor), free of charge, if defective in materials or
workmanship.
The above warranty coverage applies only to refrigerators which
are used for storage of food for private household purposes and
excludes original and replacement Kenmore Filtered Ice & Water
filter cartridges (if equipped with the filter system). Original and
replacement cartridges are warranted for 30 days, parts only,
against defects in material or workmanship.
WARRANTY SERVICE IS AVAILABLE BY CONTACTING THE
NEAREST SEARS SERVICE CENTER IN THE UNITED STATES
OR CANADA.
This warranty applies only while this product is in use in the
United States or Canada. This warranty gives you specific
legal rights, and you may also have other rights which vary
from state to state or province to province.
Warranty terms may vary in Canada. Contact your local Sears
Service Center for complete details.
Sears, Roebuck and Co.
Dept. 817WA, Hoffman Estates, IL 60179
Sears Canada, Inc., Toronto, Ontario, Canada M5B 2B8
Product Record
In the space below, record your complete model number, serial
number, and purchase date. You can find this information on the
model and serial number label located on the inside wall of the
refrigerator compartment.
Have this information available to help you obtain assistance or
service more quickly whenever you contact Sears concerning
your refrigerator.
Model number 106.
Serial number
Purchase date
Save these instructions and your sales receipt for future
reference.
2
REFRIGERATOR SAFETY
Your safety and the safety of others are very important.
We have provided many important safety messages in this manual and on your appliance. Always read and obey all
safety messages.
This is the safety alert symbol.
This symbol alerts you to potential hazards that can killor hurt you and others.
All safety messages will follow the safety alert symbol and either the word "DANGER" or
"WARNING." These words mean:
You can be killed or seriously injured if you don't
immediately follow instructions.
You can be killed or seriously injured if you don't
follow instructions.
All safety messages will tell you what the potential hazard is, tell you how to reduce the chance of injury, and tell you
what can happen if the instructions are not followed.
IMPORTANT SAFETY INSTRUCTIONS
WARNING: To reduce the risk of fire, electric shock, or injury when using your refrigerator, follow these basic
precautions:
• Plug into a grounded 3 prong outlet.
• Do not remove ground prong.
• Do not use an adapter.
• Do not use an extension cord.
• Disconnect power before servicing.
• Replace all panels before operating.
• Remove doors from your old refrigerator.
• Use nonflammable cleaner.
• Keep flammable materials and vapors, such as
gasoline, away from refrigerator.
• Use two or more people to move and install
refrigerator.
• Disconnect power before installing ice maker (on
ice maker kit ready models only).
• Use a sturdy glass when dispensing ice or water
(on some models).
SAVE THESE INSTRUCTIONS
Proper Disposal of
Your Old Refrigerator
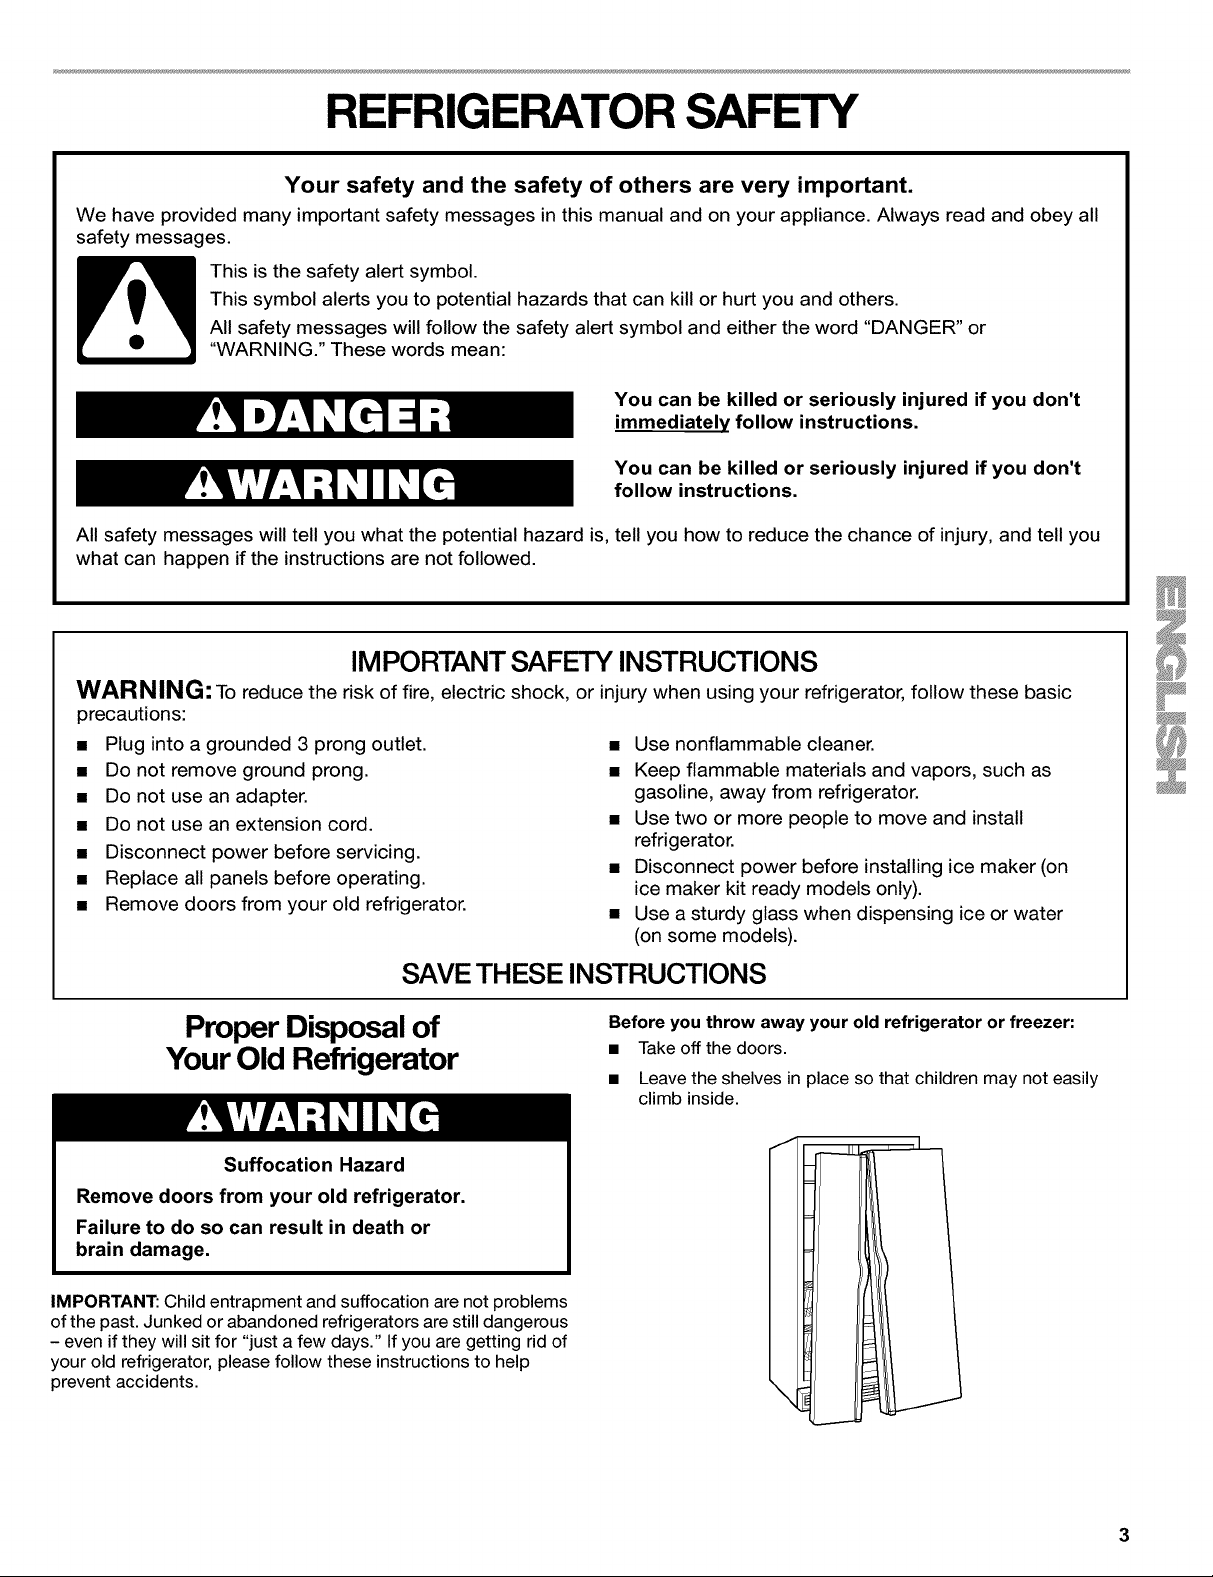
Before you throw away your old refrigerator or freezer:
• Take off the doors.
• Leave the shelves in place so that children may not easily
climb inside.
Suffocation Hazard
Remove doors from your old refrigerator.
Failure to do so can result in death or
brain damage.
IMPORTANT: Child entrapment and suffocation are not problems
of the past. Junked or abandoned refrigerators are still dangerous
- even if they will sit for "just a few days." If you are getting rid of
your old refrigerator, please follow these instructions to help
prevent accidents.
3
REFRIGERATOR
INSTALLATION
Excessive Weight Hazard
Use two or more people to move and install
refrigerator,
Failure to do so can result in back or other injury,
Removing packaging materials
• Remove tape and glue residue from surfaces before turning
on the refrigerator. Rub a small amount of liquid dish soap
over the adhesive with your fingers. Wipe with warm water
and dry.
• Do not use sharp instruments, rubbing alcohol, flammable
fluids, or abrasive cleaners to remove tape or glue. These
products can damage the surface of your refrigerator. For
more information, see the "Refrigerator Safety" section.
When Moving Your Refrigerator:
Your refrigerator is heavy. When moving the refrigerator
for cleaning or service, be sure to protect the floor.
Always pull the refrigerator straight out when moving it.
Do not wiggle or "walk" the refrigerator when trying to move
it, as floor damage could occur.
Cleaning before use
After you remove all of the packaging materials, clean the inside
of your refrigerator before using it. See the cleaning instructions
in the "Refrigerator Care" section.
Important information to know about glass shelves
and covers:
Do not clean glass shelves or covers with warm water when
they are cold. Shelves and covers may break if exposed to
sudden temperature changes or impact, such as bumping.
For your protection, tempered glass is designed to shatter
into many small, pebble-size pieces. This is normal. Glass
shelves and covers are heavy. Use special care when re-
moving them to avoid impact from dropping.
_'_.-__ _ _ A¸ _ o_e,
Explosion Hazard
Keep flammable materials and vapors, such as
gasoline, away from refrigerator,
Failure to do so can result in death, explosion,
or fire,
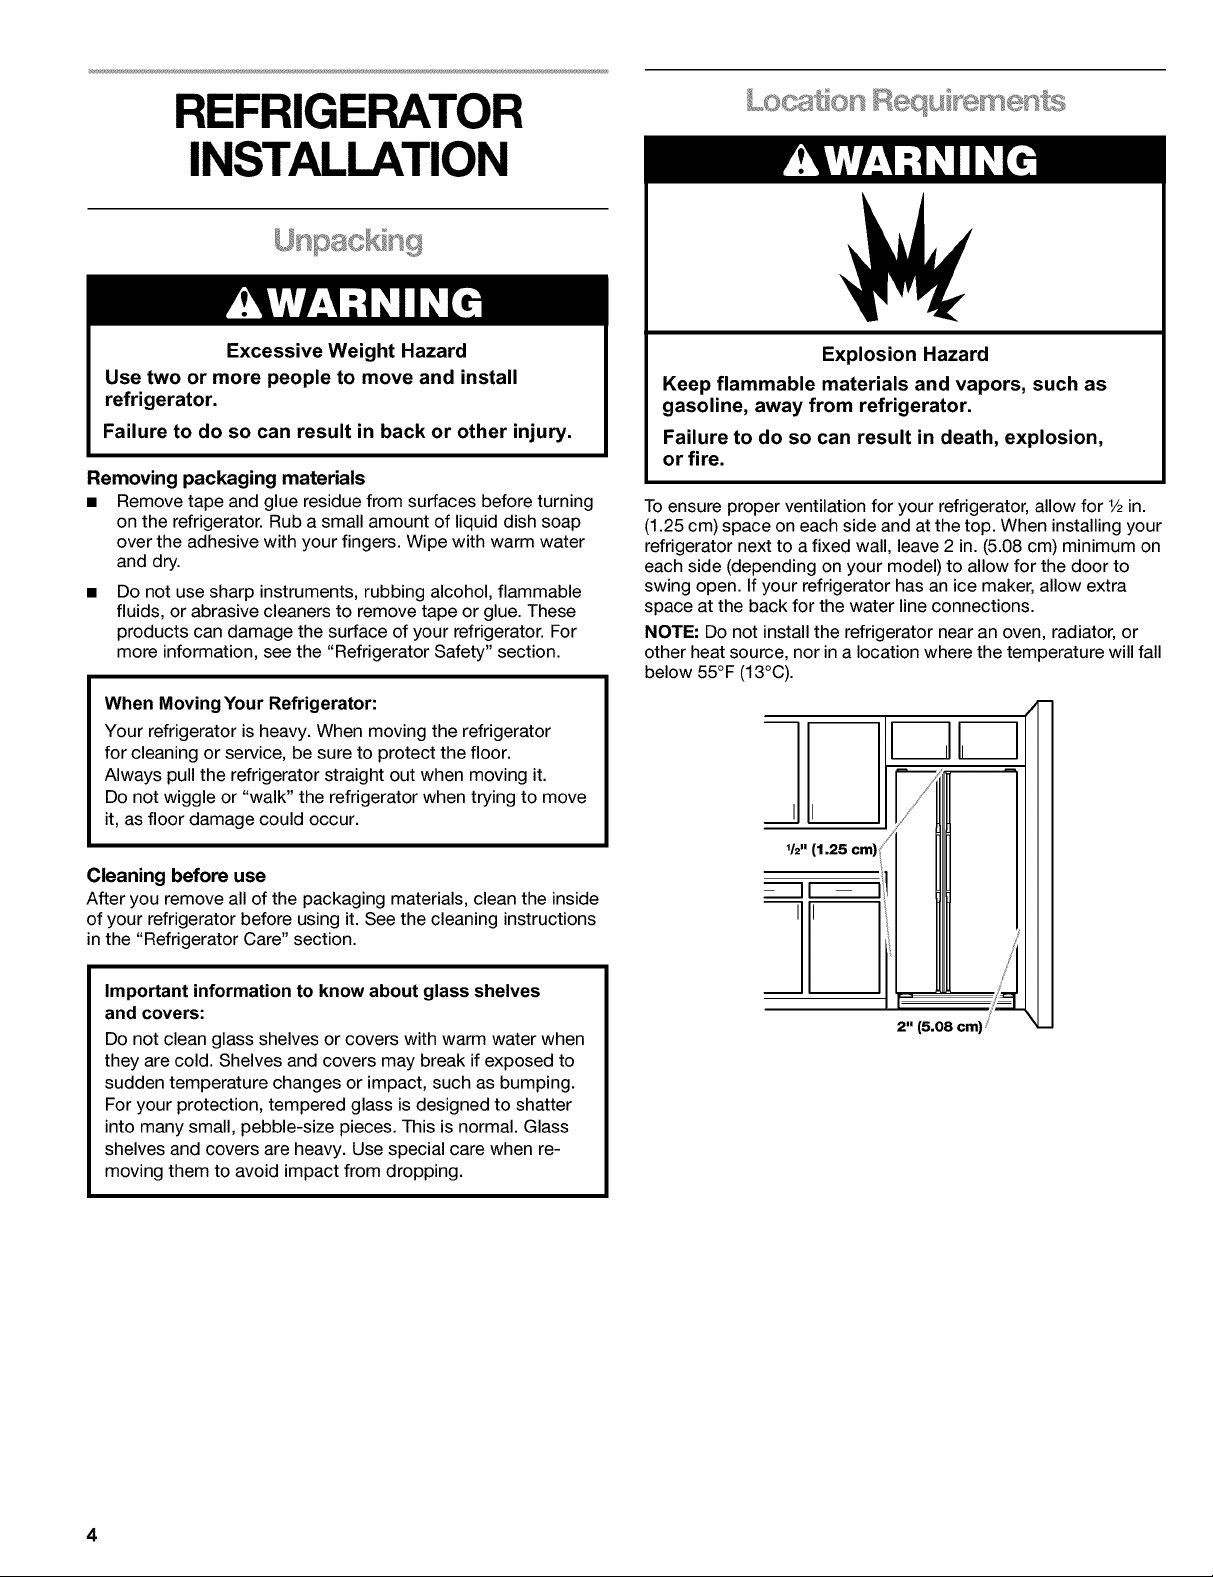
To ensure proper ventilation for your refrigerator, allow for 1/2in.
(1.25 cm) space on each side and at the top. When installing your
refrigerator next to a fixed wall, leave 2 in. (5.08 cm) minimum on
each side (depending on your model) to allow for the door to
swing open. If your refrigerator has an ice maker, allow extra
space at the back for the water line connections.
NOTE: Do not install the refrigerator near an oven, radiator, or
other heat source, nor in a location where the temperature will fall
below 55°F (13°C).
1/2" (1.25 cm) /
II -- lil
___JL__
/
//
/
/
/
u _
J
2" (5.08 cm) /
4
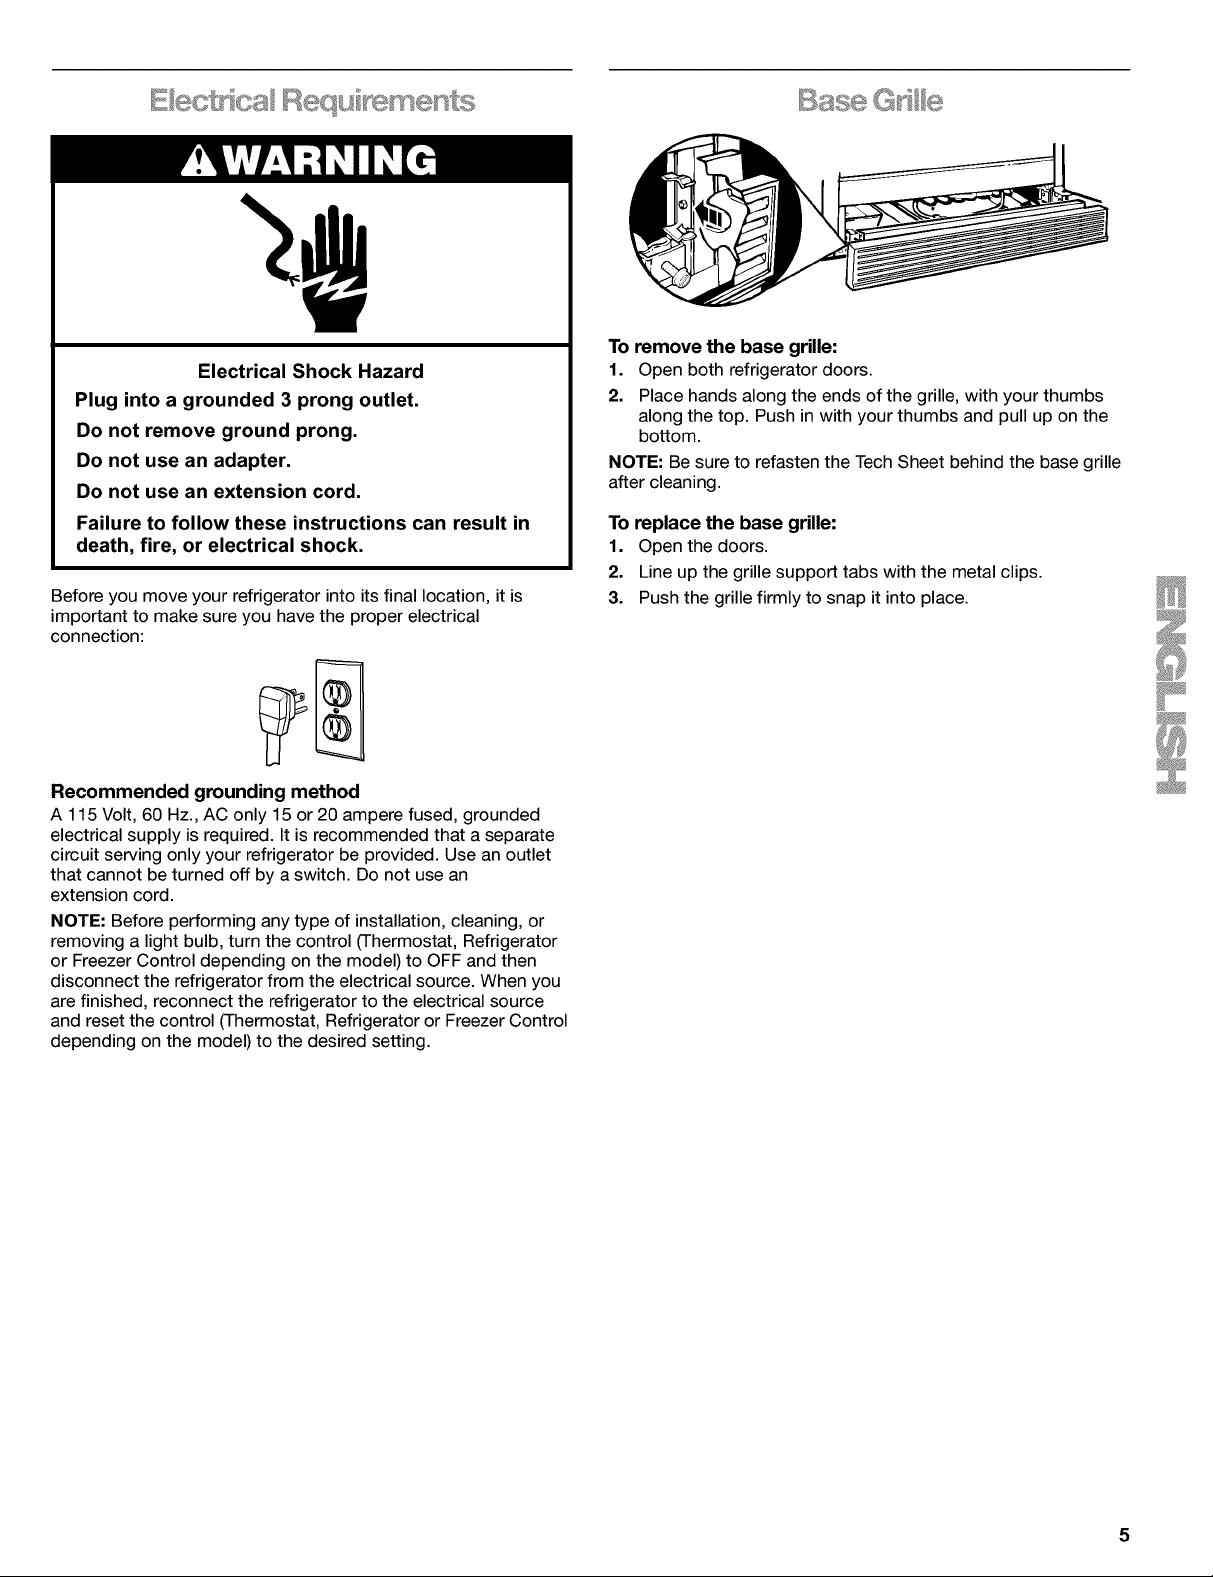
Electrical Shock Hazard
Plug into a grounded 3 prong outlet.
Do not remove ground prong.
Do not use an adapter.
Do not use an extension cord.
Failure to follow these instructions can result in
death, fire, or electrical shock.
Before you move your refrigerator into its final location, it is
important to make sure you have the proper electrical
connection:
Recommended grounding method
A 115 Volt, 60 Hz., AC only 15 or 20 ampere fused, grounded
electrical supply is required. It is recommended that a separate
circuit serving only your refrigerator be provided. Use an outlet
that cannot be turned off by a switch. Do not use an
extension cord.
NOTE: Before performing any type of installation, cleaning, or
removing a light bulb, turn the control (Thermostat, Refrigerator
or Freezer Control depending on the model) to OFF and then
disconnect the refrigerator from the electrical source. When you
are finished, reconnect the refrigerator to the electrical source
and reset the control (Thermostat, Refrigerator or Freezer Control
depending on the model) to the desired setting.
To remove the base grille:
1. Open both refrigerator doors.
2. Place hands along the ends of the grille, with your thumbs
along the top. Push in with your thumbs and pull up on the
bottom.
NOTE: Be sure to refasten the Tech Sheet behind the base grille
after cleaning.
To replace the base grille:
1. Open the doors.
2. Line up the grille support tabs with the metal clips.
3. Push the grille firmly to snap it into place.
5
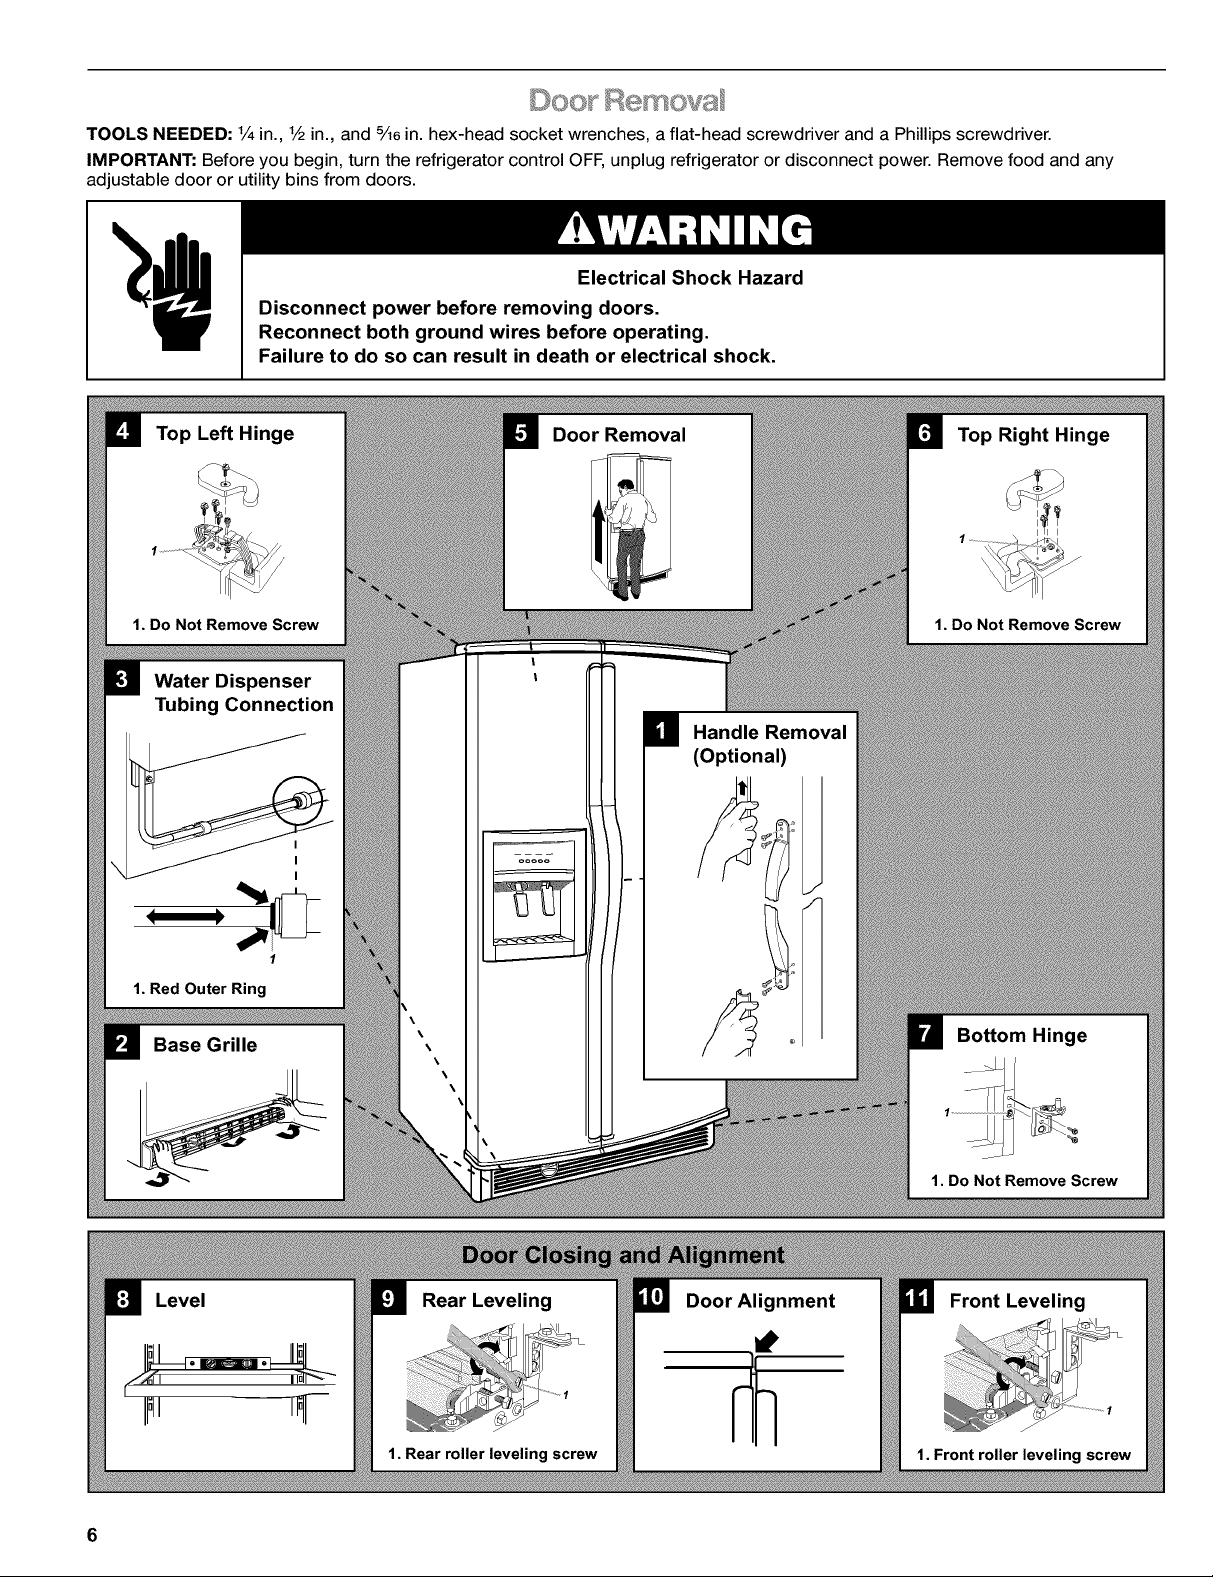
TOOLS NEEDED: 1/4in., 1/_in., and 5A6in. hex-head socket wrenches, a flat-head screwdriver and a Phillips screwdriver.
IMPORTANT: Before you begin, turn the refrigerator control OFF, unplug refrigerator or disconnect power. Remove food and any
adjustable door or utility bins from doors.
Electrical Shock Hazard
Disconnect power before removing doors.
Reconnect both ground wires before operating.
Failure to do so can result in death or electrical shock.
\
Top Left Hinge
1. Do Not Remove Screw
Water Dispenser
Tubing Connection
1
1. Red Outer Ring
Base Grille
Door Removal
Handle Removal
(Optional)
Top Right Hinge
1. Do Not Remove Screw
Bottom Hinge
1. Do Not Remove Screw
6
NOTE: It may only be necessary to remove either the door handle
or the doors to get your product through the doorway of your
residence. Measure the door opening to determine whether to
remove the refrigerator handles or the doors.
Handle Removal (optional)
1.
2.
3.
Apply firm pressure with your hand on the face of trim. Slide
top trim up and bottom trim down away from handle. Lift trim
pieces off shoulder screws (see Graphic 1).
Remove handle screws and handles.
Move refrigerator into place. Replace handles as shown (see
Graphic 1).
Door Removal
Door and Hinge Replacement
1. Replace both bottom hinges, if removed. Tighten screws.
2. Assistance may be needed to feed the water line through the
bottom hinge while reinstalling the freezer door. Carefully feed
the dispenser tubing through the bottom left hinge before
replacing the door on the hinge.
NOTE: Provide additional support for the doors while the top
hinges are being replaced. Do not depend on the door magnets
to hold the doors in place while you are working.
3. Reconnect water dispenser tubing by pushing tubing into
fitting until it stops and black mark touches face of fitting (see
Graphic 3). On some models, replace tubing in hose clip.
4. Align and replace the top left hinge as shown (see Graphic 4).
Tighten screws.
Electrical Shock Hazard
Disconnect power before removing doors.
Failure to do so can result in death or
electrical shock.
Unplug refrigerator or disconnect power.
2. Open both refrigerator doors. Remove the base grille by
pulling up on the bottom outside corners (see Graphic 2).
3. Close both doors and keep them closed until you are ready to
lift them free from the cabinet.
4. If you have a dispenser (ice or water), disconnect the water
dispenser tubing located behind the base grille on the freezer
door side (see Graphic 3).
• Press red outer ring against the face of fitting and pull the
dispenser tubing free.
• On some models, remove tubing from hose clip.
5. Remove top left hinge screw and cover as shown (see
Graphic 4).
6. Disconnect wiring plug and both ground wires from ground
wire screw (on some models) as shown (see Graphic 4).
7. Remove remaining left hinge screws and hinge as shown (see
Graphic 4). Do not remove screw 1.
8. Carefully lift freezer door straight up off bottom hinge (see
Graphic 5). The water dispenser tubing remains attached to
the freezer door and pulls through the bottom left hinge.
Make sure you protect the dispenser tubing from damage.
9. Remove top right hinge cover and screws as shown (see
Graphic 6). Do not remove screw 1.
10. Lift the refrigerator door straight up off bottom hinge.
11. It may not be necessary to remove the bottom hinge to move
the refrigerator through a doorway. Both bottom hinges have
similar construction.
• Disassemble the hinges as shown (see Graphic 7). Do not
remove screw 1.
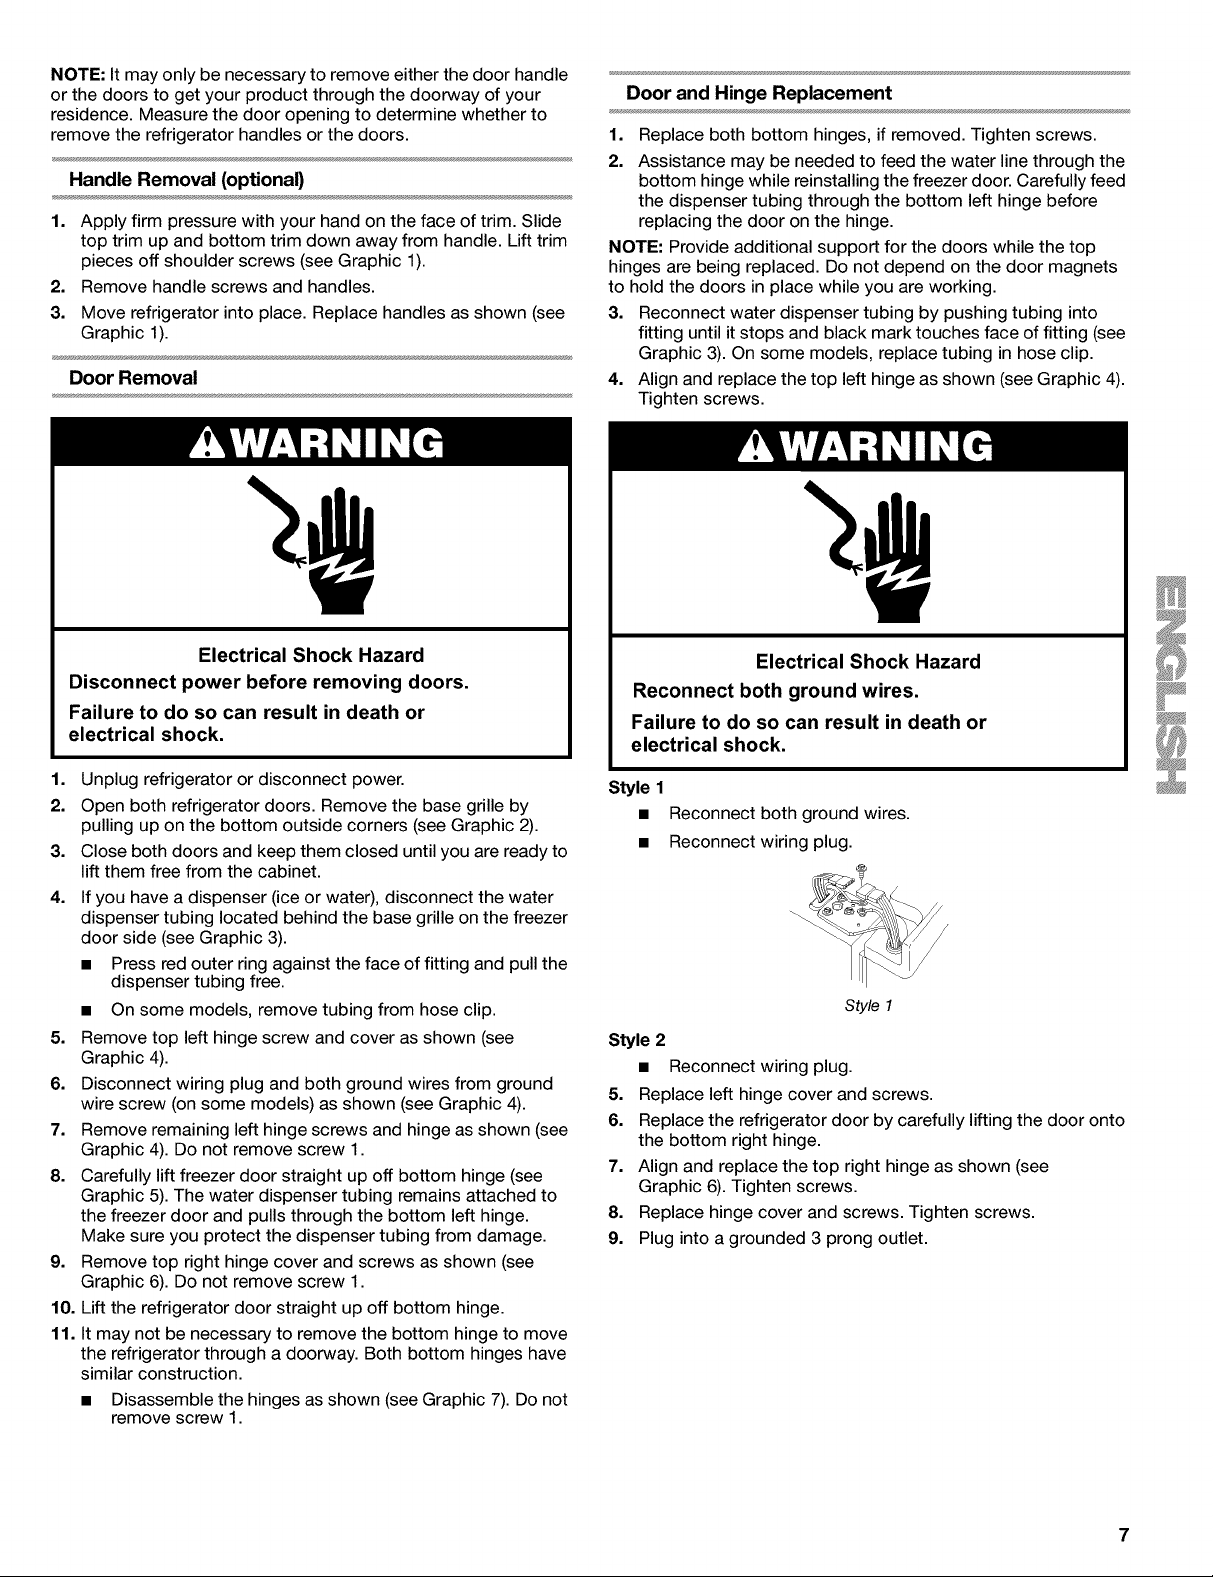
Electrical Shock Hazard
Reconnect both ground wires.
Failure to do so can result in death or
electrical shock.
Style 1
• Reconnect both ground wires.
• Reconnect wiring plug.
/
/
Style 1
Style 2
• Reconnect wiring plug.
5. Replace left hinge cover and screws.
6. Replace the refrigerator door by carefully lifting the door onto
the bottom right hinge.
7. Align and replace the top right hinge as shown (see
Graphic 6). Tighten screws.
8. Replace hinge cover and screws. Tighten screws.
9. Plug into a grounded 3 prong outlet.
7
'_ _ S _ C '_ __ "_
D®o and A ignment
Door Closing
1. Move the refrigerator into its final position.
2. Place a level inside the refrigerator at the back of the top shelf
(see Graphic 8).
3. Locate the leveling screws behind the base grille of the
refrigerator on either side.
4. Use a hex-head socket wrench to adjust the rear roller
leveling screws until the refrigerator is level. Turn the rear
roller leveling screw to the right to raise that side of the
refrigerator or turn the leveling screw to the left to lower that
side (see Graphic 9). Make sure refrigerator is level before
proceeding.
5. Check the door alignment after leveling the refrigerator.
Door Alignment
If the doors are uneven after leveling the product (see
Graphic 10), follow the steps below.
1. Use a hex-head socket wrench to adjust the front roller
leveling screws until the doors are even. Turn the front roller
leveling screw to the right to raise that side of the refrigerator
or turn the leveling screw to the left to lower that side (see
Graphic 11).
NOTE: Open and close both the refrigerator and freezer doors
after each adjustment to check the door alignment.
2. Open the doors and replace the base grille. Line up the grille
support tabs with the metal clips. Push the grille firmly to
snap it into place.
NOTE: Be sure to refasten the Tech Sheet behind the base grille.
Supply Con eot © s
Read all directions carefully before you begin.
IMPORTANT:
• If you turn the refrigerator on before the water line is
connected, turn the ice maker OFR
• All installations must meet local plumbing code requirements.
• Use copper tubing and check for leaks. Install copper tubing
only in areas where temperatures will remain above freezing.
Tools required: Standard screwdriver, 7/16in. and V2in. open-end
wrenches or two adjustable wrenches, V4in. nut driver and drill
bit, hand drill or electric drill (properly grounded).
NOTE: Your refrigerator dealer has a kit available with a V4in.
(6.35 mm) saddle-type shutoff valve, a union, and copper tubing.
Before purchasing, make sure a saddle-type valve complies with
your local plumbing codes. Do not use a piercing-type or 3/1ein.
(4.76 mm) saddle valve which reduces water flow and clogs more
easily.
Cold water supply
Connect the ice maker to a cold water line with water pressure
between 30 and 120 psi. If you have questions about your water
pressure, call your utility company.
Connecting to Water Line
1. Unplug refrigerator or disconnect power.
2. Turn OFF main water supply. Turn ON nearest faucet long
enough to clear line of water.
3,
4,
5,
Locate a _/2in. to 1V4in. (1.25 cm to 3.18 cm) vertical COLD
water pipe near the refrigerator.
NOTE: Horizontal pipe will work, but drill on the top side of
the pipe, not the bottom. This will help keep water away from
the drill and normal sediment from collecting in the valve.
Determine the length of copper tubing you need. Measure
from the connection on the lower left rear of refrigerator to the
water pipe. Add 7 ft. (2.1 m) to allow for cleaning. Use V4in.
(6.35 mm) O.D. (outside diameter) copper tubing. Be sure
both ends of copper tubing are cut square.
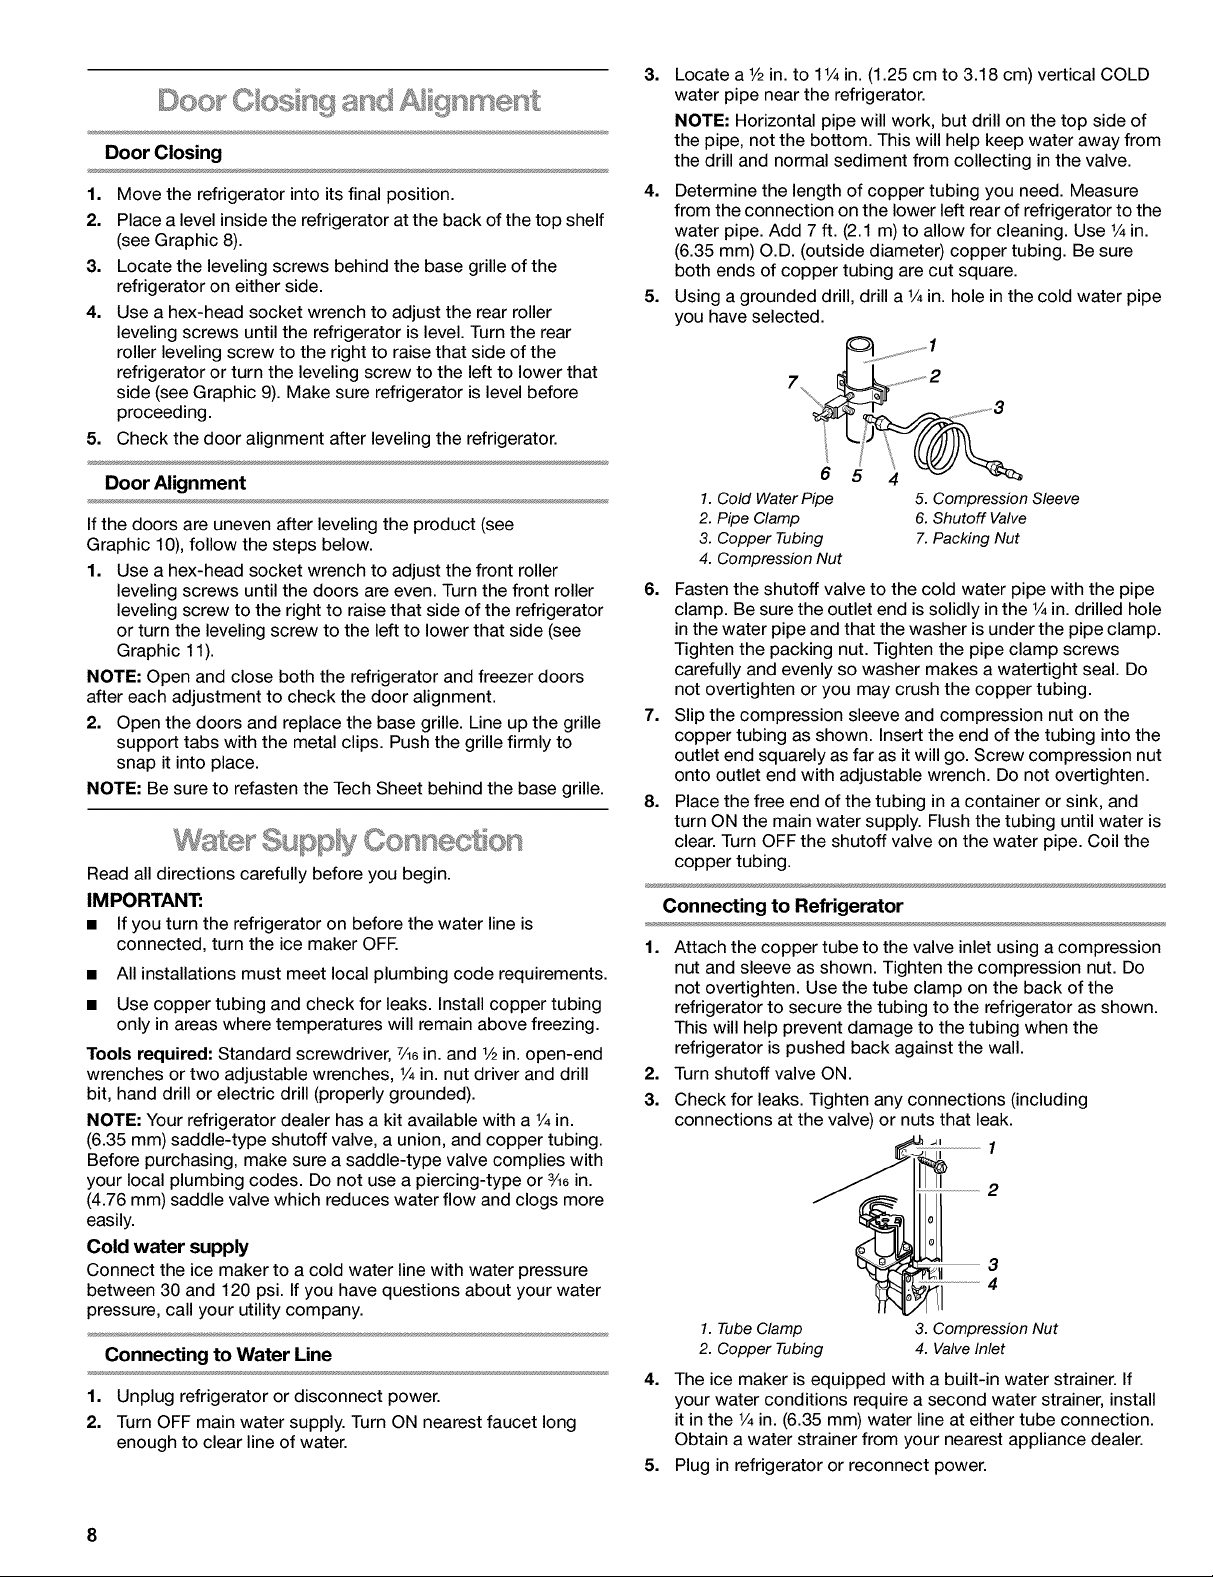
Using a grounded drill, drill a V4in. hole in the cold water pipe
you have selected.
1. Cold Water Pipe 5. Compression Sleeve
2. Pipe Clamp 6.Shutoff Valve
3. Copper Tubing 7.Packing Nut
4. Compression Nut
6. Fasten the shutoff valve to the cold water pipe with the pipe
clamp. Be sure the outlet end is solidly in the V4in. drilled hole
in the water pipe and that the washer is under the pipe clamp.
Tighten the packing nut. Tighten the pipe clamp screws
carefully and evenly so washer makes a watertight seal. Do
not overtighten or you may crush the copper tubing.
7. Slip the compression sleeve and compression nut on the
copper tubing as shown. Insert the end of the tubing into the
outlet end squarely as far as it will go. Screw compression nut
onto outlet end with adjustable wrench. Do not overtighten.
8. Place the free end of the tubing in a container or sink, and
turn ON the main water supply. Flush the tubing until water is
clear. Turn OFF the shutoff valve on the water pipe. Coil the
copper tubing.
Connecting to Refrigerator
1.
2,
3.
Attach the copper tube to the valve inlet using a compression
nut and sleeve as shown. Tighten the compression nut. Do
not overtighten. Use the tube clamp on the back of the
refrigerator to secure the tubing to the refrigerator as shown.
This will help prevent damage to the tubing when the
refrigerator is pushed back against the wall.
Turn shutoff valve ON.
Check for leaks. Tighten any connections (including
connections at the valve) or nuts that leak.
--1
1. Tube Clamp
2. Copper Tubing
3. Compression Nut
4. Valve Inlet
4. The ice maker is equipped with a built-in water strainer. If
your water conditions require a second water strainer, install
it in the V4in. (6.35 mm) water line at either tube connection.
Obtain a water strainer from your nearest appliance dealer.
5. Plug in refrigerator or reconnect power.
8
 Loading...