


KP9 F11 S-G S

KP9 F11 S/G S
English
Operating Instructions
COOKER
Contents
Operating Instructions,1
Warnings,2
Assistance,2
Description of the appliance,3
Installation,4
Start-up and use,7
Precautions and tips,9
Maintenance and care,9
Afetr Sales Service,11
Guarantee,12

Warnings
WARNING: The appliance and its
accessible parts become hot during use.
Care should be taken to avoid touching
heating elements. Children less than 8
years of age shall be kept away unless
continuously supervised. This appliance
can be used by children aged from 8 years
and above and persons with reduced
physical, sensory or mental capabilities
or lack of experience and knowledge
if they have been given supervision
or instruction concerning use of the
appliance in a safe way and understand
the hazards involved. Children shall not
play with the appliance. Cleaning and
user maintenance shall not be made by
children without supervision.
WARNING: Unattended cooking on a hob
with fat or oil can be dangerous and may
result in re.
NEVER try to extinguish a re with water,
but switch off the appliance and then
cover ame e.g. with a lid or a re blanket.
WARNING: Ensure that the appliance is
switched off before replacing the lamp to
avoid the possibility of electric shock.
CAUTION: the use of inappropriate hob
guards can cause accidents.
! When you place the rack inside, make
sure that the stop is directed upwards and
in the back of the cavity.
Assistance
! Never use the services of an unauthorised technician.
Please have the following information to hand:
• The type of problem encountered.
• The appliance model (Mod.).
• The serial number (S/N).
The latter two pieces of information can be found on the
data plate located on the appliance.
Do not use harsh abrasive cleaners or
sharp metal scrapers to clean the oven
door glass since they can scratch the
surface, which may result in shattering
of the glass.
The internal surfaces of the compartment
(where present) may become hot.
Never use steam cleaners or pressure
cleaners on the appliance.
“Remove any liquid from the lid before
opening it.
Do not close the glass cover (if present)
when the gas burners or electric hotplates
are still hot.”
2
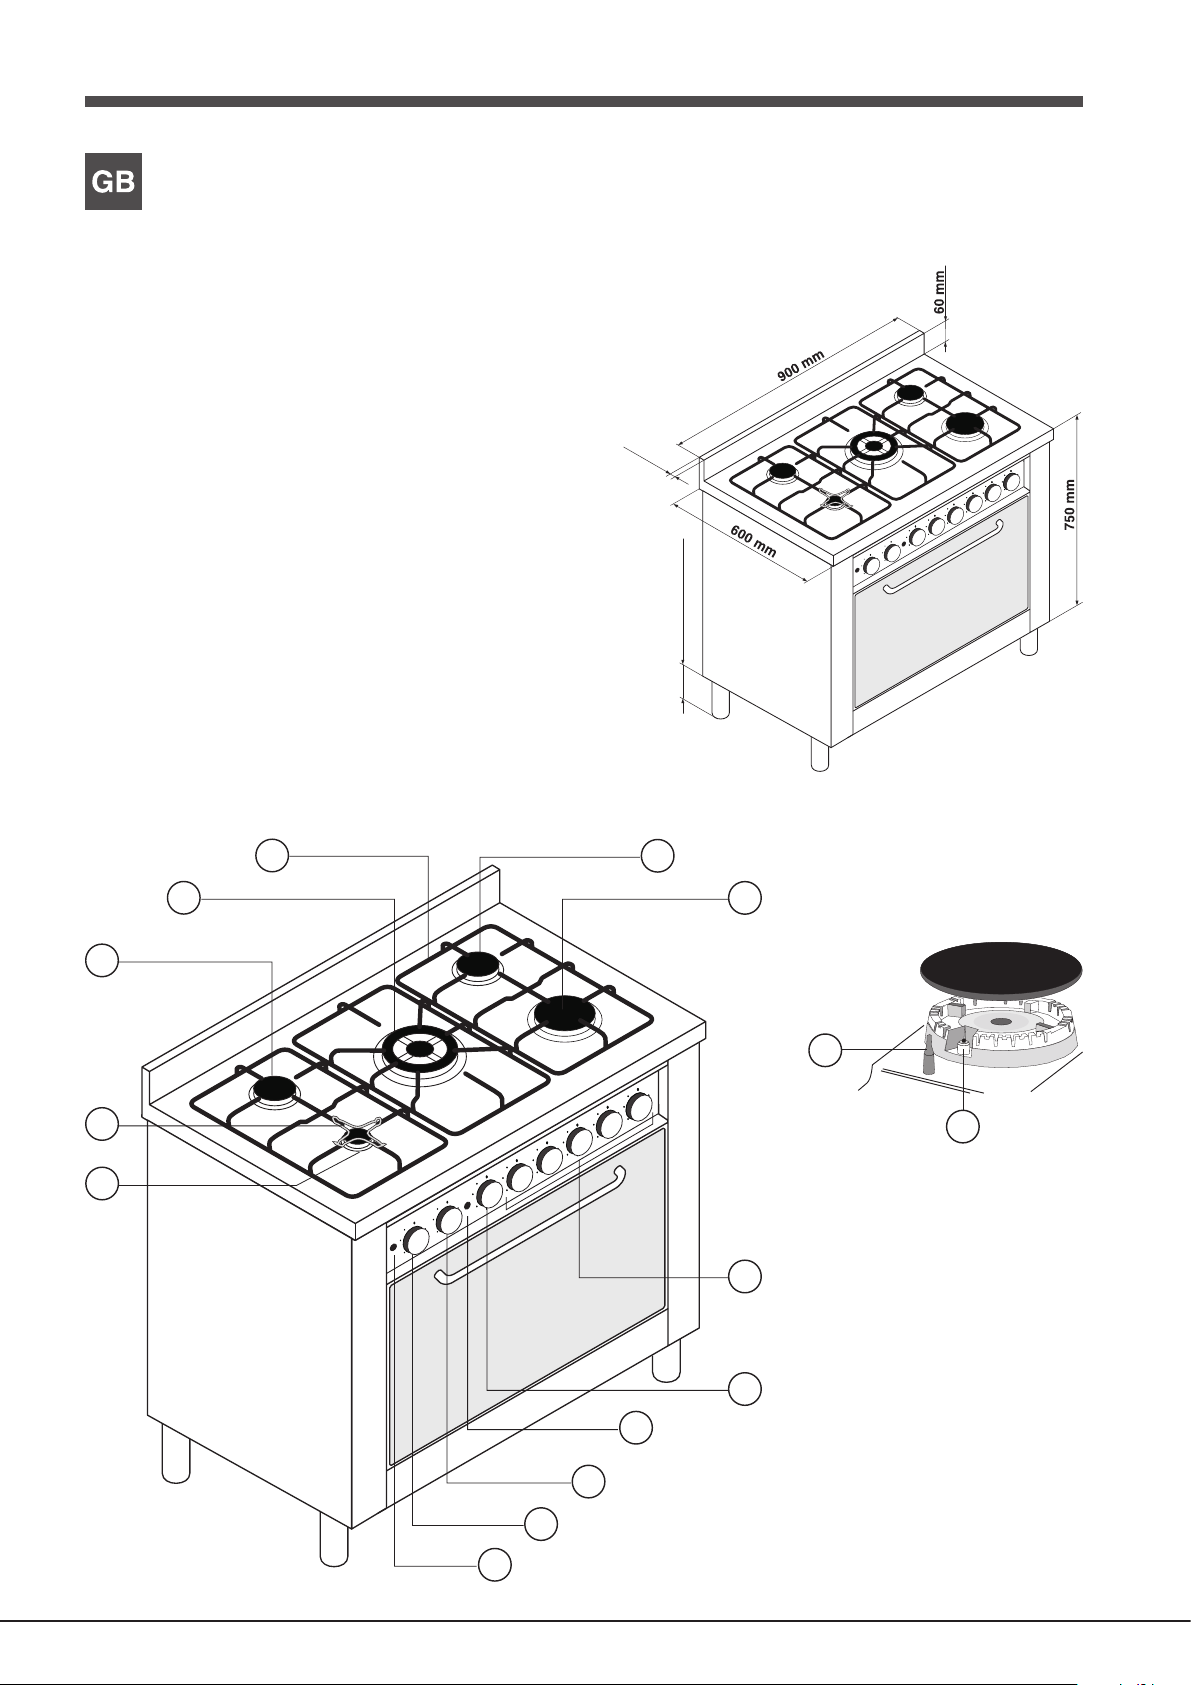
Description of the appliance
Overall view
1 AUXLIARY gas burner
2 PAN REDUCING support
3 SEMI-RAPID gas burner
4 TRIPLE RING gas burner
5 SUPPORT grid
6 RAPID gas burner
7 Control knobs for GAS BURNERS
8 TIMER KNOB (Cooking programmer)
9 IGNITOR PUSHBUTTON for Gas BURNERS
10 ELECTRIC OVEN THERMOSTAT KNOB
(temperature selection)
11 ELECTRIC OVEN SELECTOR KNOB
(cooking mode selection)
12 Electric oven operation INDICATOR LIGHT
13 SAFETY DEVICE * - Activates if the ame accidentally
goes out (spills, drafts, etc.), interrupting the supply of
gas to the burner.
14 IGNITOR * for Gas BURNERS
* Only available in certain models.
20 mm
120 - 180 mm
5
4
3
6
3
13
2
14
1
7
8
9
12
10
11
3
Installation
GB
! Before placing your new appliance into operation please
read these operating instructions carefully. It contains
important information concerning the safe installation and
operation of the appliance.
! Please keep these operating instructions for future
reference. Make sure that the instructions are kept with the
appliance if it is sold, given away or moved.
! The appliance must be installed by a qualied professional
in accordance with the instructions provided.
! Any necessary adjustment or maintenance must be performed
after the cooker has been disconnected from the electricity supply.
The cookers have the following technical specications:
Category: II 2H3+
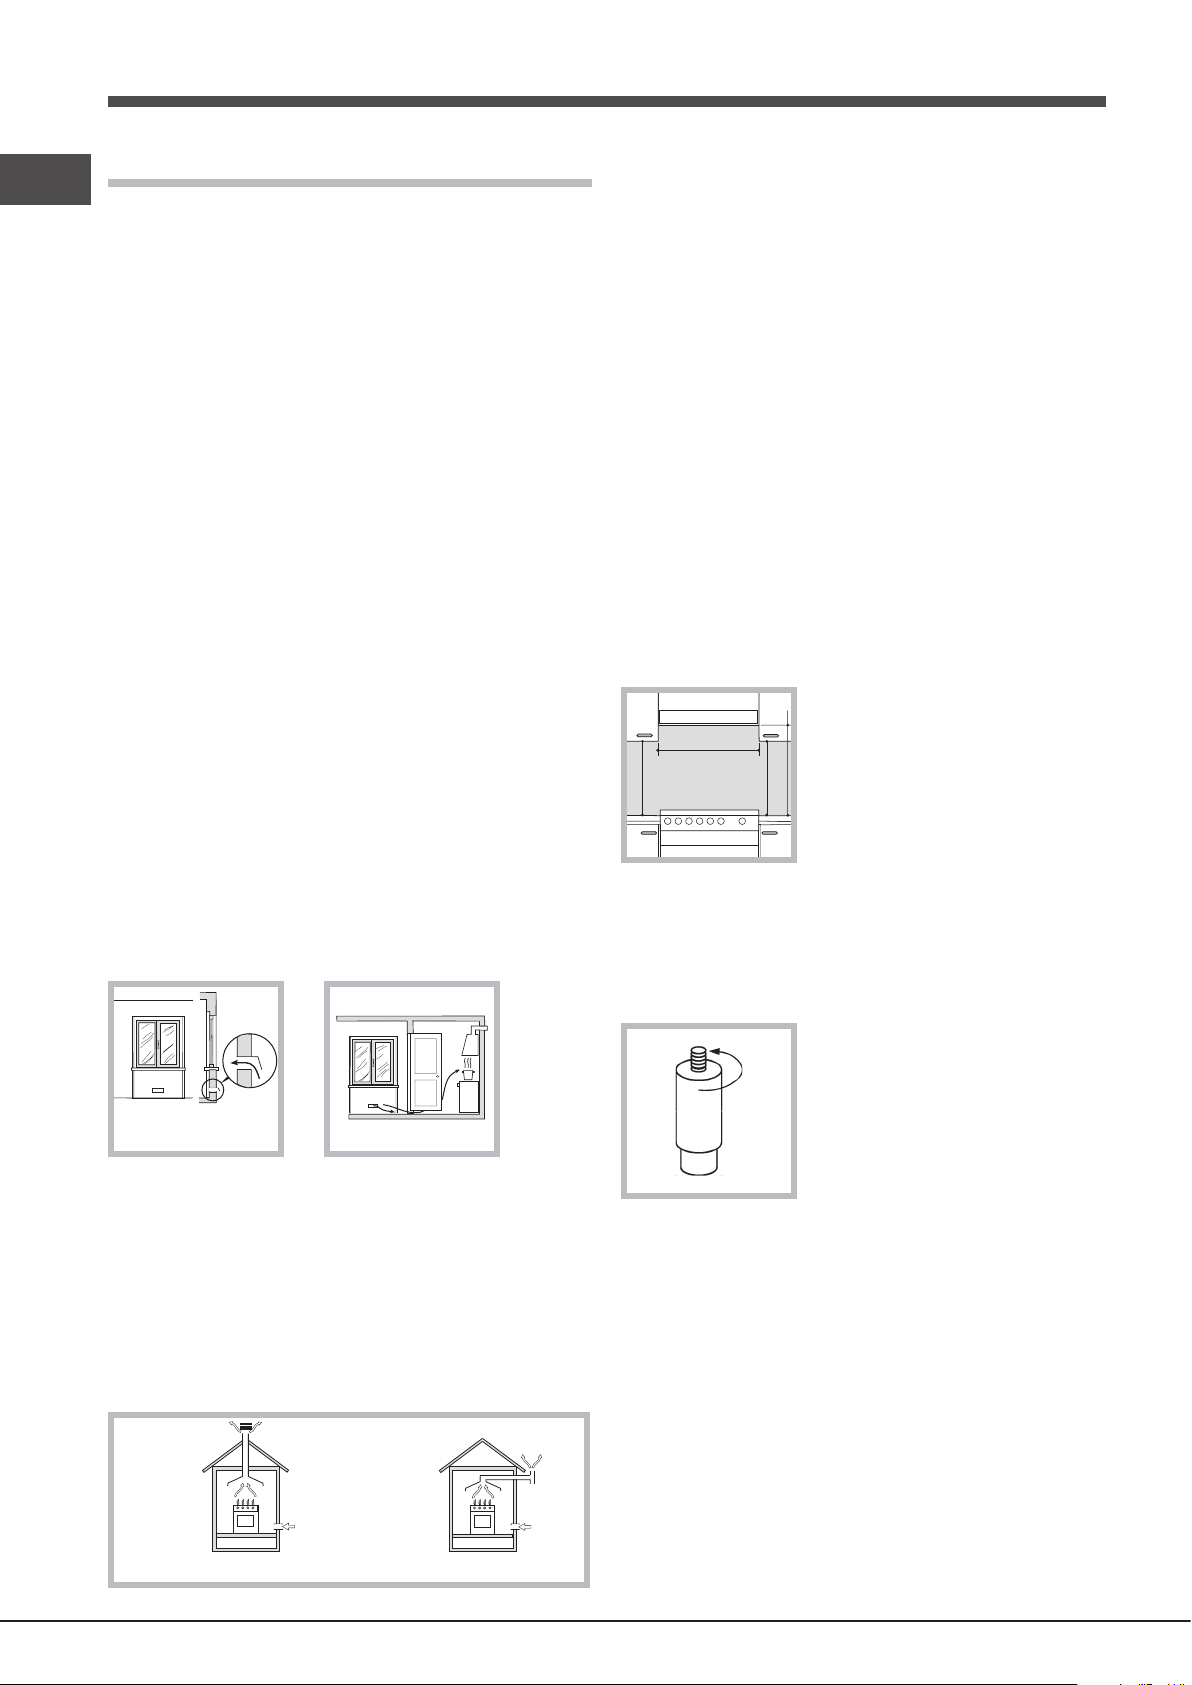
Room ventilation
The appliance may only be installed in permanentlyventilated rooms, according to current national legislation.
The room in which the appliance is installed must be
ventilated adequately in order to provide as much air as is
needed by the normal gas combustion process (the ow of
air must not be lower than 2 m3/h per kW of installed power).
The air inlets, protected by grilles, should have a duct
with an inner cross section of at least 100 cm2 and should
be positioned so that they are not liable to even partial
obstruction (see gure A).
These inlets should be enlarged by 100% - with a minimum of
200 cm2 - whenever the surface of the hob is not equipped with
a ame failure safety device. When the ow of air is provided in
an indirect manner from adjacent rooms (see gure B), provided
that these are not communal parts of a building, areas with
increased re hazards or bedrooms, the inlets should be tted
with a ventilation duct leading outside as described above.
Examples of
ventilation holes
for comburant air.
Adjacent
Room
A
Enlarging the ventilation slot
between window and floor.
Room to be
Vented
A B
! After prolonged use of the appliance, it is advisable to open
a window or increase the speed of any fans used.
Disposing of combustion fumes
The efcient disposal of combustion fumes should be
guaranteed using a hood which is connected to a safe
and efcient natural suction chimney, or using an electric
fan which begins to operate automatically every time the
appliance is switched on (see gure).
! The liqueed petroleum gases are heavier than air and
collect by the oor, therefore all rooms containing LPG
cylinders must have openings leading outside so that any
leaked gas can escape easily. LPG cylinders, therefore,
whether partially or completely full, must not be installed or
stored in rooms or storage areas which are below ground
level (cellars, etc.). Only the cylinder being used should
be stored in the room; this should also be kept well away
from sources of heat (ovens, chimneys, stoves) which may
cause the temperature of the cylinder to rise above 50°C.
Positioning and levelling
! The appliance may be installed alongside any cupboards
whose height does not exceed that of the hob surface.
! Make sure that the wall in contact with the back of the appliance
is made from a non-ammable, heat-resistant material (T 90°C).
To install the appliance correctly:
• Place it in the kitchen, the dining room or the studio at
(not in the bathroom).
• If the top of the hob is higher than the cupboards, the
appliance must be installed at least 500 mm away from them.
• If the cooker is installed
underneath a wall cabinet, there
must be a minimum distance of 420
mm between this cabinet and the
top of the hob.
420
700 mm. without hood
Min. mm.
This distance should be increased
min. 650 mm. with hood
min.
mm.
420
Min.
HOOD
Min. mm.
600
to 700 mm if the wall cabinets are
ammable (see gure).
• Do not position blinds behind the cooker or less than 200
mm away from its sides.
• Any hoods must be installed in accordance with the
instructions listed in the relevant operating manual.
Levelling
If it is necessary to level the
appliance, screw the adjustable
feet into the places provided on
each corner of the base of the
cooker (see gure).
Electrical connection
THE APPLIANCE MUST BE EARTHED
ATTENTION: This appliance has a maximum power
exeeding 3kW; it is therefore necessary for it to be
connected to a socket able to support a rated current higher
than 13A (the appliance rated current is 15A). Connecting
the supply cable to the mains electricity supply A 13. A plug
in compliance whit BS 1362 is not suitable.
In a chimney stack or branched flue.
(exclusively for cooking appliances)
4
Directly to
the Outside
Install a standardised plug corresponding to the load indicated
on the appliance data plate (see Technical data table).
The appliance must be directly connected to the mains using
an omnipolar switch with a minimum contact opening of 3
mm installed between the appliance and the mains.
 Loading...