


FV 10 K.B IX GB

FV 10 K.B IX GB
FV 20 K.B GB
Electric ventilated oven
Instructions for installation and use

Electric ventilated oven
Instructions for installation and use
3
Congratulations on choosing an Indesit appliance, which you will find is dependable and easy to use. We recommend
that you read the instructions in this owner’ s manual carefully before use for the best perf ormance and to extend the lif e
of your appliance, as it will provide you with all the instructions you require to ensure its safe installation, use and
maintenance. Always k eep this owner’ s manual close to hand since you may need to ref er to it in the future. Thank you.
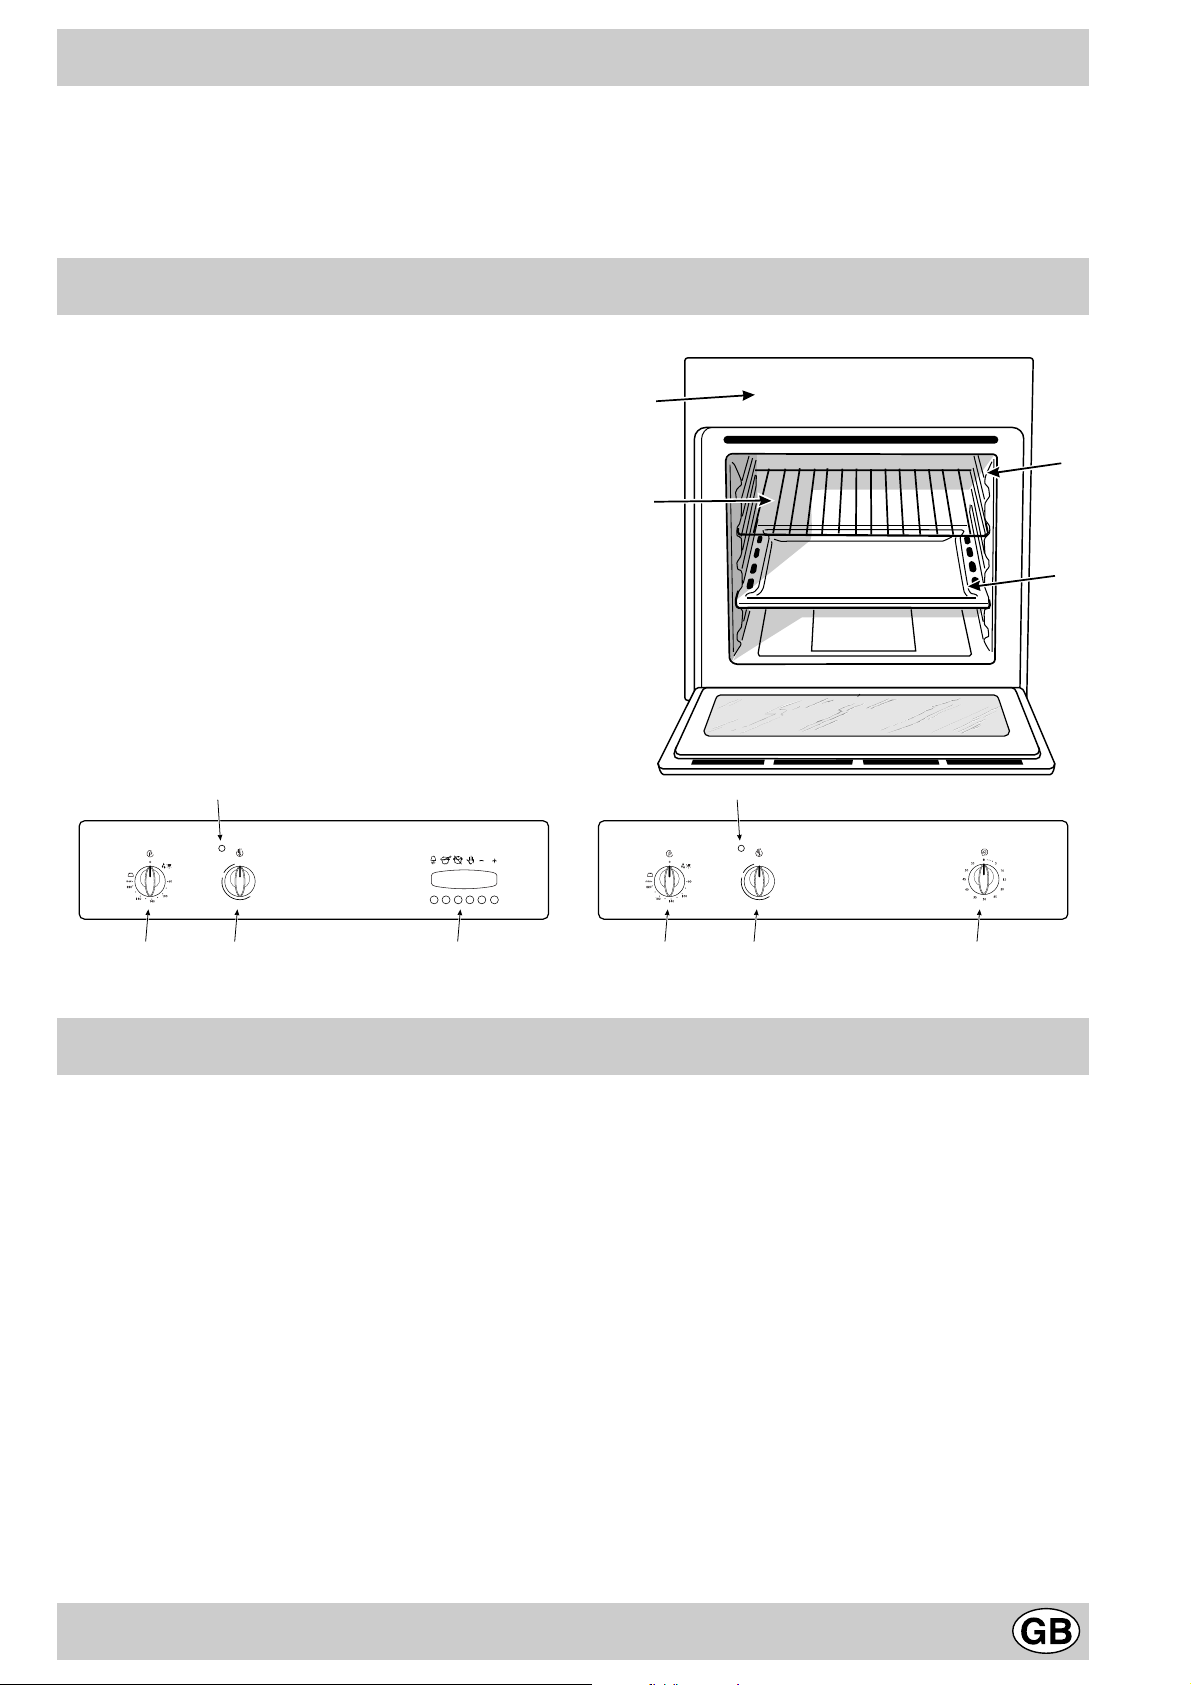
Close-up view
A. Control Panel
B. Cooking mode selection knob
C. V ariab le Grill Knob
D. Timer knob (only available on certain models)
E. Oven indicator light (only available on certain models)
- When lit, it indicates the ovens is heating up to the
temperature set.
F. Dripping Pan or Baking Sheet
G. Oven Rack
H. Guides for sliding the racks or dripping pan in and
out
I. Electronic programmer (only available on certain
models) - Allows you to programme the desired cooking
mode by selecting the cooking time and the end
cooking time. It can also be used as a timer.
G
A
F
H
B C I
E
MAX
MIN
1/2
B C D
E
MAX
MIN
1/2
The various features offered b y your ov en are selected by
means of selector knob “B” and thermostat “C” situated
on the control panel.
Notice: The first time y ou use your appliance, we recom-
mend that you set the thermostat to the highest setting
and leave the ov en on f or about half an hour with nothing
in it, with the oven door shut. Then, open the oven door
and let the room air. The odour that is often detected dur-
ing this initial use is due to the evaporation of substances
used to protect the oven during storage and until it is in-
stalled.
Notice: Place the dripping pan provided on the bottom
shelf of the oven to prev ent any sauce and/or grease from
dripping onto the bottom of the oven only when grilling
food or when using the rotisserie (only available on cer-
tain models). F or all other types of cooking, ne ver use the
bottom shelf and never place anything on the bottom of
the oven when it is in operation because this could dam-
age the enamel. Alw ays place your cookware (dishes , alu-
minium foil, etc. etc.) on the grid provided with the appli-
ance inserted especially along the oven guides.
N.B.: Should the appliance be equipped with an electronic
programmer, to use the electric o ven, just press button
(
(the
m
symbol will appear on the display) before selecting
the desired cooking function.
Thermostatically controlled oven (F an Assisted
Mode)
When the oven control knob (B) is turned in a clockwise
direction to the symbol
z
the fan and oven light will come
on to assist in the defrosting of frozen food. Rotating further
to the complete range of temperatures shown on the dial
you can choose which is most suitable for the food you
are going to cook. The temperature is reached
automatically and controlled by the ov en thermostat (from
60°C to MAX).
Note: Whilst using tag o ven for con ventional cooking knob
(C) must be set with “MAX” in line with the reference mark
on the control panel.
How to use your oven

4
Grill d
Both of the top heating elements turn on. On this setting,
food is cooked by the thermal radiation given off in the
downward direction by the electric heating element. The
very high temperature and direct heat of the grill make it
possible to brown meats on the surface while locking in
the juices to keep them tender .
The oven light
Set knob “B” to the
z
symbol to turn it on. It lights the
oven and sta ys on when any of the electrical heating ele-
ments in the oven come on.
Cooling ventilation
In order to cool down the exterior of the appliance, some
models are equipped with a cooling fan which comes on
automatically when the oven is hot.
When the fan is on, a normal flow of air can be heard
exiting between the oven door and the control panel.
Note: When cooking is done, the fan stays on until
the oven cools down sufficiently.
 Loading...