


 Loading...
User’s Guide
HP Business Inkjet 2800 series printer
User’s Guide

Copyright Information
© 2005 Copyright Hewlett-Packard
Development Company, L.P.
Edition 1, 2/2005
Reproduction, adaptation or translation without prior written permission is prohibited, except as allowed under the copyright laws.
The information contained herein is subject to change without notice.
The only warranties for HP products and services are set forth in the express warranty statements accompanying such products and services. Nothing herein should be construed as constituting an additional warranty. HP shall not be liable for technical or editorial errors or omissions contained herein.
Trademark Credits
Microsoft® , Windows® , Windows NT® , and MS-DOS® are U.S. registered trademarks of Microsoft Corporation.
UNIX® is a registered trademark of the Open Group.
Novell® and NetWare® are registered trademarks of Novell Corporation.
Pentium® is a registered trademark of Intel Corporation.
Adobe® and Acrobat® are registered trademarks of Adobe Systems Incorporate.
Safety Information
Always follow basic safety precautions when using this product to reduce risk of injury from fire or electric shock.
1Read and understand all instructions in the documentation that comes with the printer.
2Use only a grounded electrical outlet when connecting this product to a power source. If you do not know whether the outlet is grounded, check with a qualified electrician.
3Observe all warnings and instructions marked on the product.
4Unplug this product from wall outlets before cleaning.
5Do not install or use this product near water, or when you are wet.
6Install the product securely on a stable surface.
7Install the product in a protected location where no one can step on or trip over the line cord, and the line cord cannot be damaged.
8If the product does not operate normally, see Maintaining and troubleshooting.
9There are no user-serviceable parts inside. Refer servicing to qualified service personnel.
Contents
1 Getting started
Finding other resources for the product . . . . . . . . . . . . . . . . . . . . . . . . . . . . . . . . . . . . . . . . 6 Understanding the printer parts . . . . . . . . . . . . . . . . . . . . . . . . . . . . . . . . . . . . . . . . . . . . . . 8
2 Installing accessories
Installing tray 2 . . . . . . . . . . . . . . . . . . . . . . . . . . . . . . . . . . . . . . . . . . . . . . . . . . . . . . . . . . 11 Installing the auto-duplex unit . . . . . . . . . . . . . . . . . . . . . . . . . . . . . . . . . . . . . . . . . . . . . . 12 Installing the HP Jetdirect print server . . . . . . . . . . . . . . . . . . . . . . . . . . . . . . . . . . . . . . . . 13 To install the HP Jetdirect print server. . . . . . . . . . . . . . . . . . . . . . . . . . . . . . . . . . . . . 13 To verify that the print server has been installed correctly . . . . . . . . . . . . . . . . . . . . . 13 To obtain more information . . . . . . . . . . . . . . . . . . . . . . . . . . . . . . . . . . . . . . . . . . . . . 14
Installing memory modules . . . . . . . . . . . . . . . . . . . . . . . . . . . . . . . . . . . . . . . . . . . . . . . . 15 To install a DIMM. . . . . . . . . . . . . . . . . . . . . . . . . . . . . . . . . . . . . . . . . . . . . . . . . . . . . 15 To verify that the DIMM is installed correctly . . . . . . . . . . . . . . . . . . . . . . . . . . . . . . . . 16
Enabling accessories in the printer driver . . . . . . . . . . . . . . . . . . . . . . . . . . . . . . . . . . . . . 17
3 Using the printer
Selecting print media . . . . . . . . . . . . . . . . . . . . . . . . . . . . . . . . . . . . . . . . . . . . . . . . . . . . . 18 Tips for selecting and using print media . . . . . . . . . . . . . . . . . . . . . . . . . . . . . . . . . . . 18 Understanding specifications for supported media . . . . . . . . . . . . . . . . . . . . . . . . . . . 19 Setting minimum margins . . . . . . . . . . . . . . . . . . . . . . . . . . . . . . . . . . . . . . . . . . . . . . 22 Loading media . . . . . . . . . . . . . . . . . . . . . . . . . . . . . . . . . . . . . . . . . . . . . . . . . . . . . . . . . . 23 Changing print settings . . . . . . . . . . . . . . . . . . . . . . . . . . . . . . . . . . . . . . . . . . . . . . . . . . . 25 Canceling a print job . . . . . . . . . . . . . . . . . . . . . . . . . . . . . . . . . . . . . . . . . . . . . . . . . . . . . 25 Printing with the front or rear manual feed slot . . . . . . . . . . . . . . . . . . . . . . . . . . . . . . . . . 26 Printing on both sides (duplexing) . . . . . . . . . . . . . . . . . . . . . . . . . . . . . . . . . . . . . . . . . . . 27 Guidelines for printing on both sides of a page . . . . . . . . . . . . . . . . . . . . . . . . . . . . . . 27 To perform duplexing (Windows). . . . . . . . . . . . . . . . . . . . . . . . . . . . . . . . . . . . . . . . . 28 To perform automatic duplexing (Mac OS) . . . . . . . . . . . . . . . . . . . . . . . . . . . . . . . . . 28
Printing on special and custom-size media . . . . . . . . . . . . . . . . . . . . . . . . . . . . . . . . . . . . 29
4 Configuring and managing the printer
Managing the printer . . . . . . . . . . . . . . . . . . . . . . . . . . . . . . . . . . . . . . . . . . . . . . . . . . . . . 30 Overview of printer management tasks . . . . . . . . . . . . . . . . . . . . . . . . . . . . . . . . . . . . 30 Monitor the printer . . . . . . . . . . . . . . . . . . . . . . . . . . . . . . . . . . . . . . . . . . . . . . . . . . . 31 Configure network options . . . . . . . . . . . . . . . . . . . . . . . . . . . . . . . . . . . . . . . . . . . . . . 33 Overview of printer management tools . . . . . . . . . . . . . . . . . . . . . . . . . . . . . . . . . . . . 33
Understanding and printing the configuration page . . . . . . . . . . . . . . . . . . . . . . . . . . . . . . 38 Upgrading the firmware in the printer. . . . . . . . . . . . . . . . . . . . . . . . . . . . . . . . . . . . . . . . . 39 Configuring the printer (Windows) . . . . . . . . . . . . . . . . . . . . . . . . . . . . . . . . . . . . . . . . . . . 40 Direct connection . . . . . . . . . . . . . . . . . . . . . . . . . . . . . . . . . . . . . . . . . . . . . . . . . . . . 40 Network connection . . . . . . . . . . . . . . . . . . . . . . . . . . . . . . . . . . . . . . . . . . . . . . . . . . . 42 Configuring the printer (Mac OS) . . . . . . . . . . . . . . . . . . . . . . . . . . . . . . . . . . . . . . . . . . . . 44 Uninstalling the printer software. . . . . . . . . . . . . . . . . . . . . . . . . . . . . . . . . . . . . . . . . . . . . 46
ENWW |
3 |
5 Control panel
Understanding control-panel messages. . . . . . . . . . . . . . . . . . . . . . . . . . . . . . . . . . . . . . . 47 Types of control-panel messages . . . . . . . . . . . . . . . . . . . . . . . . . . . . . . . . . . . . . . . . 47 Control-panel messages . . . . . . . . . . . . . . . . . . . . . . . . . . . . . . . . . . . . . . . . . . . . . . . 48 Understanding control-panel menus . . . . . . . . . . . . . . . . . . . . . . . . . . . . . . . . . . . . . . . . . 50 Information menu. . . . . . . . . . . . . . . . . . . . . . . . . . . . . . . . . . . . . . . . . . . . . . . . . . . . . 50 Paper Handling menu . . . . . . . . . . . . . . . . . . . . . . . . . . . . . . . . . . . . . . . . . . . . . . . . . 51 Configure Device menu . . . . . . . . . . . . . . . . . . . . . . . . . . . . . . . . . . . . . . . . . . . . . . . . 53 Printing menu . . . . . . . . . . . . . . . . . . . . . . . . . . . . . . . . . . . . . . . . . . . . . . . . . . . . . . . 54 Maintenance menu . . . . . . . . . . . . . . . . . . . . . . . . . . . . . . . . . . . . . . . . . . . . . . . . . . . 55 Changing networking parameters from the control panel . . . . . . . . . . . . . . . . . . . . . . . . . 56 EIO menu . . . . . . . . . . . . . . . . . . . . . . . . . . . . . . . . . . . . . . . . . . . . . . . . . . . . . . . . . . 56 Disabling network protocols (optional). . . . . . . . . . . . . . . . . . . . . . . . . . . . . . . . . . . . . 58 Resetting the HP Jetdirect print server . . . . . . . . . . . . . . . . . . . . . . . . . . . . . . . . . . . . 59 Printing control-panel menu map . . . . . . . . . . . . . . . . . . . . . . . . . . . . . . . . . . . . . . . . . . . . 59 Changing printer settings from the control panel . . . . . . . . . . . . . . . . . . . . . . . . . . . . . . . . 59
6 Maintaining and troubleshooting
Replacing the ink cartridges. . . . . . . . . . . . . . . . . . . . . . . . . . . . . . . . . . . . . . . . . . . . . . . . 60 Maintaining the printheads . . . . . . . . . . . . . . . . . . . . . . . . . . . . . . . . . . . . . . . . . . . . . . . . . 61 Calibrating the color . . . . . . . . . . . . . . . . . . . . . . . . . . . . . . . . . . . . . . . . . . . . . . . . . . . . . . 66 Calibrating the linefeed . . . . . . . . . . . . . . . . . . . . . . . . . . . . . . . . . . . . . . . . . . . . . . . . . . . 66 Troubleshooting tips and resources . . . . . . . . . . . . . . . . . . . . . . . . . . . . . . . . . . . . . . . . . . 67 General troubleshooting tips . . . . . . . . . . . . . . . . . . . . . . . . . . . . . . . . . . . . . . . . . . . . . . . 67 Resetting the control panel language. . . . . . . . . . . . . . . . . . . . . . . . . . . . . . . . . . . . . . . . . 68 Resolving printing problems. . . . . . . . . . . . . . . . . . . . . . . . . . . . . . . . . . . . . . . . . . . . . . . . 68
Printer shuts down unexpectedly. . . . . . . . . . . . . . . . . . . . . . . . . . . . . . . . . . . . . . . . . 68 All printer lights are blinking. . . . . . . . . . . . . . . . . . . . . . . . . . . . . . . . . . . . . . . . . . . . . 68 Printer is not responding (nothing prints). . . . . . . . . . . . . . . . . . . . . . . . . . . . . . . . . . . 68 Printer does not accept printhead . . . . . . . . . . . . . . . . . . . . . . . . . . . . . . . . . . . . . . . . 69 Printer takes a long time to print . . . . . . . . . . . . . . . . . . . . . . . . . . . . . . . . . . . . . . . . . 70 Blank page printed. . . . . . . . . . . . . . . . . . . . . . . . . . . . . . . . . . . . . . . . . . . . . . . . . . . . 70 Placement of the text or graphics is wrong . . . . . . . . . . . . . . . . . . . . . . . . . . . . . . . . . 70
Poor print quality and unexpected printouts. . . . . . . . . . . . . . . . . . . . . . . . . . . . . . . . . . . . 71 Meaningless characters print. . . . . . . . . . . . . . . . . . . . . . . . . . . . . . . . . . . . . . . . . . . . 72 Ink is smearing . . . . . . . . . . . . . . . . . . . . . . . . . . . . . . . . . . . . . . . . . . . . . . . . . . . . . . 72 Ink is not filling the text or graphics completely . . . . . . . . . . . . . . . . . . . . . . . . . . . . . . 73 Output is faded or dull colored. . . . . . . . . . . . . . . . . . . . . . . . . . . . . . . . . . . . . . . . . . . 74 Colors are printing as black and white. . . . . . . . . . . . . . . . . . . . . . . . . . . . . . . . . . . . . 74 Wrong colors are printing . . . . . . . . . . . . . . . . . . . . . . . . . . . . . . . . . . . . . . . . . . . . . . 74 Printout shows bleeding colors . . . . . . . . . . . . . . . . . . . . . . . . . . . . . . . . . . . . . . . . . . 74 Colors do not line up properly . . . . . . . . . . . . . . . . . . . . . . . . . . . . . . . . . . . . . . . . . . . 75 Lines or dots are missing from text or graphics . . . . . . . . . . . . . . . . . . . . . . . . . . . . . . 75
Resolving paper-feed problems . . . . . . . . . . . . . . . . . . . . . . . . . . . . . . . . . . . . . . . . . . . . . 76 Tray cannot be inserted . . . . . . . . . . . . . . . . . . . . . . . . . . . . . . . . . . . . . . . . . . . . . . . . 76 Media is not supported for the printer or tray. . . . . . . . . . . . . . . . . . . . . . . . . . . . . . . . 76 Media is not picked up from tray 1 or tray 2. . . . . . . . . . . . . . . . . . . . . . . . . . . . . . . . . 76 Media is not coming out correctly . . . . . . . . . . . . . . . . . . . . . . . . . . . . . . . . . . . . . . . . 76 Pages are skewing . . . . . . . . . . . . . . . . . . . . . . . . . . . . . . . . . . . . . . . . . . . . . . . . . . . 76
Resolving printer management problems . . . . . . . . . . . . . . . . . . . . . . . . . . . . . . . . . . . . . 77 Embedded Web server (EWS) cannot be opened. . . . . . . . . . . . . . . . . . . . . . . . . . . . 77 Troubleshooting installation issues . . . . . . . . . . . . . . . . . . . . . . . . . . . . . . . . . . . . . . . . . . 78 Problems printing alignment page . . . . . . . . . . . . . . . . . . . . . . . . . . . . . . . . . . . . . . . . 78 Problems installing software . . . . . . . . . . . . . . . . . . . . . . . . . . . . . . . . . . . . . . . . . . . . 78 Problems connecting to a network . . . . . . . . . . . . . . . . . . . . . . . . . . . . . . . . . . . . . . . 79 Clearing jams . . . . . . . . . . . . . . . . . . . . . . . . . . . . . . . . . . . . . . . . . . . . . . . . . . . . . . . . . . . 80
4 |
ENWW |
A HP supplies and accessories
Ordering printing supplies online . . . . . . . . . . . . . . . . . . . . . . . . . . . . . . . . . . . . . . . . . . . . 82 Accessories . . . . . . . . . . . . . . . . . . . . . . . . . . . . . . . . . . . . . . . . . . . . . . . . . . . . . . . . . . . . 83 Supplies . . . . . . . . . . . . . . . . . . . . . . . . . . . . . . . . . . . . . . . . . . . . . . . . . . . . . . . . . . . . . . . 84 Ink supplies . . . . . . . . . . . . . . . . . . . . . . . . . . . . . . . . . . . . . . . . . . . . . . . . . . . . . . . . . 84 HP Media . . . . . . . . . . . . . . . . . . . . . . . . . . . . . . . . . . . . . . . . . . . . . . . . . . . . . . . . . . . 84
B Support and warranty
Obtaining electronic support . . . . . . . . . . . . . . . . . . . . . . . . . . . . . . . . . . . . . . . . . . . . . . . 87 Obtaining HP telephone support . . . . . . . . . . . . . . . . . . . . . . . . . . . . . . . . . . . . . . . . . . . . 87 Before you call . . . . . . . . . . . . . . . . . . . . . . . . . . . . . . . . . . . . . . . . . . . . . . . . . . . . . . . 87 Telephone support numbers . . . . . . . . . . . . . . . . . . . . . . . . . . . . . . . . . . . . . . . . . . . . 88 Hewlett-Packard limited warranty statement . . . . . . . . . . . . . . . . . . . . . . . . . . . . . . . . . . . 92
C Printer specifications
Printer specifications . . . . . . . . . . . . . . . . . . . . . . . . . . . . . . . . . . . . . . . . . . . . . . . . . . . . . 96
D Regulatory information
FCC statement . . . . . . . . . . . . . . . . . . . . . . . . . . . . . . . . . . . . . . . . . . . . . . . . . . . . . . . . . 101 EMI statement (Korea) . . . . . . . . . . . . . . . . . . . . . . . . . . . . . . . . . . . . . . . . . . . . . . . . . . . 101 VCCI statement (Japan). . . . . . . . . . . . . . . . . . . . . . . . . . . . . . . . . . . . . . . . . . . . . . . . . . 102 Regulatory model number . . . . . . . . . . . . . . . . . . . . . . . . . . . . . . . . . . . . . . . . . . . . . . . . 102 Power cord statement . . . . . . . . . . . . . . . . . . . . . . . . . . . . . . . . . . . . . . . . . . . . . . . . . . . 102 LED classification. . . . . . . . . . . . . . . . . . . . . . . . . . . . . . . . . . . . . . . . . . . . . . . . . . . . . . . 102 Declaration of conformity . . . . . . . . . . . . . . . . . . . . . . . . . . . . . . . . . . . . . . . . . . . . . . . . . 103 Environmental sustainability program . . . . . . . . . . . . . . . . . . . . . . . . . . . . . . . . . . . . . . . 104
Reduction and elimination . . . . . . . . . . . . . . . . . . . . . . . . . . . . . . . . . . . . . . . . . . . . . 104 Power consumption . . . . . . . . . . . . . . . . . . . . . . . . . . . . . . . . . . . . . . . . . . . . . . . . . . 104 Hazardous materials . . . . . . . . . . . . . . . . . . . . . . . . . . . . . . . . . . . . . . . . . . . . . . . . . 105 Recycling . . . . . . . . . . . . . . . . . . . . . . . . . . . . . . . . . . . . . . . . . . . . . . . . . . . . . . . . . . 105 Material safety data sheets . . . . . . . . . . . . . . . . . . . . . . . . . . . . . . . . . . . . . . . . . . . . 105 End-of-life returns . . . . . . . . . . . . . . . . . . . . . . . . . . . . . . . . . . . . . . . . . . . . . . . . . . . 105
Index . . . . . . . . . . . . . . . . . . . . . . . . . . . . . . . . . . . . . . . . . . . . . . . . . . . . 106
ENWW |
5 |

1 |
Getting started |
Thank you for buying the printer. This guide provides details about how to use the printer and to resolve printer and printing problems.
Finding other resources for the product
You can obtain product information and further troubleshooting resources that are not included in this guide from the following resources:
Resource |
Description |
Location |
|
|
|
Setup poster |
Provides illustrated setup information. |
A printed version of this document |
|
|
is provided with the printer. Also, |
|
|
an electronic version is available |
|
|
as an Adobe® Acrobat® Portable |
|
|
Document Format (PDF) file on |
|
|
the Starter CD. |
Getting started |
Provides instructions for setting up the printer |
guide |
and information about the warranty and |
|
safety issues. |
Included as a printed guide in the box with the printer.
Readme file and |
Provide late-breaking information and |
Included on the Starter CD. |
release notes |
troubleshooting tips. |
|
|
|
|
Embedded Web |
Allows you to view status information, change |
Available through any standard |
server (network |
settings, and manage the printer from any |
Web browser. |
connection) |
computer on the network. |
|
|
See Embedded Web server (EWS). |
|
|
|
|
Toolbox |
Provides information about printhead health. |
Available if you choose an |
(Microsoft® |
See Toolbox (Windows) for more information. |
installation option that includes |
Windows® ) |
|
the Toolbox. |
Printer-driver |
Provides an explanation of the features in the |
Available from the printer driver. |
onscreen Help |
printer driver. |
|
(Windows) |
|
|
HP Instant |
Helps you quickly identify, diagnose, and |
Support |
resolve printing problems. |
|
See HP Instant Support for more information. |
Available through any standard Web browser or through the Toolbox (Windows).
HP Jetdirect |
Provides information for configuring and |
Included on the Starter CD. |
Administrator’s |
troubleshooting the HP Jetdirect print server |
|
Guide |
that is installed in the printer. |
|
|
|
|
Control-panel |
Provides status, error, and warning information |
See Control panel. |
|
about printer operation. |
|
|
|
|
Configuration |
Provides information about the printer hardware |
See Understanding and printing |
page |
(such as the firmware version and model |
the configuration page. |
|
number), printer settings, and accessories that |
|
|
are installed (such as memory and trays). If the |
|
|
printer is connected to a network, an additional |
|
|
network configuration page is available. |
|
6 1 - Getting started |
ENWW |
Resource |
Description |
Location |
|
|
|
System tests and |
Provides information to help diagnose problems |
See Administer the printer. |
printouts (such the |
in the print mechanism and paper path. |
|
demo page |
z Demo page printout |
|
printout and |
z Paper-path test |
|
paper-path test) |
|
|
|
|
|
|
|
|
HP websites |
Provides the latest printer software, product and |
http://www.hp.com/support/ |
|
support information. |
businessinkjet2800 |
|
|
http://www.hp.com |
|
|
|
HP telephone |
Lists information to contact HP. During the |
See Telephone support numbers. |
support |
warranty period, this support is often free |
|
|
of charge. |
|
|
|
|
ENWW
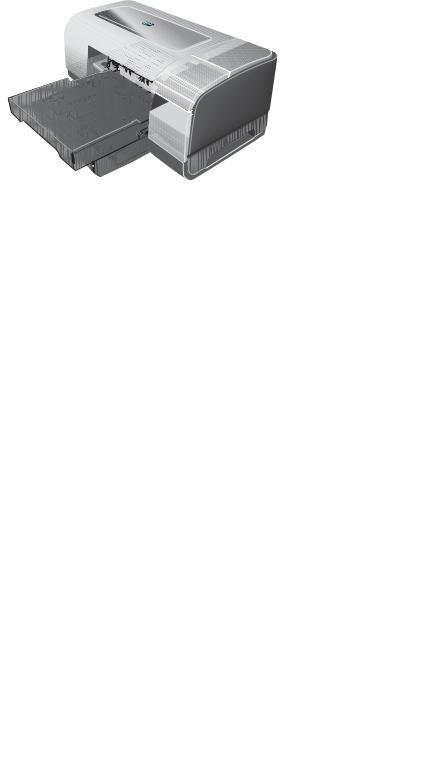
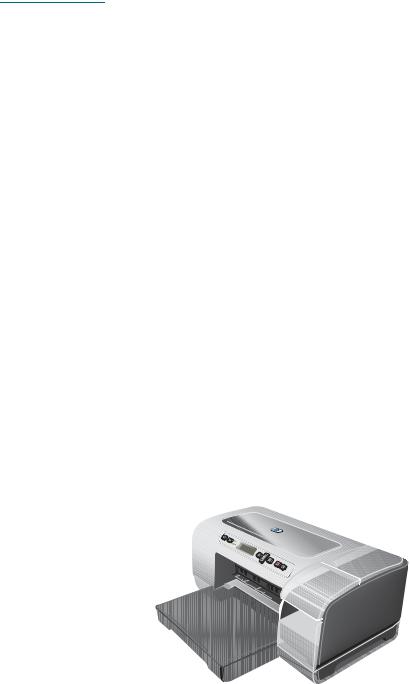
Understanding the printer parts
Front view
1 |
2 |
3 |
4 |
13
8 9 10
11
6
7 |
5 |
12
13
14
1Control panel
2Printhead cover
3Ink cartridge cover
4Printhead latch
5Printheads
6Ink cartridges
7Front manual feed slot
8Tray 1
9Stack indicator
10Guides
11Output tray
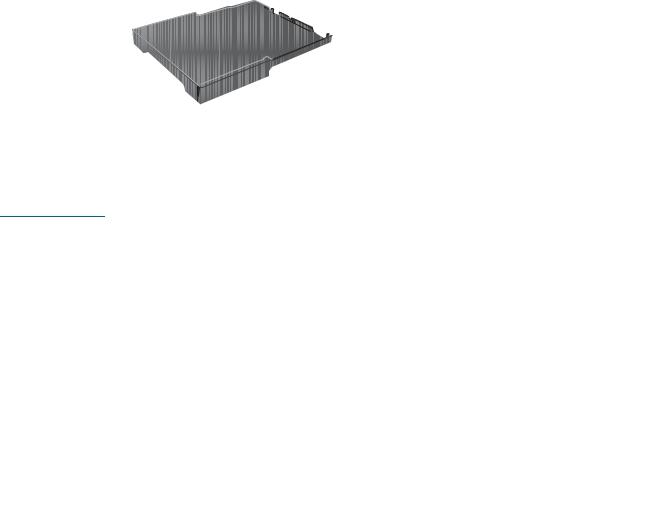
12Tray 2
13Tray extension lock
14Tray 2 Cover
8 1 - Getting started |
ENWW |
Control panel
See Control panel for more information.
1 |
2 |
4 |
5 |
6 |
7 |
8 |
9 |
10 |
||
|
|
|
|
|
|
|
|
|
|
|
3
1 (Power button)
2 (Help button)
3 (Attention light)
4 (Ready light)
5Control-panel display
6 (Back button)
7 (Up Arrow button) and
  (Down Arrow button)
8 (Select button)
9 (Cancel button)
10 (Resume button)
ENWW |
Understanding the printer parts 9 |
Back view
1
2
8 |
7 |
6 |
5 |
4 |
3 |
1Parallel (IEEE 1284) connector
2USB connector
3Power input
4Guide
5Rear access panel
6Rear manual feed slot
7Auto-duplex unit (HP Business Inkjet 2800dt and HP Business Inkjet 2800dtn printers)
8HP Jetdirect print server (HP Business Inkjet 2800dtn printer)
10 1 - Getting started |
ENWW |

2 |
Installing accessories |
Installing tray 2
Tray 2 comes with the HP Business Inkjet 2800dt and HP Business Inkjet 2800dtn printers. It can hold up to 250 sheets of plain paper.
To install tray 2
1Unpack the tray, remove the packing tapes and materials, and move the tray to the prepared location.
2Turn off the printer, and disconnect the power cord.
3Set the printer on top of the tray.
WARNING! Be careful to keep your fingers and hands clear of the bottom of the printer.
4Connect the power cord and turn on the printer.
5Enable the tray in the printer driver. See Enabling accessories in the printer driver.
ENWW |
Installing tray 2 11 |

Installing the auto-duplex unit
You can print on both sides of a sheet of paper automatically when the auto-duplex unit is installed on the printer. The auto-duplex unit comes with the HP Business Inkjet 2800dt and HP Business Inkjet 2800dtn printers. For information on using it, see Enabling accessories in the printer driver and Printing on both sides (duplexing).
To install an auto-duplex unit
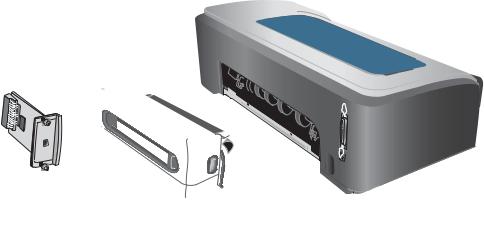
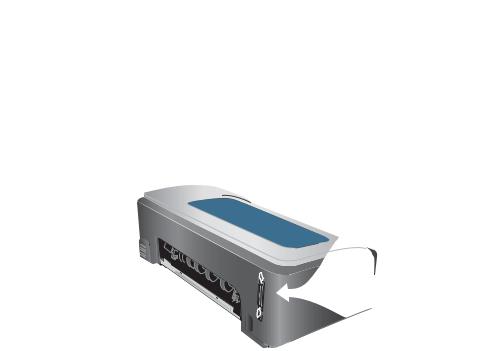
1Push the buttons on both sides of the rear access panel and remove the panel from the printer.
2Slide the auto-duplex unit into the printer until the unit locks into place.
Note |
Do not press the buttons on either side of the auto-duplex unit when installing; use them only |
|
for removing the unit from the printer. |
|
|
3Enable the auto-duplex unit in the printer driver. See Enabling accessories in the printer driver.
12 2 - Installing accessories |
ENWW |
Installing the HP Jetdirect print server
|
Your printer can be shared in a network environment by connecting it directly to the network |
|
with an HP Jetdirect print server. The print server can be used in both client-server and |
|
peer-to-peer printing configurations. It can provide better performance than printing through |
|
non-network connections, and can also provide flexibility in preparing a location for the printer. |
|
An HP Jetdirect print server is preinstalled in the HP Business Inkjet 2800dtn printer. For a list |
|
of print servers that can be purchased for the printer, see Accessories. |
|
To install the HP Jetdirect print server |
|
|
CAUTION |
The HP Jetdirect print server card contains electronic components that can be damaged by |
|
static electricity. If possible, wear a grounding wrist strap (or similar device). Handle the print |
|
server card carefully at all times. Avoid touching electronic components or circuit paths. |
|
Failure to follow these recommendations could result in damage to the parts. |
|
1 Turn off the printer, and disconnect the power cord and any other cables. |
|
|
|
2 Use a Phillips screwdriver to loosen and remove the retaining screw that hold the cover for |
|
the empty EIO slot. Remove the cover. |
|
3 Firmly insert the HP Jetdirect print server card into the EIO slot. |
4Insert and tighten the retaining screws that came with the print server card.
5Connect a network cable between the print server card and the network.
To verify that the print server has been installed correctly
1Connect the power cord and turn on the printer.
2Print a configuration page. See Understanding and printing the configuration page.
Two pages should print. The second page is the network configuration page for the print server card. If the page does not print, uninstall and reinstall the print server card to ensure that it is completely seated in the slot.
ENWW |
Installing the HP Jetdirect print server 13 |
To obtain more information
If you encounter any problems or difficulty printing over a network, see the following resources.
Document |
Description |
|
|
HP Jetdirect Administrator’s |
This guide, which is included on the Starter CD, provides detailed |
Guide |
information about setting up and using an HP Jetdirect print server. |
|
The guide also provides information about the following topics: |
|
z HP software solutions for HP Jetdirect print servers |
|
z TCP/IP configurations |
|
z Line Printer Daemon (LPD) services on the print server |
|
z File Transfer Protocol (FTP) printing |
|
z Configuration page messages and troubleshooting |
|
z Embedded Web server, a Web-based tool for configuring and |
|
managing network devices |
|
|
Documentation for the |
This documentation came with your computer or your network operating |
operating system and |
system and provides basic information about network printing issues. |
network operating system |
|
|
|
In addition to these resources, printer information and configuration features are available through HP Web Jetadmin. See HP Web Jetadmin software or visit http://www.hp.com/ support/businessinkjet2800 for more information.
14 2 - Installing accessories |
ENWW |

Installing memory modules
Note
CAUTION
If you often print complex graphics or PostScript® (PS) documents, or if you print with the auto-duplex unit, you might want to add more memory to the printer.
Adding memory gives the printer the ability to process these more complex print jobs, but might not increase processing speed.
The printer contains 96 MB of built-in memory and has two DIMM slots that accept 64 MB, 128 MB, or 256 MB of RAM (see Accessories for ordering information.) You can find out how much memory is installed from the printer configuration page. Note that the printer only recognizes up to 544 MB of printer memory. As such, if you have installed two 256 MB RAM, the total printer usable memory is only 544 MB.
The DIMMs contain electronic components that can be damaged by static electricity.
To prevent the buildup of static electricity, maintain frequent contact with any bare sheet metal surface on the printer. If possible, wear a grounding wrist strap (or similar device). Handle the DIMMs carefully at all times. Avoid touching electronic components or circuit paths. Failure to follow these recommendations could result in damage to the parts.
To install a DIMM
1Print the printer configuration page to find out how much memory is available in the printer. See Understanding and printing the configuration page.
2Turn off the printer, and disconnect the power cord and any other cables.
3On the left side of the printer, remove the side cover.
4On an empty DIMM slot, push the DIMM locks outward to release the locks.
5Remove the DIMM from the antistatic package.
ENWW |
Installing memory modules 15 |
6Align the DIMM so that the notches on the lower edge line up with the raised marks in the DIMM slot.
7Insert and press the DIMM into the slot until the DIMM snaps into place.
8Replace the side cover.
9Connect the power cord and any cables, and turn on the printer.
10Enable the DIMMs in the printer driver. See Enabling accessories in the printer driver.
To verify that the DIMM is installed correctly
1Make sure the power cord and any cables are connected and the printer is turned on.
2Make sure that READY appears on the control-panel display. If an error message appears, a DIMM might have been installed incorrectly.
3Print the printer configuration page. In the memory section, compare the memory amount with the amount on the configuration page that you printed before installing the DIMM. If the amount of memory has not increased, one of the following problems might have occurred:
•The DIMM might not be installed correctly. Remove the DIMM and repeat the installation procedure.
•The DIMM might be defective. Try a new DIMM.
16 2 - Installing accessories |
ENWW |

Enabling accessories in the printer driver
Note |
The Mac OS automatically turns on the auto-duplex unit and tray 2 in the printer driver when |
|
you install the printer software. However, you will need to manually enable the DIMMs. |
|
|
To enable accessories on Windows computers
After installing the printer software on Windows computers, tray 2 and the auto-duplex unit must be enabled in the printer driver in order for them to work.
1Click Start, point to Settings, and then click Printers or Printers and Faxes.
2Right-click the printer icon, and then click Properties, Document Defaults, or Printing Preferences.
3Click the Configure, Device Settings, or Device Options tab. The name of the tab depends on the printer driver and the operating system.
4On the selected tab, click Automatic Configuration, click Update now..., and then click OK.
ENWW |
Enabling accessories in the printer driver 17 |

3 |
Using the printer |
Selecting print media
The printer is designed to work well with most types of office paper. It is best to test a variety of print media types before buying large quantities. Use HP media for optimum print quality. See HP supplies and accessories.
Tips for selecting and using print media
For the best results, observe the following guidelines.
zAlways use media that conforms to the printer specifications. See Understanding specifications for supported media.
zSelect the appropriate media type and size from the printer driver. See Changing print settings.
zLoad only one type of media of the same size at a time into a tray.
zFor tray 1 and tray 2, load media print-side down and aligned against the right and back edges of the tray. See Loading media.
Note |
Tray 2 is designed to hold only plain paper. |
|
|
zDo not overload the trays. See Understanding specifications for supported media.
zTo prevent jams, poor print quality, and other printer problems, avoid the following media:
•Multipart forms
•Media that is damaged, curled, or wrinkled
•Media with cutouts or perforations
•Media that is heavily textured, embossed, or does not accept ink well
•Media that is too lightweight or stretches easily
For more information on printing on supported media, see Printing on special and custom-size media.
Cards and envelopes
zAvoid envelopes that have a very slick finish, self-stick adhesives, clasps, or windows. Also avoid cards and envelopes with thick, irregular, or curled edges, or areas that are wrinkled, torn, or otherwise damaged.
zUse tightly constructed envelopes, and make sure the folds are sharply creased.
zLoad envelopes into the printer according to the icon on the tray.
18 3 - Using the printer |
ENWW |
Photo paper
zUse the Best mode to print photographs. Note that in this mode, printing takes longer and more memory may be required from your computer and printer.
zRemove each sheet as it prints and set it aside to dry. Allowing wet media to stack up may cause smearing.
Transparencies
zInsert transparencies with the rough side down and the adhesive strip pointing towards the back of the printer.
zUse the Best mode to print transparencies. This mode provides longer drying time and ensures that the ink dries completely before the next page is delivered to the output tray. Allowing wet media to stack up may cause smearing.
Custom-size media
zUse only custom-size media supported by the printer.
zIf your application supports custom-size media, set the media size in the application before printing the document. If not, set the size in the printer driver. You might need to reformat existing documents to print them correctly on custom-size media.
Understanding specifications for supported media
This section provides information regarding the sizes, types, and weights of media that the printer supports. It also provides information on the tray capacity.
Note |
Tray 2 and auto-deplex unit comes with the HP Business Inkjet 2800dt and |
|
HP Business Inkjet 2800dtn printers. |
|
|
Supported media sizes
* These media sizes support manual duplex. See Printing on both sides (duplexing).
Media size |
Tray 1 |
Tray 2 |
Front |
Rear |
Auto-duplex |
|
|
|
manual |
manual |
unit |
|
|
|
feed slot |
feed slot |
|
|
|
|
|
|
|
Standard paper sizes |
|
|
|
|
|
|
|
|
|
|
|
U.S. Letter |
|
|
|
|
|
(216 by 279 mm; 8.5 by 11 inches) |
|
|
|
|
|
U.S. Legal
(216 by 356 mm; 8.5 by 14 inches)
A4
(210 by 297 mm; 8.3 by 11.7 inches)
U.S. Executive
(184 by 267 mm; 7.25 by 10.5 inches)
U.S. Statement
(140 by 216 mm; 5.5 by 8.5 inches)
A5
(148 by 210 mm; 5.8 by 8.3 inches)
A6
(105 by 148 mm; 4.1 by 5.8 inches)
ENWW |
Selecting print media 19 |

Media size |
Tray 1 |
Tray 2 |
Front |
Rear |
Auto-duplex |
|
|
|
manual |
manual |
unit |
|
|
|
feed slot |
feed slot |
|
|
|
|
|
|
|
JIS B4 |
|
|
|
|
|
(257 by 364 mm; 10.1 by 14.3 inches) |
|
|
|
|
|
JIS B5
(182 by 257 mm; 7.2 by 10.1 inches)
Tabloid
(279 by 432 mm; 11 by 17 inches)
A3
(297 by 420 mm; 11.7 by 16.5 inches)
Super B, A3 Nobi
(330 by 483 mm; 13.0 by 19.0 inches)
Envelopes
U.S. #10 Envelope
(105 by 241 mm; 4.12 by 9.5 inches)
Monarch Envelope
(98 by 191 mm; 3.88 by 7.5 inches)
HP Greeting Card Envelope
(111 by 152 mm; 4.38 by 6 inches)
Envelope A2
(111 by 146 mm; 4.37 by 5.75 inches)
DL Envelope
(110 by 220 mm; 4.3 by 8.7 inches)
C5 Envelope
(162 by 229 mm; 6.4 by 9 inches)
C6 Envelope
(114 by 162 mm; 4.5 by 6.4 inches)
Envelope Kaku #2
(240 by 332 mm; 9.4 by 13.1 inches)
Japanese Envelope Chou #3 (120 x 235 mm; 4.7 by 9.3 inches)
Japanese Envelope Chou #4 (90 x 205 mm; 3.5 by 8.1 inches)
Cards
Index card
(102 by 152 mm; 4 by 6 inches)
Index card
(127 by 203 mm; 5 by 8 inches)
4 x 6 Index card with tab
(102 by 152 mm; 4 by 6 inches)
Hagaki
(100 by 148 mm; 3.9 by 5.8 inches)
Ofuku Hagaki
(148 by 200 mm; 5.8 by 7.9 inches)
Custom-size media
Between 90 to 330 mm wide and 146 to 483 mm long (3.54 to 13.0 inches wide and 5.75 to 19.0 inches long)
Between 182 to 330 mm wide and 257 to 483 mm long (7.2 to 13.0 inches wide and 10.1 to 19.0 inches long)
20 3 - Using the printer |
ENWW |

Media size |
Tray 1 |
Tray 2 |
Front |
Rear |
Auto-duplex |
|
|
|
manual |
manual |
unit |
|
|
|
feed slot |
feed slot |
|
|
|
|
|
|
|
Between 110 to 330 mm wide and 220 to 483 mm long (4.33 to 13.0 inches wide and 8.65 to 19.0 inches long)
Between 96 to 330 mm wide and 146 to 483 mm long (3.77 to 13.0 inches wide and 5.75 to 19.0 inches long)
Supported media types and weights
Tray |
Type |
Weight |
Capacity |
|
|
|
|
Tray 1 |
Paper |
60 to 90 g/m2 |
Up to 150 sheets of plain paper |
|
|
(16 to 24 lb bond) |
(13 mm or 0.5 inch stacked) |
|
|
|
|
|
Envelopes |
75 to 90 g/m2 |
Up to 22 sheets |
|
|
(20 to 24 lb bond |
(13 mm or 0.5 inch stacked) |
|
|
envelope) |
|
|
|
|
|
|
Cards |
Up to 200 g/m2 |
Up to 5 cards |
|
|
(110 lb index) |
|
|
|
|
|
|
Transparencies or labels |
|
Up to 30 sheets |
|
|
|
(8 mm or 0.3 inch stacked) |
|
|
|
|
|
Special Media |
|
Up to 50 sheets |
|
|
|
(13mm or 0.5 inch stacked) |
|
|
|
|
Tray 2 |
Plain paper only |
60 to 90 g/m2 |
Up to 250 sheets of plain paper |
|
|
(16 to 24 lb bond) |
(25 mm or 1 inch stacked) |
|
|
|
|
Front manual |
Paper |
60 to 90 g/m2 |
Up to 10 sheets |
feed |
|
(16 to 24 lb bond) |
|
|
|
|
|
|
Envelopes |
75 to 90 g/m2 |
One sheet at a time |
|
|
(20 to 24 lb) |
|
|
|
|
|
|
Transparencies |
|
Up to 8 sheets |
|
|
|
|
|
Special media |
|
Up to 6 sheets |
|
|
|
|
Rear manual |
Paper |
60 to 270 g/m2 |
One sheet at a time |
feed |
|
(16 to 72 lb bond) |
|
|
|
|
|
|
Envelopes |
75 to 90 g/m2 |
One sheet at a time |
|
|
(20 to 24 lb) |
|
|
|
|
|
|
Cards |
Up to 200 g/m2 |
One sheet at a time |
|
|
(Up to 110 lb index) |
|
|
|
|
|
|
Transparencies |
|
One sheet at a time |
|
|
|
|
|
Special media |
|
One sheet at a time |
|
|
|
|
Auto-duplex unit |
Paper |
60 to 90 g/m2 |
N.A. |
|
|
(16 to 24 lb bond) |
|
|
|
|
|
|
Two-sided special media |
|
N.A. |
|
|
|
|
Output tray |
All supported media |
|
Up to 100 sheets of plain paper |
|
|
|
(text printing) |
|
|
|
|
ENWW |
Selecting print media 21 |

Setting minimum margins
The document margins must match (or exceed) these minimum margin settings in portrait orientation.
|
|
|
|
Top |
|
|
|
|
Top |
|
|
|
|
|
|
|
|||
|
|
|
|
|
|
|
|
|
|
|
|
|
|
|
|
|
|
|
|
|
|
|
|
|
|
|
|
|
|
|
|
|
|
|
|
|
|
|
|
Bottom
Bottom
|
|
|
|
|
|
|
|
|
|
|
|
|
|
|
|
|
|
|
Left |
Right |
|
|
|
Right |
|||||||||||||
|
|
|
|
|
|
|
|
Left |
||||||||||
|
|
Media |
Left margin |
Right margin |
Top margin |
Bottom margin |
|
|
|
|
|
|
|
|
|
U.S. Letter, A4, U.S. |
3.3 mm |
3.3 mm |
11.7 mm |
11.7 mm |
|
|
Executive, U.S. Statement, |
(0.13 inch) |
(0.13 inch) |
(0.46 inch) |
(0.46 inch); |
|
|
Hagaki, Ofuku Hagaki, |
|
|
|
3.0 mm (0.12 inch |
|
|
JIS B4, JIS B5, |
|
|
|
with minimized |
|
|
Index Card (5 by 8 inches), |
|
|
|
margins) |
|
|
A5, A6 cards |
|
|
|
|
|
|
|
|
|
|
|
|
|
U.S. Legal, Tabloid, |
5.1 mm |
5.1 mm |
11.7 mm |
11.7 mm |
|
|
A3, Super B, A3 Nobi, |
(0.2 inch) |
(0.2 inch) |
(0.46 inch) |
(0.46 inch); |
|
|
custom-size media |
|
|
|
3.0 mm (0.12 inch |
|
|
|
|
|
|
with minimized |
|
|
|
|
|
|
margins) |
|
|
|
|
|
|
|
|
|
U.S. #10 Envelope, |
3.2 mm |
3.2 mm |
11.7 mm |
11.7 mm |
|
|
Monarch Envelope, |
(0.13 inch) |
(0.13 inch) |
(0.46 inch) |
(0.46 inch) |
|
|
HP Greeting Card |
|
|
|
|
|
|
Envelope, Envelope A2, |
|
|
|
|
|
|
DL Envelope, C5 |
|
|
|
|
|
|
Envelope, C6 Envelope, |
|
|
|
|
|
|
Japanese Envelope |
|
|
|
|
|
|
Chou #3, Japanese |
|
|
|
|
|
|
Envelope Chou #4 |
|
|
|
|
|
|
|
|
|
|
|
|
|
Envelope Kaku #2 |
5.1 mm |
5.1 mm |
11.7 mm |
11.7 mm |
|
|
|
(0.2 inch) |
(0.2 inch) |
(0.46 inch) |
(0.46 inch) |
|
|
|
|
|
|
|
|
|
Photo media (4 by |
3.0 mm |
3.0 mm |
3.0 mm |
3.0 mm |
|
|
6 inches, or 101.6 by |
(0.12 inch) |
(0.12 inch) |
(0.12 inch) |
(0.12 inch) |
|
|
152.4 mm) with tear-off tab |
|
|
|
|
|
|
|
||||
|
|
|
|
|
|
|
Note |
|
When you are using the auto-duplex unit, the minimum top and bottom margin must match or |
||||
|
|
exceed 12.7 mm (0.5 inch). |
|
|
|
|
|
|
|
|
|
|
|
22 3 - Using the printer |
ENWW |
Loading media
To load tray 1 or tray 2
1If you are loading tray 1, raise the output tray and pull tray 1 out of the printer by grasping under the front of the tray 1.
If you are loading tray 2, pull out tray 2 and raise its cover.
2If you are loading A3 or larger sized media, extend the tray by pressing the tray extension lock near the front of the tray and pulling both ends of the tray in opposite directions until it is fully extended.
Tray 1
3Press the button of the media width guide and slide the guide to the left. Press the button of the media length guide and slide the guide towards you.
ENWW |
Loading media 23 |
4Insert the media print-side down along the right of the tray. Make sure the stack of media aligns with the right and back edges of the tray, and does not spill over the edges.
5Press the buttons of the media guides and slide the guides to the edges of the loaded media.
Tray 1
6If you removed tray 1, gently reinsert it into the printer and lower the output tray to its original position.
If you removed tray 2, lower the tray cover and gently reinsert tray 2.
CAUTION |
If you have extended the tray, do not press the tray extension lock when inserting the tray. |
|
Pressing it will cause the tray to be retracted when you push in the tray. The longer media in |
|
the tray will be folded; this will cause problem during printing. |
|
|
7If you have extended tray 1 or tray 2, extend the output tray by grasping under the front of the output tray and pulling out the media extension.
8When printing, select the appropriate media type and size from the printer driver. See Changing print settings.
24 3 - Using the printer |
ENWW |

Changing print settings
|
You can change print settings (such as media size or type) from an application or the printer |
|
driver. Changes made from an application take precedence over changes made from the |
|
printer driver. However, after the application is closed, the settings return to the defaults |
|
configured in the printer driver. |
|
|
Note |
To set print settings for all print jobs, make the changes in the printer driver. |
|
For more information about printer driver features in Windows, see the printer driver online |
|
help. For more information about printing from a specific application, see the documentation |
|
for that application. |
|
|
To change settings from an application for current jobs (Windows)
1Open the document you want to print.
2On the File menu, click Print, and then click Setup or Properties. (Specific options may vary depending on the application you are using.)
3Change any other desired settings and click OK, Print, or a similar command.
To change default settings for all future jobs (Windows)
1Click Start, point to Settings, and then click Printers or Printers and Faxes.
2Right-click the printer icon, and then choose Properties, Document Defaults, or Printing Preferences.
3Change any other desired settings and click OK.
To change settings (Mac OS)
1On the File menu, click Page Setup.
2Change any desired settings and click OK.
3On the File menu, click Print.
4Change any desired settings and click Print.
Canceling a print job
You can cancel a print job using one of the following ways.
zControl panel
Press the  (Cancel button). This will clear the job that the printer is currently processing. It does not affect jobs waiting to be processed.
zWindows
Double-click the printer icon that appears in the lower right corner of the computer screen. Select the print job, and then press the Delete key on the keyboard.
zMac OS X (10.1.5 and later)
Click the Print Center icon, and then double-click the printer icon. Select the print job and click Delete.
ENWW |
Changing print settings 25 |
Printing with the front or rear manual feed slot
Note |
The rear manual feed slot is not available if you have installed an auto-duplex unit. |
1For Windows:
a Open the printer driver.
b On the Paper/Quality tab, select the manual feed option from the Source is drop-down list.
c Change any other desired settings and click OK. d Print your document.
For Mac OS:
a On the File menu, click Page Setup. b Select the media size.
c On the File menu, click Print.
d In the Copies & Pages panel, select the manual feed option. e Open the Paper Type/Quality panel.
f Click the Paper tab and select the media type.
g Change any other desired settings and click OK or Print.
2Wait for the Resume light to blink.
3If you are using the front manual feed slot, do the following: a Remove any printouts on the output tray.
b Insert media, print-side down along the right of the slot until the media reaches the maximum depth. For envelopes, insert them according to the icon on the tray. See Supported media types and weights.
cSlide the media width guide to the edge of the loaded media.
dPress  (Resume button) to print.
26 3 - Using the printer |
ENWW |

4If you are using the rear manual feed slot, do the following:
a If the auto-duplex unit is installed, replace with the rear access panel. b Slide the media width guide to the required media width.
cInsert a sheet of media print-side up into the left side of the slot until the printer grips the media.
dPress  (Resume button) to print.
eIf you are printing more than one page, press  (Resume button) to print after inserting each sheet.
Printing on both sides (duplexing)
You can print on both sides of a sheet of media, either automatically by using the auto-duplex unit or manually by turning the media over and feeding it into the printer again.
Guidelines for printing on both sides of a page
zAlways use media that conforms to the printer specifications. See Understanding specifications for supported media.
zSpecify duplex options in your application or in the printer driver.
zDo not print on both sides of transparencies, envelopes, photo paper, glossy media. Jams might occur with these media types.
zSeveral kinds of media require a specific orientation when you print on both sides of a page, such as letterhead, preprinted paper, and paper with watermarks. When you print from a computer running Windows, the printer prints the first side of the media first. When you print from a computer using the Mac OS, the printer prints the second side first. Load the media with the front side facing down.
zWhen printing finishes on one side of the media, the printer holds the media and pauses while the ink dries. Once the ink dries, the media is pulled back into the printer and the second side is printed. When printing is complete, the media is dropped onto the output tray. Do not grab it before printing is complete.
zYou can print on both sides of supported custom-size media by using the printer’s manual duplex capabilities. (For a list of supported custom sizes, see Understanding specifications for supported media.)
ENWW |
Printing on both sides (duplexing) 27 |

Note
Note
Note
To perform duplexing (Windows)
For automatic-duplexing, ensure the auto-duplex unit is properly installed and enabled. See Enabling accessories in the printer driver. The printer will print on one side (simplex) of the media if the auto-duplex unit is not installed.
1Load the appropriate media. See Guidelines for printing on both sides of a page and Loading media.
2With a document open, on the File menu, click Print, and then choose Properties,
Document Defaults, or Printing Preferences.
3Click the Finishing tab.
4Select the Print on Both Sides check box.
5For automatic duplexing, ensure that Use auto-duplex unit is selected.
For manual duplexing, ensure the option is cleared. See Enabling accessories in the printer driver.
6To automatically resize each page to match the document's onscreen layout, ensure Preserve Layout is selected. Clearing this option may result in unwanted page breaks.
7Select or clear the Flip Pages Up check box depending on which way you want the binding. See the graphics in the printer driver for examples.
8Change any other desired settings and click OK.
9Print your document.
If you are using a computer running Windows NT 4.0, click Continue in the dialog box that appears to print the document. Otherwise, the printer does not start printing.
10For manual duplexing, after the first side of the document is printed, follow the onscreen instructions and reload the paper into the tray (blank-side down) or the front manual feed (blank-side up) to complete printing.
To perform automatic duplexing (Mac OS)
For automatic-duplexing, ensure the auto-duplex unit is properly installed and enabled. See Enabling accessories in the printer driver.
1Load the appropriate media. See Guidelines for printing on both sides of a page and Loading media.
2On the File menu, click Print.
3Open the Duplex or Layout panel.
4Select the option to print on both sides.
5Select the desired binding orientation by clicking the appropriate icon.
6Change any other desired settings and click Print.
28 3 - Using the printer |
ENWW |
Loading...