


DEClaser 2200 plus Printer Operator's Guide
Order Number EK–DECLB–OG–001
Digital Equipment Corporation
Maynard, Massachusetts

First Printing, June 1990
Revised, July 1991
The information in this document is subject to change without notice and should not be construed as a commitment by Digital Equipment Corporation.
Digital Equipment Corporation assumes no responsibility for any errors that may appear in this document.
Any software described in this document is furnished under a license and may be used or copied only in accordance with the terms of such license. No responsibility is assumed for the use or reliability of software or equipment that is not supplied by Digital Equipment Corporation or its affiliated companies.
Restricted Rights: Use, duplication, or disclosure by the U.S. Government is subject to restrictions as set forth in subparagraph (c)(1)(ii) of the Rights in Technical Data and Computer Software clause at DFARS 252.227–7013.
© Digital Equipment Corporation 1991 All rights reserved. Printed in U.S.A.
The Reader's Comments form at the end of this document requests your critical evaluation to assist in preparing future documentation.
The following are trademarks of Digital Equipment Corporation: BASIC Service, DECdirect, DEClaser, DECmailer, DECmate, DECserver, DECservice, DECstation, EDT, LN03, MicroVAX, PRO, Rainbow, ReGIS, VAX, VAX DOCUMENT, VAXmate, VAXstation, VAX/VMS, VMS, WPS-PLUS, VT, and the DIGITAL Logo.
The following are third-party trademarks: BITSTREAM is a registered trademark of Bitstream, Inc. Centronics is a trademark of Centronics Data Computer Corporation. GC Times and CG Triumvirate are trademarks of AGFA Compugraphic Corporation. IBM and ProPrinter are registered trademarks of International Business Machines Corporation. LaserJet is a trademark of Hewlett–Packard Corporation. ITC Souvenir is a registered trademark of International Typeface Corporation. PostScript is a registered trademark of Adobe Systems, Inc. Tektronix is a registered trademark of Tektronix, Inc.
S1700
This document was prepared using VAX DOCUMENT, Version 1.2.
FCC NOTICE: This equipment generates and uses radio frequency energy and if not installed and used properly, that is, in strict accordance with the manufacturer's instructions, may cause interference to radio and television reception. It has been type tested and found to comply with the limits for a Class B computing device in accordance with the specifications in Subpart J of Part 15 of FCC Rules, which are designed to provide reasonable protection against such interference in a residential installation. However, there is no guarantee that interference will not occur in a particular installation. If this equipment does cause interference to radio or television reception, which can be determined by turning the equipment off and on, the user is encouraged to try to correct the interference by one or more of the following methods.
–Reorient the receiving antenna.
–Relocate the computer or peripheral with respect to the receiver.
–Move the computer or peripheral away from the receiver.
–Plug the computer or peripheral into a different outlet so that they are on different branch circuits than the receiver.
If necessary, the user should consult the dealer or an experienced radio/television technician for additional suggestions. The user may find the booklet How to Identify and Resolve Radio/TV Interference Problems, prepared by the Federal Communications Commission helpful. This booklet is available from the U.S. Government Printing Office, Washington DC, 20402, Stock No. 004-000-00345-4.
To meet FCC requirements a shielded parallel cable is required to connect the device to a personal computer or other Class B device.
3

Contents
Preface |
xi |
Chapter 1 Printer Components
1.1 Functions of the Printer Components . . . . . . . . . . . . . . . . . . 1–1 1.2 Required Operating Space . . . . . . . . . . . . . . . . . . . . . . . . . . . 1–9
Chapter 2 Operating Information
2.1 Powering the Printer On . . . . . . . . . . . . . . . . . . . . . . . . . . . . 2–1 2.2 Powering the Printer Off . . . . . . . . . . . . . . . . . . . . . . . . . . . . 2–3 2.3 Opening the Top Cover . . . . . . . . . . . . . . . . . . . . . . . . . . . . . . 2–4 2.4 Closing the Top Cover . . . . . . . . . . . . . . . . . . . . . . . . . . . . . . 2–6 2.5 Printout Selector . . . . . . . . . . . . . . . . . . . . . . . . . . . . . . . . . . 2–7 2.6 Printing in Simplex Mode . . . . . . . . . . . . . . . . . . . . . . . . . . . 2–8 2.6.1 Selecting Facedown Printout (Top Output Tray) . . . . . . . . 2–9 2.6.2 Selecting Faceup Printouts (Rear Output Tray) . . . . . . . . . 2–10
2.6.3Printing Preprinted and Prepunched Media in Simplex
Mode . . . . . . . . . . . . . . . . . . . . . . . . . . . . . . . . . . . . . . . . . 2–11 2.7 Printing in Duplex Mode . . . . . . . . . . . . . . . . . . . . . . . . . . . . 2–11 2.7.1 Duplex Printing Printer Setup . . . . . . . . . . . . . . . . . . . . . . 2–12
2.7.2Printing Preprinted and Prepunched Media in Duplex
Mode . . . . . . . . . . . . . . . . . . . . . . . . . . . . . . . . . . . . . . . . . 2–14 2.8 Loading Paper . . . . . . . . . . . . . . . . . . . . . . . . . . . . . . . . . . . . 2–14 2.8.1 Adding Paper to the Cassettes . . . . . . . . . . . . . . . . . . . . . . 2–16 2.9 Feeding Media Manually . . . . . . . . . . . . . . . . . . . . . . . . . . . . 2–19 2.9.1 Manually Feeding Paper, Labels, and Transparencies . . . . 2–21 2.10 Feeding Envelopes Manually . . . . . . . . . . . . . . . . . . . . . . . . . 2–27 2.10.1 Feeding Envelopes . . . . . . . . . . . . . . . . . . . . . . . . . . . . . . . 2–27 2.11 Adjusting the Print Density . . . . . . . . . . . . . . . . . . . . . . . . . . 2–33 2.12 Printing the Engine Test Print . . . . . . . . . . . . . . . . . . . . . . . . 2–37
iii

2.13 |
Printing Test Print A . . . . . . . . . . . . . . . . . . . . . . . . . . . . . . . |
2–40 |
2.14 |
Printing Test Print B . . . . . . . . . . . . . . . . . . . . . . . . . . . . . . . |
2–44 |
2.15 |
Printing the Font List . . . . . . . . . . . . . . . . . . . . . . . . . . . . . . |
2–46 |
2.16 |
Using Control Representation Mode . . . . . . . . . . . . . . . . . . . |
2–49 |
2.16.1 Entering Control Representation Mode . . . . . . . . . . . . . . . |
2–49 |
|
2.17 |
Resetting the Printer . . . . . . . . . . . . . . . . . . . . . . . . . . . . . . . |
2–50 |
2.18 |
Emulation Mode of Operation . . . . . . . . . . . . . . . . . . . . . . . . |
2–51 |
Chapter 3 The Control Panel
3.1 |
Using the Keypad in Keypad Mode . . . . . . . . . . . . . . . . . . . . |
3–4 |
3.1.1 |
Entering Keypad Mode . . . . . . . . . . . . . . . . . . . . . . . . . . . |
3–4 |
3.2 |
Using the Keypad in Menu Mode . . . . . . . . . . . . . . . . . . . . . . |
3–7 |
Chapter 4 |
Printer Configuration |
|
|
||
4.1 |
|
Entering Menu Mode . . . . . . . . . . . . . . . . . . . . . . . . . . . . . . . |
4–2 |
||
4.1.1 Using the Keypad in Menu Mode . . . . . . . . . . . . . . . . . . . . |
4–3 |
||||
4.2 |
Reading the Display in Menu Mode . . . . . . . . . . . . . . . . . . . . |
4–4 |
|||
4.2.1 Displaying Menu and Feature Selections . . . . . . . . . . . . . . |
4–4 |
||||
4.2.2 |
Displaying Menu Values . . . . . . . . . . . . . . . . . . . . . . . . . . |
4–5 |
|||
4.3 |
|
Printer Configuration Memory . . . . . . . . . . . . . . . . . . . . . . . . |
4–5 |
||
4.3.1 |
Operating Memory . . . . . . . . . . . . . . . . . . . . . . . . . . . . . . . |
4–6 |
|||
4.3.2 |
ROM (Read-Only Memory) . . . . . . . . . . . . . . . . . . . . . . . . . |
4–7 |
|||
4.3.3 NVRAM (Nonvolatile Random-Access Memory) . . . . . . . . . |
4–8 |
||||
4.3.4 |
RAM (Random-Access Memory) . . . . . . . . . . . . . . . . . . . . . |
4–9 |
|||
4.4 |
Operational Flow in Menu Mode . . . . . . . . . . . . . . . . . . . . . . |
4–9 |
|||
4.4.1 Sample Procedure for Changing and Saving Values . . . . . . |
4–11 |
||||
4.5 |
|
Menu Descriptions . . . . . . . . . . . . . . . . . . . . . . . . . . . . . . . . . |
4–15 |
||
4.5.1 |
FEEDER Menu . . . . . . . . . . . . . . . . . . . . . . . . . . . . . . . . . |
4–18 |
|||
4.5.2 |
LAYOUT Menu . . . . . . . . . . . . . . . . . . . . . . . . . . . . . . . . . |
4–20 |
|||
4.5.2.1 |
Offset Position (offsetX, offsetY) . . . . . . . . . . . . . . . . . . . |
4–21 |
|||
4.5.2.2 |
Automatic New Line (autoNL) . . . . . . . . . . . . . . . . . . . . |
4–23 |
|||
4.5.3 |
COPY Menu . . . . . . . . . . . . . . . . . . . . . . . . . . . . . . . . . . . . |
4–23 |
|||
4.5.4 |
COMMAND Menu . . . . . . . . . . . . . . . . . . . . . . . . . . . . . . . |
4–23 |
|||
iv

4.5.5 INITIAL Menu . . . . . . . . . . . . . . . . . . . . . . . . . . . . . . . . . . 4–24 4.5.5.1 Macro . . . . . . . . . . . . . . . . . . . . . . . . . . . . . . . . . . . . . . . 4–25 4.5.5.2 Examples Using the Macro Feature . . . . . . . . . . . . . . . . 4–27 4.5.5.3 Paint Mode (paint) . . . . . . . . . . . . . . . . . . . . . . . . . . . . . 4–27 4.5.5.4 Paper Size (paper) . . . . . . . . . . . . . . . . . . . . . . . . . . . . . 4–27 4.5.6 INTERFACE Menu . . . . . . . . . . . . . . . . . . . . . . . . . . . . . . 4–28 4.5.6.1 Interface Selection (i/f) . . . . . . . . . . . . . . . . . . . . . . . . . . 4–30 4.5.6.2 Baud Rate (baud) . . . . . . . . . . . . . . . . . . . . . . . . . . . . . . 4–30 4.5.6.3 RS232C Data Format (rsmode) . . . . . . . . . . . . . . . . . . . 4–30 4.5.6.4 Data Terminal Ready (dtr) . . . . . . . . . . . . . . . . . . . . . . . 4–30 4.5.6.5 Buffer Control (xon/xoff) . . . . . . . . . . . . . . . . . . . . . . . . . 4–31 4.5.6.6 End of Text/Acknowledge (etx/ack) . . . . . . . . . . . . . . . . . 4–31 4.5.7 DUPLEX Menu . . . . . . . . . . . . . . . . . . . . . . . . . . . . . . . . . 4–31
Chapter 5 Print Media
5.1 Paper Specifications . . . . . . . . . . . . . . . . . . . . . . . . . . . . . . . . 5–2 5.1.1 Special Considerations When Printing on Paper . . . . . . . . 5–3 5.2 Envelope Requirements . . . . . . . . . . . . . . . . . . . . . . . . . . . . . 5–4 5.2.1 Special Considerations When Printing on Envelopes . . . . . 5–7 5.3 Transparencies . . . . . . . . . . . . . . . . . . . . . . . . . . . . . . . . . . . . 5–8
5.3.1Special Considerations When Printing Transparencies . . . 5–8
5.4 Labels . . . . . . . . . . . . . . . . . . . . . . . . . . . . . . . . . . . . . . . . . . 5–9 5.4.1 Special Considerations When Printing on Labels . . . . . . . . 5–10 5.5 Paper Handling and Storage . . . . . . . . . . . . . . . . . . . . . . . . . 5–10 5.5.1 Paper Handling . . . . . . . . . . . . . . . . . . . . . . . . . . . . . . . . . 5–10 5.5.2 Paper Storage . . . . . . . . . . . . . . . . . . . . . . . . . . . . . . . . . . 5–11
Chapter 6 Troubleshooting
6.1 Error Skip Procedure . . . . . . . . . . . . . . . . . . . . . . . . . . . . . . . 6–1 6.2 Printer Status Messages . . . . . . . . . . . . . . . . . . . . . . . . . . . . 6–2 6.3 Operator Call Messages . . . . . . . . . . . . . . . . . . . . . . . . . . . . . 6–3 6.4 Software Error Messages . . . . . . . . . . . . . . . . . . . . . . . . . . . . 6–5 6.5 Service Call Messages . . . . . . . . . . . . . . . . . . . . . . . . . . . . . . 6–8 6.6 Common Operating Problems . . . . . . . . . . . . . . . . . . . . . . . . 6–8
v

6.6.1 Incorrect Printing Mode . . . . . . . . . . . . . . . . . . . . . . . . . . . 6–12 6.7 Paper Jams . . . . . . . . . . . . . . . . . . . . . . . . . . . . . . . . . . . . . . 6–13 6.7.1 Paper Jam Areas 1, 6, and 7 . . . . . . . . . . . . . . . . . . . . . . . 6–14 6.7.2 Paper Jam Areas 2, 3, 4, and 6 . . . . . . . . . . . . . . . . . . . . . 6–19 6.7.3 Paper Jam Area 5 (Duplex Printing Mode Only) . . . . . . . . 6–24 6.7.4 Paper Jam Area 8 (Duplex Printing Only) . . . . . . . . . . . . . 6–28
Chapter 7 Maintenance
7.1 Cleaning the Printer . . . . . . . . . . . . . . . . . . . . . . . . . . . . . . . 7–1 7.1.1 Cleaning the Internal Surfaces . . . . . . . . . . . . . . . . . . . . . 7–2 7.1.2 Cleaning the Primary Corona Wire . . . . . . . . . . . . . . . . . . 7–7 7.1.3 Cleaning the Transfer Corona Wires and Discharging Pins 7–15 7.2 Extending EP-S Cartridge Life . . . . . . . . . . . . . . . . . . . . . . . 7–21 7.3 Replacing the EP-S Cartridge . . . . . . . . . . . . . . . . . . . . . . . . 7–22 7.4 Replacing the Ozone Filter . . . . . . . . . . . . . . . . . . . . . . . . . . . 7–40
Chapter 8 Service
8.1 Digital Equipment Corporation Services . . . . . . . . . . . . . . . . 8–1
Appendix A DEClaser Printer Quick Reference Guide
A.1 |
Positioning Controls . . . . . . . . . . . . . . . . . . . . . . . . . . . . . . . . |
A–3 |
A.2 |
Margins and Spacing . . . . . . . . . . . . . . . . . . . . . . . . . . . . . . . |
A–6 |
A.3 |
Set/Reset Modes . . . . . . . . . . . . . . . . . . . . . . . . . . . . . . . . . . . |
A–12 |
A.4 |
Fonts and Character Sets . . . . . . . . . . . . . . . . . . . . . . . . . . . |
A–14 |
A.5 |
Miscellaneous . . . . . . . . . . . . . . . . . . . . . . . . . . . . . . . . . . . . . |
A–20 |
Appendix B Accessories and Supplies
B.1 Ordering Information . . . . . . . . . . . . . . . . . . . . . . . . . . . . . . . B–4
vi

Appendix C Specifications
C.1 |
Operating Specifications . . . . . . . . . . . . . . . . . . . . . . . . . . . . . |
C–1 |
C.2 |
Serial Interface Specifications . . . . . . . . . . . . . . . . . . . . . . . . |
C–4 |
C.3 |
Parallel Interface Specifications . . . . . . . . . . . . . . . . . . . . . . . |
C–8 |
Appendix D LN03 Compatibility
D.1 |
General Differences . . . . . . . . . . . . . . . . . . . . . . . . . . . . . . . . |
D–1 |
D.2 |
Printable Area Compatibility . . . . . . . . . . . . . . . . . . . . . . . . . |
D–2 |
D.3 |
Protocol Compatibility . . . . . . . . . . . . . . . . . . . . . . . . . . . . . . |
D–2 |
Glossary
Index
Figures
1 CDRH Label . . . . . . . . . . . . . . . . . . . . . . . . . . . . . . . . . . . . . . xvii 1–1 Components: Front/Right-Side View . . . . . . . . . . . . . . . . . . . 1–1 1–2 Components: Rear/Left-Side View . . . . . . . . . . . . . . . . . . . . . 1–3 1–3 Components: Rear Output Tray . . . . . . . . . . . . . . . . . . . . . . . 1–5 1–4 Components: Inside the Printer . . . . . . . . . . . . . . . . . . . . . . . 1–7 1–5 Operating Space: Top View . . . . . . . . . . . . . . . . . . . . . . . . . . 1–10 1–6 Operating Space: Side View . . . . . . . . . . . . . . . . . . . . . . . . . . 1–10 2–1 Printout Selector . . . . . . . . . . . . . . . . . . . . . . . . . . . . . . . . . . 2–7 2–2 Printout Selections . . . . . . . . . . . . . . . . . . . . . . . . . . . . . . . . . 2–8 2–3 Duplex Paper Path . . . . . . . . . . . . . . . . . . . . . . . . . . . . . . . . . 2–11 2–4 Engine Test Print . . . . . . . . . . . . . . . . . . . . . . . . . . . . . . . . . . 2–38 2–5 Test Print A . . . . . . . . . . . . . . . . . . . . . . . . . . . . . . . . . . . . . . 2–41 2–6 Test Print B . . . . . . . . . . . . . . . . . . . . . . . . . . . . . . . . . . . . . . 2–45 2–7 Font List . . . . . . . . . . . . . . . . . . . . . . . . . . . . . . . . . . . . . . . . 2–47 3–1 Control Panel . . . . . . . . . . . . . . . . . . . . . . . . . . . . . . . . . . . . . 3–1 4–1 Sample of a Menu . . . . . . . . . . . . . . . . . . . . . . . . . . . . . . . . . 4–1 4–2 Menu Display . . . . . . . . . . . . . . . . . . . . . . . . . . . . . . . . . . . . . 4–4 4–3 Operating Memory . . . . . . . . . . . . . . . . . . . . . . . . . . . . . . . . . 4–6
vii

4–4 |
Operational Flow Chart . . . . . . . . . . . . . . . . . . . . . . . . . . . . . |
4–10 |
4–5 |
Test Print A Verification . . . . . . . . . . . . . . . . . . . . . . . . . . . . . |
4–14 |
4–6 |
Offset Positioning . . . . . . . . . . . . . . . . . . . . . . . . . . . . . . . . . . |
4–21 |
4–7 |
Offset Printout Samples . . . . . . . . . . . . . . . . . . . . . . . . . . . . . |
4–22 |
5–1 |
Unacceptable Labels . . . . . . . . . . . . . . . . . . . . . . . . . . . . . . . |
5–9 |
6–1 |
Paper Jam Areas . . . . . . . . . . . . . . . . . . . . . . . . . . . . . . . . . . |
6–14 |
7–1 |
Rocking the EP-S Cartridge . . . . . . . . . . . . . . . . . . . . . . . . . . |
7–22 |
C–1 |
RS232C Pin Assignments . . . . . . . . . . . . . . . . . . . . . . . . . . . . |
C–5 |
C–2 |
Serial Connections to Modem . . . . . . . . . . . . . . . . . . . . . . . . . |
C–6 |
C–3 |
Serial Connections Without Modem . . . . . . . . . . . . . . . . . . . . |
C–7 |
C–4 |
Parallel Pin Assignment . . . . . . . . . . . . . . . . . . . . . . . . . . . . |
C–10 |
C–5 |
Parallel Connections . . . . . . . . . . . . . . . . . . . . . . . . . . . . . . . |
C–10 |
Tables
1–1 Printer Components: Front/Right-Side View . . . . . . . . . . . . . 1–2 1–2 Printer Components: Rear/Left-Side View . . . . . . . . . . . . . . . 1–4 1–3 Printer Components: Rear Output Tray . . . . . . . . . . . . . . . . . 1–6 1–4 Printer Components: Internal View . . . . . . . . . . . . . . . . . . . . 1–8 2–1 Legal-Size Coding Example . . . . . . . . . . . . . . . . . . . . . . . . . . 2–20 2–2 Test Print A . . . . . . . . . . . . . . . . . . . . . . . . . . . . . . . . . . . . . . 2–42 2–3 Printing Test Print A . . . . . . . . . . . . . . . . . . . . . . . . . . . . . . . 2–43 2–4 Printing Test Print B . . . . . . . . . . . . . . . . . . . . . . . . . . . . . . . 2–46 2–5 Printing the Font List . . . . . . . . . . . . . . . . . . . . . . . . . . . . . . 2–48 2–6 Entering Control Representation Mode . . . . . . . . . . . . . . . . . 2–49 2–7 Resetting the Printer . . . . . . . . . . . . . . . . . . . . . . . . . . . . . . . 2–50 2–8 Selecting Emulation Mode . . . . . . . . . . . . . . . . . . . . . . . . . . . 2–51 3–1 Control Panel Functions . . . . . . . . . . . . . . . . . . . . . . . . . . . . 3–2 3–2 Entering Keypad Mode . . . . . . . . . . . . . . . . . . . . . . . . . . . . . 3–4 3–3 Keypad Functions: Keypad Mode . . . . . . . . . . . . . . . . . . . . . . 3–5 4–1 Entering Menu Mode . . . . . . . . . . . . . . . . . . . . . . . . . . . . . . . 4–2 4–2 Keypad Functions: Menu Mode . . . . . . . . . . . . . . . . . . . . . . . 4–3 4–3 Recalling Factory Default Values from ROM . . . . . . . . . . . . . 4–7 4–4 Saving Values in NVRAM . . . . . . . . . . . . . . . . . . . . . . . . . . . 4–8 4–5 Saving Values in RAM . . . . . . . . . . . . . . . . . . . . . . . . . . . . . . 4–9 4–6 Changing and Saving Values . . . . . . . . . . . . . . . . . . . . . . . . . 4–11 4–7 Menu Mode Features and Values . . . . . . . . . . . . . . . . . . . . . . 4–15
viii
4–8 |
FEEDER Menu Features and Values . . . . . . . . . . . . . . . . . . . |
4–19 |
4–9 |
LAYOUT Menu Features and Values . . . . . . . . . . . . . . . . . . . |
4–20 |
4–10 |
COPY Menu Features and Values . . . . . . . . . . . . . . . . . . . . . |
4–23 |
4–11 |
COMMAND Menu Features and Values . . . . . . . . . . . . . . . . |
4–23 |
4–12 |
INITIAL Menu Features and Values . . . . . . . . . . . . . . . . . . . |
4–24 |
4–13 |
User Preference Character Set . . . . . . . . . . . . . . . . . . . . . . . . |
4–25 |
4–14 |
Initialization Message . . . . . . . . . . . . . . . . . . . . . . . . . . . . . . |
4–26 |
4–15 |
Device Identification . . . . . . . . . . . . . . . . . . . . . . . . . . . . . . . |
4–26 |
4–16 |
Macro Feature Examples . . . . . . . . . . . . . . . . . . . . . . . . . . . . |
4–27 |
4–17 |
INTERFACE Menu Features and Values . . . . . . . . . . . . . . . . |
4–28 |
4–18 |
DUPLEX Menu Features and Values . . . . . . . . . . . . . . . . . . . |
4–32 |
5–1 |
Cassette Feed Paper Sizes . . . . . . . . . . . . . . . . . . . . . . . . . . . |
5–2 |
5–2 |
Paper Specifications . . . . . . . . . . . . . . . . . . . . . . . . . . . . . . . . |
5–3 |
5–3 |
Transparency Sizes . . . . . . . . . . . . . . . . . . . . . . . . . . . . . . . . |
5–8 |
5–4 |
Transparency Specifications . . . . . . . . . . . . . . . . . . . . . . . . . . |
5–8 |
6–1 |
Error Skip Procedure . . . . . . . . . . . . . . . . . . . . . . . . . . . . . . . |
6–2 |
6–2 |
Printer Status Messages . . . . . . . . . . . . . . . . . . . . . . . . . . . . |
6–2 |
6–3 |
Operator Call Messages . . . . . . . . . . . . . . . . . . . . . . . . . . . . . |
6–3 |
6–4 |
Software Error Messages . . . . . . . . . . . . . . . . . . . . . . . . . . . . |
6–6 |
6–5 |
Common Operating Problems . . . . . . . . . . . . . . . . . . . . . . . . |
6–9 |
8–1 |
Questions to Consider Before You Call . . . . . . . . . . . . . . . . . . |
8–2 |
A–1 |
DECVPFS Numeric Parameters . . . . . . . . . . . . . . . . . . . . . . |
A–9 |
A–2 |
Character Set Identification . . . . . . . . . . . . . . . . . . . . . . . . . . |
A–17 |
B–1 |
DEClaser 2200 plus Printer Accessories and Supplies . . . . . . |
B–1 |
B–2 |
Ordering Within the U.S.A. . . . . . . . . . . . . . . . . . . . . . . . . . . |
B–4 |
B–3 |
Ordering Outside the U.S.A. . . . . . . . . . . . . . . . . . . . . . . . . . |
B–4 |
C–1 |
Serial Interface Pin Assignment . . . . . . . . . . . . . . . . . . . . . . |
C–4 |
C–2 |
Parallel Interface Pin Assignments . . . . . . . . . . . . . . . . . . . . |
C–9 |
ix
Preface
The DEClaser 2200 plus printer uses electrophotographic laser technology to print text and graphics at speeds up to 8 pages/minute with a density of 300 x 300 dots/inch. The printer consists of an engine (print mechanism) and a controller (formatter) that are driven from host-based software to provide shared printer access from the Digital network. The printer can serve as a personal desktop printer or as a shared group printer, and is designed to print from 5,000 to 12,000 prints per month.
Some of the features of the DEClaser 2200 plus printer include:
•Duplex (two-sided) printing capability
•Two cassette trays with automatic switching capability
•Capacity for two (optional) external Digital ANSI-compliant font cartridges, emulation cartridges, or PostScript cartridges.
•Font downline loading capability
•Support for both serial and parallel interfaces
•Convenient user maintenance (one replaceable supply cartridge)
•Ability to print on envelopes
•Manual feeding capability
The following are some of the options available for the DEClaser 2200 plus printer:
•User-installable memory expansion (up to 3 MB)
•User-installable emulation cartridges
•Digital ANSI-compliant font cartridges
•User-installable PostScript upgrade capability
•User-installable envelope feeder
•Envelope cassette
xi
Software Requirements
Some features of the DEClaser 2200 plus printer may or may not be available depending on the operating software used by the host computer system and the application software that you are using. For information about the printer features you can use with your application program, consult your application program documentation.
For help choosing the right software package for your application needs, contact your Digital sales representative.
Document Structure
This guide focuses mainly on the operational aspects of the DEClaser 2200 plus and explains how to use and maintain the printer hardware. For printer installation instructions, refer to the DEClaser 2200 plus Printer Installation Guide in this binder.
This guide describes the printer components and their functions, such as loading paper, changing the supply cartridge, and using the operator panel. It also covers the proper maintenance procedures to keep your printer operating efficiently, and basic troubleshooting techniques for correcting common operating problems. The appendices describe accessories and supplies, operating specifications, programming information, and contain a glossary of terms.
This guide is organized as follows:
•Chapter 1, Printer Components, describes the components and features of the DEClaser 2200 plus printer.
•Chapter 2, Operating Information, covers operating procedures such as powering the printer on, loading paper, and adjusting print density. It also describes how to manually feed print media.
•Chapter 3, The Control Panel, covers the use of the printer's control panel. It describes operational information about the indicators, keys, and message display.
•Chapter 4, Printer Configuration, explains how to configure the printer so that it can communicate with your computer system. You configure the printer by selecting features and their associated values from the various set-up menus. This chapter also describes how to save values in memory.
•Chapter 5, Print Media, describes the various printing media that can be used with the DEClaser 2200 plus, including paper, envelopes,
xii
transparencies, and labels. It also addresses the proper way to store and handle paper.
•Chapter 6, Troubleshooting, contains basic testing and troubleshooting techniques that allow you to correct common operating problems such as poor printing or paper jams.
•Chapter 7, Maintenance, explains how to care for and maintain the printer. It describes how to replace the electrophotographic supply (EP- S) cartridge and ozone filter, and how to clean the printer.
•Chapter 8, Service, explains how to obtain service if the printer needs repair.
•Appendix A, DEClaser Printer Quick Reference Guide, lists the DEClaser escape sequences used to program the printer. It is intended as a reference for the experienced programmer.
•Appendix B, Accessories and Supplies, describes the accessories and supplies available for the DEClaser 2200 plus printer and explains how to order them.
•Appendix C, Specifications, lists the power, environmental, and physical specifications of the DEClaser 2200 plus printer.
•Appendix D, LN03 Compatibility, highlights the major differences between the LN03 and DEClaser 2200 plus printers.
•The Glossary contains definitions of printer-related terms.
Ordering Additional Copies of This Documentation Set
You can order additional copies of this documentation set from DECdirect as described in the ordering information section at the end of this guide. The ordering number for the documentation is EK–DECLB–DK.
The documentation set consists of one of each of the following:
•DEClaser 2200 plus Printer Installation Guide
•DEClaser 2200 plus Printer Operator's Guide
•Spine insert for the binder
•Three-ring binder
NOTE: You cannot order the installation or operator's guide individually. You can only order the documentation set.
xiii
Associated Documents
Several other related manuals are available for use with the DEClaser 2200 plus printer. You can order these optional manuals from DECdirect as described in the ordering information section at the end of this guide.
Those optional manuals are:
•Digital ANSI-Compliant Printing Protocol Level 3 Programming Reference Manual (EK–PPLV3–PM–001)
This manual is for application programmers who create software that produces Digital ANSI-compliant level 3 output. It describes printer protocol character processing and printer control functions.
•Digital ANSI-Compliant Printing Protocol Level 3 Programming Supplement (EK–PPLV3–PS–001)
Contains device specific information for programmers who create applications for Digital's ANSI-compliant level 3 devices. It is also for programmers who write applications with ANSI output that requires conversion to the PostScript page description language for printing on Digital printers.
•PostScript Translators Reference Manual for ReGIS and Tektronix 4010/4014 (AA–PBWFA–TE)
This manual is for programmers who need to convert ReGIS or Tektronix 4010/4014 documents to PostScript for printing on PostScript printers. The DEClaser 2200 plus has a PostScript option and can print Tektronix 4010/4014 and ReGIS files using the Common Print Symbiont (CPS).
•Digital Laser Printers Guide to Paper and Other Media
(EK–LASER–GD)
This manual is for general users and contains detailed information about buying and storing print media (paper, envelopes, labels, and transparencies) that can be used with Digital laser printers.
xiv

Conventions Used in This Guide
The following terms and conventions are used in this guide:
Convention |
Meaning |
||||
|
|
|
|
|
|
NOTE |
Notes provide important additional information. |
||||
CAUTION |
Cautions provide information required to prevent damage |
||||
|
|
to equipment. |
|||
WARNING |
Warnings provide information to prevent personal injury. |
||||
Dash (—) |
A statement preceded by a dash describes the result of a |
||||
|
|
procedural step. For example: |
|||
|
|
1. |
Insert the paper cassette by sliding it straight into |
||
|
|
|
the cassette slot. |
||
|
|
— |
The Alarm indicator shuts off. |
||
|
|
— |
The display reads 00 READY. |
||
Check Mark ( ) |
A statement marked by a check mark indicates a special |
||||
|
|
instruction related to a procedural step. For example: |
|||
|
|
1. |
Add paper to the cassette by placing it into the left |
||
|
|
|
side first, being sure the paper is inserted below the |
||
|
|
|
paper guide and maximum height guard. |
||
|
|
|
To prevent paper jams, do not load too much paper |
||
|
|
|
into the cassette. Leave a small amount of space |
||
|
|
|
between the paper and the maximum height guard. |
||
|
|
|
Make sure the paper lies perfectly flat in the cassette. |
||
|
|
A key name is shown enclosed in a box to indicate that |
|||
Key |
|
||||
|
|
you press that key on the control panel. Key names are |
|||
|
|
always shown in initial capital letters. For example: |
|||
|
|
1. |
Press |
|
to access the printer menu selections. |
|
|
Menu |
|||
UPPERCASE |
Printer status messages and operator call messages are |
||||
|
|
shown in uppercase. For example: |
|||
|
|
— |
The display reads 00 READY. |
||
|
|
— |
The display reads 11 PAPER OUT. |
||
xv

Convention |
Meaning |
||
|
|
|
|
Bold |
Items from the scrolling menus appear as they do on the |
||
|
display (uppercase, lowercase, or initial capital letters) |
||
|
with the menu item shown in bold type. For example: |
||
|
1. Press |
|
to enter Menu Mode. |
|
Menu |
||
|
— The menu display reads FONT/FEED LAYOUT. |
||
Safety Information
The DEClaser 2200 plus printer complies with all United States government safety regulations applicable to ozone gas emissions and laser beam light exposure. Read the following information to become familiar with ozone and laser safety.
Ozone Safety
Ozone is a colorless gas (O3) that is a by-product of the electrophotographic process. The DEClaser printers use an ozone filter to remove the ozone generated by the printer. The ozone filter is replaced at 100,000 page intervals. See Appendix B for ordering information.
WARNING: Be sure to replace the ozone filter every 100,000 pages, and never operate the printer without the ozone filter in place. The filter removes ozone that could be hazardous to your health.
xvi
Laser Safety
The DEClaser 2200 plus printer complies with 21 CFR Chapter 1, Subchapter J, as a Class 1 laser product under the U.S. Department of Health and Human Services (DHHS) Radiation Performance Standard according to the Radiation Control for Health and Safety Act of 1968. The printer does not emit hazardous light since the laser beam is totally enclosed during all modes of customer operation and maintenance.
WARNING: Use of controls or adjustment procedures other than those specified in this manual may result in hazardous laser light exposure.
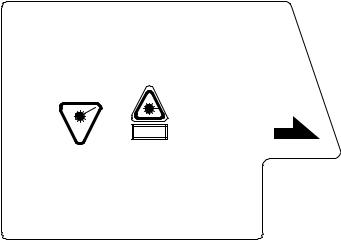
CDRH Regulations
The Center for Devices and Radiological Health (CDRH) of the U.S. Food and Drug Administration implemented regulations for laser products on August 2, 1976. These regulations apply to laser products manufactured beginning August 1, 1976. Compliance is mandatory for products marketed in the United States. The label shown in Figure 1 indicates compliance with the CDRH regulations and must be attached to laser products marketed in the United States.
Figure 1: CDRH Label
DANGER - INVISIBLE LASER RADIATION WHEN OPEN.
AVOID DIRECT EXPOSURE TO BEAM.
ATTENTION - RAYONNEMENT LASER INVISIBLE SI OUVERT.
DANGEREUX DE REGARDER A L’INTERIEUR.
..
VORSICHT - UNSICHTBARE LASERSTRAHLEN WENN GEOFFNET. NICHT HINEINSEHEN.
750-850nm 5mW
Laserstrahl
CAUTION - INVISIBLE LASER RADIATION WHEN OPEN.
AVOID EXPOSURE TO BEAM.
ATTENTION - RAYONNEMENT LASER EN CAS
D’OUVERTURE EXPOSITION DANGEREUSE
AU FAISCEAU.
VARO! - |
|
.. |
.. .. .. |
AVATTAESSA OLET ALTTINA NAKYMATTOMALLE |
|||
|
.. |
.. .. |
.. |
LASERSATEILYLLE ALA KATSO SATEESEEN.
MLO-004945
NOTE: This label is attached to the laser scanner unit inside the printer.
xvii

Chapter 1
Printer Components
This chapter describes the components of the DEClaser 2200 plus printer and their functions. This chapter also provides information about the operating space required to perform day-to-day printing operations.
1.1 Functions of the Printer Components
Figures 1–1 through 1–4 show the printer components. Tables 1–1 through 1–4 explain the printer components and their functions.
Figure 1–1: Components: Front/Right-Side View
MLO-005110 (Figure 1-1; 14.5 picas)
Printer Components 1–1

Table 1–1: Printer Components: Front/Right-Side View
Component |
Function |
|
|
|
|
|
|
||
1. |
Top Output Tray |
Printed sheets are automatically collated and stacked |
||
|
|
(facedown) here. |
|
|
2. |
Top Cover Release Button |
Pressing this button unlocks the top cover so it can |
||
|
|
be opened. The top cover is opened to perform certain |
||
|
|
printer funtions such as adding a new EP-S1 cartridge |
||
|
|
or clearing a paper jam. See Section 2.3 for more |
||
|
|
information about opening the top cover. |
||
3. |
Carrying Grip Plate |
The carrying grip plates are located on the right and |
||
|
|
left sides of the printer. These plates are grooved |
||
|
|
to provide a nonslip surface when you are lifting the |
||
|
|
printer. Always place your hands under the carrying |
||
|
|
grip plates when lifting the printer. |
|
|
4. |
Test Print Button |
This button is used to print the Engine Test Print. |
||
|
|
The button is recessed. To depress it use a ballpoint |
||
|
|
pen or similar instrument. See Section 2.12 for more |
||
|
|
information about printing the Engine Test Print. |
||
5. |
Control Panel |
The control panel consists of a message display, |
||
|
|
indicator lights, |
and a keypad. |
The control |
|
|
panel provides information on printer status and |
||
|
|
can be used to perform certain printer functions |
||
|
|
such as resetting the printer or configuring the |
||
|
|
printer menus. |
See Chapter 3 for additional |
|
|
|
information about using the control panel while |
||
|
|
printing. Chapter 5 has information about using the |
||
|
|
control panel to change the various printer menus. |
||
6. |
Font Cartridge Slots |
These two slots accept the optional font, PostScript, |
||
|
|
and emulation program cartridges available for the |
||
|
|
printer. |
|
|
7. |
Upper and Lower Paper Cassettes |
The paper cassettes automatically feed paper to the |
||
|
|
printer. Each cassette can hold approximately 200 |
||
|
|
sheets of 20 lb. (75 g/m2 basis weight) paper. See |
||
|
|
Section 2.8 for more information about loading paper |
||
|
|
in the cassettes. |
|
|
8. |
Manual Feed Guide |
The manual feed guide is part of the paper cassette |
||
|
|
cover. The feed guide allows you to manually feed |
||
|
|
paper, envelopes, transparencies, and labels into the |
||
printer. For more information about feeding print media manually, see Section 2.9.
1EP-S stands for electrophotographic supply.
1–2 Operator's Guide
Figure 1–2: Components: Rear/Left-Side View
MLO-005111 (Figure 1-2; 12.5 picas)
Printer Components 1–3
Table 1–2: Printer Components: Rear/Left-Side View
Component |
Function |
|
|
|
|
1. Power Switch |
Powers the printer on or off. Pressing |
`` | '' turns |
|
power on; pressing ``O'' turns power off. To ensure |
|
|
that data is not lost, always be sure the display reads |
|
|
00 READY and the Data indicator is off before you |
|
|
power off the printer. See Section 2.1 and Section 2.2 |
|
|
for additional information about powering the printer |
|
|
on and off. |
|
2. Rear Output Tray |
The rear output tray is selected when you are using |
|
|
certain types of print media, such as transparencies, |
|
|
labels, and envelopes. It can also be used when you |
|
|
want printed output to be stacked faceup. Refer |
|
|
to Section 2.6.2 for information about choosing the |
|
|
different output trays. |
|
3. Memory Board Access Cover |
Additional RAM (random-access memory) can be |
|
|
added to the printer in 1, 2, or 3 MB capacities. |
|
|
This access cover allows you to easily install the |
|
|
extra memory board. Refer to the documentation that |
|
|
comes with the optional memory board for installation |
|
|
instructions. |
|
4. Paper Jam Access Cover |
Opening this access cover allows you to remove paper |
|
|
jammed in the lower paper path. See Section 6.7 for |
|
|
more information about clearing paper jams. |
|
5. Parallel (Centronics) |
This connector is used if the interface cable from |
|
Interface Cable Connector |
the host computer is a parallel cable. |
See the |
|
DEClaser 2200 plus Printer Installation Guide for |
|
|
more information about connecting the printer to your |
|
|
computer. |
|
6. Serial (RS232C) |
This connector is used if the interface cable from |
|
Interface Cable Connector |
the host computer is a serial cable. |
See the |
|
DEClaser 2200 plus Printer Installation Guide for |
|
|
more information about connecting your computer to |
|
|
the printer. |
|
7. Power Cord Receptacle |
This is where the power cord is connected to the |
|
|
printer. |
|
|
|
|
1–4 Operator's Guide
Figure 1–3: Components: Rear Output Tray
MLO-005112 (Figure 1-3; 15.5 picas)
Printer Components 1–5

Table 1–3: Printer Components: Rear Output Tray
Component |
Function |
|
|
8. Extension Tray |
Must be extended when printing documents faceup. |
|
See Section 2.6.2 for information about using the |
|
extension tray. |
9. Paper Jam Clearance Lever |
Lifting this lever allows you to access paper jams in |
|
the rear output tray area. See Section 6.7 for more |
|
information about clearing paper jams. |
10. Printout Selector |
Allows you to select either envelope/faceup mode or |
|
duplex/facedown mode. Envelope/faceup mode sends |
|
simplex output and envelopes to the rear output tray. |
|
The duplex/facedown mode can be used in simplex or |
|
duplex mode. This mode delivers paper facedown to |
|
the top output tray. |
|
NOTE: The printer ``beeps'' if you try to select duplex |
|
mode and the printout selector is not set to the duplex |
|
position. The printout selector must be set to the |
|
duplex position to print in duplex mode. |
11. Paper Support Guide |
This guide is raised during printing in duplex mode |
|
(Section 2.7). The guide supports the paper as it |
|
moves over the rear output tray during the reversing |
|
cycle. |
|
|
1–6 Operator's Guide
Figure 1–4: Components: Inside the Printer
MLO-005113 (Figure 1-4; 30.5 picas)
Printer Components 1–7

Table 1–4: Printer Components: Internal View
Component |
Function |
|
|
1. Print Density Dial |
Has a range of 1–9 to adjust the print density. |
|
Selecting the lower numbers results in heavier or |
|
darker print density. For most printing applications |
|
the dial can be set to 7. See Section 2.11 for additional |
|
information about setting the print density. |
2. Cleaning Brush |
The (green) cleaning brush has two cleaning surfaces: |
|
The brush end, which is used to clean the discharging |
|
pins on the transfer corona assembly; and the fabric |
|
end, which is used to clean the primary corona wire |
|
in the EP-S cartridge. See Chapter 7 for more |
|
information about using the cleaning brush. |
3. Fixing Assembly |
The fixing assembly consists of a heat roller, a |
|
pressure roller, and a roller cleaner. Toner is bonded |
|
to the paper as it passes between the heat and |
|
pressure rollers. The roller cleaner removes excess |
|
toner that may accumulate on the heat roller. The |
|
roller cleaner is replaced each time a new EP-S |
|
cartridge is installed. Each EP-S cartridge comes |
|
with replacement instructions, or you can refer to |
|
Section 7.3 for more information about replacing the |
|
roller cleaner. |
4. EP-S Cartridge |
The EP-S cartridge contains a photo-sensitive drum, |
|
the primary charge corona wire, a drum cleaning |
|
blade, toner, and a toner application roller. When |
|
the 16 TONER LOW message is displayed, it could |
|
mean that the toner is not being distributed evenly. |
|
Rock the cartridge to redistribute the toner (see |
|
Section 7.3). If the 16 TONER LOW message |
|
continues to be displayed after you rock the cartridge, |
|
it means the EP-S cartridge has run out of toner and |
|
you should replace it (see Section 7.3). |
5. Ozone Filter |
Removes ozone generated by the printer. The ozone |
|
filter is replaced every 100,000 pages. The page count |
|
is shown on Test Print A (see Section 2.13). See |
|
Section 7.4 for replacement instructions. |
|
WARNING: Do not operate the printer without the |
|
ozone filter in place. The filter removes ozone that |
|
could be hazardous to your health. |
1–8 Operator's Guide

Table 1–4 (Cont.): Printer Components: Internal View
Component |
Function |
|
|
6. Transfer Corona Assembly |
Contains a corona wire that places a negative charge |
|
on the paper as it passes over the wire. This negative |
|
charge attracts the (positively charged) toner from |
|
the photo-sensitive drum in the EP-S cartridge to |
|
the paper. Keep the transfer corona wire clean |
|
at all times to ensure optimum print quality. See |
|
Section 7.1.3 for information about cleaning the |
|
transfer corona wire. |
7. Paper Transfer Guide |
Ensures that paper is properly routed from the |
|
cassette to the transfer corona assembly. You can |
|
also open the paper transfer guide to access paper |
|
jams that occur in that area. Lift the green handle to |
|
remove the jammed paper. |
|
|
1.2 Required Operating Space
Always allow ample space around the printer to perform day-to-day printing operations. Figure 1–5 and Figure 1–6 show the minimum amount of space required to perform these operations. See the DEClaser 2200 plus Printer Installation Guide for additional information about location requirements and environmental conditions.
Printer Components 1–9
Figure 1–5: Operating Space: Top View
MLO-005115 (Figure 1-5; 15 picas)
Figure 1–6: Operating Space: Side View
MLO-005114 (Figure 1-6; 12 picas)
1–10 Operator's Guide

Chapter 2
Operating Information
This chapter provides the operating information necessary to perform day- to-day printer operations. It covers typical tasks such as adding paper, selecting an output tray, or powering the printer on and off. This chapter also covers manual feed operation for all print media.
2.1 Powering the Printer On
Power the printer on using the following procedure.
1. Press the power switch on the back of the printer to the | (ON) position.
MLO-005116 (Figure 2-1; 16 picas)
You should observe the following when you power on the printer:
—All control panel indicators light for a moment.
—The Ready indicator flashes and the display reads
02 WARMING UP (assuming that the printer has cooled below operating temperature before it is powered on).
Operating Information 2–1
— The Online and Ready indicators remain on and the display reads 00 READY DEC.
NOTE: The display reads 00 READY DEC only if you are using Digital's ANSI-Compliant Printing Protocol, which is the factory default setting. If you are using an optional protocol such as PostScript or CaPSL, the display shows the protocol being used. For instance, if you are using PostScript protocol, the display reads PS READY/IDLE. Since several protocols can be used with the DEClaser 2200 plus printer, the remainder of this manual shows the message as 00 READY.
If the printer does not power on correctly, refer to Chapter 6 for troubleshooting information.
2–2 Operator's Guide
2.2 Powering the Printer Off
Power the printer off using the following procedure.
1.Be sure the printer is not printing and that the Data indicator is not on.
CAUTION: Do not power the printer off while it is printing. Powering the printer off during printing causes paper jams and loss of data. Powering the printer off while the Data indicator is on causes the data in the print buffer to be lost.
2.Press the power switch on the back of the printer to the O (OFF) position.
MLO-005117 (Figure 2-2; 15 picas)
NOTE: After powering the printer off, always wait at least two seconds before you power the printer back on. This waiting period ensures that the printer will initialize (cycle) properly when it is powered back on.
Operating Information 2–3
 Loading...