


FOR YOUR SAFETY
1HITACHI
Video Deck |
VHS |
VT-F391A Owner's Manual
Your Complete Guide
to Videocassette Viewing and Recording
Using these quality features:
VHS hi-fidelity sound in playback
Automatic tape head cleaning
Up to 8 delayed recording programs
Auto tracking for improved picture in playback
Frequency synthesizer quartz tuner
Remote control for use with your VCR and TV, and cable converter
On-screen programming guide
Multi-channel TV sound (MTS)
HITACHI HOME |
HITACHI SALES |
HITACHI (HSC) |
|
ELECTRONICS |
CORPORATION |
CANADA INC. |
|
(AMERICA), INC. |
OF HAWAII, INC. |
3300 Trans Canada Hwy. |
|
3890 Steve Reynolds Blvd., |
3219 Koapaka Street |
Pointe |
|
Claire, Quebec |
|
|
|
Norcross, GA 30093 |
Honolulu, HI 96819 |
|
H9R1B1, CANADA |
Tel. 404-279-5600 |
Tel. 808-836-3621 |
Tel. 514-697-9150 |
|
1

FOR YOUR SAFETY
TABLE OF CONTENTS |
|
FOR YOUR SAFETY................................................................................................................................. |
4 |
Read This First ........................................................................................................................................ |
6 |
IMPORTANT SAFEGUARDS .................................................................................................................. |
7 |
Getting Started........................................................................................................................................... |
12 |
Simple Hookups.............................................................................................................................. |
12 |
1 Decide Where to Put Your VCR .................................................................................................. |
12 |
2 Decide Which Hookup Method to Use......................................................................................... |
12 |
3 Hook up the Audio/Video Signal................................................................................................... |
13 |
4 Hook up the RF Signal ................................................................................................................... |
13 |
5 Attach the TV and VCR to the Power Supply............................................................................. |
16 |
6 Install Batteries in the Remote Control........................................................................................ |
16 |
7 Set the RF or Video Channel Switch ........................................................................................... |
17 |
Getting Started (Controls)......................................................................................................................... |
18 |
Remote Control Buttons .................................................................................................................... |
18 |
When the Remote Doesn't Work Right ........................................................................................... |
19 |
VCR Controls ...................................................................................................................................... |
20 |
Display Indicators ............................................................................................................................... |
20 |
Meet Your On-Screen Guide ............................................................................................................ |
21 |
Getting Started (Initial Setup) ................................................................................................................... |
22 |
Setup for First-Time Operation..................................................................................................... |
22 |
Initial Setup Options........................................................................................................................... |
22 |
Setting the Clock................................................................................................................................. |
23 |
More About Channel Selections....................................................................................................... |
24 |
Choosing a Mode for Audio Playback............................................................................................. |
25 |
Stereo vs. Mono Sound..................................................................................................................... |
25 |
Hi-Fi Sound.......................................................................................................................................... |
25 |
Getting Started (Videotapes)..................................................................................................................... |
26 |
About Videocassette Tapes.......................................................................................................... |
26 |
Types.................................................................................................................................................... |
26 |
Safety Tabs Prevent Erasure ........................................................................................................... |
26 |
Loading and Ejecting ......................................................................................................................... |
27 |
Tape Storage....................................................................................................................................... |
27 |
Basic Operations ....................................................................................................................................... |
28 |
Viewing a Videocassette ............................................................................................................... |
28 |
To play Back a Recorded Tape........................................................................................................ |
28 |
To Fine Tune the Picture................................................................................................................... |
28 |
Rewinding the Tape ........................................................................................................................... |
29 |
Special Playback Effects................................................................................................................... |
29 |
To Find Specific Sections on a Tape............................................................................................... |
30 |
Basic Operations (Recording) ................................................................................................................... |
33 |
Recording a Program..................................................................................................................... |
33 |
Before you Record ............................................................................................................................. |
33 |
Basic Recording Steps ...................................................................................................................... |
33 |
Recording Tips.................................................................................................................................... |
33 |
Using the Instant Recording Timer (IRT)........................................................................................ |
35 |
2

FOR YOUR SAFETY
Setting the VCR to Record Later ..................................................................................................... |
35 |
Reviewing What You Have Programmed....................................................................................... |
37 |
Programming Priorities ...................................................................................................................... |
37 |
Advanced Operations ................................................................................................................................ |
38 |
Controlling Your TV with the VCR's Remote ............................................................................. |
38 |
Programming the Remote Control................................................................................................... |
38 |
Controlling the TV............................................................................................................................... |
39 |
Advanced Operations (Cable Box Hookups)............................................................................................ |
40 |
Hooking Up to a Cable Box .......................................................................................................... |
40 |
A Step-by-Step Approach ................................................................................................................. |
40 |
Remote Control of the Cable Converter ......................................................................................... |
42 |
Advanced Operations (Stereo System) ..................................................................................................... |
44 |
Integrating Your Stereo System................................................................................................... |
44 |
Hookup................................................................................................................................................. |
44 |
Recording from Your Stereo System............................................................................................... |
44 |
Advanced Operations (Second VCR) ....................................................................................................... |
46 |
Integrating a Second VCR ............................................................................................................ |
46 |
Hookup................................................................................................................................................. |
46 |
Copying from One VCR to Another (Dubbing)............................................................................... |
46 |
Copying Tapes From a Camcorder ................................................................................................. |
47 |
VCR Care and Servicing........................................................................................................................... |
48 |
Routine Cleaning............................................................................................................................ |
48 |
Head Cleaning .................................................................................................................................... |
48 |
Periodic Maintenance ........................................................................................................................ |
48 |
If the VCR Doesn't Work Right..................................................................................................... |
48 |
Don't Attempt Repairs Yourself........................................................................................................ |
49 |
Technical Specifications................................................................................................................ |
49 |
Care and Servicing (Problems) ................................................................................................................. |
50 |
Often Encountered Problems ........................................................................................................... |
50 |
Hitachi Service Hotline....................................................................................................................... |
51 |
HITACHI WARRANTY CARD (USA Back) ......................................................................................... |
53 |
HITACHI WARRANTY CARD (Front) CANADA ONLY.................................................................... |
55 |
HITACHI CANADA WARRANTY CARD (Back) ................................................................................ |
58 |
3
FOR YOUR SAFETY
FOR YOUR SAFETY
POWER SUPPLY: AC 120V, 60 Hz ONLY.
The POWER switch turns the VCR on and off, leaving the clock/timer unaffected. If the unit is to be
left unattended for a long period, it is recommended that the unit be completely switched off and
unplugged.
Illustrated below is the label on the back of your unit.
 This symbol warns the user that uninsulated voltage within the unit may have sufficient magnitude to cause electric shock. Therefore, it is dangerous to make any kind of contact with any inside part of this unit.
 This symbol alerts the user that important literature concerning the operation and maintenance of this unit has been included. Therefore, it should be read carefully in order to avoid any problems.
CAUTION: TO REDUCE THE RISK OF ELECTRIC
SHOCK, DO NOT REMOVE COVER (OR BACK).
NO USER-SERVICEABLE PARTS INSIDE.
REFER SERVICING TO QUALIFIED SERVICE PERSONNEL.
WARNING: Many television programs and films are copyrighted. In certain circumstances, copyright
law may apply to private in-home videotaping of copyrighted materials.
WARNING: TO PREVENT FIRE OR ELECTRIC SHOCK, DO NOT EXPOSE THIS APPLIANCE TO RAIN OR MOISTURE.
4

FOR YOUR SAFETY
CAUTION: TO PREVENT ELECTRIC SHOCK, MATCH WIDE BLADE OF PLUG TO WIDE
SLOT, FULLY INSERT.
Caution to user: Changes or modifications not expressly approved by the party responsible
for compliance could void the user's authority to operate the equipment.
"Note to CATV system installer: This reminder is provided to call the CATV system installer's
attention to Article 820-40 of the NEC that provides guidelines for proper grounding and, in particular, specifies that the cable ground shall be connected to the grounding system of the building,
as close to the point of cable entry as practical".
5

Read This First
Read This First
Thank you for buying a Hitachi product. You've chosen the best VCR for you, and we want to help you make the most of your purchase. Please take time to become familiar with this manual and how it is set up. Keep it handy for future reference, too.
To guide you, we've concluded:
"Must read" sections containing important cautions for your family's safety as well as the basic facts you need to use the VCR. These sections are highlighted like this in the table of contents:
Information on the advanced features of your Hitachi VCR. We hope you'll take time to learn about these functions since we've designed them for you. But you can use the VCR without reading these sections.
We want this manual to be a tool for you, so we provide two ways to find the information you need:
A quick index to the basic functions of the VCR which you will use often (this page).
A detailed table of contents directing you to specific information quickly (page 4).
Get to know your VCR by using this manual, and get to know Hitachi. We appreciate your business.
|
Quick Index |
To play a tape |
.....27 |
To record a program.....33 |
|
To reset the clock and channel selections.....22, 23 |
|
Instructions in French and Spanish.....19 |
|
Problem chart..... |
53 |
6

IMPORTANT SAFEGUARDS
IMPORTANT SAFEGUARDS
In addition to the careful attention devoted to quality standards in the manufacture of your video product, safety is a major factor in the design of every instrument. But, safety is your responsibility too.
This page lists important information that will help to assure your enjoyment and proper use of a Video Cassette Recorder and accessory equipment. Please read it carefully before operating your video product and keep it in a handy place for future reference.
INSTALLATION
7
IMPORTANT SAFEGUARDS
instructions.
6 Overloading -- Do not overload wall outlets and extension cords as this can result in a risk of fire or electric shock. Overloaded AC outlets and extension cords are dangerous, and so are frayed power cords, damaged or cracked wire insulation and broken plugs. They may result in shock or fire hazard. Periodically examine the cord and have it replaced by your service technician if appearance indicates damage or deteriorated insulation.
7Power Cord Protection -- Power supply cords should be routed so that they are not likely to be walked on or pinched by items placed upon or against them, paying particular attention to cords at plugs, convenience receptacles, and the point where they exit from the appliance.
8Ventilation -- Slots and openings in the cabinet are provided for ventilation to ensure reliable operation of the video product and to protect it from overheating. These openings must not be blocked or covered. The openings should never be blocked by placing the video product on a bed, sofa, rug or other similar surface. This video product should never be placed near or over a radiator or heat register. This video product should not be placed in a built-in installation such as a bookcase or rack unless proper ventilation is provided or the video product manufacturer's instructions have been followed.
9Attachments -- Do not use attachments unless recommended by the video product manufacturer as they may cause hazards.
Caution: Maintain electrical safety. Power-line operated equipment or accessories connected to this unit should bear the UL listing mark or CSA certification mark on the accessory itself and should not have been modified so as to defeat the safety features.
This will help avoid any potential hazard from electric shock or fire. If in doubt, contact qualified service personnel.
10 Water and Moisture -- Do not use this video product near water -- for example,
8

IMPORTANT SAFEGUARDS
near a bath tub, wash bowl, kitchen sink, or laundry tub, in a wet basement, or near a swimming pool, and the like.
11Accessories -- Do not place this video product on an unstable card, stand, tripod, bracket or table. The video product may fall, causing serious injury to a child or adult, and serious damage to the appliance. Use only with a cart, stand, tripod, bracket or table recommended by the manufacturer, or sold with the video product. Any mounting of the product should follow the manufacturer's instructions, and should use a mounting accessory recommended by the manufacturer.
11A An appliance and cart combination should be moved with care. Quick stops, excessive force, and uneven surfaces may cause the appliance and cart combination to overturn.
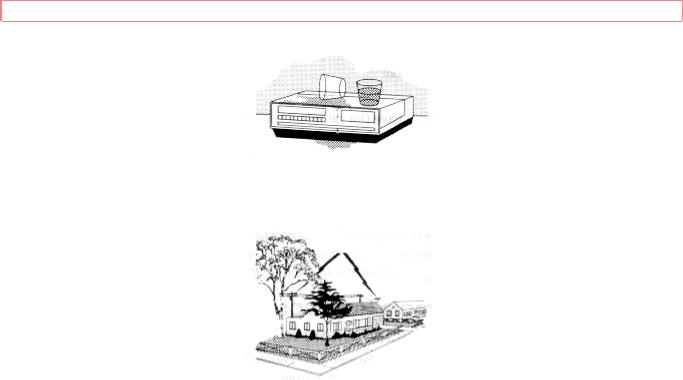
12Outdoor Antenna Grounding -- If an outside antenna or cable system is connected to the video product, be sure the antenna or cable system is grounded so as to provide some protection against voltage surges and built-up static charges. Section
810of the National Electrical Code, ANSI/NFPA No. 70, provides information with respect to proper grounding of the mast and supporting structure, grounding of the leadin wire to an antenna discharge unit, size of grounding conductors, location of antennadischarge unit, connection to grounding electrodes, and requirements for the grounding electrode. See example below:
EXAMPLE OF ANTENNA GROUNDING
13Power Lines -- An outside antenna system should not be located in the vicinity of overhead power lines or other electric light or power circuits, or where it can fall into such power lines or circuits. When installing an outside antenna system, extreme care should be taken to keep from touching or approaching such power lines or circuits as contact with them might be fatal. Installing an outdoor antenna can be hazardous and should be left to a professional antenna installer.
USE
14Cleaning -- Unplug this video product from the wall outlet before cleaning. Do not use liquid cleaners or aerosol cleaners. Use a damp cloth for cleaning.
15Object and Liquid Entry -- Never push objects of any kind into this video product through openings as they may touch dangerous voltage points or short-out parts that could result in a fire or electric shock. Never spill liquid of any kind on the video product.
9
IMPORTANT SAFEGUARDS
16 Lightning -- For added protection for this video product during a lightning storm, or when it its left unattended and unused for long periods of time, unplug it from the wall outlet and disconnect the antenna or cable-system. This will prevent damage to the video product due to lightning and power-line surges.
SERVICE
17Servicing -- Do not attempt to service this video product yourself as opening or removing covers may expose you to dangerous voltage or other hazards. Refer all servicing to qualified service personnel.
18Conditions Requiring Service -- Unplug this video product from the wall outlet and refer servicing to qualified service personnel under the following conditions.
a. When the power-supply cord or plug is damaged
b. If liquid has been spilled or objects have fallen into the video product. c. If the video product has been exposed to rain or water.
d. If the video product does not operate normally by following the operating instructions. Adjust only those controls that are covered by the operating instructions. Improper adjustment of other controls may result in damage and will often require extensive work
10
IMPORTANT SAFEGUARDS
by a qualified technician to restore the video product to its normal operation.
e.If the video product has been dropped or the cabinet has been damaged.
f.When the video product exhibits a distinct change in performance -- this indicates a need for service.
19 Replacement Parts -- When replacement parts are required, have the service technician verify that the replacements he uses have the same safety characteristics as the original parts. Use of replacements specified by the video product manufacturer can prevent fire, electric shock or other hazards
20 Safety Check -- Upon completion of any service or repairs to this video product, ask the service technician to perform safety checks recommended by the manufacturer to determine that the video product is in safe operating condition.
11

Getting Started
Getting Started
Relax. Using a VCR is very straightforward.
This sections explains how to hookup the VCR, quick tour of the controls, set up for first-time operation using on-screen menus, and videocassette tapes.
Enjoy getting to know all about your Hitachi VCR. Let's get started.
Simple Hookups
1 Decide Where to Put Your VCR
Be sure your chosen location allows for proper ventilation, stability, and protection from heat and moisture (see Important Safeguards).
Place the VCR near your TV but not on top of it. For convenience in using the remote control, locate them no more than three feet apart.
If you have an external cable or antenna, place the TV and VCR where you have ample cable to hook them up. If necessary, you can purchase a cable extension and connector.
If you plan to route your VCR audio through your stereo speakers for better sound reproduction, place the VCR near the stereo receiver, or have enough long audio cables to make the connections. (but keep in mind that the electronic signal weakens the further it has to travel.)
2 Decide Which Hookup Method to Use
To make your VCR function, you'll deal with two basic hookups:
1.The audio and video signal: If all you want to do is view a prerecorded videotape on the VCR, this three-line hookup is the only one you need.
2.The radio frequency (RF) signal from a cable or antenna: Make this hookup if you also want to record programs, or if you have no audio/video connectors on your TV.
We will show you the simplest hookups first and then present several variations to suit specific needs. Be aware that you may need to purchase additional connectors to make the desired hookup. These are available at video stores and electronic hardware stores.
Choose which hookup method to use based on:
Your TV's capabilities
The type of antenna or cable system you have (for cable box hookup, see Advanced
Operations)
Any other devices you want to include in the system (stereo, second VCR, etc.)
We will guide you through the process. But first, turn the TV and the VCR around so
12
Getting Started
you are looking at their backs. Note the various input and output receptacles, their shapes, and how they are labeled. Then read through the rest of this hookup section before proceeding to an actual hookup.
DO NOT TURN ON THE POWER YET. FOR YOUR SAFETY, LEAVE YOUR TV AND VCR UNPLUGGED WHILE HOOKING THEM UP.
3 Hook up the Audio/Video Signal
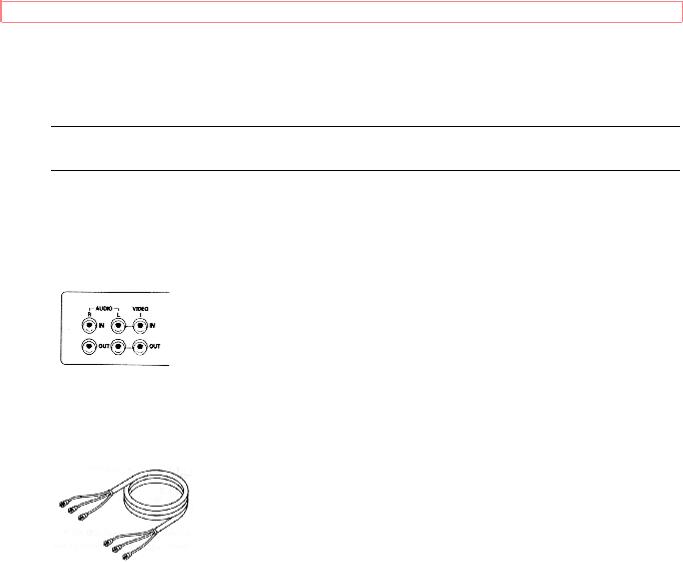
If your TV is a fairly recent model, you probably have both audio and video jacks. Look on the back of your TV for three jacks--possibly color-coded yellow, white and red.
They will be labeled something like IN (L and R), AUDIO IN, or VIDEO IN. (If you are not sure, look at the back of your VCR-- you will see two sets of these jacks.)
If you have no jacks like these on your TV, skip this step and proceed to Step 4.
TV with Audio and Video Jacks
If you do find all three jacks on your TV, you need to purchase a three-line audio/video cable with bell (RCA) connectors, like this:
If you find a video jack and only one audio jack, your TV is probably monaural. You can purchase a two-line audio/video cable, but the three-line is handy in case you get a stereo TV later.
Connect the yellow VIDEO OUT jack on the VCR to the VIDEO IN jack on the TV. This direct video input will give you the best picture. It will also let you play videos in a "picture in picture" feature, if your TV has it.
Then connect the AUDIO OUT jacks (red and white) on the VCR to the AUDIO IN jacks on the TV (left to left, right to right).
This audio hookup will give you better sound than the RF signal hookup, because the electronic signal won't have to go through a conversion process.
Plus your VCR has a stereo decoder, which your TV might not. For big speaker sound, you can also use these jacks to connect the VCR to your stereo system (page 46). Capabilities: The audio and video signal connections are all you need to play back a prerecorded tape. If you do not intend to record on your VCR from your antenna/cable, then you're all hooked up now. Otherwise, continue with Step 4, which will let you record off TV channels.
4 Hook up the RF Signal
13
Getting Started
 Look at the back of your TV for a connector that looks like one of these, and follow the corresponding hookup option. If you have any sort of cable box, see the hookup options in Advanced Operations (page 42).
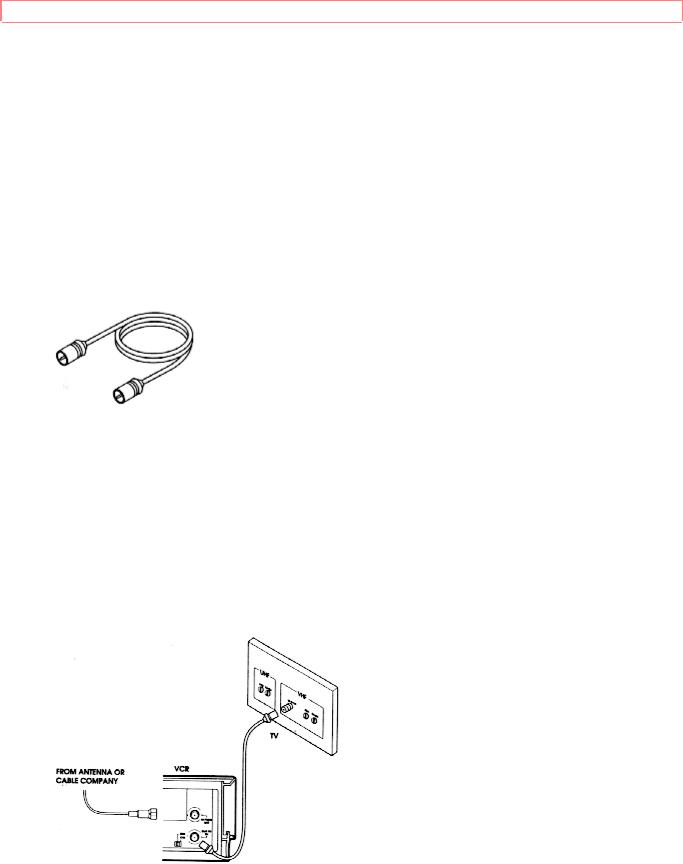
Simple Antenna/Cable 75 Ohm Hookup
This is an easy hookup that you can use if your cable or antenna has a 75 ohm round wire connector. You will need the 75 ohm cable supplied with your VCR. It looks like this:
If you have been watching the TV in your home before getting the VCR, you will already have a round wire attached to your TV. Otherwise, look for a cable connection coming in through the wall from outside. (If you find this connection, remember to call your local cable company to start the service.)
1.If still hooked up to your TV, unscrew the round wire from the 75 ohm connector on your television. Otherwise, take the wire that comes in from the wall.
2.Screw this round wire into the IN FROM ANT jack on the back of your VCR.
3.Using the 75 ohm cable supplied with your VCR, slide on either end to the OUT TO TV jack on the back of the VCR.
4.Connect the other end of the same cable onto the 75 ohm antenna input on your TV
(where you first disconnected the TV in step 1.)
Capabilities: With this hookup, you should now be able to perform all the basic functions
14
Getting Started
provided by this equipment.
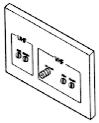
External or Internal 300 Ohm Antenna
If you have either an external or internal (rabbit ears) antenna rather than cable, you may have 300 ohm connectors like these.
In this case, you will need special adapters to make the 75 ohm round wire connection shown below. (You may already have one on your TV.)
1.Remove the antenna line from the back of your TV if it is already connected there, or take it from where it comes in on the wall.
2.Considering the three pictures below, determine which adapter you will need to hook it into your VCR.
If you have |
Use this adapter |
Single 300 ohm flat wire
Separate UHF and VHF antenna wires, both 300 ohm flat wire
300 ohm flat UHF and 75 ohm round VHF
15
Getting Started
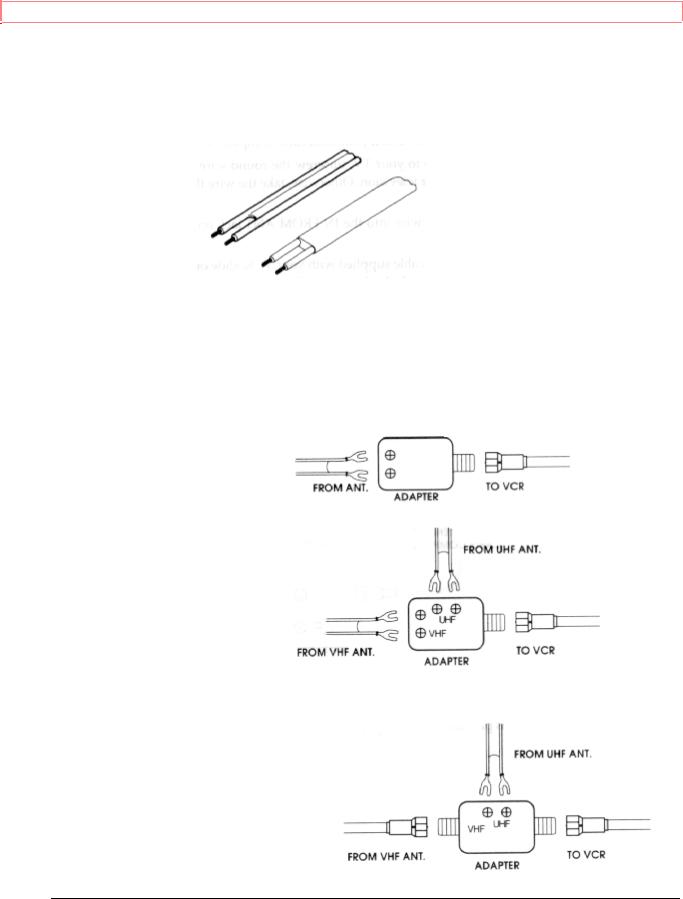
If you have "rabbit ears" (an antenna on top of your TV), you will need an additional adapter and 75 ohm extension to make your leads reach from the antenna to the VCR. This connection will work only if you have a strong, clear picture on the TV, indicating a strong signal. Connect the antenna to the adapter, and use the cable extension to go from the adapter to the VCR. Use the supplied 75 ohm cable to connect the VCR to the TV.
Now continue with the hookup:
1.Using whichever adapter you have fit your antenna with, attach that connector to the IN FROM ANT jack on the back of the VCR.
2.Using the 75 ohm cable supplied with your VCR, connect either end to the OUT TO
TV jack on the back of the VCR.
3.Use a second adapter to attach the other end of the 75 ohm connector back into the TV (where you first disconnected the antenna).
Capabilities: With this hookup, you should now be able to perform all basic functions provided by this equipment.
5 Attach the TV and VCR to the Power Supply
Plug in the TV and VCR power cords to the wall outlet or an appropriate extension cord or surge protector. See Important Safeguards for further precautions (page 6).
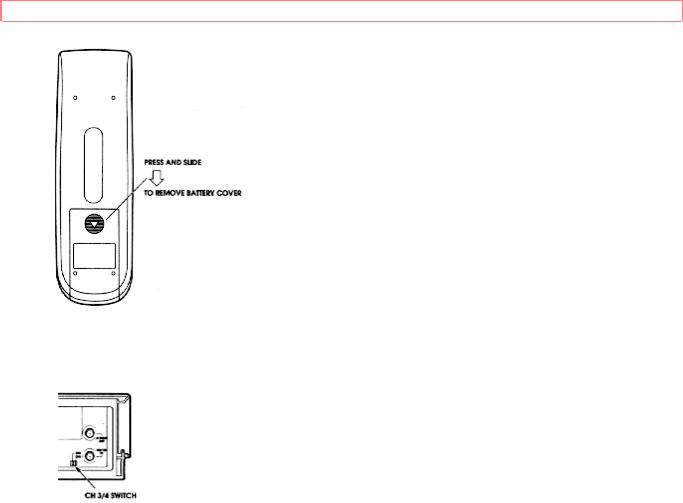
6 Install Batteries in the Remote Control
The remote control requires two fresh "AA" batteries. On the back of the remote, a plastic cover slides off in the direction shown by the arrow. Remove this cover and install the batteries, matching the plus end of each battery with the plus mark on the remote.
16
Getting Started
7 Set the RF or Video Channel Switch
When the VCR is on, its video signal can come into your TV on either channel 3 or channel 4. You need to select the appropriate channel.
Turn the power on to both the TV and the VCR, and look for a switch on the back of the VCR. Set the switch to 3 or 4, whichever is not a commercial channel in your area.
Your basic hookup is now complete. When you're ready to try hooking up a second VCR or a video camera for a complete home entertainment system, see Advanced Operations.
Now turn the TV and VCR back around facing you and begin your quick tour of the controls (page 15).
17

Getting Started (Controls)
Getting Started (Controls)
Quick Tour of the Controls
Study these pictures carefully to learn about the buttons and controls that you'll need for everyday operation. Various controls are explained throughout this manual as they are needed, but now is a good time to get familiar with their locations.
Most of the time, you'll be directing the VCR from the remote control, but there are some controls on the VCR that will come in handy too.
When you're familiar with these basic controls, proceed to Initial Setup (page 20). We'll show you how to program your local channels and set the clock to make your VCR fully functional.
How the Remote Control Works
Pressing a button on the remote control transmits an invisible beam of light (infrared) to a receiver at the right front of the VCR.
When using the remote, aim the front end toward the VCR and make sure nothing--such as a coffee table or your dog--is blocking the path of the infrared beam.
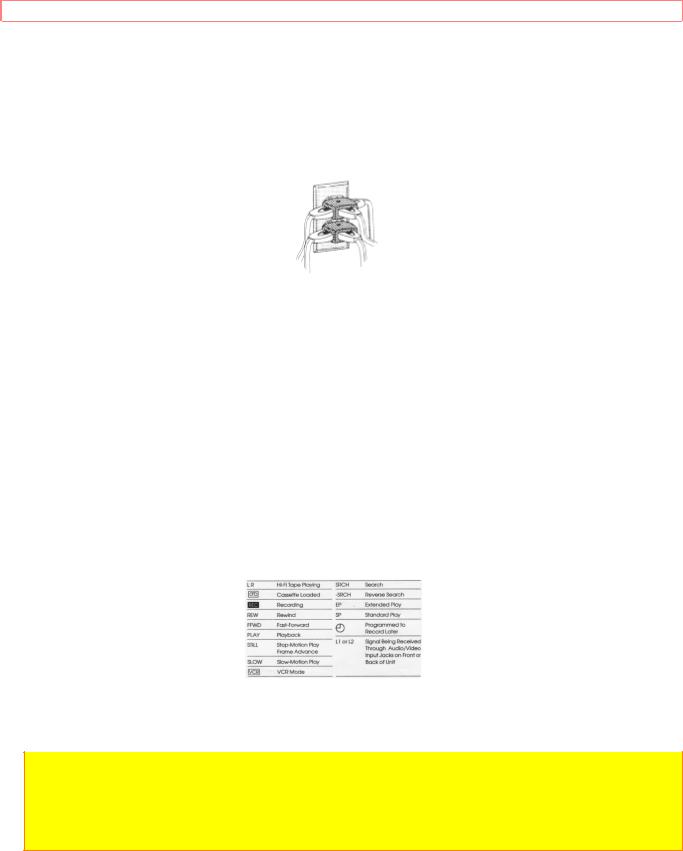
Remote Control Buttons
Remote Control Illustration
POWER Turns the VCR on and off
18
 Loading...