


RC300

Hearth & Home Technologies • RC300 Multifunction Remote Control • 2166-393 Rev. C • 9/10
1
Installation & Operating Instructions
RC300
IntelliFire Plus™ Multifunction Remote Control
Hearth & Home T echnologies disclaims any responsibility for ,
and the warranty will be voided by, the following actions:
• Installation and use of any damaged system component.
• Modifi cation of the system component.
• Installation other than as instructed by Hearth & Home
Technologies.
• Installation and/or use of any component part not approved
by Hearth & Home Technologies.
Any such action may cause a fi re hazard.
• Read, understand and follow these instructions for safe
installation and operation.
Introduction
The RC300 multifunctional remote control is designed
to control pilot light, fl ame height, blower speed, and
up to two 120 VAC auxiliary functions on your gas fi re-
place. The RC300 is equipped with thermostat func-
tions which can automatically control the temperature
in the room in which it is installed. The control is only
for use with the Hearth & Home Technologies IntelliFire
Plus™ system (IPI). The AUX300 module is rated for 120
VAC, 60 Hz, and is required for operation of this remote
control device.
Installation Precautions
This remote control is tested and safe when installed in
accordance with this installation manual. Do not install
any components that may be damaged.
Do not modify , disassemble, or substitute any of the com-
ponents included with this kit. Installation of this unit must
be done by a qualifi ed service technician.
Placement of this remote control may affect performance.
An assessment of the space should be done prior to in-
stallation for optimum performance.
Determine Location
Determine the location for the remote control. The selected
location should be in the same space as the gas fi replace.
Never place this unit in a separate room. The remote control
must be placed within 30 feet (9.14 m) of the fi replace but
should not be exposed to extreme heat.
The RC300 is approved for interior installation and should
not be used in exterior applications.
• Keep remote control out of reach of children.
FCC Requirements
WARNING! Risk of Fire! Changes or modifi cations to
this unit not expressly approved by the party responsible
for compliance could void the user’s authority to operate
the equipment.
Note: This equipment has been tested and found to
comply with the limits for a Class B digital device, pur-
suant to Part 15 of the FCC Rules. These limits are
designed to provide reasonable protection against
harmful interference in a residential installation. This
equipment generates, uses, and can radiate radio
frequency energy and, if not installed and used in ac-
cordance with the instructions, may cause harmful in-
terference to radio communications. However, there is
no guarantee that interference will not occur in a partic-
ular installation. If this equipment does cause harmful
interference to radio or television reception, which can
be determined by turning the equipment off and on, the
user is encouraged to try to correct the interference by
one or more of the following measures:
• Reorient or relocate the receiving antenna.
• Increase the separation between the equipment and
receiver.
• Connect the equipment into an outlet on a circuit dif-
ferent from that to which the receiver is connected.
• Contact the dealer or an experienced radio TV techni-
cian for help.
Canadian Equipment Requirements
This digital apparatus does not exceed the (Class A/ Class
B) limits for radio noise emissions from digital apparatus
set out in the Radio Interference Regulations of the Cana-
dian Department of Communications. Le present appareil
numerique n’emet pas de bruits radioelectriques depas-
sant les limites applicables aux appareils numeriques (de
la class A/de la class B) prescrites dans le Reglement sur
le brouillage radioelectrique edicte par le ministere des
Communications du Canada.
This device complies with RSS-210 of Industry and Science
Canada. Operation is subject to the following two condi-
tions: (1) this device may not cause interference, and (2)
this device must accept any interference, including interfer-
ence that may cause undesired operation of the device.
Hearth & Home Technologies • RC300 Multifunction Remote Control • 2166-393 Rev. C • 9/10
2
Figure 4. Mounting Remote Control Housing
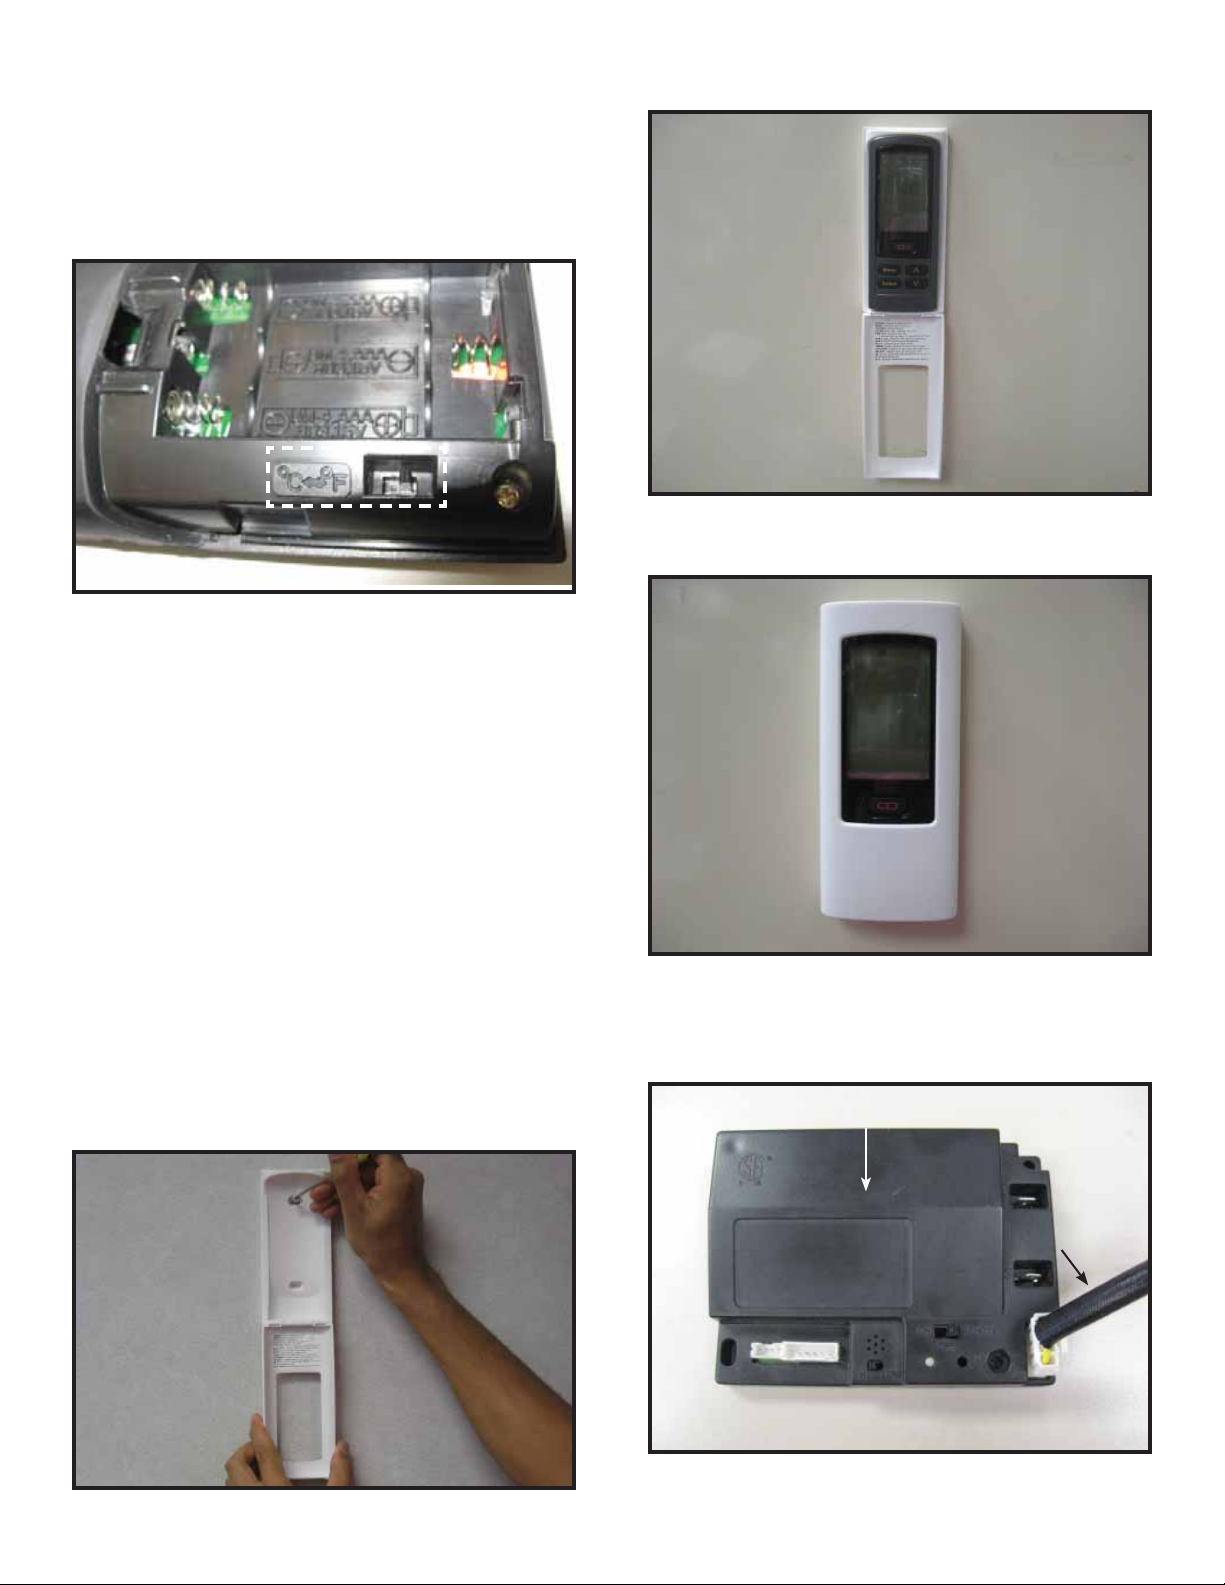
5. Close the housing door. See Figure 4.
AUX300 Module Installation
• Insert the 4 hole harness from the AUX300 module into
the 4 pin plug on the control module. See Figure 5.
Figure 5. AUX 300 module installation
4. Place remote control inside housing. See Figure 3.
Figure 3. Remote in Housing
Installation of Remote Control Housing
CAUTION! Risk of Fire! DO NOT install damaged or
modifi ed components. Warranty will be voided if damaged
or modifi ed components are installed.
Kit components: One remote control, two #6 screws, two
wall anchors, 3 AAA batteries and one AUX300 module. If
batteries are properly installed the remote will turn on
1. Remove remote control components from packaging.
2. Remove battery cover from the back of the remote by
sliding it down and install 3 AAA batteries.
T o prevent unintended operation when not using your fi re-
place for an extended period of time (summer months,
vacation, trips, etc):
• Remove batteries from remote control.
• Unplug switching adapter and remove back-up batteries.
3. Secure the remote control housing on a fl at wall sur-
face using the two screws and wall anchors provided.
See Figure 2.
Figure 2. Mounting Remote Control Housing
CONTROL MODULE
CONTROL MODULE
AUX 300 CABLE
AUX 300 CABLE
Figure 1. Temperature scale
Changing Temperature Scale
To change the temperature display between Celsius and
Fahrenheit, remove the battery cover from the back of the
remote control and slide the switch to your desired tem-
perature scale (see Figure 1). The screen will automati-
cally change the indicators on the room temperature and
set temperature portion.
Hearth & Home Technologies • RC300 Multifunction Remote Control • 2166-393 Rev. C • 9/10
3
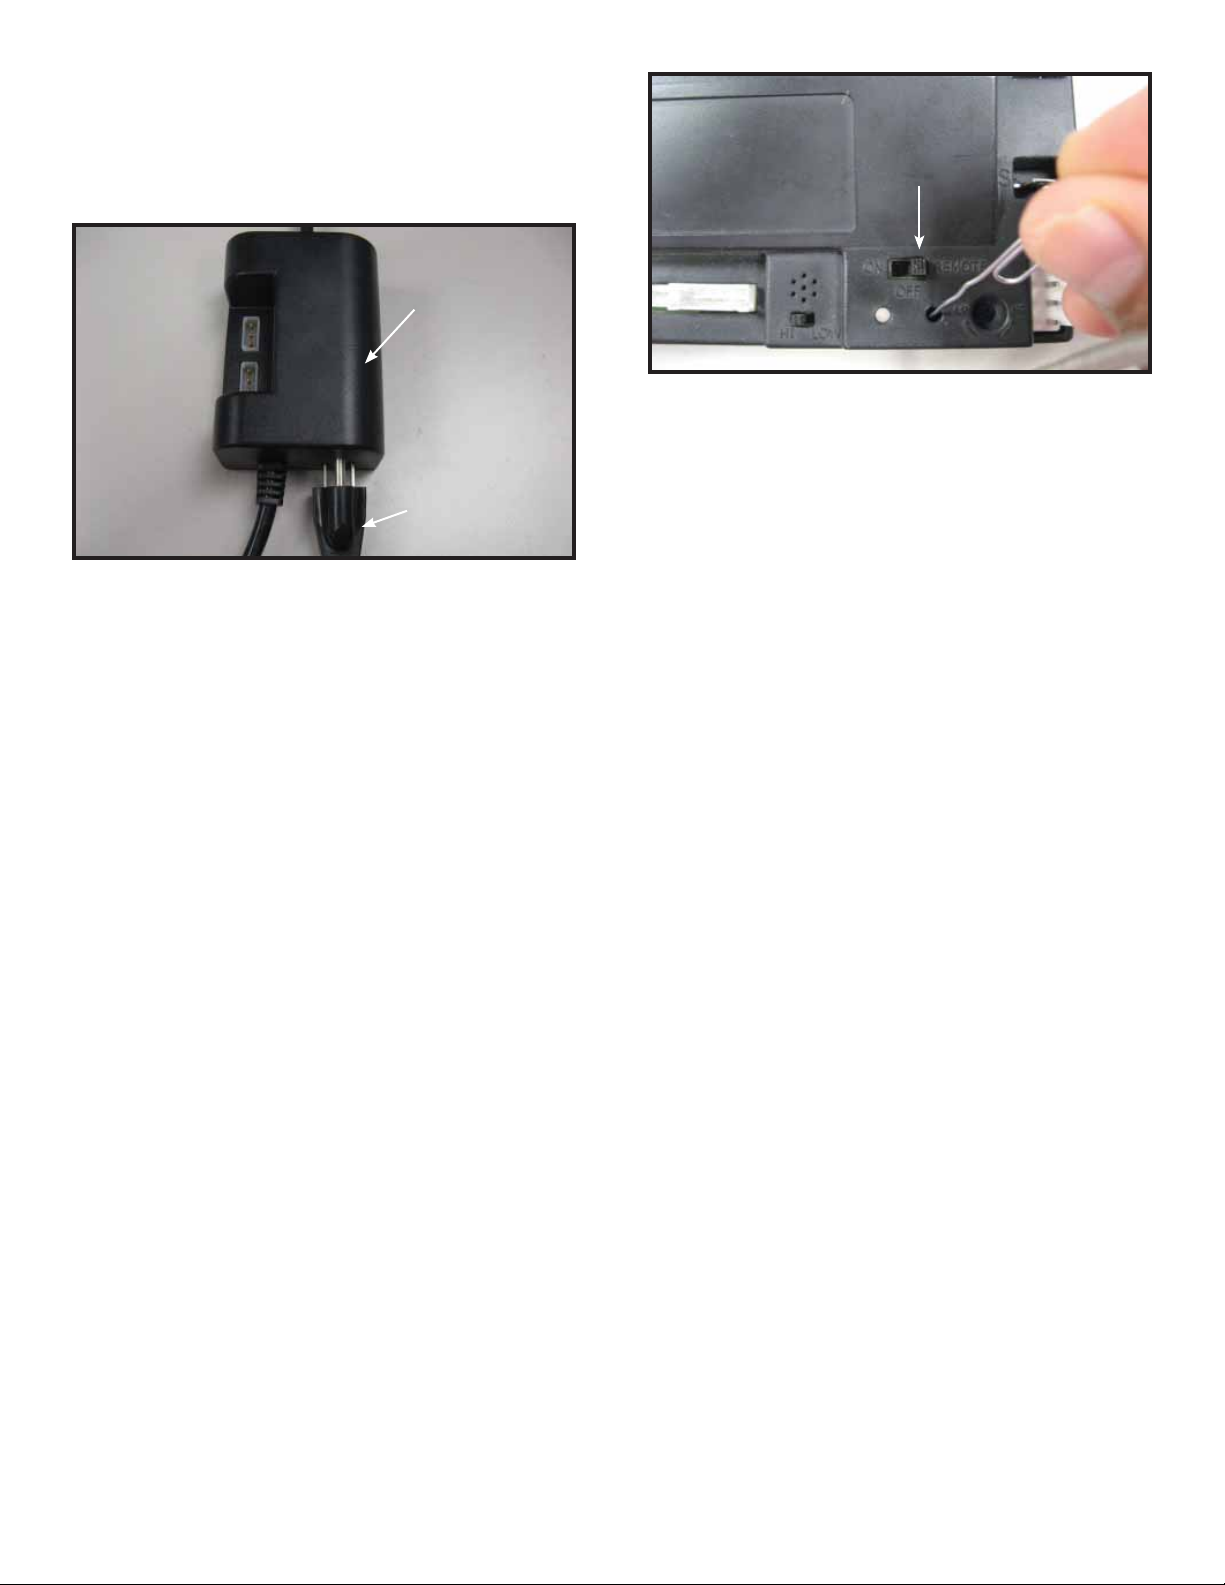
Fan Installation
• Insert the 3 prong plug from the fan into the receptacle
located in the AUX300 module. See Figure 6.
• Insert 3 prong plug from AUX300 module into REM/AUX
receptacle of fi replace junction box.
Figure 6. Plug Fan into AUX300 Module
AUX 300 MODULE
AUX 300 MODULE
FAN CORD
FAN CORD
Figure 7. Programming RC300
REMOTE POSITION
REMOTE POSITION
Programming the RC300 to the Control Module
CAUTION! Risk of burns! DO NOT program the remote
control to the control module when fi replace is hot.
• Verify the ON/OFF/REMOTE switch is in the REMOTE
position. Green LED light will blink three times and wall
switch will beep once 5 seconds later when ready . See
Figure 7.
• Using a small item (such as a paper clip) press and
release the LEARN button located near the ON/OFF/
REMOTE switch. See Figure 7.
• Control module will beep once and LED will blink green
for 10 seconds.
• While the LED is blinking, press the POWER button on
the remote control. A double beep will come out of the
control module to indicate that it has been programmed
successfully.
NOTICE: Up to three remote controls can be programmed
into the control module. Simply press a button on the other
remote controls during the 10 second programming process
to add another remote into the system. It is recommended
to program only one RC300 remote control.
To clear memory in the control module, use a small item
(such as a paper clip) to press and release the LEARN
button. Control module will beep once and LED will blink
green for 10 seconds DO NOT press any buttons on the
remote during the ten seconds that the green LED blinks.
The memory will be cleared. Note that the RC300 will not
be programmed if it’s in STANDBY mode. Press the ON/
OFF button twice to switch to IDLE mode.
 Loading...