


24929
Universal Remote Instruction Manual
Control Remoto Universal Manual de Instrucciones
input

Table of Contents |
|
Introduction..................................................................................... |
2 |
Setup................................................................................................... |
3 |
Battery Installation................................................................ |
3 |
Battery Saver........................................................................... |
3 |
Code Saver................................................................................ |
3 |
Button Functions.................................................................... |
4 |
Programming Your Remote..................................................... |
6 |
Direct Code Entry................................................................... |
6 |
Auto Code Search.................................................................. |
8 |
Controlling Combo Devices............................................... |
9 |
Using Your Remote..................................................................... |
10 |
Master Volume Feature.................................................... |
10 |
Code Identification.............................................................. |
11 |
Reset to Factory Settings................................................. |
11 |
Troubleshooting........................................................................... |
12 |
Warranty......................................................................................... |
13 |
FCC Statement............................................................................. |
14 |
Congratulations on your purchase of the GE Universal Remote Control. The GE Universal Remote Control is one of the most easy to use remote controls available today. With the GE Universal Remote Control, juggling multiple remote controls is a thing of the past!
Your GE Universal Remote Control controls multiple devices, including the most popular brands of TV, DVR, DVD, CBL, and SAT. The GE Universal Remote Control is easy to use, easy to program, and it gives you total control—at the touch of your fingertips!
IMPORTANT: SAVE THIS MANUAL AND CODE LIST FOR FUTURE REFERENCE
2

Setup
Your universal remote requires two (2) AAA Alkaline batteries (not included).
To Install the Batteries
1.On the back of the remote, push down on the tab and lift the cover off.
2.Match the (+) and (-) marks on the batteries to the
(+) and (-) marks inside the battery compartment, then insert two (2) AAA Alkaline batteries. Be sure to use fresh batteries.
3.Press the battery cover back into place.
NOTE: If your remote stops operating properly, replace the batteries with new ones. The remote will retain the codes you have programmed for up to 10 minutes after the batteries are removed.
Battery Precautions
•Do not mix old and new batteries.
•Do not mix alkaline, standard (carbon-zinc), or rechargeable (Ni-Cd, Ni-MH, etc.) batteries.
•Always remove old, weak or worn-out batteries promptly and recycle or dispose of them in accordance with local and national regulations.
Battery Saver
Your remote automatically turns off if the buttons are depressed more than 8 seconds. This will save your batteries should your remote get stuck in a place where the buttons remain depressed (e.g., between the sofa cushions).
Code Saver
You will have up to 10 minutes to change the batteries in your remote without losing codes you have programmed. However, do not press any buttons until batteries are installed in the remote. If buttons are pressed without batteries in the remote, all codes will be lost.
3
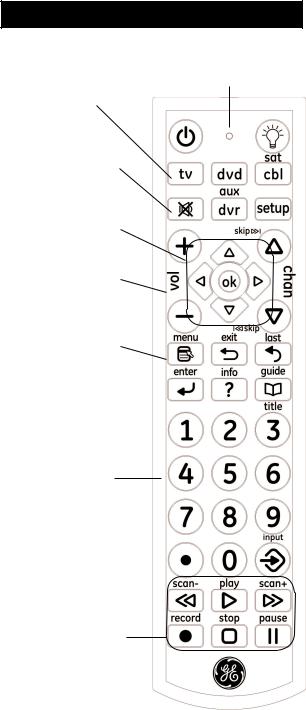
Button Functions
TV, DVD, CBL/SAT, DVR/AUX
Selects device to control.
MUTE Turns off the TV sound while the picture remains.
UP, DOWN, LEFT & RIGHT
Navigation buttons.
VOLUME UP/DOWN
Changes the volume level of the product, normally the TV.
MENU Displays the Menu on the TV.
Red Indicator Lights when any button is pressed.
ENTER
For some TV models,
used after direct  channel number entry
to immediately change to the selected channel.
NUMBERS
Enter numbers for direct channel selection. Some devices require ENTER to be pressed after channel selection.
DOT: Used to select  digital channels, e.g., 2.3.
RECORD, PLAY, STOP, REW, FF, PAUSE
Also operates DVD Scan -/+.
4

Button Functions, cont.
ON•OFF Turns |
BACKLIGHT |
devices On or Off. |
Toggles backlighting |
|
feature On/Off |
|
SETUP Used to |
|
setup the remote, |
|
and for code |
|
search function. |
|
OK Selects menu |
|
items for the device |
|
you are controlling. |
|
CHANNEL UP/DOWN |
|
Changes the channels. Also |
|
controls DVD CHAPTER +/- |
|
track selection, |
|
EXIT Exits On-Screen |
|
Menus. |
|
LAST Returns to |
|
the previously |
|
selected channel. |
|
GUIDE Displays satellite |
|
or cable on-screen |
|
program guide. |
|
INFO Displays/selects |
|
on-screen channel |
|
information. |
INPUT Selects the video inputs from available viewing sources.
5
Programming Your Remote
Your GE universal remote control is designed to control multiple audio/video devices such as TV, DVD, DVR, satellite, cable and audio using only one remote. To use this remote, you will need to program it to control the devices of your choice. There are two ways to program the remote - direct code entry or auto code search.
Direct Code Entry (Recommended)
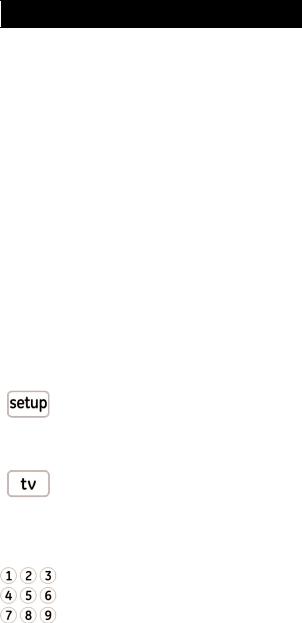
1.Locate the Remote Code List provided in this manual. Find the DEVICE CATEGORY you wish to program (for example TV, DVD, CBL/SAT, DVR/ AUX) and then find the BRAND of that device. Circle all the codes under that brand. Example: For a GE TV, locate the TV code section then circle all of the GE TV codes.
2.Manually turn on the device you wish to control.
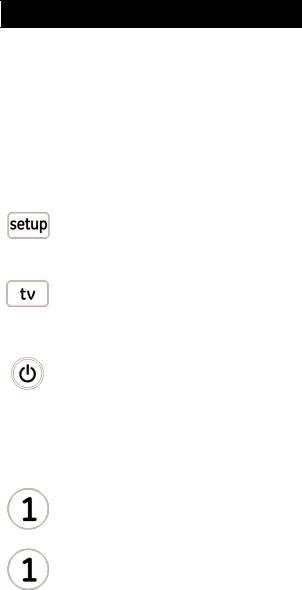
3.Press and hold the SETUP button
until the red indicator light stays on (approximately 4 seconds) and then release the SETUP button.
4.Press and release the desired device button on the remote (TV, DVD, CBL/ SAT, DVR/AUX). The red indicator will blink once and then remain on.
5.Enter the first 4-digit code previously found in the code list using the number buttons on the remote. If the code entered is a valid code, the red indicator light will turn off. If the code entered is not a valid code, the red indicator light will flash and remain on allowing you to re-enter the code.
Note: If no buttons are pressed for 10 seconds, the remote will exit the SETUP mode and you will have to start over.
6

Programming Your Remote, cont.
6.Point the remote at the device. Press the POWER button—if the device turns off, no further programming is required for that device. If the device does not turn off, return to step 3 and use the next code found in the code list. Continue this process until a code for your device is found.
7.Repeat this process for each device (for example TV, DVD, CBL, SAT, DVR, AUX) in your home entertainment system you wish to control. Four devices can be programmed.
Programming Notes
•If your device does not respond to the remote after trying all codes listed or your brand is not listed in the code list, use the Auto Code Search method to program your remote.
•Sometimes the first code that “works” with your device may operate only a few functions of your device. There may be another code in the code list that performs more functions. Try other codes from the code list for more functionality.
•With the Direct Code Entry method, you can program any device button to control any device in your home entertainment system.
For example, you can use the DVR/AUX device button to control an audio receiver or a DVD, VCR, satellite device, etc.
•For combination devices, you may have to enter a code for each device. For example, for a VCR/DVD device, you may have to enter a code for the DVD under the DVD button and enter a code for the VCR using a different device button on the remote.
•Write down the code found to operate your device for future reference.
7
Programming Your Remote, cont.
Auto Code Search
The Auto Code Search searches automatically through all of the codes stored in this remote. Read all the following steps prior to starting the auto search as you will need to be prepared to lock-in the proper code when found.
1.Manually turn on the device you wish to control.
2.Press and hold the SETUP button until the red indicator light stays on (approximately 4 seconds) and then release the button.
3.Press and release the desired device button on the remote (TV, DVD, CBL/ SAT, DVR/AUX). The red indicator will blink once and then remain on.
4.Point the remote at the device and press and release the POWER button (for TV) or PLAY button (for DVD, VCR, etc.) to start the search. The red indicator will flash (approximately every 2 seconds) as the remote searches. Note: The remote must be pointed at the device for the duration of this search.
5.Place your finger on the #1 button so you are prepared to lock-in the code.
6.When the device shuts off or begins playing, press the #1 button to lock-in the code. The red indicator light will turn off. Note: You have approximately two seconds after the device shuts off or begins playing to lock-in the code.
7.Point the remote at the device and check to see if the remote operates the device as desired. If it does, no further programming is required for that device. If it does not, return to step 2 and start the auto search again.
8

Programming Your Remote, cont.
8.Repeat this process for each device (for example TV, DVD, SAT, AUX) in your home entertainment system you wish to control. Four devices can
be programmed.
Programming Notes
•This process may take several minutes as the remote contains many codes.
•When using the Auto Code Search programming method, the device button corresponding to
the type of device you want to control must be selected (for example, the TV device button must be selected in step 3 if you want to control a TV, the DVD device button for a DVD player, etc.)
•The SETUP button can be used during the search process to reverse the direction of the search of the remote codes. For example, if you miss the code for your device and the remote is continuing to search (as indicated by the blinking red light), press the SETUP button and the code search will reverse direction and return to the code.
•Sometimes the first code that “works” with your device may operate only a few functions of your device. There may be another code in the code list that performs more functions. Continue the auto code search as directed above until the best code is found.
Controlling Combo Devices
Some Combo devices (e.g. TV/VCR, TV/DVD, DVD/ VCR, etc.) will require you to set up two different Mode buttons to control both parts of the Combo device. For example, if you have a TV/DVD Combo, you might need to set up one code under the TV button to control the TV part AND a separate code (under any other Mode button) to control the DVD part.
9
Using Your Remote
Master Volume Feature
The Master Volume Feature allows you to select a single device (TV or audio receiver) that the volume control always controls. For example, the remote can be in TV mode while the volume buttons control the volume on your audio receiver instead of your TV.
Enabling the Master Volume Feature
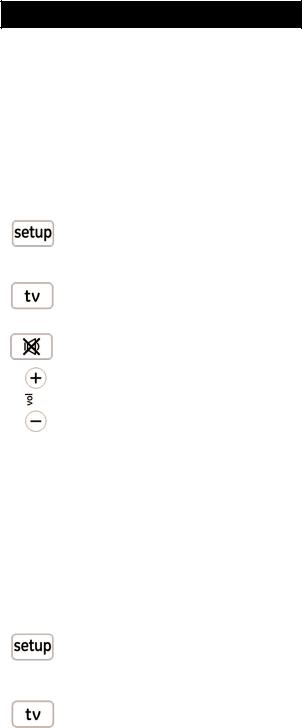
1.Press and hold the SETUP button until the red indicator stays on (approximately 4 seconds) and then release the button.
2.Press and release desired device button (TV, DVD, CBL/SAT, DVR/AUX) for the device you wish to setup to control the volume.
3.Press and release the MUTE button.
4.Press and release the VOL + button. The red indicator will blink twice and then go off.
To test the feature put the remote in another mode such as the TV mode if you programmed the audio receiver to be the Master Volume Device. Point the remote at the audio receiver, press and hold either the VOL - or the VOL + button. If the audio receiver volume changes then the remote is programmed correctly. If the TV volume changes and not the audio receiver, you will have to repeat the steps above and test again.
Disabling the Master Volume Feature
1.Press and hold the SETUP button until the red indicator stays on (approximately 4 seconds) and then release the button.
2.Press and release the device button (TV, DVD, CBL/SAT, DVR/AUX) which is programmed to control the Master
10
Using Your Remote, cont.
Volume Feature.
3. Press and release the MUTE button.
4.Press and release the VOL - button. The red indicator light will blink twice and go off.
Code Identification
1.Press and hold the SETUP button until the red indicator stays on (approximately 4 seconds) and then release the button.
2.Press and release the desired device button (TV, DVD, CBL/SAT, DVR/AUX) you would like the code for.
3.Press and release ENTER button.
4.Press and release the #1 button. Count the number of times the remote light flashes. This is the number corresponding to the first digit of the code. Repeat the process by pressing the #2, #3 and #4 buttons for the remaining digits.
5.Press and release ENTER button to exit this mode.
Reset to Factory Settings
1.Press and hold the SETUP button until the red indicator stays on (approximately 4 seconds) and then release the button.
2.Press and release the MUTE button.
3.Press and release the number #0 button. The red indicator light will flash twice.
11

Troubleshooting
Remote does not operate your device.
•Press the device button of the device you want to control.
•Program the remote with a new code.
•Install new batteries. (You might have to reprogram your remote after installing new batteries.)
•Remote may not be compatible with your device.
Remote does not operate some features of your device.
•Sometimes a particular code might operate some features but not all. Try programing remote with a new code.
•Remote may not be able to operate all features of your device or button names might be different than your device.
Red Indicator blinks and stays on after you program a product code.
•Remote did not accept the code.
•Try to program the code again or try a different code.
Remote Code is not available for a combo device (e.g. TV/VCR)
• See section for controlling combo devices.
For additional troubleshooting information please visit www.jascoproducts.com
12

90 Day Limited Warranty
Jasco Products Company warrants this product to be free from manufacturing defects for a period of ninety days from the original date of consumer purchase.
This warranty is limited to the repair or replacement of this product only and does not extend to consequential or incidental damage to other products that may be used with this unit. This warranty is in lieu of all other warranties express or implied. Some states do not allow limitations on how long an implied warranty lasts or permit the exclusion or limitation of incidental or consequential damages, so the above limitations may not apply to you. This warranty gives you specific rights, and you may also have other rights which vary from state to state. If unit should prove defective within the warranty period, return prepaid with dated proof of purchase to:
Jasco Products Company 10 East Memorial Road Oklahoma City, OK 73114 www.jascoproducts.com
13
 Loading...