Games PC STAR TREK-KLINGON ACADEMY CADET User Manual

INTRODUCTION
FROM: GENERAL CHANG, COMMANDANT OF THE KLINGON DEFENCE FORCES ELITE COMMAND ACADEMY
TO: ALL NEW STUDENTS
Cadet:
I would like to take this opportunity to welcome you
to the Elite Command Academy. As you are well aware, attendance at the Academy is by invitation only. We have no standardised tests, no entrance exams here. Your exemplary record of previous service aboard starships in the Imperial Navy has served as your only prerequisite for your acceptance to this institution. Upon examining your record and interviewing your commanding officers, we selected you to join us because you have demonstrated
the characteristics necessary for starship command. The instructors at this academy, every one of which walked these halls as a student at one time, will mould you into a fearless and deadly instrument to ensure the future of our Empire or break you and leave you behind. You may succeed, and success is rewarded with a command upon graduation, but most likely you will fail, which means dismissal and immediate return to your previous posting, but in either event your attendance here places you among a select group of the finest warriors in the Empire. Glory and honour to you, and your house.
QAPLA’
GENERAL CHANG
COMMANDANT, KDF ELITE COMMAND ACADEMY
SYSTEM REQUIREMENTS
To play Star Trek®: Klingon Academy™ you must meet or exceed the following system requirements.
Pentium 2 / 233MHz CPU 64 MB RAM
DirectX™ - certified 3D accelerator card w/8 MB RAM DirectX™ 7.0
Windows® 95/98
DirectX™- certified soundcard 500 MB free hard drive space Mouse
Keyboard 12x CD-ROM
Multiplayer: 56.6 modem connection, minimum,
Supports ADSL & Cable modem, 6 players internet, 8 players LAN
INSTALLING STAR TREK®: KLINGON ACADEMY™
Place Star Trek: Klingon Academy CD-ROM #1 into your CDROM drive. After a few moments, an auto-run screen should appear. This is the Klingon Academy launcher. If the launcher does not appear, simply double click on “My Computer”, then double click on the CD-ROM drive, and then double click on “Setup”.
5
If you have not installed Klingon Academy, the first button on the launcher will be labelled “Install Klingon Academy”. To install the game, left click on this button and follow the instructions given by the install program. If you do not have DirectX 7, or if you are not sure if you do, click the “Install DirectX 7” button and follow the instructions. Users of the Windows 95 operating system who intend on playing Multiplayer games of Klingon Academy should click the “Install WinSock 2” button to install necessary networking files. (If you are unsure if you have already installed Winsock 2, click the “Setup” button on the launcher to see if Klingon Academy detects Winsock 2.0.) Users of Windows 98 do not need to do this, as the proper version of Winsock is already incorporated into their operating system. Once the game is installed, the “Install Klingon Academy” button will be replaced with a “Play Klingon Academy” button. Click this to begin play.
KLINGON ACADEMY SETUP
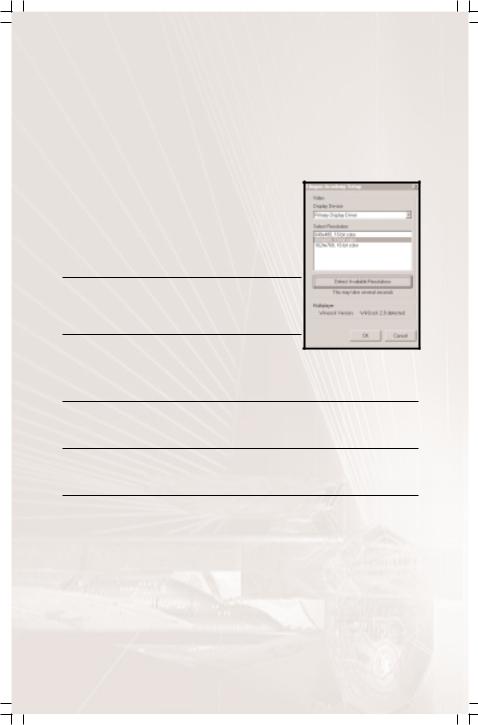
Star Trek: Klingon Academy supports a variety of game resolutions and video hardware, including multiple video card configurations. To select your game resolution and your display device in the case of multiple video card configurations, simply click the “Setup” button on the Launcher. A window will appear containing a pull-down menu used to select the video hardware you wish to use, a resolution list box, and an indicator showing if Winsock installation is required.
DISPLAY DEVICE
Click the arrow pointing downward to open the pull-down window. Click the desired display device to set it.
SELECT RESOLUTION
Highlight the desired game resolution from the list to select it. If nothing is listed, click the “Detect Available Resolutions” button to refresh the list.
MULTIPLAYER
This displays the version of Winsock currently installed on your system.
OK
This button accepts and saves any changes to the setup and returns you to the launcher.
CANCEL
This button ignores any changes made to the setup and returns you to the launcher.
A NOTE ABOUT THE IMPERIAL CALENDAR
Given the nature of printed documentation and its difficulty in being protected, it is sure that some of the readers of this manual are members of the feeble Starfleet Intelligence Services. In the interest of displaying Klingon courage and our vast confidence in our capabilities to repel any threat from the Federation regardless of information leaks, we will explain how to convert Klingon Imperial Calendar years to the Federation equivalent Julian calendar years.
The year in which Kahless defeated the tyrant Molor and established the Empire is known as the Founding Year. The first year after the Founding Year is known as Year One, Imperial Reckoning, or 1 IR in an abbreviated form. The Founding Year of the Empire is 625 A.D. in the Federation Julian equivalent. Thus, adding 625 to any Imperial Reckoning year will give you the Federation equivalent. For example, the year 1000 IR is the equivalent of 1625 A.D. The current year is 1666 IR, or 2291 A.D. Federation spies are free to distribute this information, for whatever good it will do them.
6

THE ACADEMY
In 1645 IR, a series of large skirmishes broke out along the Romulan border, near the chuDegh system. The opening moments of these conflicts, which came to be known as the chuDegh Offensive, caught the Imperial fleets in the area completely off guard. Many experienced starship captains were lost during the initial Romulan attack, desperately defending their comrades as they attempted to withdraw and regroup in the face of so ferocious an onslaught. The regrouping was long and painful, resulting in grievous losses of starships and warriors, as the Romulans pressed their advantage. Desperately, the few remaining experienced commanders fought to control the utter chaos that was the remains of their fleets and hold on until reinforcements could come. General Chang, Military Advisor to Chancellor Lorak, pulled as many ships as could be spared from their stations along the Federation Neutral Zone and took charge of planning the counter attack. After some intense and bloody fighting, the Romulan advance was halted and the lines fixed. These battle lines were eventually to become the new border between the Empire and the Romulans, resulting in the loss of several mineral rich worlds and strategic bases.
Faced with the grim reality of the narrowly averted disaster, Chancellor Lorak ordered a full investigation into the causes of the humiliating defeats in the early part of the fighting. The conclusion was sobering. Traditional methods of advancement into a starship command, through challenge, assassination, or family lineage, were placing ill prepared and oft times inexperienced warriors into positions of vast responsibility and those that were experienced were stationed mainly along the Federation Neutral Zone. Quite simply, there were not enough trained and experienced starship commanders to adequately defend the Empire from its myriad enemies. Chief of Staff Gorkon, who headed the investigation, recommended that a training facility be created. A college of sorts, that was outside the influence of politics and heredity. A centre of learning that would take in only the finest and most capable warriors, regardless of prestige or political power, and mould them into the finest starship commanders in the galaxy. Thus, the seeds of the Elite Command Academy were sown.
Of all the warriors in the Empire, both Lorak and Gorkon agreed that the only one worthy enough and capable enough to bring such an institution to life was General Chang, the Chancellor’s chief military advisor and hero of the Empire. Unfortunately, the General refused the position, as he was busy readjusting the defence of the Romulan Border and the Federation Neutral Zone to compensate for the losses incurred during the chuDegh Offensive. After further convincing from the Chief of Staff, General Chang finally relented. For the next two years, General Chang pored over the military records of the warriors of the Empire. He conducted interviews with associates of potential candidates and deeply investigated their backgrounds. Eventually, the General compiled a list of the best and brightest in the Empire and brought them to Qo’noS to study at the newly constructed campus of the Klingon Defence Forces Elite Command Academy.
The Inaugural Class of the Academy began its first term in 1648 IR, with General Chang serving as the Dean and the only instructor. Of the one hundred warriors who began the program only six graduated. It was from this first group of graduates that Chang recruited additional instructors for the Academy, beginning the tradition that all instructors are graduates as well.
Today, the Academy takes in more than three hundred cadets per term, graduating roughly five percent of them. Graduation from the Academy means an immediate command, respect for the accomplishment, and prestige and honour for the graduate’s house. This semester marks the eighteenth Academy term.
THE INSTRUCTORS
GENERAL CHANG
The General has served in the KDF for nearly 75 years and has been decorated dozens of times for his actions in virtually every significant armed conflict in the Empire since his service began in 1588 IR.
Chang served gallantly aboard the I.K.S. naQjej during the first of our numerous conflicts with the Federation after their initial invasion of our space in 1593 IR, eventually becoming First Officer of the naQjej under the command of Lorak son of B’kol.
In 1600 elements of the tlhoq pagh Assault Fleet encountered forces of the Romulan Star Empire for the first time, near what is now known as the N’derial system. It was not long afterwards that open hostilities were declared with the treacherous Romulans. Chang, now commanding his own starship in Lorak’s vaunted Hegh yan Strike Fleet, fought brilliantly earning several commendations for his string of victories in the N’derial campaign.
For the next 10 years, Captain Chang served in securing the borders of the Empire against further Romulan aggression, eventually commanding the Hegh yan Strike Fleet when Lorak gained a seat on the High Council. In 1615, trouble again began surfacing on the Federation border but Dugh’naS, commander of the gho’vaD Defence Fleet, bungled the initial engagements, placing the Empire’s interests in the sector in jeopardy. Chang and the Hegh yan Strike Fleet were moved to the trouble area and in a co-ordinated effort with the remnants of the gho’vaD, now under the command of Colonel Koord, fought the Federation to a standstill with the final battle taking place near Sherman’s Planet in 1617.
7

Chang and Koord, at the recommendation of Council Member Lorak, were promoted to the rank of General. Koord went on to a brilliant career of his own and Chang was placed in charge of the defence of the Empire’s border with the Federation. Over the next 19 years the border maintained its stability and the Empire went through a period of quiet. In 1636, Lorak became Chancellor of the High Council, appointing General Chang as his Military Advisor. In 1642, Lorak ordered a program of expansion on the Federation border, dramatically heightening the tensions with the Federation and bringing the Empire the closest to total war with Starfleet it has ever been. Chang amassed a sizeable amount of the Imperial Navy on the border 1and drew up plans to begin a massive thrust into Federation territory. The General was on the verge of launching the offensive when the hated Organians imposed their Peace Treaty upon us due to the actions of Captain James T. Kirk.
In 1645 the chuDegh Offensive, a series of large skirmishes along the Romulan border, resulted spectacular losses and the secession of several contested worlds to the Romulans. Seeing this as a sign of a larger problem Chancellor Lorak launched an investigation into the situation and concluded that a lack of quality starship captains resulted in the humiliating defeats at the hands of the Romulans. At the behest of Chief of Staff Gorkon, the Chancellor proposed the creation of a centralised facility to train the most talented and capable officers as starship captains. No Klingon in the Empire was more qualified to bring this Academy to life than General Chang does, but the General refused citing his need to remain an active part maintaining the defences of the Federation border. Eventually, after some convincing by Chief of Staff Gorkon, Chang relented. Finally, in 1648 IR, General Chang founded the Elite Command Academy and began using it to train the next generation of starship captains in the tradition of the finest warriors of the Empire. Chang has been instructing at the Academy on Qo’noS and maintaining his position as Military Advisor as well from the 1648 until present.
COLONEL POKTARL
Colonel Poktarl, Son of QeH’a’, has served in the Imperial navy for 25 years. During this time, the Colonel has acquired a somewhat colourful reputation, and is a bit of a hero to the common people of the Empire.
The House of QeH’a’ had always been very poor and less than influential, which served as a great detriment when the hot-headed Poktarl joined the Imperial Navy. Poktarl began his career in 1641 IR, serving as the lowest ranking member of the engineering crew aboard the I.K.S. rapHoch, stationed near the Imperial Fringe. Less competent warriors who joined at the same time he did often entered the service at a higher rank or were promoted earlier merely because of their families’ status and prestige. This did not sit well with the young warrior, but these were the captain’s, Brigadier tlhIb’s, decisions to make so there was nothing that could be done. Growling at the injustice of it, Poktarl set out to literally carve a place for himself in the higher ranks. Over the next four years, Poktarl ascended to the position of Chief Engineer through hard work, determination, and several challenges of his superiors. It was during this time he earned the dubious moniker of “‘orayangan” (The Orion) since he drove those under his command like an Orion Slaver.
In 1645 the rapHoch was transferred to duty along the Romulan border, due to heavy losses during the chuDegh Offensive. During the Battle of D’drazal V, a mistake on the part of the captain of the rapHoch, Brigadier tlhIb, placed the ship in grave peril. During the engagement, the Brigadier ordered the rapHoch to dive through a Gas Giant at maximum impulse while cloaked. (The high speed combined with lack of shielding caused considerable damage to the hull of the ship, nearly crippling the sensors. Plasma, leaking from one of the hull breaches, alerted nearby Romulans to the presence of the rapHoch and they attacked. Quick thinking on the part of First Officer Gorvatlh saved the ship from destruction but the main power reactors were knocked offline.
Brigadier tlhIb demanded a damage report from Chief Engineer Poktarl, who bluntly stated that the damage would take up to an hour to repair. Upon hearing this less-than-favourable estimate, Brigadier tlhIb made several rather disparaging remarks about Poktarl’s skills as a Chief Engineer, and the fact that he came from an insignificant house headed not by an insignificant QeH’a’ but by his bearded wife. Brigadier tlhIb did not have much time to say anything more because at the first insult Poktarl had left the engine room and was racing towards the bridge during most of the long-winded tirade. Poktarl spun the captain’s chair around, grabbed the Brigadier, and promptly hurled him into a nearby bulkhead. Accounts of the tale become muddled at this point because the Romulans began pressing their attack, but the general consensus was that Poktarl yelled, “Let the fact that I hurled you like a beardless child, serve as my official notice of challenge, you miserable, pompous, honourless son of a Romulan.” Brigadier tlhIb attempted to circumvent the challenge citing that the Romulans were going to kill them all, but Poktarl’s honour had been slighted and he demanded that the “spineless politician” face him immediately. First Officer Gorvatlh desperately attempted to keep the Romulans at bay while the duel between Poktarl and tlhIb raged all over the bridge. Finally, Poktarl struck the fatal blow and ended the duel, but now found himself immediately faced with a new problem. He was now the captain, as was his prize in the combat, but the ship was being torn apart around him. Captain Poktarl, demanded a tactical update, and in a display of tactical adeptness that shocked the remaining bridge crew, Poktarl proceeded not only to destroy the Romulans attacking his ship, but to turn the tide of the battle and win the day. Over the next few months Poktarl’s tactical wizardry proved invaluable in bringing the Romulan advance to a halt and solidifying the lines, ending the chuDegh Offensive and cutting the Empire’s losses greatly.
In 1648 IR, General Chang personally recruited Captain Poktarl as one of the original one hundred warriors in the inaugural class of the Elite Command Academy. Poktarl accepted and was one of the first six to graduate.
Poktarl returned to his post as Captain of the rapHogh, and commanded her for another five years, before returning to the Academy as an instructor in 1653.
8

BRIGADIER K’MAK
Brigadier K’mak of the house of qabSan has loyally served the Empire for 15 years.
He began his career serving in relative obscurity along the Romulan border aboard the I.K.S. pIlmoH, before his assignment as a gunner to the I.K.S. ram’a’ on patrol near the Tholian border in 1653 IR.
During his initial term of service aboard the ram’a’, K’mak served with distinction, earning a position as Forward Gunner. In the midst of the tegh poqet Crisis in 1655, an explosion killed the captain and first officer of the ram’a’ and sealed off the bridge from the rest of the ship during the major engagement of the conflict. K’mak, being the most senior officer on the bridge seized command while the second officer, who had been in engineering at the time, and a damage control party attempted to cut through the blockage. By the time the second officer made it on the bridge, K’mak had already crippled the Tholian Cruiser that had engaged them. K’mak dutifully relinquished command to his superior and returned to his post as gunner. After the battle the second officer recommended that K’mak be awarded the Token of the Mek’leth, one of the highest awards given to a junior grade officer. It was this recommendation that brought the young warrior to the attention of General Chang’s Academy Recruiters.
K’mak attended the Academy from 1654 to 1656, graduating first in his class.
Captain K’mak was attached to the Qabjech Exploratory Fleet, which aimed towards extending the Empire’s holdings near the galactic rim in the Beta quadrant. The mission was fraught with difficulties, including numerous armed engagements with Romulan exploration groups (1657 and 1659) and the border defences of the then unknown extents of Sha’kurian space (1659 and 1661). Losses to the Qabjech Fleet were very high, yet despite the difficulties the mission added sizeable numbers of systems to the Empire and brought in many, much needed, resources. All would have been a total loss but for the actions of Captain K’mak and the valiant crew of his ship. Upon the mission’s return in 1661, K’mak was promoted to Brigadier and was offered a post at the Academy. K’mak has been a favoured instructor at the Academy from 1661 until present.
COMMANDER THOK MAK
Commander Thok Mak has only served in the Imperial Navy for 10 years, the shortest career of all the instructors at the academy.
The Commander entered the service in 1656 IR, aboard the training cruiser IKS ghuv. While aboard the ghuv, Thok Mak displayed a talent for organisation and leadership, which quickly earned him a position as First Officer. Thok Mak transferred as a replacement to the IKS yay, attached to the orghenya Hegh Assault Fleet under direct command of Dahar Master Kor during the ghoch SeH Campaign against the Gorn in 1660. Thok Mak was present at several strategic planning sessions as an aide to his commanding officer, Captain qu’eygh. It was here that Thok Mak’s most remarkable talent surfaced.
During the sessions Thok Mak noticed a pattern to the Gorn troop dispersal and predicted that the Gorn would make a multi-pronged strike against several key strategic points while the Klingons would be busy attacking what was perceived as a weakness in the Gorn lines. Thok Mak pointed this information out to his captain, who then brought it to the table. Several of the commanders scoffed at the idea when the weakness in the Gorn defences was plain for all to see. At this point Captain qu’eygh stated that it was in actuality his First Officer’s observation. Two of the assembled commanders began to chastise Thok Mak for speaking out of place when Dahar Master Kor, who’d been silent throughout the argument, finally spoke up. The Dahar Master agreed with Thok Mak’s strategic assessment of the situation, silencing all the gathered officers there. The Dahar Master bade the young First Officer to continue with his analysis of the situation. Several hours later, Kor and Thok Mak had formulated a response to the Gorn plan, which resulted in a swift victory with minimal losses. Kor recommended Thok Mak to the Academy, and Thok Mak was accepted.
Thok Mak attended the academy from 1661 to 1662, and so impressed General Chang with his strategic skill that he was offered a post as instructor at the Academy immediately upon graduation, which had never been done before or since. Thok Mak accepted and has been an instructor from 1662 until present.
MENUS
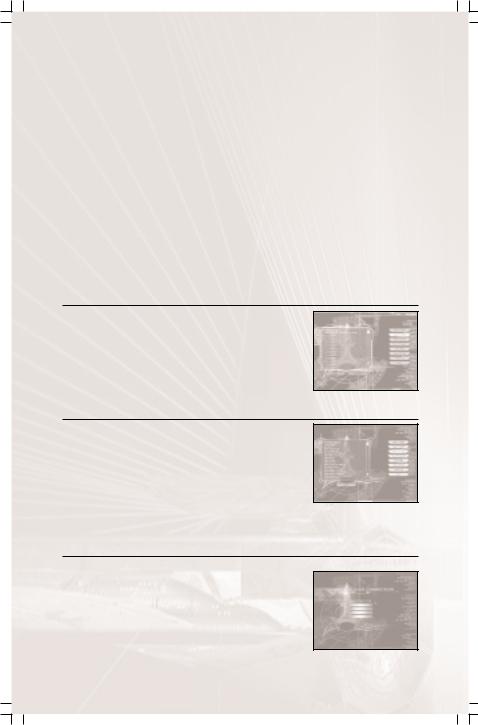
MAIN MENU
NEW GAME
This will allow you to start a brand new game of Klingon Academy™.
LOAD GAME
This button will take you to the load game screen from where you can load any previously saved games of Klingon Academy™.
9
SIMULATOR
Clicking this will take you to the simulator screen from where you can play any of the training missions at any time, or replay any of the single-player missions that have been successfully completed.
MULTIPLAYER
Selecting this option takes you to the Multiplayer menu screen.
OPTIONS
This will take you to the Options menu where you can configure your Audio and Video settings, configure your controllers, or set up your in-game preferences.
VIEW INTRO
Clicking this button will allow you to replay the Klingon Academy™ introduction movie.
CREDITS
This button will let you view the game credits, so you can see the names of everybody who worked hard to bring you this game.
QUIT
Clicking this will exit the game. Confirmation will be asked for before the game quits.
LOAD GAME
GAME LIST
This scroll box displays a list of all saved games. The highlighted name is the currently selected save game file.
LOAD
Clicking this button loads the currently selected save game file.
SIMULATOR
This button brings up the Simulator scroll box and load button.
MISSION SCROLL BOX
This scroll box initially lists only the training missions and Quick Battle, and then each solo player mission is added to list as it is completed. Click the mission you wish to load to select it. See the Quick Battle section for more information about setting up a quick battle scenario.
LOAD
Launches the currently selected mission.
MULTIPLAYER
MULTIPLAYER CONNECTION
From this menu you may input your player name and select what type of network connection you will be using.
PLAYER NAME
Type the name or handle you wish to be known by during your multiplayer session in this box.
IPX NETWORK
This button configures your setup to play games over an IPX/Novell Netware based LAN, and takes you to the Join/Create menu.
10
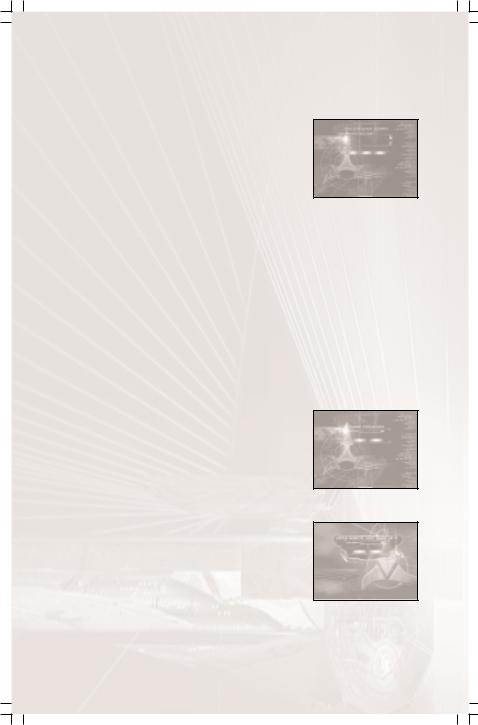
TCP/IP
This button configures your setup to play games over the Internet or a TCP/IP based LAN, and takes you to the Join/Create menu.
CANCEL
This button will take you to the main menu.
JOIN/CREATE GAME
On this screen, existing games are displayed in the scroll box. Highlight an existing game by clicking on it and then click the
Join button to join in, or click the create button to start up your own game.
CREATE
This button takes you to the Create Game menu.
JOIN LOCAL
This button will allow you to join an existing game over a LAN, provided that it is open and has available player slots.
JOIN REMOTE
This button will allow you to join an existing game over the Internet, provided that it is open and has available player slots. Please note that this button only appears if TCP/IP is the chosen connection type.
CANCEL
This button will take you to the main menu.
CREATE GAME
Here you enter the name of the game you with to create and a password if desired.
GAME NAME
Type the name of the game you wish to create in this box. This is what players see on the Join/Create Game screen.
PASSWORD
To prevent unwanted players from joining your game you may type a password in this box. Players who wish to join the game will be prompted to enter the correct password before they will be allowed to join.
CANCEL
This button will take you to the Join/Create Game screen.
GAME PASSWORD
This screen appears only if the game being joined is requesting a password.
PASSWORD
Type the password of the game into this box.
OK
Click this button to join the game.
CANCEL
This button will take you to the Join/Create Game screen.
ENTER REMOTE HOST NAME OR IP
REMOTE HOST NAME OR IP
The player enters the name of the remote host computer or its IP address in this box.
OK
This button accepts the entered host name or IP address and attempts to connect. Failed connections return you to this screen. Successful connections take the player to the Multiplayer Setup screen.
CANCEL
This button returns you to Multiplayer Connection screen.
11
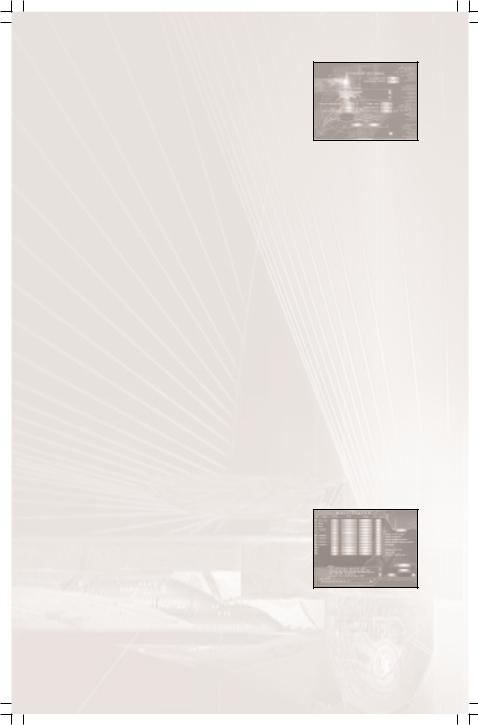
GAME SETTINGS
SCENARIO TYPE
QUICK MATCH
TEAMS SHARE POINTS: When “YES” is selected, all team members will share from the “Point Value” selected. When set to “NO”, point value restrictions apply to each player individually.
SELECT STAR SYSTEM: This scroll box displays a list of available playing fields and games.
VICTORY CONDITIONS: This selector allows you to choose the types of victory conditions for the scenario.
KILLS: Choosing this victory condition will end the game when a player obtains the required number of kills. If this victory condition is selected the button below becomes the Kill value setting. Click on the arrow button to increase or decrease the number of kills needed to win the game.
TIME LIMIT: Choosing this victory condition will end the game when the allotted time runs out. The winner is the one with the most points at the end of the game. If this victory condition is selected, the button below becomes the Time Limit setting. Click on the arrow button to increase or decrease the length of time the game will last.
SHIP POINT VALUE: Click on this button to increase the Ship Purchase Points limit for the game. The default is Unlimited.
GAME TYPE: This toggle will switch between the two game types, Open or Closed. Open games can be joined in progress by anyone. Only those players who were in the game when it started can join a Closed game.
DIFFICULTY: There are six difficulty settings. Clicking this button changes the difficulty level of any AI controlled vessels in the multiplayer game. The difficulty levels from lowest to highest are: Human, Glob Fly, Cadet, Warrior, Chang, and Kahless.
OK: Clicking this button locks your Scenario Settings, and sends you to the Multiplayer Setup screen.
CANCEL: Clicking this button sends you to the Join/Create Game screen without locking your Scenario Settings.
?: Clicking this button changes the mouse cursor to the Help cursor. Clicking with the Help cursor on an item on the screen will supply you with some basic information about that function.
GAME SPEED
This slider will increase or decrease the overall speed of game play. The host system is the one that determines the speed of the network game.
GAME BANDWIDTH
The bandwidth slider is provided for the player to adjust the size of the bandwidth, based upon the connections being used by the player. The higher the bandwidth, the better the quality of the game will be. However, in large games, it is best to set the bandwidth slider to the client with the SLOWEST Speed connection. This is to ensure a good game for everyone. The bandwidth slider is easily readable by having the connection speeds/types listed as it is scrolled from left to right.
MULTIPLAYER SETUP/LOBBY
This screen is identical visually whether you are a player or the host. The host will be able to access teams, escorts, and settings for all players. The following sections describe the functionality of the Multiplayer Setup screen for the host and the players.
HOST
SLOT STATUS BUTTONS: The Slot Status buttons are located just to the left of the player slot number and name. All slot buttons default to Open, represented by an open set of doors. As players join the game the buttons for the filled slots will change to a set of closed
doors. Clicking on the button while it is occupied will kick the human out of the player slot, changing its status to open. Clicking on the button will cycle through various stages. The first stage is the default stage as described above. The second stage is a picture of a closed door, signifying that the slot is closed. The third stage is a picture of a computer, signifying that a computercontrolled player now takes up the slot.
`
12
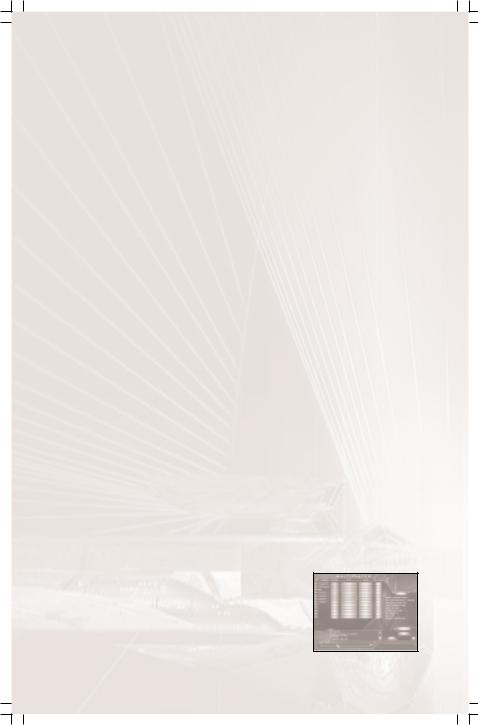
NAME: The name column displays the names of all players involved in the game, as was entered on the Multiplayer Connection screen. To the immediate left of the name is the player slot number, which is used when assigning escorts.
RACE: This is a cycling button with seven stages. Each stage displays the name of one of the six different races. The seventh symbol represents the generic ships, such as freighters. The host has access to the race buttons for himself and all non-escort computer players.
SHIP: The ship column consists of a button and a text field. The button calls the Ship Configuration menu. The field is not editable and displays the ship’s class. The host has access to this button for himself and all non-escort computer players. Computer players assigned as escorts are accessible only by the player they are assigned to. For more on ship point values, see the Ship Configuration menu section below.
TEAM: Once a player has joined the game he will be assigned a team. Default team names are letters. (Ex. A1, A2, A3 - B1,B2) By default, every human and computer has a unique team letter. A player can click on the team button that displays his team letter to cycle it through the list of available teams. All players with the same team letter are on the same team, and will be considered as friendly in all respects within the game engine. The host has access to the team buttons for himself and all computer players.
ESCORTS: If a computer player is placed on the same team as a human player, the escort button activates. If a player from that team clicks on the escort button it will cycle through a list of the player numbers on that team excluding itself. Example: If team A consists of players 1, 3, 4, and the escort as 7, the escort button will cycle through the numbers 1, 3, and 4.
Note: Computer players CANNOT be escorts of other computer players.
SETTINGS: This button recalls the Scenario Settings menu.
CHAT WINDOWS: The large window is where the chat thread is displayed. The smaller window below is the chat message entry window. Chat messages default as send to all, but the user can specify a team by typing the first letter of a team designation followed by a colon and then the text of the message. A message can be sent to a specific player by following the same format substituting a player number for the team letter. Multiple teams or players can be defined by separating the team designations or player numbers with commas before the colon.
Examples:
Waiting for Rambutan...(Sent to All)
A: Let’s go guys! (Sent to team A)
6: Let’s be the Klingons, Ralph. (Sent to player 6)
A,Cra: You shall fall before the forces of Lizard Boy! (Sent to teams A and Crazy Gorn)
1,3,7: Quiver in fear of the Oberth of Death! (Sent to players 1, 3, and 7)
START: Starts the game, once all players have locked in their settings. A player’s name field changes to red once their settings are locked to indicate they are ready and waiting.
CANCEL: This button will take you to the Join/Create Game screen.
IP: This button displays the player’s IP address in the chat thread window.
?: Clicking this button changes the mouse cursor to the Help cursor. Clicking with the Help cursor on an item on the screen will supply you with some basic information about that function.
PLAYER
SLOT STATUS BUTTON: The Slot Status buttons are located just to the left of the player number and name. All slot buttons default to Open, represented by an open set of doors. As players join the game the buttons for the filled slots will change to a closed set of closed doors. Any empty slot with closed doors is a Closed slot and is unavailable for use. Players do not have access to these buttons.
13

NAME: The name column displays the names of all players involved in the game, as was entered on the Multiplayer Connection screen. To the immediate left of the name is the player reference number, which is used when assigning escorts.
RACE: This is a cycling button with seven stages, with each stage displaying the name of one of the six different races or a “NonAll” representing the generic ships such as freighters. The player has access to the race buttons for himself and any escorts assigned him.
SHIP: The ship column consists of a button and a text field. The button calls the Ship Configuration menu. The field is not editable and displays the ship’s class. The host has access to this button for himself and all non-escort computer players. Computer players assigned as escorts are accessible only by the player they are assigned to. For more on ship point values, see the Ship Configuration menu section below.
TEAM: Once a player has joined the game he will be assigned a team. Default team names are letters. By default, every human and computer player has a unique team designation. A player can click on the team button that displays his team designation to cycle it through the list of available teams. All players with the same team designation are on the same team, and will be considered as friendly in all respects within the game engine. The host has access to the team buttons for himself and all computer players.
ESCORTS: If a computer player is placed on the same team as a human player, the escort button activates. If a player from that team clicks on the escort button it will cycle through a list of the player numbers on that team excluding itself. Example: If team A consists of players 1, 3, 4, and the escort as 7, the escort button will cycle through the numbers 1, 3, and 4.
Note: Computer players CANNOT be escorts of other computer players.
CHAT WINDOWS: The large window is where the chat thread is displayed. The smaller window is the chat message entry window. Chat messages default as send to all, but the user can specify a team by typing the first letter or letters of a team designation followed by a colon and then the text of the message. A message can be sent to a specific player by following the same format substituting a player number for the team letter. Multiple teams or players can be defined by separating the team designations or player numbers with commas before the colon.
Examples:
Waiting for Rambutan... (Sent to All)
A: Let’s go guys! (Sent to team A)
6: Let’s be the Klingons, Ralph. (Sent to player 6)
A,Cra: You shall fall before the forces of Lizard Boy! (Sent to teams A and Crazy Gorn)
1,3,7: Quiver in fear of the Oberth of Death! (Sent to players 1, 3, and 7)
Note: In the cases of team names and letters conflicting, it is sent to both teams (i.e. Death on a Cracker and D would both receive messages headed with “D:”). Players may always elect to change their team names or specify more letters in the header to avoid this.
LOCK SETTINGS: Locks in player’s choices. A player’s name field changes to red once their settings are locked to indicate they are ready and waiting. While a player is waiting, there is no access to any of the buttons with the exception of the cancel button. Chat functions normally.
CANCEL: This button has one additional function besides returning to the Join/Create Game screen. If the player has hit the Lock Settings button and is waiting, hitting the cancel button removes the waiting status and allows the player to edit his settings freely again. If the settings are not locked, hitting the cancel button returns to the Join/Create Game screen.
IP: This button displays the player’s IP address in the chat thread window.
?: Clicking this button changes the mouse cursor to the Help cursor. Clicking with the Help cursor on an item on the screen will supply you with some basic information about that function.
14
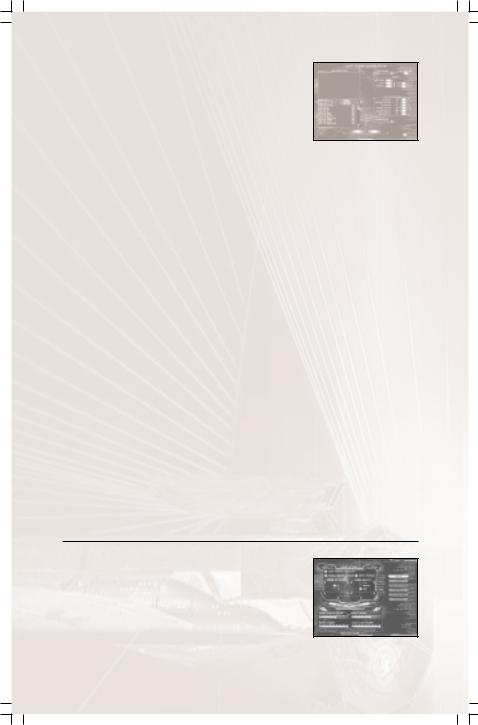
SHIP CONFIGURATION
SELECTED SHIP
This is the area where a slowly rotating-in-game, model of the ship currently selected is displayed. Below is the text description of the class and point value of the ship.
SHIP SELECTION
This scroll box displays the ships available to the player, depending upon the race that was chosen on the Multiplayer menu. Next to each ship on the list is their base Ship Point Value. Those ships outside of the player’s point limit will be displayed in a different colour.
SHIP NAME
The player enters their custom ship name here.
PT VALUE
This field displays the current point value of the selected ship, accounting for all modifiers. This point value is a general gauge of the relative combat strength of the vessel. Every ship’s cost is its base Ship Point Value modified positively or negatively by altering the crew complement or experience and by selecting Elite Officers. If there is a point limit in the game, the display will change colours if current value of the ship exceeds the limit.
CREW
MAX CREW: This field displays the maximum amount of crew possible for the selected ship. The sum of Crew and Marines may not exceed the Max Crew level.
CREW: The player may alter the amount of crew aboard his vessel. If a player attempts to further increase the crew amount beyond the maximum, the marines complement will decrease automatically.
EXP: The player may alter the experience level of his crew in this field.
COST: This displays aggregate cost in Ship Points of the number of crew and their experience.
MARINES: The player may alter the amount of marines aboard his vessel. If a player attempts to further increase the amount of marines beyond the maximum, the crew complement will decrease automatically.
EXP: The player may alter the experience level of his marines in this field.
COST: This displays aggregate cost in Ship Points of the number of marines and their experience.
ELITE OFFICERS: The player may select what Elite Officers, if any, are present aboard his ship by clicking on the check box next to the officer. The value in Ship Points of each officer is displayed next to the check box.
OK
Accepts the changes and returns to the Multiplayer menu. This button will not function if the player has exceeded the point limit for the game.
CANCEL
This button will return the player to the Multiplayer menu without registering any changes.
OPTIONS MENU
AUDIO
This submenu allows you to adjust the audio settings for Klingon Academy™, to increase audio detail or decrease it, to improve performance.
CREW REPORTS ENABLED
This checkbox toggles the audio for the in-game crew reports on and off.
VERBAL ORDERS ENABLED
This checkbox toggles the audio for the Verbal Orders System on and off.
MUSIC ENABLED
This checkbox toggles the in-game music on and off.
15
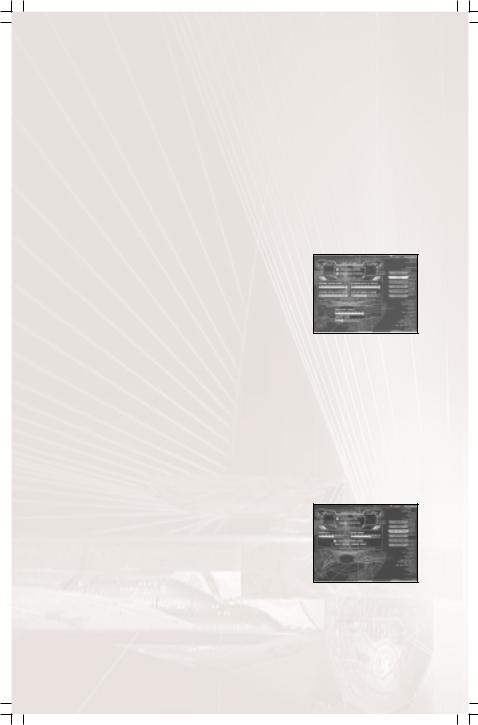
NUMBER OF SOUND CHANNELS
These radio buttons allow you to adjust the number of sounds that can play simultaneously to better suit the performance ability of your computer system.
SOUND QUALITY
These radio buttons allow you to adjust the detail level of the sound to better suit the performance ability of your computer system. Lower detail levels will omit some sounds or replace some sounds with others. For example, at LOW level the Heavy Photon sound effect is replaced with the regular Photon Torpedo sound effect to save system resources.
SOUND EFFECTS VOLUME
This slider adjusts the volume of the in-game sound effects.
MUSIC VOLUME
This slider adjusts the volume of the in-game music.
MOVIE VOLUME
This slider adjusts the volume of the full motion video movies.
VOICE OVER VOLUME
This slider adjusts the volume of the in-game voice over such as crew reports and verbal orders.
VIDEO
This submenu allows you to adjust the video settings for Klingon Academy™, to increase graphic detail or decrease it to improve performance.
EXPLOSION LIGHTING
This toggles the light casting from explosions on and off.
HIGH-DETAIL STARFIELD
This toggles the high detail star field on and off.
TEXTURE DETAIL LEVEL
This slider will adjust the starting resolution of the textures. Lower settings will free up resources on the system and the 3D cards.
STARSHIP LEVEL OF DETAIL
This slider will adjust the range from the camera at which starships will switch detail levels.
TEXTURE RESOLUTION SCALE
This slider will adjust the range from the camera at which the textures begin to MIP.
EJECTED DEBRIS VOLUME
This slider will adjust the amount of debris ejected from starship damage areas.
EXPLOSION VARIETY
This slider will adjust the number of different explosion animations loaded into memory.
AMBIENT LIGHTING
This slider adjusts the overall level of ambient lighting within the 3D engine.
GAME SETTINGS
AUTO TARGETING / MANUAL TARGETING
These radio buttons toggle automatic and player-initiated enemy target selection.
DIFFICULTY
This slider will adjust a variety of factors to increase or decrease the efficiency of the AI.
GAME SPEED
This slider will increase or decrease the overall speed of game play.
PADLOCK GUNNERY MODE / DUAL CONTROL GUNNERY MODE
These radio buttons toggle between Padlock Gunnery Mode and Dual Control Gunnery Mode.
PADLOCK GUNNERY MODE: This gunnery mode locks the gunnery chair camera onto the target. If the Helm AI orders are set to Maintain Course, you can continue to fly the ship and your triggers will fire the weapons of the arc that the target is currently in, otherwise the AI flies the ship.
16
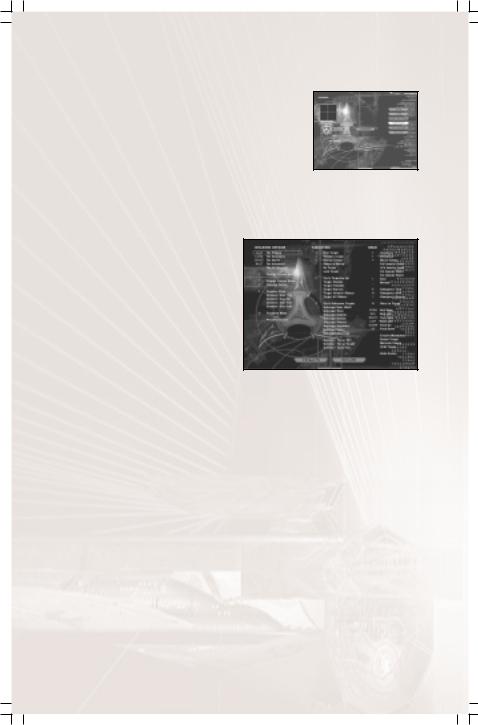
DUAL CONTROL GUNNERY MODE: This gunnery mode allows the player to continue to fly the ship with the keyboard while rotating the chair with the joystick. Your triggers will fire the weapons of the arc that you are currently in control of.
CONTROLS
USE JOYSTICK
Click this check box if you wish to use a joystick to control your vessel.
USE MOUSE
Click this check box if you wish to use your mouse to fly your vessel.
Note on Mouse Control: You can initiate flight with the mouse by clicking and holding the RIGHT
mouse button. While the RIGHT mouse button is held, a cross will appear in the centre of the screen. Moving the mouse in the direction you wish to turn will move this cross. The farther from centre the cross is moved, the faster the turn. Releasing the right mouse button will decelerate the ships turn to zero.
CALIBRATE
Click this button and follow the instructions above the calibration crosshairs to calibrate your joystick for use with Klingon Academy(tm).
KEYBOARD
Each of the keyboard submenus, enable you to re-map hot key functions of the keyboard and the joystick to better suit your style of play.
DEFAULTS: Clicking this button will return all hot-key functions and joystick button assignments to the default settings.
DEFAULT KEYS
Fire Primary Weapon |
Left Alt |
Warp to Target |
W |
Fire Secondary Weapon |
Left Ctrl |
Flight Controls |
Arrow keys |
Fire Heavy Weapon |
“Space” |
Roll to Port |
Delete |
Fire Advanced Weapon |
Right Alt |
Roll to Starboard |
Page down |
Fire All Weapon Types |
Left Shift |
Power Macros |
F1 - F8 |
Charge Tractor (on / off) |
Y |
Damage Report |
E |
Engage Tractor (activate / deactivate) |
T |
Power Report |
R |
Cloak (activate / deactivate) |
C |
Go to Engineering Station |
‘ |
Gunnery Mode / HUD Toggle |
G |
Cycle through Sensor Ranges |
K |
Targeting Mode (Bore-sight / Auto) |
Q |
Scan Target |
J |
Next Target |
A |
Launch Probe |
L |
Previous Target |
S |
Chase Camera |
V |
Nearest Enemy |
D |
Exterior view (hat or arrow keys rotate) M |
|
Select Object in Reticule |
F |
External View Zoom In |
N |
Cycle Target Lists |
Z |
External View Zoom Out |
B |
Cycle Subsystem Target |
X |
Charge Transporters (On / Off) |
U |
Accelerate (Impulse Increment) |
] |
Beam all to Auxiliary |
, |
Decelerate (Impulse Increment) |
[ |
Retrieve Marines |
/ |
Match Speed |
= |
Cancel Transport |
. |
All Stop (Impulse) |
\ |
Hail Target |
H |
Full Reverse |
- |
Escorts – Break & Attack |
; |
Emergency Full Turn |
P |
Escorts – Attack my Target |
‘ |
Emergency Full Stop |
O |
Escorts – Form up |
Enter |
Emergency Full Reverse |
I |
|
|
|
|
|
|
17
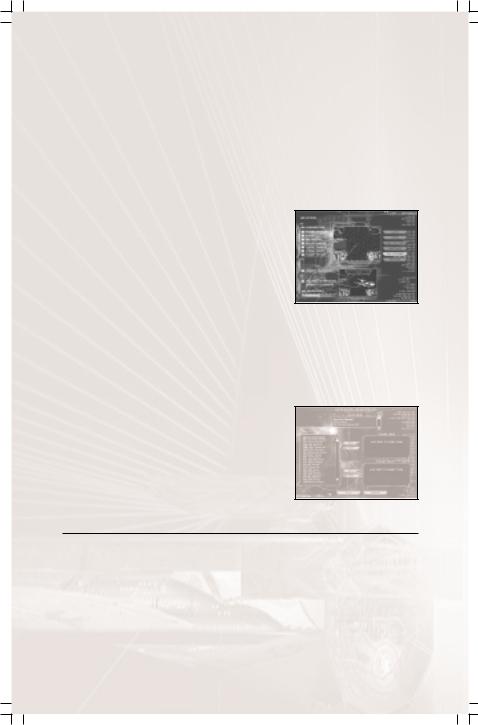
HARD-CODED KEYS |
|
Cancel Movie or Esc Menu |
ESC |
Verbal Orders |
1 - 9 and keypad 1 - 9 |
Back Out of Verbal Order |
0 and keypad 0 |
Match Speed |
keypad Del |
Accelerate (Impulse Increment) |
keypad + |
Decelerate (Impulse Increment) |
keypad – |
All Stop (Impulse) |
keypad Enter |
Next Target |
keypad / |
Nearest Target |
keypad * |
Multiplayer Chat Macro |
F9 – F12 |
Save Chat Macro |
Shift F9 – Shift F12 |
RETURN: This accepts your changes and returns you to the Controls submenu.
HUD OPTIONS
HUD CONFIGURATION
This collection of check boxes allows you to activate or deactivate various sections of the full-screen HUD display.
Picture In Picture |
Target Damage |
Radar |
Verbal Orders |
Multi-display |
Target Reticule |
Player Damage |
Gunnery Chair Radar |
SUBTARGETING BRACKETS
This check box toggles the subsystem targeting indicator boxes on and off.
INTERFACE SLOWDOWN
If this box is checked, the game will be slowed down to one-fifth its current speed while you art at an officer’s station such as damage control, to give you more time to manage your ship systems.
HUD OPACITY
This slider will adjust the opacity of the HUD gauge background polygons to aid text readability in some terrains.
RETURN
This takes you back to the main menu.
QUICK BATTLE
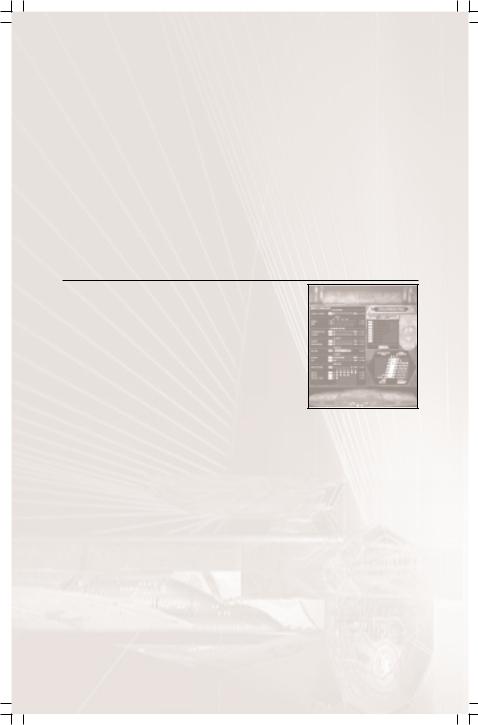
The Quick Battle generator is loaded like any other mission from the Simulator Menu. But, unlike other missions, the Quick Battle generator brings up a menu to assist you in selecting the battle options.
SYSTEM
This scroll box displays the various star systems and terrains that a Quick Battle can take place in. Highlight the system that you wish to play in.
SHIPS
This scroll box contains a list of all ships available for Quick Battle.
18
TEAMS
There are two Team Windows, which display up to 8 ships each. The first ship in Team 1 is your ship; the AI controls all other ships. All other ships on Team 1 are assigned to you as wingmen. Next to each Team Window there is a pair of buttons labelled ADD and REM. The ADD button will add the highlighted ship in the Ships scroll box to the Team Window the button is next to. The REM button will remove the highlighted ship in the Team Window the button is next to.
PLAY
Clicking this button accepts all the settings and starts the Quick Battle.
CANCEL
This button returns you to the Main Menu.
STARSHIP OPERATIONS
The purpose of the Academy is to train the very finest warship commanders in the galaxy. In order to graduate from this institution and take your place among the stars, you must understand the purpose and function of each system aboard your warship. Only then will you be prepared to succeed in the trials before you, and to take you place in the great coming conflict with the United Federation of Planets.
SYSTEMS
A warship is basically a collection of systems held together by the framework of the ship’s hull. Each system is essential to the efficient operation of the vessel and when wielded together, form an extremely effective weapon.
POWER ALLOCATION
One of the most essential tasks in starship operations is power allocation. All ship systems require power, and effective power management can prove to be the deciding factor in battle. Power is a limited resource, and must be carefully allocated to each ship system in order to meet the ever-changing demands of combat. There are two concepts that need to be understood in order to properly manage your ship’s power: power requests, and power priority.
Each ship system has controls on the Engineering screen and officer stations that adjust the
amount of power that system is requesting. By turning on shields from the Engineering screen or by giving a verbal order to move at full impulse, you are requesting that the appropriate amount of power be assigned to these systems. These resources will receive the power that you requested as long as there is available power to do so. If the amount of power that is being requested exceeds your ship’s current power generation some systems will have to go without power. To determine which systems to keep activated and which to shut down your Engineer will follow the power priorities you have given on the Engineering screen.
Every system aboard your starship is assigned a power priority from 0 to 9 on the Engineering screen. The system with the lowest priority number will receive its power first, with the remaining power being allocated to the next lowest number and so on, until all available power has been distributed. Systems that share the same priority number will receive power in equal amounts simultaneously. Once all the available power has been distributed, your engineer will shut down any remaining systems that have not received power, until additional power is made available for them.
By carefully setting the power request and power priority of your ship’s resources before battle, and by utilising power macros to save your preferences, you can effectively manage your ship’s power. Following the priorities you have given, your engineer will be able to automatically compensate for damage or repairs made to power generators during battle, so you can remain in the captain’s chair.
We will now discuss the actual controls that will enable you to set power requests and power priorities from the Engineering screen and officer’s stations, and review the effects of power macros and verbal order (VOS) commands given from the HUD.
MANUAL POWER ADJUSTMENT
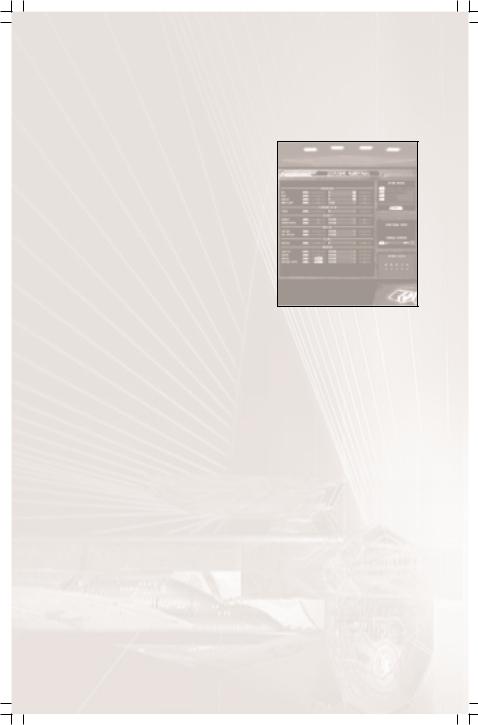
From the Engineering station or individual officer’s station, you may manually adjust the amount of power requested by a ship system. There are four different types of controls on these screens that are used to make power requests.
The first and most common type of power control is the power booster. The power booster consists of an “On / Off” button followed by a slider and an efficiency percentage. Pressing the On button will request the minimum amount of power necessary to activate the system. Once activated, the efficiency percentage for the system will be displayed.
19

You may increase the efficiency of the system by using the slider to boost the amount of power to that system, hence the term “power booster”. The slider range is from one unit of power up to 50% of the ship’s original total power output. The impact of additional power to a system’s effective efficiency is determined by a formula unique to each system. By experimentation you can figure out how additional power affects each system. The efficiency of a system is also effected by damage, crew experience, crew staffing level and the presence of elite officers. The efficiency of the Sensor, Tractor Beam and Transporter systems are further modified by factors external to the ship such as the range to the currently selected target, ECM of that target and terrain effects.
The second type of power control is the movement power throttle. This control is used by the Helm to request power for impulse and warp movement. The throttle consists of a power slider with the speed markings of a throttle. Moving the slider along this gage will request the necessary power to move at the indicated speed. Your ship will not actually begin moving at the selected speed until you give the appropriate command from the VOS or the Helm screen.
The third type of power control is the stepped power request button utilised for the Medical system. It consists of an on / off button followed by a three position toggle and an efficiency percentage. The toggle switch will alternate between “Standby,” “Medical Alert” and “Emergency.” Each medical level requests a fixed amount of power since all of sickbay must be powered to accept casualties at the desired level.
The fourth and final type of power control is the banked resource control panel utilised by the shield and weapon systems. The ship’s banked systems are each controlled by an on / off button next to a small triangular button and a row of LED lights. Shields and weapons aboard a starship are grouped into banks, with a single bank for each firing arc. The row of LED lights indicate that status of each bank of that system, with yellow representing basic charge, orange representing a weapon or shield overloaded (reinforced) to 150%, and red representing a weapon or shield overloaded (reinforced) above 150%. If a bank is not powered these indicator will not be displayed. Pressing the small triangular button next to the resource will replace the LED lights with a Bank Preferences window. Within this window, the player may elect to turn off or overload an individual bank. Listed within the window will be the name of each bank (firing arc) and a button that cycles between three settings: off, charge, and overload. When this button is set to the overload position, a second button will appear which will cycle between the following overload settings: 125%, 150%, 175%, and 200% (for shields this represents reinforcement). Pressing the On button for shields or a weapon system will activate all banks. As with the stepped power request button used for Medical, each overload level is requesting a fixed amount of power.
POWER PRIORITY
Power priorities can be manually fine-tuned at the Engineering station. To the right of each power control on the Engineering screen is the system’s priority number. You may assign a priority level to a given system by clicking on the up or down buttons next to the priority number.
The individual officer’s stations do not have a priority number next to their power controls. This is because only at the Engineering station do you have the necessary information to set meaningful priority levels. Instead, the other stations have a priority override button next to their power controls. By pressing the priority override button, the power priority of the selected system will temporarily be set as the highest possible priority (Priority 0). This ensures that the item receives the power it is requesting. Only one system at a time may be on priority override. Once another system is given a priority override, the previous system that was on priority override will return to its original power priority. Orders given from the VOS automatically receive priority override status, as it is assumed that the captain’s immediate order takes precedence over previous instructions.
POWER MACROS
On the Engineering station, there is a list of eight pre-set power request and priority configurations. These Power Macros can be called via hotkeys or through the VOS. Calling a power macro will automatically reset the current power request and priority setting to those saved in the macro. These are particularly useful during battle as they enable you to make rapid changes to your power allocation to reinforce shields or cloak your vessel and repair. You can utilise the eight pre-set macros below, or create and save your own macros. You may delete all of your macros and restore the defaults by exiting the game and deleting the contents of the macros folder.
BATTLE - STANDARD: This macro configures the ship for battle at full impulse, with no particular tactic in mind. This is a basic, multipurpose combat setting.
BATTLE - OFFENSIVE: This macro configures the ship for a highly aggressive combat profile at half impulse while charging transporters, tractors and overloading weapons.
BATTLE - DEFENSIVE: This macro configures the ship for a more defensive stance at half impulse while heavily reinforcing shields.
STEALTH: This macro configures the ship for maximum invisibility. If the ship is equipped with a cloaking device it will be activated. Otherwise the vessel will run at half impulse and make heavy use of ECM. Reducing impulse speed from the VOS will boost ECM even further.
HUNT FOR CLOAKED SHIPS: This macro configures the ship for hunting cloaked ships at half impulse, by allocating large amounts of power to sensors. Reducing impulse speed from the VOS will boost sensors even further.
20
WITHDRAW AND REPAIR: This macro configures the ship for the maximum repairs at full impulse. If the ship has a cloaking device, it will be activated. Once you have broken away from the engagement, reduce impulse speed from the VOS to speed repairs.
REPEL ENEMY MARINES: This macro is designed to maximise the ship’s security defences while maintaining full impulse. Reducing impulse speed from the VOS will boost security substantially. If the ship has a cloaking device, it will be activated.
WARP OUT: This macro configures the ship for maximum warp speed and repairs. If a cloak is present, it is activate.
DAMAGE CONTROL
Your crew will automatically make repairs to damaged systems, even if no power is allocated to damage control. As your crew gains in experience, the rate at which they can affect repairs will increase. If crewmembers are injured or killed in battle, your repair rate will decrease substantially. In fact, your ship’s rate of repair is directly related to your crew staffing level as reported on your ship’s medical screen and HUD. Therefore, if half of your crew is injured or dead you will take twice as long to conduct repairs.
Although power is not required for your crew to conduct repairs, merely activating the damage control system will make your teams twice as effective and allocating additional power will continue to improve their performance.
As your ship becomes damaged, parts of it may be blown off or entire systems may be destroyed. Should a portion of the vessel is destroyed, such as a breach in the hull or the partial loss of a warp nacelle, the crew may not be able to fully repair that system in the field. When this occurs, the repair time on the damage control station will be listed as “MAX” once your crew has repaired that system as much is possible. If a resource is fully destroyed (i.e. listed as “destroyed” on
the damage control station and at 0% damage level) your crew cannot affect any repairs in the field.
THE EFFECTS OF DAMAGE
As you will be commanding a ship of war, damage to your starship is inevitable. In order to better assist you in making decisions on damage control allocation you must first understand how damage effects the systems aboard your starship. Knowledge of how the performance of the individual systems degrades is key in making intelligent choices that could snatch victory from the jaws of defeat, or send yourself and your crew to a glorious if ultimately useless death.
In general, damage to specific systems result in loss of operation effectiveness, forcing a performance degradation or the allocation of additional power to the damaged systems just to compensate. A system is considered to have suffered minor damage at seventy-five percent to ninety-nine percent integrity, heavy damage at thirty-five percent to seventy-four percent integrity, critical damage at fifteen percent to thirty-four percent integrity, extensive at one percent to fourteen percent integrity, and destroyed at zero. At twenty-five percent integrity, a given system goes off-line due to the damage incurred. The system can still be repaired, but it will not function until brought back on-line by repairing it up to twenty-six percent integrity or higher.
HULL: Damage to the hull, or space frame of the starship, results in high amounts of crew casualties and general loss of structural integrity. Though ship performance is not degraded by physical damage to the hull, the crew casualties do result in overall performance loss to every ship system. Unlike other systems, hull does not go off-line, though if hull is destroyed the entire ship is destroyed with it.
IMPULSE: The effects of damage to the impulse engines are very serious. First, there is a loss in manoeuvrability and maximum speed. Additionally, there is a loss in power generation from the impulse reactors, making impulse a highly critical system and one that is worth serious consideration when distributing damage control power. When impulse engines are knocked off-line, all impulse travel stops, the ability to perform emergency manoeuvres is lost, and manoeuvring is done with manoeuvring thrusters only. (See IMPULSE for more details on the relation between impulse engines and manoeuvring thrusters.) Power generation is unaffected by off-line status.
WARP: Damage to the warp engines results in power losses. If the warp drive goes off-line, warp travel is no longer possible, either in-system or out-system. Like the impulse fusion reactors, power generation from the warp core is unaffected by off-line status.
AUXILIARY: As the auxiliary reactors get damaged they generate less power. The reactors do not go off-line.
SECURITY: The security system loses some of the defensive benefits it offers to your onboard marine complement as it is damaged. If the security system goes off-line it no longer offers any defensive benefits until its operation is restored.
21
TRANSPORTERS: When the transporters are damaged, their ability to maintain a safe lock is compromised, thus forcing the captain to increase transporter power or try some other means of compensating for the performance degradation. If the transporters go off-line they shut down immediately. Once they are brought back on-line they must recharge again as normal.
MEDICAL: If sickbay suffers damage, the healing rate of the crew decreases. Sickbay can go off-line, and when it does the condition of injured crew begins to worsen.
SENSORS: The sensors system is actually the source of both the sensor and ECM functions of your starship. Because of this, damage to the sensors resource not only reduces the strength of your sensor locks, but will reduce the effectiveness of your defensive ECM generation as well. If the sensors resource goes off-line, all targeting information on enemy ships as well as the radar display shuts off. ECM shuts off as well, and neither the sensors nor the ECM functions of the starship can be activated until the sensors system is brought back on-line.
TRACTOR BEAM: Damage to the tractor beam simply results in lower strength tractor links that are more easily broken. It also makes breaking tractor links with repulsor beams more difficult because more power than normal would be required. If knocked off-line, any existing tractor links drop and the system cannot be used. Once back on-line, the tractor beam system must recharge before it can be operated again.
CLOAKING DEVICE: As long as the cloaking device is on-line, there is no performance degradation due to damage. Once the device is off-line, it shuts off if already active and cannot be reactivated until brought back on line.
SHIELD GENERATOR: Damage to the shield generator results in decreased recharge rates for all shield facings. If the shield generator is knocked off-line, all shield facings drop immediately and lose all currently stored charge. When the shield generator is brought back on-line, the shield facings begin recharging from zero.
WEAPONS SYSTEMS: For most weapons systems, damage simply results in longer recharge times between firings. There are two notable exceptions. A damaged GDDS or Web Spinner suffers from a decrease in the duration of the weapon’s effects when activated.
On a side note, the tractor beam system is required for the operation of a GHRC, QCB, or Web. The tractor beam resource merely needs to be activated at minimum level and charged, but if the tractor beam resource is off-line or destroyed these weapons will not function regardless of their damage status.
IMPULSE
Impulse engines are the source of the bulk of the movement capability of your starship. Further, the fusion reactors that provide supplementary power to the impulse engines can be tapped for other uses as well, furnishing a full thirty-five percent of the ship’s total power generation. This dual function of movement and power generation makes the impulse engines a very important system aboard your ship.
IMPULSE MOVEMENT
Power for movement must be set aside, or allocated to the impulse system. This gives the impulse engines ready and immediate access to the power necessary to travel at the speeds you require. The actual movement speed can be set independently of the power available to the impulse engines, but it can never be set higher than the maximum power currently allocated. Please note that impulse movement and warp travel operate independently of each other and one is not required for the other.
Manoeuvring the starship is handled through a combination of the impulse
thruster units and smaller low-powered attitude adjustment and docking thruster units scattered about the hull.
At a full stop-with or without power actually allocated to the impulse engines -a ship may still rotate, though this is with the manoeuvring thrusters only. Manoeuvring at impulse speeds is handled through thrust ratio adjustments in the output of the impulse thruster units, and is supplemented by the smaller manoeuvring thrusters. At low speeds the impulse thrust output is insufficient to manoeuvre the starship at maximum turning velocities, despite the supplemental thrusters. This makes lower speeds less than optimal for tight combat manoeuvring. At one-third impulse velocities, the thrust ratio becomes sufficient enough to enable full turning speed manoeuvring.
22
EMERGENCY MANEUVERS
The impulse engines are capable of thrust ratios far beyond the structural capability of your starship’s space frame, if only for very short periods of time and at the risk of structural breakdowns. This has resulted in the tactical development of emergency impulse manoeuvres. These manoeuvres take a sizeable amount of power, so they are only available if the power to travel at one-half impulse speed is actually allocated to the impulse engines. (See POWER ALLOCATION for more information on actual power allocated versus power requested.) The emergency manoeuvres are as follows:
EMERGENCY TURN: The thrust ratio of individual impulse thrusters can temporarily be thrown out of normal balance, resulting in quicker turning for your starship. A successful execution of an emergency turn results in the doubling of your ship’s manoeuvrability rating for approximately three seconds. Once active, the power build-up begins in the impulse system even though the starship may not be manoeuvring. It is this power build-up that is the time limiting factor, as it may only be maintained for the three seconds time span. Any time the ship begins to manoeuvre within the build-up period, it is executed at twice the normal speed and it is here that the possibility of structural breakdowns is realised, meaning that only the act of manoeuvring under emergency turn conditions can result in a breakdown.
EMERGENCY STOP: Occasionally, a captain will find himself in dire need of stopping quickly. In those situations and emergency stop may be ordered. This directs the impulse engines into a violent high-power braking mode, causing the ship to come to a complete stop from full impulse speeds in less than four seconds. Given the mass of the starships today, this can be expected to be extraordinarily taxing to the ship’s space frame. Any time during the slowdown period, the ship’s frame may succumb to the strain and result in a breakdown.
EMERGENCY REVERSE: A similar manoeuvre to the emergency stop, the emergency reverse takes the starship beyond merely achieving a dead stop by actually causing it to reverse course at the maximum reverse speed of one-quarter impulse. Like the emergency stop, the slowdown and reverse acceleration process takes less than four seconds. Any time during the slowdown and reverse acceleration period, the ship may breakdown.
STRUCTURAL BREAKDOWNS: If an emergency manoeuvre, or other high hull stress situation occurs such as entering the accretion disc of a black hole or firing certain advanced weapons, results in a breakdown two things occur. First, control of the ship is temporarily lost. No commands of any kind can be issued at this time, and helm controls will not respond as the ship tumbles out of control. Second, and more devastating, is the large amount of damage and crew casualties inflicted during the breakdown. Virtually every system aboard the ship is damaged and the crew losses can be costly.
WARP
The warp drive of a starship, and its related matter / anti-matter warp core, are the foundation upon which the power of a starship is built. Without warp capability, a vessel is unable to travel to even nearby planets in a reasonable amount of time, much less travel to another star system. And, when not in use for powering the warp drives for travel, the warp core itself provides forty-five percent of the ship’s total power output. Because of the nature of starship combat, warp speed travel and the power provided by the warp core are crucial. This makes the warp drive system critical to your success.
Warp travel has a few general properties that are common to both in-system and out-system warping. Once the warp engines are engaged, it will still take several seconds for the Chief Engineer to attenuate the proper warp field geometry necessary for warp travel. Once the warp field is properly formed, the ship will then accelerate to warp speeds. During this time, however, you may not manoeuvre the ship at all, as all manoeuvring is locked into the navigational computer and linked to the warp field status. This down time can leave you extremely vulnerable, so be sure that any enemies in the area have been
sufficiently dealt with before engaging the warp drive. Warp speed travel operates independently of impulse movement and one is not required in any form for the other.
On an additional note, if you order the Helmsman to engage the warp drives though the VOS, the Chief Engineer assigns priority override to the warp drive power throttle. However, unlike a normal priority override, the Chief Engineer will return the warp drive’s power priority to its previous level as soon as the journey is completed.
23
IN-SYSTEM WARPS
In order to warp in-system, enough power must actually be allocated to the warp drives to travel at least at warp factor one. In-system warps can be engaged to any object or planetary body within the system that is 100,000 K (100 Mk) or more away from your current position. Once an in-system warp is engaged, you may not change course or reallocate power until the destination is reached. When approaching the destination, the ship will begin braking and will come to a stop 30,000 K away from the target. In the case of a moving warp destination, such as warping to a targeted ship, your destination point is the last co-ordinates of the target when the warp drives were engaged. You will not pursue the target while at warp.
OUT-SYSTEM WARPS
Warping out-system is handled in a similar fashion as in-system warping with a few exceptions. First, a destination star system must be pre-set either on the Helm station or through the VOS. Please note that the VOS will only list those systems necessary for the completion of your mission. If you wish to travel off the mission path for some reason, you must do so from the Helm station. Second, out-system warps can take days or even weeks. This time is factored into the overall mission time limit, so speed is crucial for completing missions in a timely manner. Additional power allocated to the warp drive will allow the ship to attain greater warp speeds and thus cut down the travel time required between systems.
AUXILIARY
Every starship carries with it auxiliary power reactors. These reactors provide a seem secure source of power for a starship, sufficient to run the basic support functions of the ship in the case of the loss of the warp core and the impulse fusion reactors. The power generated by the auxiliary reactors equates to approximately twenty percent of a starship’s total power output.
SECURITY
The security system aboard a starship is in actuality a collection of several smaller systems powered and controlled from a central location. These systems include antiintruder force fields, disintegration screens, toxic gas jets, and depressurisation vents among others. The Chief of Security uses these tools to seal off, isolate, and eliminate enemy threats aboard the ship. But, all these things require power, and the more power they have available, the greater their effectiveness at defending the ship from intruders.
Without the benefit of aid from the security system, your onboard marines can only defend the ship at about seventy-five percent of their normal combat effectiveness, so it is extremely beneficial to maintain at least minimal security system power. Additional power to the security system can effectively double the defensive strength of your
security forces, allowing them to more swiftly eliminate the intruders. Security power only benefits your defensive capabilities. It offers no benefits to away teams you have sent to other vessels. If no marines are onboard, the Security system is still capable of defending the ship to some degree, and can eliminate intruders on its own over time.
TRANSPORTERS
Transporters are quite a useful system in the hands of a creative and resourceful captain. With them, a captain can cripple or even capture enemy vessels. The transporter system encompasses all transporter facilities aboard the ship and activating the transporter system powers all of them, taking eight seconds for them to become fully active. Transporters have a limited range in which transporting is safe. At normal, non-combat settings this safe transport range is 5000 kellicams (K). Boosting power to the transporter system can extend the range to a maximum of 15,000 K.
24

TRANSPORTING AND RETRIEVING AWAY TEAMS
To commence safely transporting an away team, several conditions must be met. First, the target vessel must be within transporter range. Second, you must have a direct line-of-sight with a downed shield facing on the target ship. Third, you must have sufficient sensor lock strength to determine the class of the target vessel. If these conditions are met, you may begin the transport.
Transport occurs in groups of five to fifteen marines, depending upon the number of transport facilities aboard the ship. Typically, the larger ships have more transporter facilities and are thus capable of higher transfer rates. A single group of marines, be it one marine or the maximum number possible per group, takes six seconds to transport. Your Transporter Chief will automatically lower the necessary shield face on your ship to facilitate the beam out, and will raise it once the full away team has been dispatched. If for some reason the transport cannot be completed, such as the target pulls out of range or blocks the transporter lock with an active shield, the remaining members of the away team will stay on standby in the transporter room(s) and will resume transport as soon as conditions permit. You may only beam an away team to a single target at a time, but you may have multiple away teams active concurrently. Retrieving your away teams is similar to transporting them out, and all the same conditions apply.
TRANSPORTER LOCK AND ACCIDENTS
During combat, it behooves every starship captain to prevent his ship from being boarded. Failing in this, the only other recourse is to make the task of transporting as risky and as dangerous as possible. This can be done by interfering with the transporter’s ability to lock in on a safe transport destination. Many things factor into the quality of a transporter lock. First, damage to your sensors can introduce imprecision into the transport lock. Second, ECM of any kind, be it ship generated or naturally occurring, can severely hamper accurate transporting. Third, range to target is a major factor. Transport locks can be improved by closing range and by boosting power to the transporters system.
In cases where the transporter lock is less than one hundred percent, transporter operations may still be initiated but at some risk. For each group of marines being transported, some may not rematerialise, be reassembled improperly, or materialise inside of another object. It is up to you as the captain to determine if the benefits are worth it.
MEDICAL / SICKBAY
Crew casualties occur when the hull of your starship is damaged, or when enemy marines board your ship, or if radiation penetrates the shields. These injured crewmembers are classified in one of four conditions. In order from best to worse these classifications are: active duty, wounded, critical, and dead. As the condition of injured crew changes they move from their current classification to the next, degrading crew conditions shift down the list towards dead. Healing crew shift up the list towards active duty. Thus, a critical crew casualty will die if his condition worsens or shift to wounded status if he heals.
In order to save as many of their lives as possible and return them to active duty, power must be allocated to the medical facilities in the ship’s sickbay. Activating sickbay power stabilises the injured and enables the wounded and critical crew to heal. However, even in this age of scientific and technological wonders, dead is dead. Sickbay power may be set to any one of three status levels; Standby, Alert, and Emergency. Each level draws a larger amount of
power than the previous level but offers significant increases in healing rates. Standby is the basic setting, requiring the least amount of power and healing crew at a modest rate. Alert requires significantly more power, but offers three times the healing rate of Standby. Emergency is the most costly setting, but grants the greatest benefits. Emergency offers five times the healing rate of Standby. If sickbay is not powered for some reason, it is destroyed, off-line, or simply shutdown, the condition of injured crew will gradually worsen until all of the injured are dead.
CREW
It is often difficult to consider a starship’s crew as a system. Over time, they become your brothers, comrades who fight glorious battles with you and bleed on the same distant battlefields as you. But, in the end, they are merely a resource to be used by the captain to accomplish the goals of the Empire. They join the Imperial Navy to serve and die for the greater whole. While they are expendable, they are nonetheless integral to the smooth operation of your vessel.
Starships are designed to operate best with a full complement of crew. A full crew is said to be at a staffing level of 100%. As casualties occur, this staffing level is reduced, which has negative impacts on sensor and ECM operations, the effectiveness of the internal security system, the tractor beam and transporter systems, shield reinforcement levels, and weapons recharge rates. Though these systems are noticeably affected, by far the most serious affect of crew casualties is the reduction in your ship’s repair rate. (See DAMAGE CONTROL for more information.)
As your crew completes missions, those who survive gain experience. The more crew that survives a mission, the higher the overall experience level increases. This can and often does allow your ship to perform somewhat above its normal specifications. The items that benefit from an experienced crew are the same systems and functions that suffer from crew losses; sensors, ECM, security, tractor beam, transporters, shield reinforcement, weapons charge rates, and damage repair rates.
25
ELITE OFFICERS
If you accomplish great exploits one of your officers may prove to be a cut above the rest. There are various possible elite officers, and each has a beneficial effect on some aspect of your ship’s operation. The officers and their effect on your ship are left for you to discover.
SENSORS
The sensors of your starship allow you to gather and display the myriad information necessary for effective starship combat. Fully functioning sensors with a solid lock on an object provide your ship with the capability of targeting enemy starships, getting accurate targeting information from the targeting computer, utilising the target aspect angle display on the HUD, allow seeking weapons to track, gather and display target status information, displaying the radar, and the assorted HUD reticule indicators. If the sensors are off, due to damage or lack of power, you are basically flying on visuals alone and this can result in a quick death on the battlefield.
The strength of your sensor lock on a given target determines just how much information about that target that can be gathered. The power allocated to the sensors, the range to the target, enemy ECM, terrain effects, your crew staffing level and the damage status of your sensors system all factor into the overall strength of your sensor lock. A full sensor lock gives
you the distance to target, its speed, the status of its shields, indications if its weapons are armed or if it’s generating ECM, and the status of its external subsystems, as well as its target aspect angle, radar blip, and targeting reticule indicators for it. As the lock degrades the readings of the status of the shields and subsystems become inaccurate, as do your weapons when firing on the target. The readings will begin to fluctuate in an ever-increasing range of values until finally the damage status readings are lost completely and weapons fire becomes extremely inaccurate. At this point, only the class of ship can be determined.
Given a sufficiently degraded reading, eventually target lock can be lost altogether. Complete loss of target lock only occurs when the target vessel is generating sufficiently high ECM, through powering the ECM system, activating a cloaking device, entering certain terrains, or a combination of these. When target lock is lost, your sensors may still pick up sporadic readings on the previously targeted vessel. These readings or “blips” can give you a general sense of the target’s location.
Sensor lock strength can be improved in a variety of ways and by a variety of actions, to counter any deleterious effects on your sensor strength. Even a sensor lock too weak to produce anything but the occasional blip can be improved to the point where contacts are long and frequent, if not strong enough to produce an actual lock. Allocating additional power to the sensors will increase your sensor strength, as will closing range to the target. Probes launched at the target also act to improve sensor lock strength, by relaying sensor telemetry to your vessel from closer range. Hitting an enemy with weapons fire temporarily causes a powerful sensor ping or spike, which can be quite useful when searching for a cloaked ship. Additionally, both of the ships involved in a tractor beam link become highly visible as long at the link is in existence.
ECM
ECM is a powerful defensive capability of the sensor system, and allows you to throw off enemy targeting and their ability to detect your damage and shield statuses. In sufficient strength ECM can even cause losses of sensor locks in a similar fashion to a cloaking device. This, however, is usually only possible if the targeting ship is sufficiently far away, its sensors are damaged, or you are within a terrain that generates additional natural ECM.
ECM requires a lot of power, and the more power that can be put into it the more effective it is. This means that larger vessels, with their enormous power generation capacities can generate more ECM than other, smaller starships. However, since ECM can be defeated with additional power to the sensors and that powering the sensors is less costly than powering ECM opponents can compensate for ECM rather effectively. This forces ECM to be used in specific situations in which an opponent may not be able to compensate for the interference quickly.
TRACTOR BEAM
The tractor beam is a versatile tool. It is most commonly used in towing and manipulating large objects in space, but this industrial usage is only a portion of its actual abilities. In combat it can be used to hold an enemy to prevent escape or slow one down long enough to allow you to get in a critical shot. Many captains have developed other tactics involving the tractor beam, and creative use of it can be devastating to an opponent.
The tractor beam emitter must build up a sufficient charge to establish a proper gravity field, a process that takes eight seconds. Activated, a tractor beam can be maintained indefinitely, though if the beam is shut off for any reason, the tractor beam emitter must recharge.
26

The tractor beam system is capable of 360-degree operations, and may be attached to any target with its maximum range of 7,000 K. Once a link is established, the beam attempts to stabilise the distance of the target at 3,500 K, though it does not alter the target’s relative position. If the target should drift outside of the maximum tractor range, the link is immediately broken and the tractor begins the recharging process.
While linked, either ship may manoeuvre. Rotation is unrestricted, though the linear thrust of the linked ships creates additive vector movement, meaning that both vessels may begin travelling in directions other than normal flight. This can have a negative impact on shipboard targeting computers; so many captains prefer to manually target their weapons under these conditions.
COMBAT TRACTOR DYNAMICS
When utilising a tractor beam against an enemy, it is safe to assume that they are unwilling to be held. The converse should also be true; else your term of command will be shortened considerably. This has resulted in a particular offensive/defensive tractor dynamic in combat situations.
Defensively, a starship in combat has two potential options against enemy tractor beams. First, and most obvious, is to avoid entering tractor beam range, but this also reduces the starship’s combat effectiveness. Second, faster ships can maintain high velocities
and remain at the outer edge of tractor beam range. If a link is established, the high speeds in combination with a sharp manoeuvre away from the tractoring starship can quite often carry the target ship outside of the maximum tractor range and break the link. This tactic is best for smaller ships. Finally, a starship may utilise its own tractor emitter to generate a repulsor beam in an attempt to throw off a tractor link. A repulsor beam must be stronger than the holding tractor to be able to break the link. Once the link is broken, the repulsing ship’s tractor emitters must recharge. This tactic is best reserved for situations in which the defending ship is of equal or greater class than the tractoring vessel.
Offensively, there is really only one option available, and that is to increase power to the tractor beam emitter. Stronger beams make it more difficult for a defending ship to manoeuvre, prevent ships from getting outside of maximum tractor range, and increase the difficulty of a repulsor attempt.
CLOAKING DEVICE
The cloaking device was given to the Klingon Empire by the Romulans in the initial technology exchange at the start of the alliance. Since then, it has become an effective tool, becoming standard equipment on new ships, and all old ships have been refitted with them.
The cloaking device masks the vast majority of electromagnetic emissions of a starship using one. This includes the visible light spectrum as well as a host of other subatomic and subspace emissions. It grants a much greater chance of gaining surprise and the everimportant first strike in combat, by allowing the cloaked ship to stealthily approach hapless and unwary enemies. However, it is by no means foolproof. As fast as improvements can be made to cloaking technology, the non-cloak using governments develop ever more powerful sensors. This upward spiralling arms race dynamic keeps the cloak from achieving status as a true invisibility shield, but the benefits granted even by an imperfect cloak are well worth further development of the system.
A cloaking device, when activated, renders the ship virtually invisible to visual scanning. Only a slight visible distortion betrays the presence of a cloaked vessel. For visual scanning, a cloaked ship almost invariably escapes detection by all but the most observant enemies. While the cloak is nearly perfect against visual scanning, sensor technology has progressed to sufficient levels to allow for the intermittent detection of a cloaked vessel. This intermittent sensor anomaly increases in frequency and duration for the searching ship based on range and power to the sensors, making the preferred tactic of the cloaked vessel to choose the attack run path from longer ranges, close range as fast as possible, decloak, and fire.
Despite the fact that the cloak is a highly effective system, it does have drawbacks. While the cloak is activated, weapons fire is not possible. The cloaking device must be disengaged in order to fire the ship’s weapons. Weapons may maintain charging status, so they may be fired as soon as the cloak is disengaged, but firing while cloaked is not possible. Also, the tractor beam may not be engaged while cloaked and any existing tractor beams emitting from the ship will disengage. This does not break tractor links established on the cloaking vessel by an enemy ship. Finally, the cloaking field interferes with transporter function to such an extent that transport is impossible while the cloaking device is engaged. One other additional disadvantage is that the cloaking device will not function within the ionised gas clouds of a nebula.
When a ship engages its cloaking device, it will be fully cloaked within four seconds. During this cloaking period the ship is quite vulnerable. The shields of the ship immediately drop, as will any tractor links being generated by the cloaking vessel. ECM and transporters also cease to function. Your Chief Engineer will automatically divert power from these systems until the cloak is deactivated. However, the ship is still somewhat visible to the sensors of other ships. Each second of the cloaking process increases the invisibility of the cloaking ship, thus the greatest danger is at the very beginning. Once fully cloaked, the ship is essentially invisible and can only be intermittently detected by power boosted sensors. An additional advantage of being fully cloaked is that, though enemy vessels may get blips, the sensor lock can never be sufficient to allow the enemy to transport marines aboard your ship, or initiate a tractor link.
27

SHIELDS
The primary source of defence for a starship is its shields. The shields form a seem formfitting energy shell around the whole of the starship that has the properties of both a seempermeable solid and energy absorptive screen. This dual nature of the shield system provides protection from most physical impacts as well as from energy discharges such as the destructive energy of a phaser or the deadly radiation emitted from a star. This energy shell emits through a network of six energy dispersal grids embedded in the hull. Power from the ships reactors is converted to the necessary format through the shield generators aboard the ship, and routed to the shield grids. It takes two seconds for the grid to fully activate, at which point it emanates its energy field. Activating the shield generator creates an apparently contiguous energy shell, though in actuality it is six individual shields. These six individual shields, known as shield facings, protect the forward, aft, port, starboard, dorsal, and ventral parts of the ship respectively. This does not necessarily mean that all weapons fire coming from a particular direction will hit only one specific shield facing. Because space
is three dimensional, often three or more shield facings can be struck from a given angle. Keep this in mind when manoeuvring your vessel. Depending upon the design of the starship, the different shield grids are capable of generating shields of different strength, meaning that though two shield facings may be at one hundred percent, one may be capable of absorbing more damage than the other. The forward shield facing is typically the strongest. Klingon vessels tend to follow a pattern of forward being the strongest, aft being next strongest, port and starboard being next, and dorsal and ventral being weakest. The Federation, on the other hand, tends to make the forward strongest, then the aft, then the rest all being of equal strength. The pattern of shield strength typically follows the degree of aggressiveness in a given ships design. More aggressive designs tend to concentrate strength in specific shield facings, while more defensive designs keep things more evenly distributed.
Damage inflicted on a shield is absorbed, though it weakens the cohesion of the energy field, which reduces its capacity to absorb further damage. Once this field begins to weaken it will begin its natural process of returning to its coherent state or “recharging”, slowly restoring its ability to protect. Additional power to the shield generator system will speed up this recharging process, and also generates an additional protective layer of reinforcement to the shield itself. This additional layer is a kind of quantum particle aura emanates from the shield energy shell itself. Though it is ill understood the source of this aura’s protective abilities, the effects speak for themselves. This aura quite efficiently dissipates energy that passes through it, such that weapons fire and explosive warheads lose some of their nominal damage yield before it strikes the shield energy shell directly. Additionally, this quantum reinforcement is independent of the strength level of a shield energy shell, granting the full benefit of its damage dissipation until the shield itself is no longer coherent. At that point, the quantum aura instantly disperses, but it will reassemble once shield cohesion is restored. Research has revealed that this reinforcing aura has a maximum effectiveness of roughly twenty percent damage reduction. Sadly, though, maintaining any amount of the reinforcement property of the shield system can require exorbitant amounts of power. Seven times the normal amount of power to the shield grid is required to reach the limits of the reinforcement of a shield, which can prove quite costly considering there are six individual shield facings that can be reinforced. Once a shield has lost cohesion, it takes ten seconds for the grid energy to reconstruct the initial framework of the shield facing. Once this occurs, the shield facing will recharge as normal.
The energy absorption property of the shields is highly efficient. Energy impacts, such as phasers and disruptors are fully absorbed. The same cannot be said of the seem-permeable solid property of the shields. Physical impacts and explosions are mostly deflected or absorbed, but some destructive energy still makes it through, regardless of the strength or reinforcement status of a shield. This is known as “bleed through”. Additionally, functioning shield facings can completely deflect radiation damage such as from a solar corona or the Romulan CFDIC. They can prevent or interrupt enemy boarding operations as well.
WEAPONS
ANTIMATTER FIELD PROJECTOR (AMFP)
Nickname: “Antimatter Projector”
Damage Rating: 4
Range: 10,000 K
Firing Rate: 1 / 30secs
The Antimatter Field Projector (AMFP) is a Klingon invention of devastating potential. The weapon itself is based off of the principle of utilising the warp nacelles of a starship to project a warp containment field in front of the firing vessel. Then, from a special emitter linked directly to the Matter/Antimatter Reactor, antimatter from the ship’s reactor is injected into the field. The integrity of this field begins to degrade almost immediately after firing. During this degradation, matter is passing into the weakening containment field, annihilating some of the antimatter and decreasing the damage capability of the weapon. The firing ship
28
can manoeuvre under impulse power to bring it to bear on targets within the antimatter field. Targets within that field take damage on every portion of the hull within the containment boundary. The power drain from each firing of the weapon causes brief power outages and hull fatigue in the ship that fired it and prevents sustained fire of the weapon.
This weapon is applied by the Klingon Defence Forces as a siege device due to the massive destructive potential of the weapon in concert with difficulties in engaging moving targets with it. It is typically mounted on the Accuser Class Dreadnought. These weapons are very expensive to manufacture and are thus very valuable. Commanders should take every precaution to keep vessels equipped with this weapon undamaged.
ASSAULT PHASERS
Nickname: “Super Phasers”
Damage Rating: 4
Range: 30,000 K
Firing Rate: 1 / 30secs
The Assault Phaser is a really heavy phaser. So heavy, in fact, that only large bases and battleships can carry them. They are the pinnacle of destructive power, easily piercing the shields of all but the most powerful starships and destroying weaker vessels outright. Both the Klingon Empire and the Federation employ the Assault Phaser.
Large bases (Starbases and Battlestations) have great power output capacity and large amounts of space that allow them to use their assault phasers as a primary weapons system. This makes a base very difficult to attack and destroy and virtually impossible to capture.
The ship-mounted versions can only be mounted spinally, where the hull of the ship is built around the weapon system rather than fitting the weapon into a hull. This limitation in mounting gives them an extremely limited firing arc, but provides structural support and space for the necessary systems. Other drawbacks to these weapons are that power reactors for ships are unable to provide an efficient charge for the weapon, and that hull design and materials technology can barely provide sufficient structural support.
The basic lack of power on ships equipped with these weapons means that the weapon must take quite a bit of time storing energy in capacitors attached to the weapon’s energy system. This limitation reduces the firing rate of the Assault Phaser to a fraction of that of a base mounted weapon. An additional effect is that the ship suffers a brief general power brown out after firing the weapon.
Vessels equipped with Assault Phasers suffer from structural and system stresses when firing the weapon. Each firing of the weapon could lead to a catastrophic systems failure.
BOARDING PARTIES
Most ships have a complement of marines assigned to them. These marines act both to defend your ship against intruders and to assault internal targets aboard enemy vessels. Only the offensive capabilities of your marines will be detailed here. The defensive aspects of marines are covered elsewhere. (See SECURITY for more details.)
In order to send marines to a target, you must do two things. First, you must make sure that transport is possible. (See TRANSPORTERS for more details.).
Second, you must assemble the boarding party or “away team” and give it orders. This part can be accomplished through either the VOS or the Security station. A target vessel only has so much space for you to transport marines into. Because of this, the number of marines that can be present on an enemy starship at any one time is limited. This will be displayed on the Security station. Once this maximum number is beamed across, no further transports can be made until any wounded or dead are retrieved. At that point, fresh marines can be transported in to reinforce the current boarding action back up to the maximum number allowed. During combat, marines damage their target objective as well as inflict casualties among the defenders. Certain objects, such as shuttles and workbees, cannot be boarded at all as there is no space for it.
Boarding parties can perform two different types of actions. The first type of action is an attack on a specific target system. There are two types of target systems, hard targets and soft targets. Hard targets are extremely difficult to destroy. These hard targets are warp, impulse, and life support. These systems are extremely resistant to internal damage due either to system redundancies or the sheer size of the system. Soft targets are systems such as tractor beam, security, transporters, medical, auxiliary, shields, and the cloaking device. These systems, while still difficult to totally destroy, are less resistant to damage. When your marines are attacking a system, not only are they causing damage to the system, they are also interfering with its operation. For as long as the marines are attacking a system, that system suffers this performance loss, in addition to any damage being incurred. Actually destroying a target system can be rather difficult, but often the effect of interference is sufficient. A good tactician will sometimes send smaller away teams for the specific purpose of interference, rather than attempting to destroy it outright. The second type of action that can be undertaken is a capture attempt. This is extremely difficult and takes quite a bit more time and perseverance than merely destroying a system, as well as a full complement of marines. Ships may only hope to capture vessels a class or two below them, unless special circumstances
29
occur, such as stumbling into an enemy with no marines, or one whose security system has been destroyed and even then it can be risky. If a ship is captured, the marines aboard stay aboard the captured vessel to maintain control and hold it. You may monitor the progress of any away team actions you have initiated through the MFD on the HUD, or through the Security station.
When a boarding party is in action, it will continue fighting until they are wiped out, retrieved, or they successfully complete their mission objective. Even if there are no defending marines, the internal security system of a starship is more than capable of inflicting at least some casualties on its own. If a vessel is destroyed any marines aboard it are lost, be they attacking or defending. However, if a vessel is captured all its marines are lost, even if they are aboard another vessel. Marines of different races fight with different effectiveness. Klingon warriors are about the finest individually, and the Sha’kurians are the weakest. Though strong and powerful, Gorn are slow and ungainly. This makes them less effective than some races individually, but the real danger from Gorn boarding parties are their numbers. Tholians, due to the environment required to support their kind never utilise boarding parties. Conversely, their living environment is so innately hostile to carbon based life-forms that Tholian vessels cannot be boarded.
COHESIVE FUSED DEUTERIUM
IRRADIATION CANNON (CFDIC)
Nickname: “Radiation Cannon”
Damage Rating: 2.4 / Additional
Radiation Effect
Range: 15,000 K
Firing Rate: 1 / 15secs
The Cohesive Fused Deuterium Irradiation Cannon is a medium ranged weapon of Romulan design. It is an older technology than that of the plasma torpedo, and was developed shortly after the end of the Federation-Romulan Wars in 1535 IR. The CFDIC is little more than a directed fusion explosion. A stream of excited deuterium are injected into the chamber of the weapon and bombarded with high output lasers to create deuterium plasma. This plasma is
continually compressed until a fusion reaction begins. This reaction is contained within a magnetic field and allowed to build to detonation strength. The containment field is then weakened to the point of collapse in the direction of the barrel, where additional magnetic fields direct the energy out of the ship and towards its target.
The amount of damage caused by a CFDIC is low compared to the warhead strength of the plasma torpedo, but physical damage is not the most deadly aspect of this weapon. A side effect of the weapon is the intense radiation from the bolt itself. This radiation is so intense that it can cause damage to the crew of the target vessel without piercing the hull itself. Shields, however, absorb the radiation and disburse it harmlessly.
FREQUENCY-MODULATED MESON
PARTICLE ACCELERATOR (FMPA)
Nickname: “Meson Gun” or “Shield Breaker”
Damage Rating: 2 / Shield Damage Disbursement
Range: 15,000 K
Firing Rate: 1 / 12secs
The Frequency-Modulated Meson Particle Accelerator, as it is called, is a closely guarded secret of the Klingon Empire. Only the Klingon researchers who developed it know the principles behind it. It utilises a top-secret technology to create finely adjustable meson particle streams, invisible, that are directed at the target vessel. These mesons collect around the outer portion of the target starship’s shields, and due to the frequency modulation, the mesons pool in the weakest areas of the shield. Eventually, the shields build
up a tremendous amount of meson energy along their entire surface. This energy is then subjected to a quick pulse of Eichner radiation, the only visible aspect of this weapon, which causes it to detonate, damaging all of the target ship’s shields with the most damage being applied to the weakest shield segment.
30

GORN PLASMA TORPEDO
Nickname: “Gorn Plasma”
Damage Rating: 3
Range: 12,500 K
Firing Rate: 1 / 16secs
The Gorn have developed a plasma torpedo independently of the Romulans. While it is based off of very different scientific principles than the Romulan version, the results are virtually identical. The Gorn torpedo homes in on its target in the same fashion as the Romulan version, but its warhead strength is never greater than its equivalent Romulan light plasma torpedo counterpart.
GRAVIMETRIC HARMONIC RESONANCE
CANNON (GHRC)
Nickname: “Resonator Cannon”
Damage Rating: 4
Range: 7,000 K
Firing Rate: 1 / 16secs
The Gravimetric Harmonic Resonance Cannon or Resonator Cannon is an offensive weapon derivative of the tractor beam developed by the Gorn. The cannon’s beam strikes the target ship and begins to push and pull the hull in a rapid modulation. This vibration eventually reaches the harmonic frequency of the hull and causes structural fatigue and damage. Resonator Cannons require the tractor beam system to be powered as well as the weapon system itself. Loss of the tractor system also results in an inability to fire the weapon. The
weapon has 360-degree firing capability and can be directed at any target within range. Once activated, the beam lasts for eight seconds. If fired while caught in a tractor beam, the GHRC beam instantly breaks the link but the weapon is fully discharged in the process and no damage is inflicted on the target. However, the strength of the beam is so great that no amount of repulsor beam strength will break the grip of a GHRC once it has been fired. One other strange side effect of the design of this weapon is its ability to negate any tractor beam holding the firing ship. All tractor beams holding the firing vessel are immediately broken, but the firing vessel must allow the weapon to fully recharge before firing again.
GRAVITON DENSITY DISTORTION
SPHERE (GDDS) GENERATOR
Nickname: “GDDS” or “Grav Sphere”
Damage Rating: 2 / Collision and Heavy Weapon Absorption
Range: Special
Firing Rate: 1 / 40secs
The Graviton Density Distortion Sphere Generator was developed by the Gorn Star Kingdom during its many wars with the Romulan Star Empire, and is used as an effective means of attacking slow moving vessels. During the war that saw the first use of the GDDS by the Gorn, Romulan troops captured a ship equipped with one of these devices for study. The Romulans towed said vessel to a research facility far from the Gorn border in what was then one of the farthest frontiers of their empire. Unknown to the Romulans, this frontier was to
soon become fixed as their border with the Sha’kurian people. Not long after research began on the enigmatic Gorn device, the Romulans made a regrettable first contact with the Sha’kurians. Romulan expansionist dogma clashed violently with Sha’kurian territoriality causing a second front to open for the Romulans. During the fighting, a Sha’kurian raiding force captured the research station and the GDDS as well. The Sha’kurians proved to be highly adept at adapting the Gorn device to their own purposes and have been fielding them ever since.
Though the two races, the Gorn and Sha’kurians, have nearly identical GDDS technology, they have developed radically different tactics for their use. The Gorn normally mount these devices on the larger vessels in the Gorn Royal Navy because their ramming capability suits the tremendous mass and great speed of large Gorn starships. The Sha’kurians, however, utilise the defensive capabilities of the GDDS to a far greater extent than the Gorn and thus greatly increase the survivability of their carrier forces.
31
The GDDS disperses a spherical field of gravitons in rapidly varying density around the vessel using it. This field remains active for twenty seconds or until the stored energy within the field is expended. This field prevents the generating ship from suffering the effects of collisions, thereby allowing the generating vessel to act as a ram. The GDDS field impacts ships, asteroids, projectiles, and other physical objects as a normal collision with the field absorbing any impact force that would normally have been done to the generating vessel. However, impact absorption weakens the field, reducing its overall strength. Once the field’s integrity is fully compromised, the field is deactivated and any extra collision damage is directed to the hull of the GDDS using ship. Once the GDDS deactivates, the field cannot be activated again until the gravimetric capacitors completely recharged. The GDDS is not an invulnerability shield, however. Phasers, including the assault phaser, and light and standard disruptors pass through the GDDS field unaffected.
IMPULSE VELOCITY PROJECTILES
Nickname: “Missiles”
Impulse Velocity Projectiles are missiles launched from silos, bays, or racks aboard Sha’kurian ships. Overall speed and warhead strength varies from projectile-type to projectile-type. There are four types of impulse projectiles:
ACTIVE TERMINAL GUIDANCE (ATG) SHIP-LAUNCHED
Damage Rating: 2
Range: 15,000 K
Firing Rate: 1 / 16secs
This type of projectile has a bank of image files for all known vessels with the capability of having sensor data downloaded into it at the time of launch to program in new images for unknown targets. These projectiles are launched in the general direction of a targeted vessel at which point the projectile’s own image recognition sensor suite takes over and it follows that particular vessel until it strikes or runs out of fuel. The firing ship need not maintain sensor lock on the target vessel, as the projectile is capable of maintaining an intercept trajectory.
ACTIVE TERMINAL GUIDANCE (ATG) BOMBER-LAUNCHED
Damage Rating: 2
Range: 10,000 K
Firing Rate: 1 / 16secs
This type of projectile is identical in most respects to the ship-launched version, only much, much smaller and with shorter effective range. Though the size of the missile housing is decreased, the warhead’s destructive capability is comparable to the full size version because of its “shaped charge” nature.
MULTIWARHEAD
Damage Rating: 4 / Multi-vector Attack
Range: 20,000 K
Firing Rate: 1 / 24secs
This type of projectile is slower than all other versions but has longer range. This is not its advantage, however. The advantage of this projectile is that it carries six sub-munitions onboard. When the projectile travels a certain distance, the six sub-munitions disperse and home in on the target from many directions. Each sub-munition does a good amount of damage, travels much faster than the carrier projectile, and can hit the target from multiple angles damaging many shields. During dispersal, the backwash of the sub-munitions’ engines destroys the carrier projectile.
32
BALLISTIC (FAST)
Damage Rating: .8
Range: 10,000 K
Firing Rate: 1 / 16secs
The ballistic projectile is a fighter-launched weapon that is basically a warhead attached to a super high-powered impulse engine. These projectiles reach velocities almost equal to that of the photon torpedo and do an equal amount of damage to the photon. However, these projectiles have no homing capabilities of any kind. They are “direct-fire” weapons in the truest sense of the word.
LIGHT DISRUPTOR BANKS
Damage Rating: .6
Range: 15,000 K
Firing Rate: 1 / 1.5secs
This is a rapid-firing type disruptor, similar in nature to the standard disruptor bank. Though the damage from each bolt is individually lesser than those of the standard disruptor bank, its rapid firing rate makes up for it over time. Currently, only the B’rel class escort mounts this weapon, though it is being considered for use on other platforms.
PHASE-INDUCED BIPOLAR
COMPRESSION DISRUPTOR
Nickname: “Heavy Disruptor”
Damage Rating: 1.5
Range: 12,500 K
Firing Rate: 1 / 6secs
This is essentially a grossly overpowered medium range version of the standard disruptor weapon of the Klingon Empire. The Tholian Incursion Reaction Forces also use this weapons system, although it is not known whether they researched themselves or stole it from the Empire. By using a bipolar energy field, the disruptor energy is collected and compressed into a large energy packet. The packet is subjected to a quantum energy bombardment that causes the packet to slightly shift its phase. By purposely leaving a portion of the bipolar
energy field weaker, the phase shift will cause the energy packet to exit the compression unit in a controllable direction.
The energy packet is a small torpedo-like projectile that is less powerful than a standard photon torpedo, but can be fired more rapidly and does not require any sort of expensive casings as do the photon torpedoes.
These weapons are usually employed as a prelude to an actual torpedo strike, weakening the target’s shields as well as causing some internal damage for the heavier pounding of the antimatter torpedoes.
PHASER BANKS
Damage Rating: .4
Range: 15,000 K
Firing Rate: 1 / 3secs
A common primary weapon throughout the Alpha and Beta Quadrants is the phaser. The phaser is a beam of cohesive energy, similar to a Laser but rapidly pulsing. This pulsing is so rapid as to be invisible to the eye. While the behaviour of the phaser is identical from race to race that uses them, the technology driving them is radically different producing a different look for each group.
33
 Loading...