


Warning: To Owners of Projection Televisions
Still pictures or images may cause permanent picture-tube damage or mark the phosphor of the CRT. Avoid repeated or extended use of video games on largescreen projection televisions.
Epilepsy Warning
Please read before using this game or allowing your children to use it.
Some people are susceptible to epileptic seizures or loss of consciousness when exposed to certain flashing lights or light patterns in everyday life.
Such people may have a seizure while watching television images or playing certain video games. This may happen even if the person has no medical history of epilepsy or has never had any epileptic seizures.
If you or anyone in your family has ever had symptoms related to epilepsy (seizures or loss of consciousness) when exposed to flashing lights, consult your doctor prior to playing.
We advise that parents should monitor the use of video games by their children. If you or your child experience any of the following symptoms: dizziness, blurred vision, eye or muscle twitches, loss of consciousness, disorientation, any involuntary movement or convulsion, while playing a video game, discontinue use IMMEDIATELY and consult your doctor.
Precautions to Take During Use
•Do not stand too close to the screen. Sit a good distance away from the screen, as far away as the length of the cable allows.
•Preferably play the game on a small screen.
•Avoid playing if you are tired or have not had much sleep.
•Make sure that the room in which you are playing is well lit.
•Rest for at least 10 to 15 minutes per hour while playing a video game.
1

Fox Interactive Presents:
A Monolith Production of
THE OPERATIVE™ in
No One Lives Forever™
No One Lives Forever ™ is powered by |
™ |
Check out the official No One Lives Forever™ website at
www.the-operative.com
Check out other Monolith titles at
www.lith.com
Check out other Fox Interactive titles at
www.foxinteractive.com
SYSTEM REQUIREMENTS
MINIMUM SYSTEM REQUIREMENTS
•Windows® 95/98/ME/2000
•Direct X™ 7.0 or higher
•Pentium® II 300 Mhz
•64 MB RAM
•8 MB 3D hardware accelerator card with Direct 3D™ support
•High color graphics (16-bit)
•4x CD-ROM
•Mouse
•Keyboard
•56K modem or LAN for multiplayer
•400 MB free hard drive space
•Direct X compatible 16-bit sound card
|
© 2000 Twentieth Century Fox Film Corporation. No One Lives Forever © 2000 Monolith |
|
Productions, Inc. LithTech™ game engine © 1997-2000 LithTech, Inc. All rights reserved. Fox, Fox |
|
Interactive, The Operative, No One Lives Forever and their associated logos are trademarks of |
|
Twentieth Century Fox Film Corporation. LithTech is a trademark of LithTech, Inc. Windows, DirectX, |
2 |
Direct3D are trademarks or registered trademarks of Microsoft Corporation in the United States |
and/or other countries. Pentium is a registered trademark of Intel Corporation Inc. |
TABLE OF CONTENTS |
|
INSTALLING THE GAME ................................................................................... |
4 |
MENUS AND INTERFACE SYSTEM ................................................................... |
5 |
Single Player Menus ......................................................................... |
5 |
Multiplayer Menus ............................................................................. |
7 |
Options Menus .................................................................................. |
8 |
Crosshair System ............................................................................ |
12 |
TOYMAKER’S WORKSHOP ............................................................................. |
13 |
Using Weapons and Gadgets ............................................................ |
13 |
Weapons and Gadgets List ............................................................... |
13 |
Ammunition Types ............................................................................ |
16 |
Weapon Modifications ...................................................................... |
16 |
Gear................................................................................................. |
17 |
DEFAULT KEY CONFIGURATION CHART .......................................................... |
18 |
AGENT TRAINING .......................................................................................... |
20 |
Basic Training ................................................................................. |
20 |
Weapons & Gadgets Tactics ............................................................ |
21 |
Environmental Hazards .................................................................... |
22 |
Using Vehicles ................................................................................. |
23 |
Multiplayer Tactics .......................................................................... |
23 |
UNITY FILES ................................................................................................. |
25 |
CREDITS ...................................................................................................... |
28 |
3

INSTALLING THE GAME
To begin, insert the No One Lives Forever Disc 1 into your CD-ROM drive. If AutoRun is enabled on your computer, the install screen should appear within a few seconds.
Install: This option will launch the setup utility. Follow the on-screen prompts to navigate through the setup screens as follows:
In the Select Destination Directory screen, click Next to install to the default folder or click Browse to install to a different folder on your hard drive.
In the Install Type screen, you may choose from one of two possible installation methods:
The Normal Installation requires 900 megabytes of free hard disk space and will copy both the game and all game data. For maximum performance, use this option.
The Minimum installation option requires 324 megabytes of disk space and will copy only the game files to your hard drive and leaves all levels and other data on the CD. This option is recommended if you need to conserve hard drive space.
In the Select Program Folder screen, simply click Next to add Fox Interactive/No One Lives Forever to the default folder in your Start menu or specify a different folder.
Once setup is complete, click Next to exit the installer.
Uninstall: This option becomes available only after the game has been installed. It allows you to easily remove the game files from your hard drive. Please note that other programs may share certain installation files, so you may be prompted for confirmation before some of these files are removed.
Install DirectX 7.0: This option is required if you do not already have Microsoft’s DirectX version 7.0 or higher installed on your computer.
Read Me: Provides useful information on installing and starting the game, as well as last-minute information that didn’t make it into this manual.
4
MENUS AND INTERFACE SYSTEM
The following options are available from the game’s Main Menu: Single Player: Access this menu if you wish to play through the single player missions in No One Lives Forever. Continue: This option is only available once you have begun playing the single player missions. It will allow you to pick up where you left off in single player mode by automatically reloading your last saved game. Multiplayer: Access the menu to play a Deathmatch or
H.A.R.M. vs. UNITY Team Deathmatch against other players on a LAN or on the Internet via GameSpy.
Options: Here you can change display and sound settings, game difficulty and customize your controls.
Quit: Allows you to quit the game and return to Windows.
SINGLE PLAYER MENUS
Select Mission: This menu will display all of the missions that are currently available to you. At first, only one mission will be available. As you progress through the game, each mission you complete will remain in this menu for you to play again later. To begin, just click on the name of the mission you want to play. You will then be given a Mission Briefing and the opportunity to customize your weapons and gadgets.
Mission Briefing: An overview of the mission that you chose. Click Next to continue or Back to return to the
Select Mission screen.
Mission Objectives: A list of tasks you must complete to successfully conclude the |
|
|
mission. More objectives may be added to this list during the course of the |
|
|
mission. You may bring up these objectives again at any time during the game by |
|
|
holding down the View Objectives key. |
|
|
NOTE: No One Lives Forever does not support special or accented characters. |
5 |
|
Any such characters can not be used whilst saving your game. |
||
|
Default Equipment: Selecting this option will automatically equip you with the basic weapons and gadgets necessary to complete the upcoming mission. Once you have selected this option, the Inventory Summary screen is displayed.
Select Equipment: Selecting this option will give you much greater control over the items you choose to equip for a given mission.
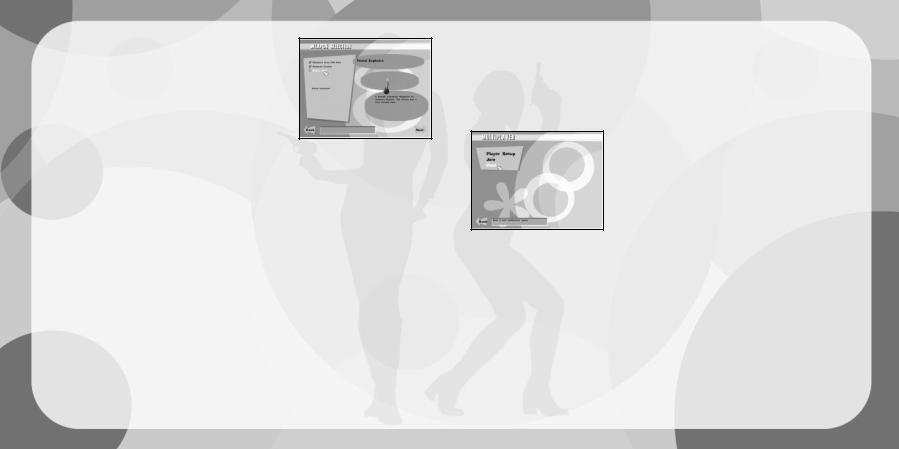
Weapon Selection: At the top-left of the screen are
your available weapon slots. A slot marked with a red X means this item is critical to your mission and cannot be deselected. Any box with a check mark indicates a weapon that can be replaced with another from the list below. If you want to replace a weapon that has been selected for you, just click on its name to reveal an empty slot. Next, click on the name of the weapon you would like to replace or simply leave this slot empty.
The first time you go through a mission, you will only choose from a few weapons. As you progress through the game, more will become available to you. When ready to continue, click Next.
Gadget Selection: Choose your gadgets the same way you chose your weaponry. When ready to continue, click Next.
Modification Selection: On this menu, you may select the weapon modifications you wish to carry. This includes items such as scopes and silencers. The modifications available depend upon the weapons you have already selected in the previous screen. When ready to continue, click Next.
Gear Selection: Here you may select the special gear you desire for the upcoming mission. This includes items such as a Fire Extinguisher to protect against burn damage, Fuzzy Slippers to soften footsteps and SCUBA gear for underwater exploration. When ready to continue, click Next.
Inventory Summary: This screen will display a list of all of the weapons, gadgets, mods and gear you have selected for the upcoming mission. In addition, you will be able to view any gadget modes or ammo types available for the items you have
selected. For example, the Barrette gadget may have both a lock-pick and a poison capsule mode available. If you want to make any changes, click Back. If you’re ready to go, click Start Mission.
NOTE: To view the items in your possession, you can access your Inventory screen at any time during the game by selecting the Inventory key.
Save Game: Save your existing game.
Load Game: Load a previously saved game or restart the current mission.
MULTIPLAYER MENUS
Player Setup: Here’s where you can customize your character for multiplayer games. You can customize the following aspects of your character:
Player Name: Type in the name you want to use here. Make sure you hit <ENTER> after you type in your name. Preferred Team: Choose either UNITY, H.A.R.M. or No Preference. The choice you make will only affect which team you are on. Choosing H.A.R.M. vs. UNITY (Team
Deathmatch) will not restrict which player models you can use. If you choose No Preference, you will be randomly assigned to a team.
Player Model: There are over 40 models available to you in No One Lives Forever. Choose the one you prefer.
Join: Allows you to join a multiplayer game already in progress. When you select this option, GameSpy will search for available servers around the world and list them for you. The Join Game screen provides several options for customizing the server list as follows:
Refresh Server List: This option will command GameSpy to update the list of available servers and all related information.
All Games: Click on this to toggle between the type of game you are interested in joining.
Any Number of Players: This acts as a filter and a list based on the number of people currently playing.
NOTE: No One Lives Forever does not support special or accented characters. Any such characters can not be used whilst entering your Player Name (in
6 |
7 |

Player Setup), session name (when hosting a Multiplayer game) or when using the Chat option in Multiplayer mode.
Join Game: Once you have clicked and highlighted the server you want to join, click on this to connect.
Host: Allows you to host your own multiplayer game. The following options are available:
Session Name: Type the name of your session here.
Game Type: You can select either a Deathmatch game or a H.A.R.M. vs. UNITY Team Deathmatch.
Game Options: For up-to-date information on how to set Deathmatch and Cooperative Assault options, see the Readme file.
Levels: Use this option to determine which levels to play. Simply click on the level you want to add and then click on the Add level option or use the Add All option to cycle though all of the available levels. If you need to remove a specific level from the queue, just click on the level name and then click on Remove. If you wish to remove all of the levels from the queue, click on Remove All. In addition, if you choose to create custom multiplayer maps, they will be available here.
Lock Server: Toggle this to “On” if you wish to restrict your game to certain players by providing a password.
Password: If Lock Server is set to “On”, you can use this option to specify the password that is needed to join your game.
Launch: Once all server options have been set, use this to launch the game.
OPTIONS MENUS
Display: Click on this option to access the game’s graphics options. The following items will become available:
Renderer: This shows the video driver that is currently being used to render the game.
Resolution: Allows you to select what resolution
matches your preferences.
Texture Depth: Both 16-bit (default) and 32-bit texture depths are available. Enabling 32-bit mode will offer significant graphical improvements but will require higher system requirements. Check to see whether your card supports 32-bit textures.
Sound: Here you may adjust sound FX and music settings.
Controls: Lets you customize the keyboard, mouse and joystick settings.
NOTE: Some menus will have an arrow at the bottom. This means that there are more items to set. Click the arrow to go to the next screen.
Configure controls: This option allows you to remap your keyboard, mouse or controller to the various actions available in the game.
Mouse: This option provides various controls that you can use to customize how your mouse interacts with the game.
Always mouse look (No/Yes): The user is always able to look around with the mouse (instead of pushing a button to look around with the mouse). Mouse sensitivity (slider): Controls the speed at which your view swings around in response to mouse movement.
Mouse smoothing (slider): Scales mouse input rate for smoother or jerkier but more responsive movement.
Invert y axis (No/Yes): Toggles vertical mouse movement. If inverted, moving the mouse up will move your view down.
Vehicle Turn Speed: Determines how fast vehicles will turn when the mouse is moved.
Keyboard: This option provides various controls that you can use to customize how your keyboard interacts with the game.
Normal turn speed (slider): If you turn with the keyboard, this determines how fast you will turn when you are walking.
Fast turn speed (slider): If you turn with the keyboard, this determines how fast you will turn when you are running.
Up/Down look speed (slider): If you look up and down with the keyboard, this determines how fast you will look up and down.
8 |
9 |

Vehicle Turn Speed: Determines how fast vehicles will turn when the keyboard is used.
Use Joystick/Gamepad (Yes/No): Enables joystick controls.
Configure Joystick: This option provides various controls that you can use to customize how your joystick interacts with the game.
Restore defaults: Reverts all controls back to the original configuration. Game Options: Allows you to set specific game options to your taste.
Crosshair Customization: Customize the look, colour and transparency of your crosshair.
Use Crosshair: If this option is turned on, a crosshair sight will appear in the middle of your screen to make targeting enemies and objects easier. Opacity: Moving this setting all the way to the right will make the crosshair a solid colour, while moving it further to the left will increase its transparency.
Red/Green/Blue: Use these options together to customize the colour of the crosshair. Moving the slider bar to the right for each of these options will increase the amount of that colour.
Dynamic Scaling: When the Dynamic option is enabled in the menu, your crosshair will change in size to reflect your accuracy. The larger it is, the worse your aim. Generally, your accuracy improves when standing still and worsens while moving.
Style: Toggle between basic, crossbar, dot-cross, post, dot and corner styles of crosshair.
Subtitles (Off/On): When turned on, subtitles will appear at the bottom of the screen whenever relevant in-game dialogue is heard.
Blood (Off/On): When turned on, blood splatters will appear on walls and floors when the player or an AI are shot.
Fade Bodies (Off/On): When turned on, bodies of slain AI will fade away over time.
Always Run (No/Yes): When turned on, the player is always running. Difficulty: There are four difficulty modes in No One Lives Forever: Easy,
Normal, Hard and Super Spy. The difficulty setting primarily affects enemies in the game, making them more or less accurate or responsive to external stimuli such as footsteps, weapon fire etc.
Heads Up Display Style: Toggles between various HUD configurations. The state of your current health, armor and ammo can be displayed either via text or graphics.
Performance Options: If your game is running poorly, you may enable or disable a variety of features within the game. More information may be available on these options in the Readme.txt available with this game.
Current Weapon/Gadget (Centre): The weapon/gadget you are currently holding appears here. When you click the Fire button you will use the item in your hands. Health/Armor Meter (Bottom left): The red meter indicates how much health you have. The blue meter indicates armor. Body armor will completely absorb most types of damage. Once it is depleted, your health will deteriorate rapidly. If your health runs out, you will die. Your heath will be restored at the start of each new mission. Ammo (Bottom right): The numbers in the ammo section display the amount of ammo available for the currently-selected weapon. The number on the left and the yellow meter represent the rounds remaining in the magazine. Once that reaches zero, you will automatically reload. You may also manually reload at any time. The number on the right and the blue meter display the total amount of ammo that you are carrying for that gun. Be warned that certain weapons may share ammunition.
10 |
11 |
 Loading...