


FLYING CORPS-GOLD

CHAPTER ONE - GAME OVERVIEW
1.0 Introduction 3
1.1 The Mission Editor 3
1.2 The Game 3
1.3 Scramble 4
1.4 Preferences 5
1.5 Multiplayer 8
1.6 The Campaigns 11
1.7 The Aircraft Cockpit 17
CHAPTER TWO - FLYING
2.1 The Aircraft 19
2.2 First Flight 20
2.3 Combat Manoeuvers Training 21
2.4 Advanced Combat Manoeuvers 23
The Half roll 23
Loop 23
Immelmann Turn 24
Dive and zoom 24
CHAPTER THREE - TACTICS
Tactics 25
Mannock’s Rules 26
Formations 26
The Approach. 27
Attack 28
The Dogfight 29
Offensive Manoeuvres 30
Defensive Manoeuvres 31
Attacking Two- seaters 32
Shooting 33
Attacking Balloons 35
Ground Attack 35
Archie 36
CHAPTER FOUR - CAMPAIGN HISTORIES
Flying Circus 37
German Markings 42
Jasta 11 42
FLYING CORPS GOLD CONTENTS
1
Tank Battle-Cambrai 1917 43
The Jastas 45
Jagdgeschwader 1 45
German Fighter Aircraft at the
Front Nov 1917 46
British Units 46
Cambrai in the Game 46
Spring Offensive 47
54 Squadron 51
German Fighter Aircraft at the
Front Feb 1918 52
Hat in the Ring 53
Rickenbacker and the
‘Hat in the Ring’ Squadron 57
The Jastas 58
CHAPTER FIVE - THE AIRCRAFT IN
FLYING CORPS GOLD
5.1 Flyable Aircraft 59
Nieuport 28 59
Spad XIII 60
Fokker Triplane 61
Albatros DIII 62
Sopwith Camel 63
SE5a 64
Fokker DVIII 65
5.2 Other Aircraft 61
Nieuport 17 & Sopwith Pup 66
1 & 1/2 Strutter & Bristol F2a 67
BE2c & RE8 68
FE2b & DH9 69
Pfalz DIII & Aviatik 70
Rumpler & Halberstadt CLII 71
BIBLIOGRAPHY 72
CREDITS 74
APPENDIX 75
QUICK STA RT 78
FLYING CORPS GOLD CONTENTS
2
CHAPTER ONE GAME OVERVIEW
1.0 INTRODUCTION
Flying Corps Gold is a simulation of World War 1
aerial combat over France. You can choose to take
part in single “scramble” missions or to immerse
yourself in one of four major campaigns. Extensive
configurable options allow you to customise Flying
Corps Gold to give you the style and type of game
you require. The aircraft in Flying Corps Gold have
been exhaustively researched and are characterised
by flight models which incorporate individual
characteristics and idiosyncrasies. The game’s
artificial intelligence is geared towards First World
War tactics, and each computer-controlled pilot is
treated as a separate individual with differing
priorities and abilities. The dogfights in Flying Corps
Gold take place over some of the most detailed
terrain seen in a flight simulation, using data taken
from period trench maps and actual wartime aerial
photography. Flying Corps Gold will take you closer
to the front than you’ve ever been before.
This manual is organised into five main chapters and
an appendix. This chapter deals with the overall
layout of Flying Corps Gold, and all of the options
within the game. Chapter Two provides the
information to enable you to fly the actual aircraft
available in Flying Corps Gold. Chapter Three covers
the wide range of tactics you will need to employ as a
First World War pilot. Chapter Four details all of the
aircraft to be found in the skies while playing Flying
Corps Gold. Chapter Five is a detailed historical
account of the major air campaigns which are
featured in the game. This is followed by a detailed
bibliography and game credits. The appendix lists the
keyboard and joystick controls for the game.
1.1 THE MISSION EDITOR
The Flying Corps Gold Mission Editor is installed
during the installation procedure. Although the
Mission Editor is a Windows 95™ only application,
missions and Campaigns can be saved for future play
with both the Windows 95™ and the DOS version of
the game. For full instructions on how to use the
Mission Editor, refer to the on-line manual which is
activated in the Help menu within the Mission Editor.
1.2 THE GAME
To install and load Flying Corps Gold refer to the
installation and loading instructions in the separate
TECHNICAL SUPPLEMENT. The game begins
with an animated title sequence. Should you not wish
to view this, press the space bar to leave the title
sequence and progress to the options screen.
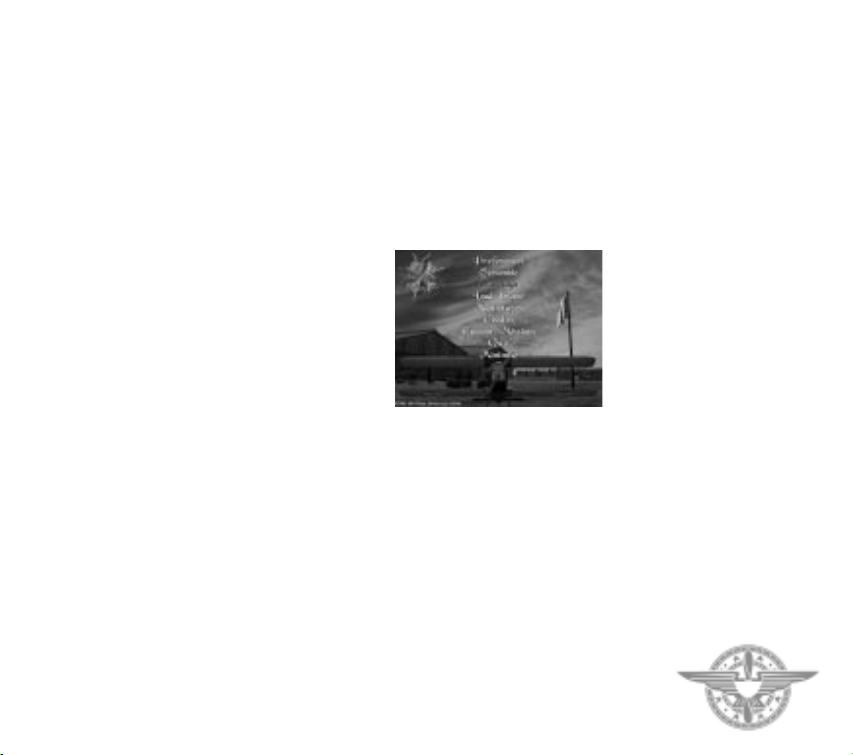
The Options Screen
The options available at the start of the game are
displayed on the options screen:
Preferences
Preferences allows you to set up all of the detailed
game characteristics ranging from your joystick and
sound settings to precise characteristics of the aircraft
you will be flying. This feature is also available
in-flight.
Scramble
The Scramble option gives you the choice of a
number of single missions ranging from a simple ‘first
flight’ to more complex stalking manoeuvres. This is
the ideal entry into the game, and it will teach you
how to survive more complex missions.
CHAPTER 1 - GAME OVERVIEW
3
Campaign
Campaign is the option which leads you to one of four
major campaigns, which will provide the most severe
test of your strategic skill and mettle. This is the heart
of Flying Corps Gold.
Load Game
Load game allows you to retrieve a previously saved
game, which may be stored on your hard disc.
Quit
Quit will end your session of Flying Corps Gold, after
you have verified that you wish to exit, and return you
to DOS or Windows.
Multiplayer
Multi player allows you to play Flying Corps Gold
with someone else, but is an option only available to
players who are running Flying Corps Gold under
Windows 95. See section 1.5.
Credits
Credits takes you to the game credit screen.
Selections can be made by highlighting an option with
the mouse pointer and clicking with the left mouse
button, or moving the highlight with the up or down
cursor key and pressing the Enter key. All selections
in Flying Corps Gold can be made using either mouse
or keyboard.
The preferences, scramble and campaign options are
now discussed in more detail. In order to allow you
to make a quick start the next section, part three,
deals with the scramble option. The full range of
available preferences are detailed in part four, and
details of the campaign elements of the game are
supplied in part five. Part six provides a schematic
description of the aircraft cockpit.
1.3 SCRAMBLE
If you wish to get straight into the action select
Scramble. Here you will find and fly small individual
missions.
First of all, you are presented with a list of the flyable
aircraft in Flying Corps Gold. Each aircraft has its
own unique set of characteristics, and are described
more fully in Chapter Five of this manual. Select the
aircraft you wish to fly using the mouse or keyboard.
The screen then displays the full choice of available
scramble missions.
First Flight
This is the simplest scramble mission. The aim is to
take off from your airfield, climb to 2000 feet and fly
a complete circuit around the airfield. Land and come
to a halt in the centre of the field. Chapter Two has a
section which deals with how you should approach
this first flight.
Follow Leader
Starting in the air, follow your leader as he performs
a series of manoeuvres designed to throw you off his
tail. You need to stay with him for about 3 minutes.
Turkey Shoot
Dive on to the tail of a novice pilot who is flying a
straight and regular course. He presents a perfect
target but he might turn if he spots you.
CHAPTER 1 - GAME OVERVIEW
4
One on One
Your opponent will pass on your right,heading in the
opposite direction. The aim is to get on his tail as
rapidly as possible.
Ground Attack
Fly low and disable tanks on the ground with your
bombs. A truck convoy and an observation balloon
present further ground targets.
Squadron Encounter
Lead your squadron of three flights against a large
enemy formation that is rushing towards you.
Stalking Prey
Your flight is above and to the rear of an enemy flight
that is unaware of your presence. Stalk your prey and
draw close enough to make a surprise attack.
First Patrol
Lead two flights of three aircraft on a patrol of the
front lines.You must be able to identify and respond
to possible threats.
Quit
Takes control back to the main options screen.
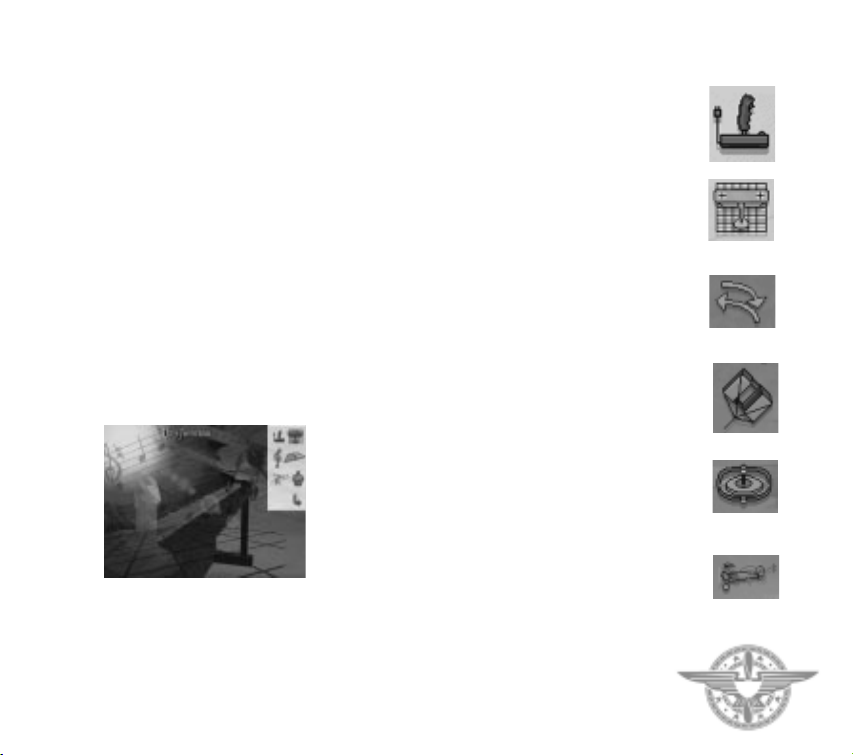
1.4 PREFERENCES
You may alter your game preferences on the main
options screen, or while you are flying - in which case
you must press the F12 key. The preferences screen
displays a number of icons which you can select:
Joystick icon: Joystick setup
This allows you to configure Flying Corps Gold to suit
your analogue control system.
The coolie hat and throttle controls are provided on a
number of advanced joysticks and the following
options apply to the CH and Thrustmaster products.
If you are using a stick that is plugged into a separate
programmable throttle then the coolie hat should be
programmed using the software provided by the
throttle adaptor manufacturer. In these circumstances
the Flying Corps Gold Coolie Hat option should be
disabled.
If you are using a stick fitted with a coolie hat and if
the stick is plugged directly into the games port, then
you should enable the Flying Corps Gold Coolie Hat
option.
After you have chosen your desired setup the in-built
calibration system will start. Follow on-screen
instructions to set up the control system.
Aircraft on grid icon: Aircraft setup
This sets the flight preferences and therefore allows
you to adjust the realism and difficulty levels of the
flight model. Flight Preference Options are:
Torque effects
When enabled, the rotating propeller will affect the
flight model.
Wind
When enabled, wind will affect all aircraft.
Gyroscopic effects
When enabled, this will allow the gyroscopic effects of
rotary engined aircraft to affect the flight model. In all
of the rotary engined aircraft featured, the gyroscopic
effect is clockwise from the pilots seat perspective.
See Chapter Two, which describes the gyroscopic
effects in more detail.
Slipstream effects
When enabled, the slipstream from the propellor will
affect the airflow over the aircraft’s lifting surfaces.
CHAPTER 1 - GAME OVERVIEW
5
Joystick
Aircraft
on grid
Torque
Effects
Wind
Gyroscopic
effects
Slipstream
effects
Co-ordinated rudder
When enabled, the rudder will be controlled in
harmony with the stick, making flight easier. Disable
if you have rudder pedals or you want a more realistic
response.
Spinning
Disabling the option will reduce the chance of your
aircraft spinning if mishandled.
Power boost
When enabled, the engine of your aircraft will be
more responsive and powerful, making flight easier.
Ground collisions
When enabled, collision with the ground will damage
or destroy your aircraft.
Two aircraft icon: Difficulty options
The following options set the level of game difficulty
when playing Flying Corps Gold.
Limited Arms
When enabled you will be able to carry
approximately 500 rounds. Otherwise your
ammunition is unlimited.
Vulnerability
When enabled you will be vulnerable to enemy fire.
Spinning Compass
When enabled, the flight compass will behave more
accurately when the aircraft is turned violently - the
compass will spin, and will only return to equilibrium
in level flight.
Decelerate Trigger
This setting is relevant after using the time
acceleration TAB key during the game.
When the trigger is set to combat, your aircraft will
drop back into real time when you are directly
threatened and enemy aircraft can fire at you. Enemy
aircraft will also be more aggressive and will not try to
escape. Use this setting when you want fast and
furious action.
If the trigger is set to tactical, then real time is reset
much earlier in the encounter. This will give you time
to engage the enemy at a tactical level and allow you
to gain height or manoeuvre, so that you may be able
to achieve tactical dominance. Enemy aircraft will be
more cautious and act more realistically. For instance,
they may turn tail and run! Use this setting for
additional realism.
Padlock
Padlock refers to the locking of head movements
from within the cockpit, or locking the viewing angle
if you are using an outside view.Two types of padlock
are supported:
Only when visible:The enemy aircraft must be in view
before the padlock can be initiated. This is the more
realistic option.
In visible range: You will be able to initiate a lock
when an enemy is within visible range. It is not
necessary to have the enemy in view to initiate the
lock.
Bomb Weight
When enabled bomb weight and drag affects the
performance of the aircraft.
Blackouts
When enabled the pilot will temporarily blackout
after pulling a high ‘g’ turn.
Whiteouts
When enabled there will be a whiteout when you look
into the sun.
Auto Pilot skill
This refers to the AI settings of your computer
opponents and therefore affects the skill level of
opposing pilots. Possible setting are novice, regular,
ace. In the game, each enemy pilot can have a
different skill level. By selecting novice,you will force
the range of skills encountered to be low.
Alternatively, selecting ace will mean that the range
of skills you encounter will be relatively high.
CHAPTER 1 - GAME OVERVIEW
6
Co-ordinated
rudder
Spinning
Two aircraft Limited Arms
Power boost Ground
collisions
Vulnerability Spinning
Compass
Decelerate
Trigger
Padlock
Bomb Weight
Blackouts
Target size
Altering this setting affects the accuracy of your guns.
Possible settings are small, regular and large. The
smaller the target size the more realistic the setting.
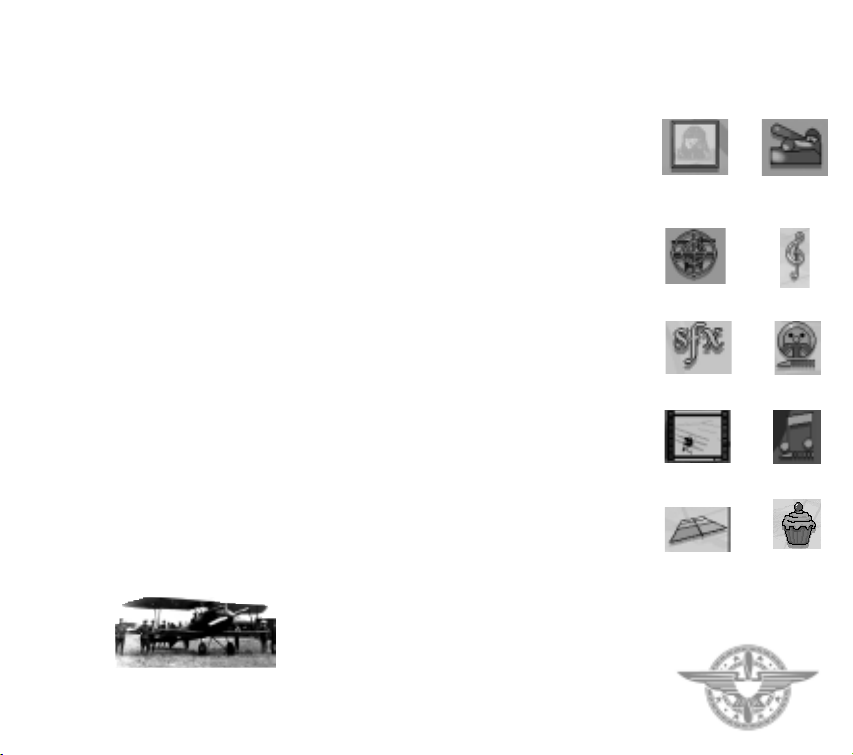
Treble clef icon:Audio Volumes
These options enable you to customise your audio
output:
SFX
Allows you to adjust the volume of in-game sounds
such as gun noise and explosions.
Engine
Allows you to alter the level of engine noise. The
engine level is also affected by the SFX level.
Film
This controls the sound channel for the animation
sequences.
Musical note
This controls the volume of music in the game.
Rectangular icon: Graphics Options
Adjusting the graphics parameters alters the way
your hardware will perform during the course of a
game.
The most significant performance factor is resolution.
Only attempt to run Flying Corps Gold at the highest
resolutions if you have fast and up-to-date hardware.
Experiment with the settings that provide the best
compromise between frame rate and detail level.
In Flying Corps Gold it is possible to set the
preferences and difficulty options in a great variety of
different ways. Player are encouraged to experiment
with the settings to produce a customised version of
Flying Corps Gold which best suits their style of play.
Cake Icon: Extra Switches
These are additional switches that allow you to
customise the game difficulty, game play and aircraft
behaviour.
Gun Jams Enabled/Disabled
Translucent Smoke Enabled/Disabled
Blackout when Injured Enabled/Disabled
Mid Air Collisions Enabled/Disabled
Peripheral Vision Markers Enabled/Disabled
When this option is enabled a number of markers will
be drawn in the 3D to indicate the position of any
aircraft that lie just outside the field of view ( just off
screen). In addition, when the option is enabled and
you are on an inside padlock view a wireframe
aircraft is drawn overhead. This wireframe gives
orientation information that is supplied by the “seat
of the pants” in real life.
Priority Messages Enabled/Disabled
If disabled messages within the 3D will not appear.
Healed Pilots to Reserve Pool Enabled/Disabled
AI Pilots Sometimes/Always use Complex Model
If AI pilots always use the complex model, both
player and computer controlled aircraft will conform
to the same aerodynamic constraints.
Stick Stiffness Enabled/Disabled
Pause on entering 3D Enabled/Disabled
When enabled press P to unpause the 3D.
Auto Inside/Outside Padlock Toggle
When this option is enabled and you are on an inside
padlock view, the camera will automatically switch
between the inside and outside padlock views. The
switch to outside occurs when the tracked aircraft
gets behind you. The switch to inside occurs when the
tracked aircraft is in front of you.
CHAPTER 1 - GAME OVERVIEW
7
Whiteouts Auto pilot
skill
Rectangular
icon
Film Musical note
Target size
Treble clef
SFX Engine
Cake
icon
1.5 MULTIPLAYER
This option allows players to host or join a
multiplayer game. Multiplayer only works using the
Windows 95 version of Flying Corps Gold.
Selecting a service
Firstly, select a service provider. A box will appear
containing a list of services that your machine
supports. Select the one you wish to use by clicking on
it and then click on the 'select service' option to
confirm. See below for details of starting Wireplay
games.The various services supported are:
•IPX Connection (Network play) - Max players 8
•Internet TCP/IP Connection - Max players 8
•Modem Connection - Max players 2
•Serial Connection (Null Modem) - Max players 2
Once a valid service has been selected you will be
asked if you wish to create (host) or join a game.
Creating a game
• IPX Connection & Internet Connection
Click on the create game option. You will then be
asked to enter your name. Type in your name and
click on the tick icon. From here you will go to the
pre-game preferences screen.
• Modem Connection
Click on create game option and enter name as above
for IPX and Internet. A Windows 95 dialogue box will
then appear allowing you to configure your modem if
required and to wait for the other player to join.
When you have selected your modem setup click on
the answer box. When the other player has dialled
you, you will be taken to the pre-game preferences
screen. When selecting the speed of your modem,
select the speed equal to or one higher than your
modem’s fastest speed.
• Serial Connection
Click on create game option and enter name as
above. A Windows 95 dialogue box will then appear
requesting your serial connection settings. Use the
highest baud rate with which you can create a session:
115200 baud or higher is a good rate, 57600 is
acceptable. Click on OK to confirm your selections
and you will be taken to the pre-game preferences
screen.
CHAPTER 1 - GAME OVERVIEW
8
PREFERENCES AND DIFFICULTY SUMMARY
The Beginner Ultimate realism
Torque effects disabled Torque effects enabled
Wind disabled Wind enabled
Gyroscope effects disabled Gyroscope effects enabled
Slipstream effects disabled Slipstream effects enabled
Co-ordinated rudder enabled
Co-ordinated rudder disabled
Spinning minimised Spinning enabled
Power Boost enabled Power Boost disabled
Ground collisions disabled Ground collisions enabled
Limited arms disabled Limited Arms enabled
Vulnerability disabled Vulnerability enabled
Spinning compass disabled Spinning compass enabled
Decelerate Trigger Combat Decelerate Trigger Tactical
Initiate Padlock if target is Initiate Padlock only
within visible range when target visible
Bomb weight & drag disabled Bomb weight & drag enabled
Blackouts disabled Blackouts enabled
Whiteouts disabled Whiteouts enabled
Autopilot skill : Novice Autopilot skill :Ace
Target size:Large Target size: Small
Gun Jams: disabled Gun Jams:enabled
Tail Heaviness:disabled Tail Heaviness:enabled
Mid air Collisions: disabled Mid air Collisions:enabled
AI pilots sometimes AI pilots always
use complex model use complex model
Stick Stiffness: disabled Stick Stiffness:enabled
Auto inside/outside Auto inside/outside
padlock: enabled padlock: disabled

Joining a game
• IPX Connection
Click on the Join Game option. A list of network
games available will appear. Select the one you wish
to join by clicking on it and click on Join Game again
to confirm your choice. You will then be asked to
enter your name and be taken to the pre-game
preferences screen.
• Internet Connection
Click on the Join Game option. A Windows 95
dialogue box will appear asking you for the name, or
IP address of the computer that is hosting the game.
Enter the address (if known) and click on OK. If you
do not know the name of the host, leave the text box
blank and click on OK. After a short period a list of
games available will appear. Click on the one you
wish to join and then click on Join Game again to
confirm. You will then be asked to enter your name
and be taken to the pre-game preferences screen.
• Modem Connection
Click on the Join Game option. A Windows 95
dialogue box will appear asking for the number of the
host of the game. You may also configure your
modem at this stage (see creating a game using
modem). Enter the phone number of the host and
click on OK. Your computer will then attempt to
connect with host. Once connected a list of available
games will be shown. Select the one you wish to join
and click on Join Game again to select.You will then
be asked to enter your name and be taken to the pre-
game preferences screen.
• Serial Connection
Click on the Join Game option.A Windows 95 dialog
box will appear requesting your serial connection
settings (see creating a serial game above). Once you
have selected your settings click on OK to confirm.A
list of available games will appear. Select the one you
wish to join by clicking on it and then confirm your
selection by clicking on Join Game again. You will
then be asked to enter your name and be taken to the
pre-game preferences screen.
• Wireplay Games
To play using Wireplay you must first connect to a
Wireplay server using a Wireplay client. Details of
how to do this will be available from the Wireplay
client. Once a Wireplay game has begun you will be
taken to the pre-game preferences screen. Wireplay
Flying Corps Gold supports a maximum of 8 players.
The Pre-Game Preferences Screen
This screen is used to select all the preferences and
options that will be used during the game. It also
shows the status of other players and their
accumulated score from previous games. You may
communicate with other players at this stage by
moving the mouse pointer over the dialogue section
and typing in a message. Pressing return will send this
message to other players.
Selecting the game duration
Only the host may change the game time.This is done
by clicking on the clock icon. The available durations
are 5 mins, 10 mins, 30 mins and 1 hour.
Selecting the game scenario
Only the host may change the game scenario. This is
done by clicking on the map icon. There are two main
types of game: Deathmatch and Teamplay. Each has
three different starting types:
CHAPTER 1 - GAME OVERVIEW
9
Random: All players start off facing in a random
direction and with different heights
Implode: Players start off in a circle facing inwards
towards each other.
Explode: Players start off in a circle facing outwards.
In deathmatch play all players fight against
everybody else. In teamplay, teams are determined by
aircraft type, german vs allied. Each team is
represented by a different colour on the preferences
screen.
Selecting your aircraft and colour scheme
All players may change their aircraft type and colour
schemes. This is done by clicking on the paint can
icon.
Selecting game preferences
To make the game fair, all options that affect aircraft
handling and game difficulty are controlled by the
host. Other options may be altered by any player.
Starting the game
Once everybody is ready the host may start the game
by clicking on the large Flying Corps icon in the top
right of the screen.
Leaving the game
To leave the preferences screen click on the cancel
icon.
Multiplayer in-game keys
S: Resurrect.When you have been dead for 5 seconds,
you may press S in order to resurrect yourself. An
explosion will occur to notify other players that you
have done so.
Q: When you have been killed you will spiral upwards
in a regeneration phase. Once the view has gone in-
cockpit, pressing Q will give you back control. The
spiral will continue up to 10000 feet, or 2000 feet
above the highest other aircraft, whichever is the
lowest.
General Notes
It is best for the host to have the fastest machine
available due to overheads managing the game.
In non-wireplay games when the host leaves the
game, that game ends and all players will be taken
back to the pre-game preferences screen. If the host
exits from the preferences screen all players will be
taken back to the main game menu.
Changing game type from deathmatch to teamplay
will wipe the scores as these are no longer
appropriate.
In teamplay F/Fire stands for friendly fire. You will
not be credited with a kill for killing your own team
members.
In some cases a service provider may be listed but is
not usable for a game. This is because parameters
related to that service are not set up correctly. For
example, to use Internet TCP/IP your computer will
require a valid IP address setting.
If you have been shot up or are out of ammo, landing
will regenerate your aircraft to full health/ammo and
put you into a resurrect spiral.
When the host is in the paint-shop or preferences
screens other players will be unable to join. The host
must be at the pre-game preferences screen for other
players to be allowed to join.
CHAPTER 1 - GAME OVERVIEW
10
How to get the most from your
Preferences settings
On entering 3D flight you will be inside the cockpit.
Press TAB and the aircraft will fly in accelerated time
along the patrol route.When the enemy are very close
the aircraft will drop out of accelerated time. Toggle
the i key to get the full help text across the top of the
screen. Switch to outside view (F6) and padlock to the
nearest unfriendly aircraft (F1). The nearest enemy
aircraft will be moved to the centre of the screen.
Maneuver your aircraft so that it is pointing at the
enemy (i.e. away from you). Switch to the inside
cockpit (F7) view. Note that switching between
outside and inside view does not alter the padlock
status, so you are now on an inside padlock view. If
you cannot keep the enemy in sight then switch back
to the outside view. Keep flying until you are on the
enemy’s tail and can shoot him down. If you are still
having difficulty then change some of the Preference
options: for instance set Target Size to ‘large’ and
Auto Pilot Skill to ‘novice’.
For a more realistic game,consider enabling all of the
Preference options except Power Boost and Co-
ordinated rudder. Set the Decelerate Trigger to
‘tactical range’. This will result in accelerated time
being turned off just before enemy aircraft are visible.
This will make it possible to stalk the enemy and
maneuver into a position of advantage before
launching an attack. Set the Initiate Padlock View to
‘only when target visible’.The computer will now only
padlock onto a target that has already appeared on
the screen. This is quite realistic as experienced pilots
tend to stay aware of previously spotted aircraft and
keep them in view.
For the most realistic play, read your mission brief
and go to the map screen. Plot the waypoints onto the
paper maps provided. When flying do not use
accelerated time, but navigate your aircraft along the
patrol route using your map, looking out for
important landmarks to ensure that you are still on
course. Stay in the cockpit,using the number pad keys
to look around. Constantly search the sky and when
an enemy aircraft is spotted attempt to stalk it so that
a surprise attack can be launched. Only use the
Padlock View once the enemy has been spotted.
When you have initiated combat you should
endeavour to maintain the element of surprise as
fighting from the cockpit requires considerable skill.
Joystick users should note that joysticks with four or
more buttons can emulate some of the important
view functions, and that a coolie hat can be used for
rotating the view.
1.6 THE CAMPAIGNS
There are four campaigns in Flying Corps Gold.
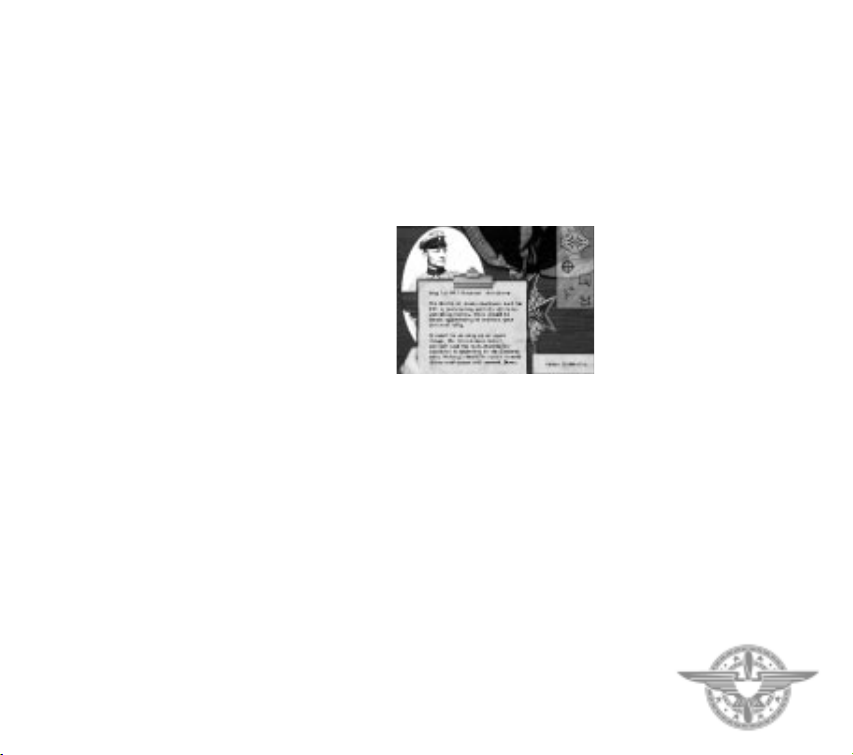
FLYING CIRCUS
In this campaign you play the part of Lothar von
Richthofen. On May 1st, 1917, Manfred, your
illustrious older brother goes on leave having scored
52 victories, goes on leave, and places you in
command of the celebrated Jasta 11.
You already have 16 victories to your credit but your
objective is to exceed Manfred’s score before he
returns in June.To accomplish this you will not only
have to shoot down enemy aircraft but also lead the
squadron successfully, ensuring that morale remains
high and that crack pilots apply to come and fly with
you. You will be presented with a variety of typical
fighter missions and must be wary of the ‘anti
Richthofen’ unit, the crack 56 British Squadron,
which has just arrived at the front.
This is a good campaign for learning the basics of
squadron management and for perfecting your
CHAPTER 1 - GAME OVERVIEW
11

dogfighting skills. Your aircraft is the Albatros DIII,
which is superior to most of the enemy machines that
you will encounter. You are allowed to take an
unhistorical option and use a Fokker Triplane instead
of the Albatros if you wish.
THE BATTLE OF CAMBRAI
In this campaign you take on the role of a German pilot
based at the forward airfield of Flesquieres.The British
have just launched a surprise attack, spearheaded by a
large number of tanks. These are already approaching
your airfield when the campaign starts.
Your first objective is to escape in your Fokker Triplane
and delay the British advance while your ground crew
retreat to the rear base at Proville.To win the campaign
you must halt the enemy tanks and stop the British
reaching Cambrai.
Tanks can be destroyed by bombing or by shells fired by
field guns. You must therefore attack the British forces
as they advance whilst protecting your own ground
troops from enemy aircraft and artillery.
This is a good campaign for planning missions on the
map, attacking ground targets and prioritising efforts
against the greatest threat. For instance, if there are
tanks approaching Cambrai, they must be dealt with as a
matter of urgency. If German field guns are being lost,
it may be necessary to fly in their support against
British aircraft or artillery. Attacks against British
supplies will slow the ground advances and raids against
British airfields can be initiated in order to reduce the
enemy air threat.
History has been slightly altered in the presentation of
this campaign to allow us to place more emphasis on air
operations. The weather is better than it was - in the
actual battle it was foggy - and your Jasta is equipped
with the Triplane. Historically this aircraft was grounded
at the time after a series of fatal crashes.
SPRING OFFENSIVE
In this campaign you are a new British pilot who
arrives at 54 Squadron in February 1918, just prior to
the massive ground offensive which the Germans
launched in March. The Germans were attempting to
win the war before the Americans reached France in
strength. You will need to prove yourself quickly, and
your objective is to help to halt the German advance
and qualify for command of your own squadron.
Initially you will take part in training missions before
flying over the front to undertake balloon busting and
other strike missions. When the German offensive
starts, you fly a variety of close air support missions.
The aim of the campaign is to weaken the German
forces so that, when they launch their last effort to
take Amiens,they cannot break the British defences.
During this last effort you will be involved in the first
ever tank versus tank battle.
This campaign features a wide variety of missions.
Your first mission is in the SE5a; thereafter you will
fly the Sopwith Camel. Once you become squadron
leader you can choose which of these aircraft to fly.
HAT IN THE RING
In this campaign you play the part of Eddie
Rickenbacker. Your objective is to equal or exceed
his achievement of scoring 26 victories and becoming
leader of the 94th ‘Hat in the Ring’ Squadron.
Rickenbacker finished the war as America’s ‘Ace of
Aces’ and won the Congressional Medal of Honor.
In this campaign, the German Army is being driven
back by Allied attacks but the German Air Service is
still a formidable foe - especially since the crack
fighter units have been grouped into
Jagdgeschwaders and issued with the Fokker DVII,
possibly the best all round fighter of the war.
This campaign features the Nieuport 28 and the Spad
XIII as the flyable aircraft.
GETTING STARTED IN A CAMPAIGN
To start a campaign choose Campaign from the
options screen. Click on the large arrows to cycle
through the four campaigns available. Once you have
chosen the campaign you wish to play, confirm your
choice by selecting the Medal icon.
CHAPTER 1 - GAME OVERVIEW
12
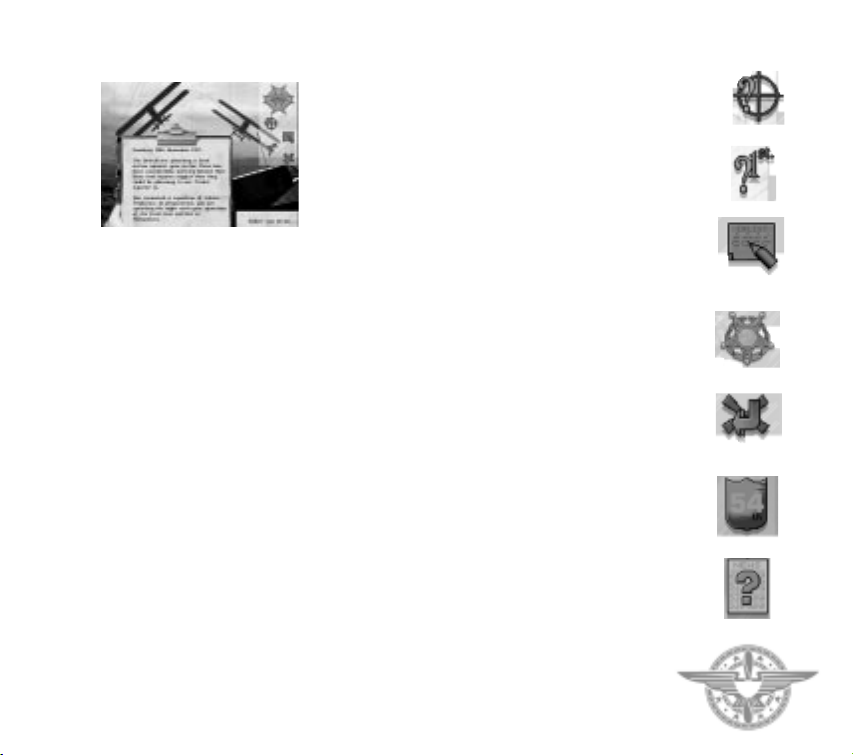
The Introductory Campaign Screen
This screen presents you with a basic overview of the
campaign on a clipboard. On the right hand side of
the screen there are a number of icons which can be
selected:
Gunsight
Select this to review the campaign objectives.
1st
Displays the briefing for the first mission.
Pencil/Paper Enlist
Allows you to enlist for this campaign.
Medal
Select this to start the campaign.
Arrow & Cross
Return to the previous screen.
Selecting the medal will start an animated sequence.
When this finishes you will find yourself in the
cockpit flying the first mission of the campaign. The
animated sequence can be terminated at any time by
pressing the space bar. At the end of a campaign
mission you will be given a report on what occurred.
Select the TICK to continue the campaign. This will
lead you to the main campaign screen.
The Main Campaign Screen
This screen allows you to decide how to conduct the
rest of your campaign by letting you select missions,
alter your squadron formations, read news events and
examine mission maps. On the top right of the screen
there are a number of selectable icons:
Medal
Select this icon to fly the currently selected mission.
You will start the mission in the cockpit of your
aircraft. At the end of the mission you will be given a
summary of what occurred.
Mission Selection
The method of selecting a mission is different in each
of the campaigns.
In the Flying Corps Gold campaign, the Left/Right
arrows can be used to cycle through the three areas to
patrol: Arras, Cambrai and Douai. Douai patrols are
behind friendly lines and are therefore the easiest.
The Cambrai area will be the most difficult because it
is patrolled by the 56 squadron.
In Hat in the Ring campaign you will have no choice
initially in selecting missions. Once promoted you will
be able to choose which type of mission you wish to
fly - balloon busting, escort, patrol or roving.
In the Spring Offensive campaign your missions are
determined for you.
The Cambrai campaign requires you to plan your
mission by positioning waypoints on the map.
Shield
Selecting the shield brings up the squadron
information screen and preferences screen. Squadron
information is where you plan the details of your
mission. This allows you to ensure that the squadron
is using a suitable formation for the mission, that the
correct pilots are assigned and that they have been
issued with necessary orders.You can also access the
Paintshop, where you can assign markings and
insignia to the aircraft under your command.
News
Selecting this icon brings up news about events
CHAPTER 1 - GAME OVERVIEW
13
Gunsight
1st
Arrow &
Cross
Shield
Pencil/Paper
Enlist
Medal
News
occurring in your area. This can give useful
information on local enemy activity.
Map
Select the map icon to see a map of your local area.
Use this to obtain information about your patrol
route, ground targets and balloon activity. In the
Cambrai campaign you will need to use the map to
plan your missions.
Disk
Selecting the disk allows you to save the game to a
specified drive or directory.
Arrow/cross
Quit the current campaign
Selecting either the shield icon or the map icon takes
you to further screens which allow you to configure
the setup of your squadron or plan the campaign
using a mission map. These further screens are now
discussed in more detail.
The squadron screen
This screen is accessed by selecting the shield icon on
the main campaign screen. There are a group of
selectable icons in the top right corner of the
squadron screen:
Medal
Selecting this icon takes you directly into flying a
mission.
Computer
Select to adjust difficulty settings and to configure
sound and control devices.
Joystick
Select to configure the controls on your joystick.
Paint Pot
Selecting this icon takes you to the Paintshop, where
you are able to assign individual colours and
markings to your squadron’s aircraft.
Shield
This icon transfers you to the squadron information
screen, and allows you to configure squadron
formations and select personnel. You will be able to
assign aircraft and pilots for today’s mission, set the
formation to be used and issue the pilots with their
instructions.
Disk
Select this icon to save the game.
Arrow
Returns control to the main campaign screen
Selecting the shield icon leads to the squadron
information screen:
The squadron information screen
There are a number of selectable icons in the top right
of the screen:
Right/Left Arrows
Select the arrows to view the possible squadron
formations for your next mission. The formations are
shown as flights on the main part of the screen, with
each flight of the squadron in a separate box. Select
the shield icon if you want to change the number of
aircraft or pilots in the flights. You can change the
formation by clicking on the right/left arrows on the
top right of each flight formation box.
Shield
Select the shield if you wish to transfer to the flight
assignment screen, which allows you to select pilots
for today’s mission and to issue new pilot orders.
Arrow with Cross
Select this icon to return to the previous menu
without accepting any squadron changes.
Arrow
Select this icon to confirm any squadron changes you
may have made, and go to back to the previous menu.
The orders for each flight are displayed in a grid at
the bottom of the screen. Any order can be changed
by selecting it. A clipboard will appear and new
orders can be chosen.
CHAPTER 1 - GAME OVERVIEW
14
Map
Disk
Computer Joystick
Arrow/cross
Medal
Paintpot Shield
Arrow

SQUADRON PLANNING AND PILOT ASSIGNMENT
SCREEN
On this screen you can view the pilots in your
squadron and their current assignments. Pilots are
attached to A, B or C Flight (or Staffel) or are
unassigned in the reserve. New pilots appear during
the course of a campaign, and their quality will
depend on the morale of your squadron. The higher
the morale, the better the quality of the new pilots
arriving. Many of the areas on this screen are
selectable:
Pilot slots
Each named pilot occupies a slot within one of the four
flight boxes. You can move pilots within flights, to a
different flight or to and from the reserve. Select the
pilot you wish to move and then select the slot to which
you wish to move him. If that slot is currently occupied
by another pilot then they will swap positions.
Flight select
Select or deselect an entire flight (or staffel) by
selecting the tick/cross in the left hand corner of the
flight’s box. This will determine whether or not the
flight will take part in the next mission.
Pilot select
Select or deselect a pilot by clicking on the left hand
column to the left of his slot. If a pilot is selected then
his numbered plane will appear in the flight’s
formation box in the centre of the screen.
Flight arrows
Select the left/right arrows on any flight box to view
the names,skill level, position and orders of each pilot
in the flight. Select the left arrow once to view
information on the pilot’s morale, character, skill and
current number of kills. Select a second time to view
details on a pilot’s position in the current formation.
You will be given his range from the flight leader,
bearing from the leader and altitude difference.
Select a third time to bring up the current orders
assigned to the pilots in the flight. Select the orders
to display a clipboard which lists the orders which
may be issued. Click on the order you wish to give to
the pilot. Note that you cannot assign orders to the
flight leaders.
Formation arrows
Select the left/right arrows on the small formation
box of each flight to cycle through the different
combination of available flight formations.
Tick
Select the tick when you have completed your
squadron planning.
It is important that you assign individuals correctly.
Poor planning will lead to increased losses and this
will have a detrimental effect on the moral of the
pilots in your squadron. It is usually unwise to assign
a rookie pilot to a rear or exposed position as this will
put the pilot in extra danger. On the other hand you
CHAPTER 1 - GAME OVERVIEW
15
Shield Staffel /flight
arrows
Tick Aircraft
Arrows, +/- in
circles
Aircraft over
double arrows
Top wing
Rudder &
engine cowling
Bottom wing Fuselage
Elevators
Head/Eagle
insignia
might wish to have your most experienced pilots next
to you! Make sure that you have a clear
understanding of the mission objectives as this will
indicate the difficulty of the mission and therefore the
strength of the squadron required to accomplish
the task.
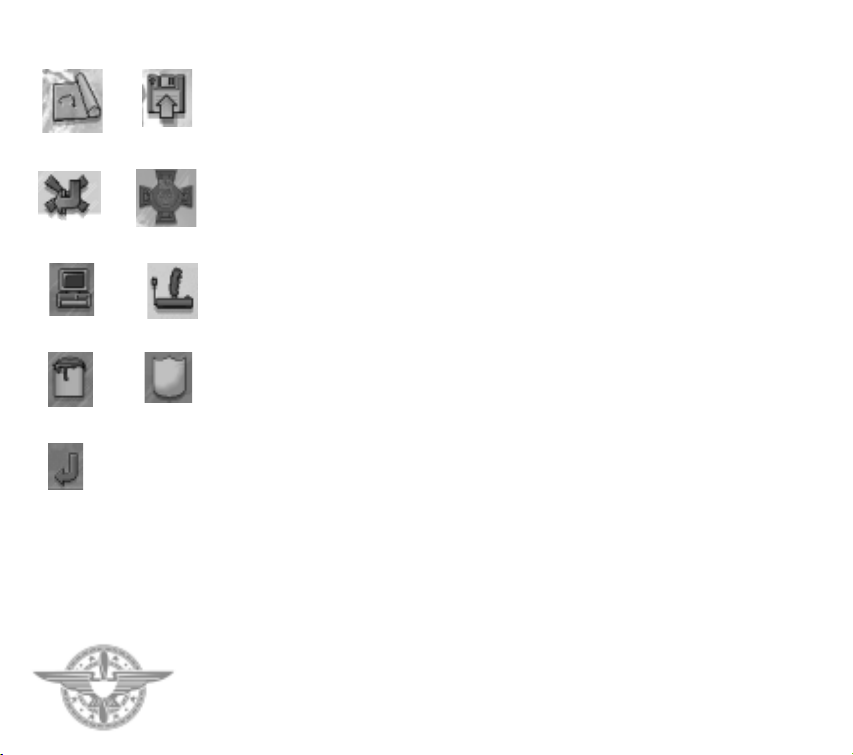
Paintshop screen
Select the paintpot on the Squadron screen to visit
the Paintshop. As it’s name suggests, it is where you
can decorate your squadron’s aircraft. It is essential
that friendly aircraft and their pilots are swiftly
identified. Without radios the best way of facilitating
this is to give each pilot an aircraft with a unique
marking. At the top right corner of the screen there
are a number of selectable icons:
Shield
Selecting the SHIELD causes all aircraft in the
current flight or squadron to be painted in the
leader’s colours. This icon is disabled if the current
pilot is not a flight or squadron leader.
Staffel/Flight arrows
Select the arrows opposite the name of the staffel or
flight to toggle through the flights.
Pilot arrows
Select the arrows to cycle through the individual
pilots of the chosen flight.
Arrows,+/- in circles
Select this icon to rotate and zoom the view of the
aircraft in the paintshop.
Aircraft over double arrows
Select the aircraft icon to change the aircraft type in
the paintshop.
Tick
Select the tick to confirm your paintshop orders.
Down the right hand side of the screen, underneath
the above icons, there are further selectable icons
which indicate features that can be cycled by selecting
the up and down arrows next to them:
Aircraft
Selects the eight overall paint schemes for the
entire aircraft.
Top wing
Selects the colour scheme for the top wing only.
Rudder & engine cowling
Selects the colour scheme for the engine cowling on
rotary aircraft or tail fin if stationary-engined.
Bottom wing
Selects the colour scheme for the bottom wing.
Fuselage
Selects the colour scheme for the fuselage.
Elevators
Select the colour scheme for the elevators.
Head/Eagle insignia
Select the individual insignia for fuselage markings.
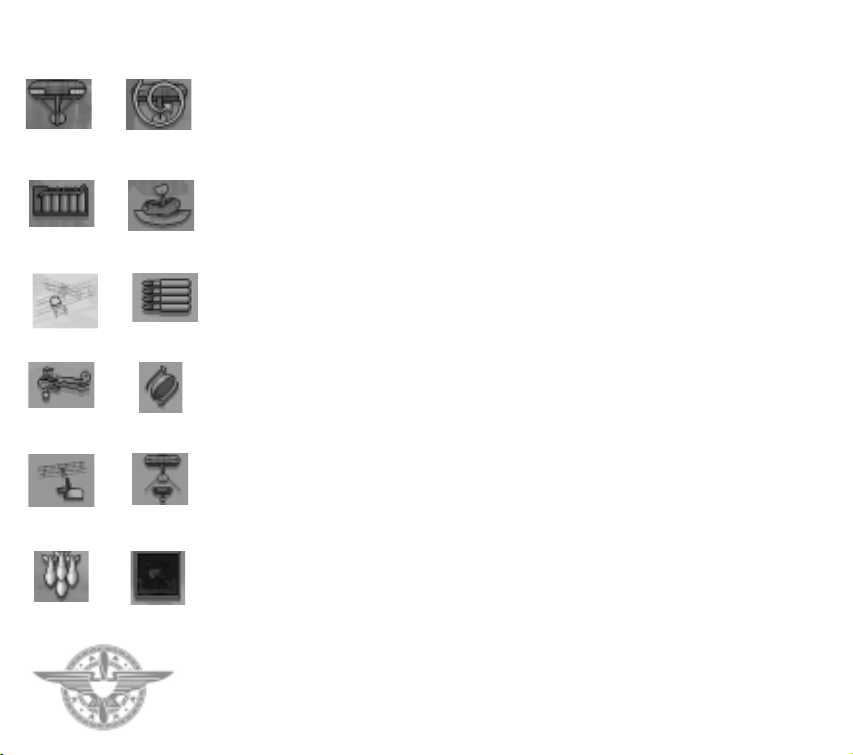
THE MAP SCREEN
The map screen is accessed from the main Campaign
screen, and displays waypoints and the course of your
flight path. The flight path is displayed as a line
joining the waypoints. Each map screen also displays
information about strategically important Allied and
German facilities and munition dispositions. The
symbols you will find on the map screens are as
follows:
CHAPTER 1 - GAME OVERVIEW
16
Waypoint
German airfield
Allied airfield
Field artillery
Important bridges
Active balloons
Tank depot
Tank convoy
Supply dump
Command centre
Each of these symbols will highlight when underneath
the pointer. If the symbol is in a square box then it is
a German feature, if in a circle then it
is an Allied feature.Selecting any symbol will open a
dialogue which gives further information about the
feature as well as its map location.
The map screen is especially useful during the Tank
Battle Campaign, where it must be used to alter your
patrol route by clicking on the waypoints shown and
dragging them across the map to the position
required. You can drop the waypoint icons on top of
other icons on the map.The waypoint action will then
change from patrol to attack, and your Jasta will
attack the item represented by the icon. When attack
waypoints are set, it is possible to use the F3 key
during flight to padlock on to the target.
Note that you will have to attack ground targets in
this campaign to make maximum impact on the
course of the ground fighting.To gain information on
the current status of ground units, select them with
the pointer.
In the Flying Circus, Spring Offensive and Hat in the
Ring campaigns, the waypoint positions cannot be
altered. However selecting a waypoint will lead to
further information about that point. Click on the
buttons on the panel in the top right of the map to
gain additional information on places of interest, such
as the locations of active balloons and the location of
airfields and bridges.
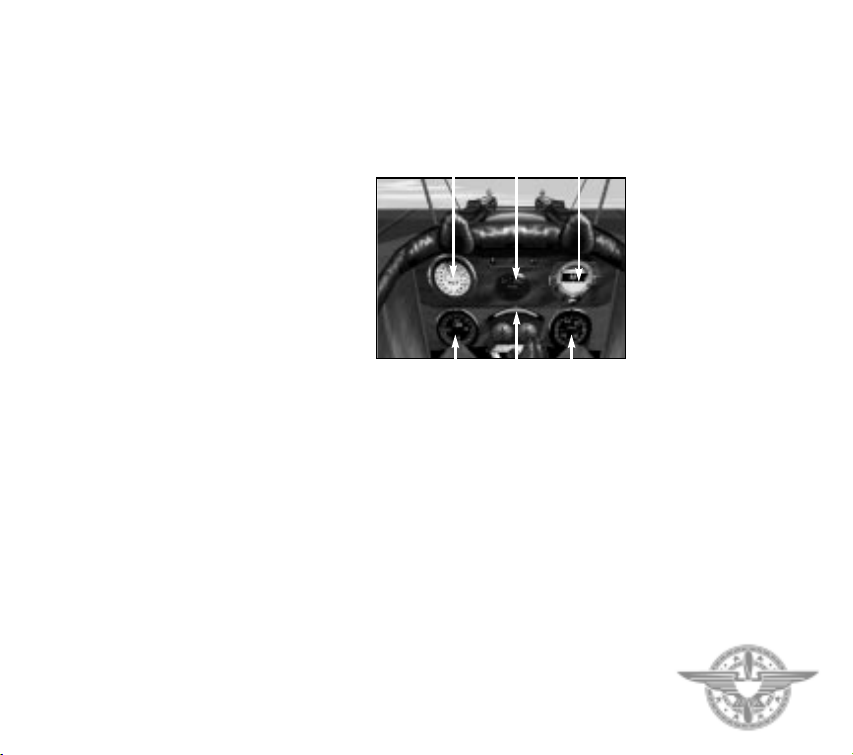
1.7 THE AIRCRAFT COCKPIT
Players should note that not all cockpits have the
same instruments.
To receive further information on your aircraft’s
flight status press the i key. There are 3 levels of
information which may be obtained by pressing the i
key consecutively three times. Pressing it a fourth
time will remove all information from the screen.
Pressing i once gives stall warning lights (your aircraft
is in danger of stalling if either of these lights is not
green), current altitude (height above ground),
current bearing (course), machine gun ammunition
left, bombs remaining and current thrust (or rpm).
Pressing i again gives tactical information (where
your target is for instance).
Pressing i the third time gives information on the
current view selection being used.
CHAPTER 1 - GAME OVERVIEW
17
ALTIMETER
FUEL
COMPASS
RPM SLIP INDICATOR
SPEED
CHAPTER TWO - FLYING
2.1 THE AIRCRAFT
Of the many aircraft featured in “Flying Corps Gold”,
six can be flown by the player. These six have been
chosen to represent the two main types of aircraft
available towards the end of the war. The rotary
engines group, which includes the Sopwith Camel,
Fokker Triplane and Nieuport 28, were highly
manoeuvrable and agile. However, when compared
with the stationary engined group, they were slow
and underpowered.
The stationary engined group,which is represented by
the SE5a, Albatros D3 and Spad 13, were high
performance aircraft with high speeds and good
sustained climbs.These aircraft were relatively stable
in flight and were generally easier to control than
rotary engined aircraft.
The rotary engine was very temperamental and
vulnerable to mistreatment. For instance, an aircraft
fitted with a rotary engine could not be left to tick
over. To avoid “meltdown”, the aircraft had to be
airborne within minutes of ignition.
Fuel delivery on the rotary engine was complicated.
The pilot had to balance the air and fuel intakes and
even then there was not a great range of control. In
fact, on the early rotary engines the pilot had a blip
switch: he could choose between no power and full
power. In Flying Corps Gold we have provided a
straight forward set of controls for power. It can be
changed in steps of one or ten percent. In addition, by
using the comma (0% thrust) and fullstop (100%
thrust) keys, it is possible to “blip” the engine.
However it was not just the fuel delivery system that
made the rotary engined aircraft difficult to master.
The huge mass of the engine rotating at high speed
gave rise to very large gyroscopic effects which forced
the aircraft to nose down in right turns and nose
upwards in left turns. These large gyroscopic forces
caught many inexperienced pilots by surprise and
were the cause of many fatalities during training.
Fortunately in Flying Corps Gold you will not have to
deal with the gyroscopic effect when doing your
initial training. The default aircraft model is fairly
neutral and, to some extent, it behaves like a modern
single prop two-seater. There are some differences
though. For instance, in the default model even
slipstream and torque effects are turned off. Also,
because World War One aircraft were tail heavy, you
will find that at the beginning of a mission you will
need forward pressure on the stick to fly level.
Generally this tail heaviness weakens during the
course of a mission as fuel usage gives rise to a shift in
the centre of gravity.
To see the range of effects that can be introduced into
the flight model, select Preferences from the main
menu and then choose the “aircraft on a grid” icon.
Some effects are more apparent on certain aircraft.
Obviously the rotary engined aircraft display the
greatest change in manoeuvrability when the
gyroscopic effects are turned on.
The co-ordinated rudder option is less obvious. This
option is designed to balance the adverse yaw effect
that occurs during a roll. Consider a clockwise roll as
viewed from the pilot seat. The roll occurs because
the lift on the left wing is greater than the lift on the
right wing. Now there is always a drag associated with
a lift and the bigger the lift the bigger the drag. This
drag acts to pull the wing backwards.The left wing has
the bigger lift and so it has the bigger drag with the
result that the aircraft yaws to the left.
The effect is called adverse yaw because the aircraft
ends up turning in the wrong direction. If a pilot
wants to turn to the right, he will roll the aircraft
clockwise. If the adverse yaw effect is not balanced
then the aircraft yaws to the left.
CHAPTER 2 - FLYING
19

In modern aircraft adverse yaw is designed out of the
aircraft. However the effect was present on early
aircraft and is most noticeable on the SE5. Adverse
yaw is counteracted by use of the rudder. If you don’t
have rudder pedals we suggest that you enable co-
ordinated rudder.
2.2 FIRST FLIGHT
“Always wear a belt or harness when flying the
Sopwith Camel as there is a tendency to leave
the seat when diving vertically” - Pilots’ Notes
Select Preferences from the main options menu and
then select the joystick icon. Configure your joystick
by following the on-screen instructions.
From the main menu, select scramble. Choose to fly
the “Camel” aircraft and the “First Flight” mission.
Your first flight starts at Boiry St Martin airfield
which is south of the city of Arras.As you enter the
cockpit, the power is already set to 100% and the
speed is increasing. Press the i key to get the general
information line at the top of the screen. Most of the
data provided on the information line is available
from the cockpit instrumentation. However for your
first few flights, at least, we suggest that you use the
information line because it is easier to interpret.
At about 20mph the airflow on the tail is sufficient for
the tail to lift off the ground. The aircraft will pick up
speed quicker now that the tail is not dragging on the
ground. At about 40 mph gently pull back on the stick
and the aircraft should leave the ground.
Use the stick to control the speed to 55-60mph. This
range of speed will give the best climb. To speed up
push the stick forward and to slow down pull the stick
back. Leave the power setting at 100%.
At 500ft push the stick forward and try to fly straight
and level. Don’t forget that because World War One
aircraft were tail heavy, you will need forward
pressure on the stick to fly level.
At this stage, you should be over the main railway
going south from Arras.Press m to get to the in-flight
map screen. The aircraft icon represents your current
position. The numbered icons represent the
waypoints for the current mission. In this case the
mission is a cross country familiarisation route.
Starting at Boiry St Martin, the route takes you down
the Ancre Valley to the town of Albert, then follows
the road up to Bapaume before turning north to
return home.
During the war, new pilots were sent up to get
familiar with the surrounding country side. You
should do the same so that you are able to find your
way home after a mission. Boiry St Martin should be
relatively easy to find because of the railway junction
to the north of the airfield.
Return to the cockpit by clicking on the icon or
pressing the return key. Now press p to pause the
game and try to get your bearings. The number pad
keys or joystick coolie hat can be used to rotate the
view around the cockpit. The view out the front is
restricted by the engine and guns and so a view to the
side is often better when navigating.This is especially
true when the aircraft is rolled slightly.
To get an even better view of the surrounding area,
press F6 to get an outside view. The plus and minus
keys can be used to zoom in and out when on
the outside view. Press F7 to return to the cockpit.
Press 5 on the number pad to reset the view to
facing forward.
Press p to unpause the game and try some of the
other views available on Flying Corps Gold. F8 gives
a forward view with the cockpit removed, F9 gives a
flyby which drops into a chase view and F10 gives a
satellite view. Keys F1 to F5 are used for a set of
CHAPTER 2 - FLYING
20
padlock views.These will be described later when the
mission involves more aircraft.
Try a gentle turn by rolling the aircraft about twenty
degrees. Pull back gently on the stick to maintain
altitude.
At this stage you can either try the suggested cross
country route, get used to the aircraft or explore the
landscape.You have about two hours of fuel.
When TAB is pressed the view changes to the map
and the aircraft will follow the waypoints in
accelerated time. Accelerated time is disengaged
manually by clicking on the return icon.
Press F12 during flight to access the Preferences.
Flight difficulty factors, like the gyroscopic effect,can
be turned on and off during flight.
When exploring the landscape fly high, 3000ft at least,
to get your bearings. World War One pilots would
then fly really low,“chasing” the contours.Around the
Somme area the ground is quite flat and so you have
to go really low when contour chasing. The height
figure on the information line is measuring the height
above the ground. Try to keep the reading below 20ft.
When you are ready to land, approach the field on a
gentle glide (5-10 degrees) with the power off. You
should aim to cross the airfield boundary at about
50mph and 50ft off the ground. Pull back gently on
the stick. The speed should drop and contact with the
ground should be made at under 40mph. When the
speed has dropped to below the stall, the stick can be
pulled back so that the tail makes contact with the
ground. This will increase the deceleration.
Use short bursts of power to taxi the aircraft and steer
with the rudder. It is also possible to steer on the
ground by making use of the adverse yaw effect
mentioned earlier.
In Flying Corps Gold it is not necessary to land at the
end of each mission. You can exit the mission at any
point by pressing alt-x.
2.3 COMBAT MANOEUVRES TRAINING
In your first flight, the recommended manoeuvres
were gentle, so you should not have lost control of the
aircraft. However during combat you will be flying
much closer to the “edge” and stalling and spinning is
very likely.The purpose of the next training flight is to
show you how to lose control, recover control and
avoid losing control.
Fly the “First Mission” option again. Make sure that
all the flight difficulty options, except spinning, are
disabled. The spinning option should be enabled.
After take-off press the u key a few times. This key
elevates the aircraft 500ft for every key press.This is a
very useful cheat because in reality World War One
aircraft took a long time to gain altitude.
Set up for straight and level flight and then reduce the
power to 0% but maintain the altitude by pulling
back on the stick. Over the course of a few seconds
you will have pulled the stick back as far as it will go
and the speed will slowly drop to around 35mph. At
this point the aircraft will either stall or spin.
If you entered the maneuver flying absolutely straight
and level then the aircraft will stall. This means that
the nose of the aircraft will drop even though you are
pulling back on the stick. Recovering from a stall is
easy: release the stick, wait for the airspeed to build
up to about 50mph and then gently pull back on the
stick.
If the aircraft was rolling or yawing when you entered
the maneuver then the aircraft is more likely to spin.
CHAPTER 2 - FLYING
21
The spin can be guaranteed by applying and
maintaining full rudder when the aircraft enters the
spin. Recovering from a spin is a little more tricky:
release the stick and apply full rudder to counter the
spin, wait for rotations to cease and then release the
rudder. Allow the airspeed to build up to about
50mph and then gently pull back on the stick.
In the above example, the spin occurred at low speed.
In combat, spins will generally occur at higher speeds.
Try this example: Select full power and gain some
altitude by pressing the u key a few times. Roll the
aircraft into a vertical or 90 degree bank. The aircraft
will start to lose altitude, so pull back on the stick.
Keep pulling on the stick to tighten the turn.At some
point you will lose control and, depending on aileron
input, the aircraft will either spin in or out of the turn.
Neither situation is desirable in combat and so we
need to consider how to maintain control rather than
how to recover once control is lost.
If you are going to maintain control of your aircraft
during air combat, some understanding of the theory
of flight is necessary. Many books have been written
on the subject and we have recommended a few in the
bibliography. We cannot hope to do justice to the
subject in a few lines, but we do have the advantage
that we can let you try things out on the flight model.
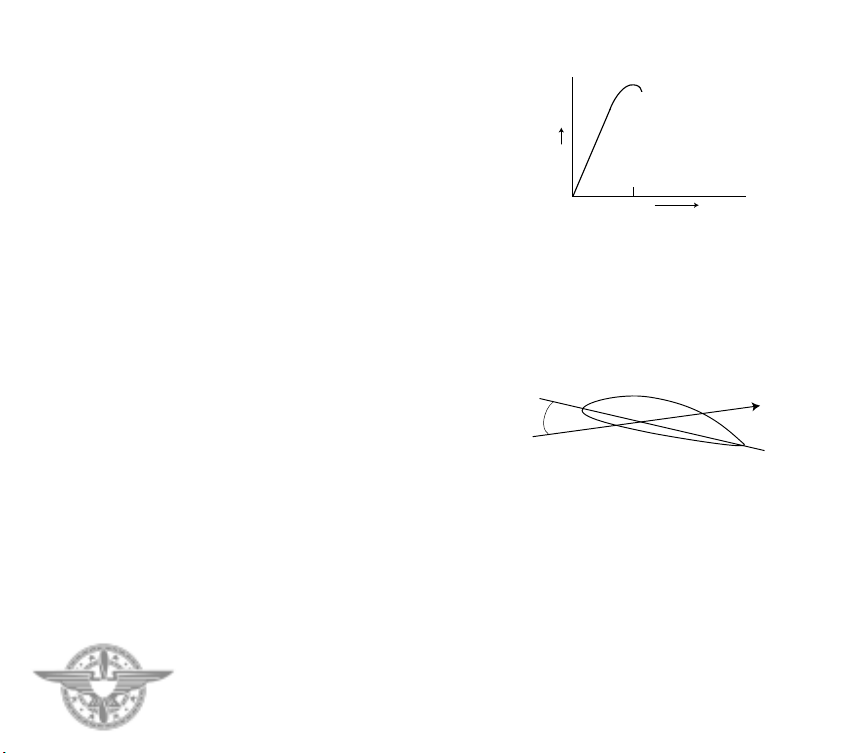
First though, we need to define some terms. An
aircraft wing is design to provide a lifting force.When
this force is greater than the weight, the aircraft will
go up. The amount of lift provided by the wing
depends on the following factors:
Shape Some wings are better lifters than others.
Velocity squared: The faster the air flow the bigger
the lift.
Angle between the wing chord and the airflow:
This angle, which is shown in the diagram, is
commonly called the angle of attack.
If an aircraft which is flying straight level slows down,
then there is a tendency for the lift to reduce and the
aircraft will go down. To maintain level flight , the pilot
compensates for the loss of speed by increasing the angle
of attack. This is done by pulling back on the stick. At
some point though, increasing the angle of attack no
longer results in an increase in lift. At this critical point
which is known as the stall, the lift actually starts to
decrease as the angle of attack increases.
In Flying Corps Gold the top general information line
contains angle of attack indicators for both left and
right wings:
Indicator Colour Angle of Attack Meaning
green <13
O
not stalled
yellow 13-15
O
near stall
pink 15
O
at stall
red >15
O
stalled
angle of
attack
wing cross-section
direction of
airflow
wing chord
angle of attack
lift
CHAPTER 2 - FLYING
22
If the conditions of both wings are indicating red then
both wings are stalled. If only one indicator is red
then only one wing is stalled and the aircraft will spin
because the lift on the two wings is not in balance.
To maintain control, the wings should never be
allowed to enter the stall zone. In a tight turn the
indicators should be yellow. After a few combat
missions you will develop a feel for the aircraft, you
will recognise the initial signs of a spin and won’t have
to rely on the indicators.
Practice vertical turns by simultaneously rolling the
aircraft to close to 90 degrees and pulling back on the
stick until the indicators turn yellow. A tendency to
roll out of the maneuver is ideally compensated for by
using the rudder. Aileron can also be used but you
then run the risk of stalling the top wing and spinning
out. Maintain full thrust and balance the aileron,
elevator and rudder controls, to turn as tightly as
possible with the minimum of altitude loss. Push the
aircraft to the limit until you can turn on the “edge”
but retain control.
If your aircraft will not spin even when you have
applied full elevator in a tight turn then you need to
recalibrate your stick. When the stick is calibrated
properly it is not possible to maintain control with full
elevator applied.
2.4 ADVANCED COMBAT MANOEUVRES
‘He must be able to loop, turn his machine on its back,
and do various other flying stunts - not that these are
actually necessary during combat but from the fact
that he has done these things several times he gets
absolute confidence, and when the fight comes along
he is not worrying about how the machine will act. He
can devote all his time to fighting the other fellow,the
flying part of it coming instinctively.’ - Bishop
In a combat situation, most fighter pilots considered
anything more than a tight turn to be tooexotic.
Richthofen was not interested in aerobatics and said
that he would never do a loop. He was more
interested in a positive attitude and shooting ability.
However some manoeuvres are useful and as Bishop
said, practising aerobatics gives the pilot confidence.
You do have to be very careful when performing
aerobatics in combat.There is the danger that you will
concentrate too much on the maneuver and not
enough on what your opponent is doing. Also many
manoeuvres will slow the aircraft down and a slow
aircraft is very vulnerable in combat. Even if you can
see that your opponent is not in a shooting position, it
is still dangerous to slow down. There are other
aircraft in the sky.
THE HALF ROLL
Yeates described this as the “only stunt useful in
fighting” and in World War II, this maneuver became
known as the Split S. The stunt is useful when you
need to shake someone off your tail. It is performed
by rolling the aircraft on its back and then pulling
back on the stick.
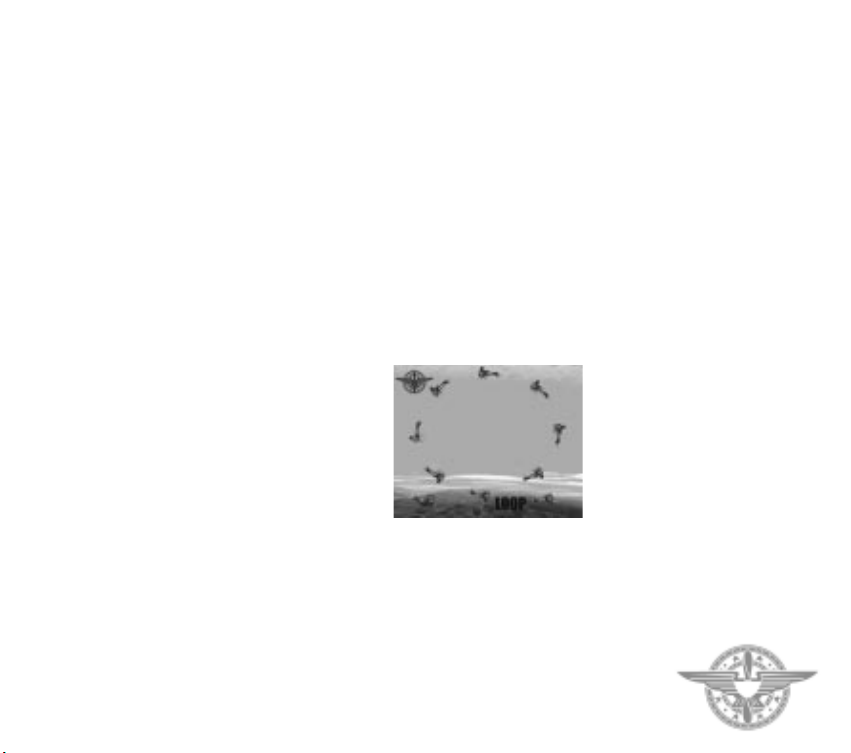
LOOP
This maneuver is seldom used in combat. It simply
involves pulling back on the stick and keeping it there.
The aircraft will climb.At the top of the manoeuvre, the
aircraft will be inverted and facing in the opposite
direction. Keep pulling back on the stick and the aircraft
will dive. Eventually it will be right side up and flying on
its original heading. A loop is best entered from a slight
dive and with relatively high speed. In the stationary
engined aircraft this maneuver is straightforward,
CHAPTER 2 - FLYING
23
whereas in the rotary engined aircraft, plenty of left
rudder will be required at the top of the maneuver
whilst inverted.
In both types of aircraft you will need ‘to feel’ the
amount to pull back on the stick. Too much or too
little may result in a stall.
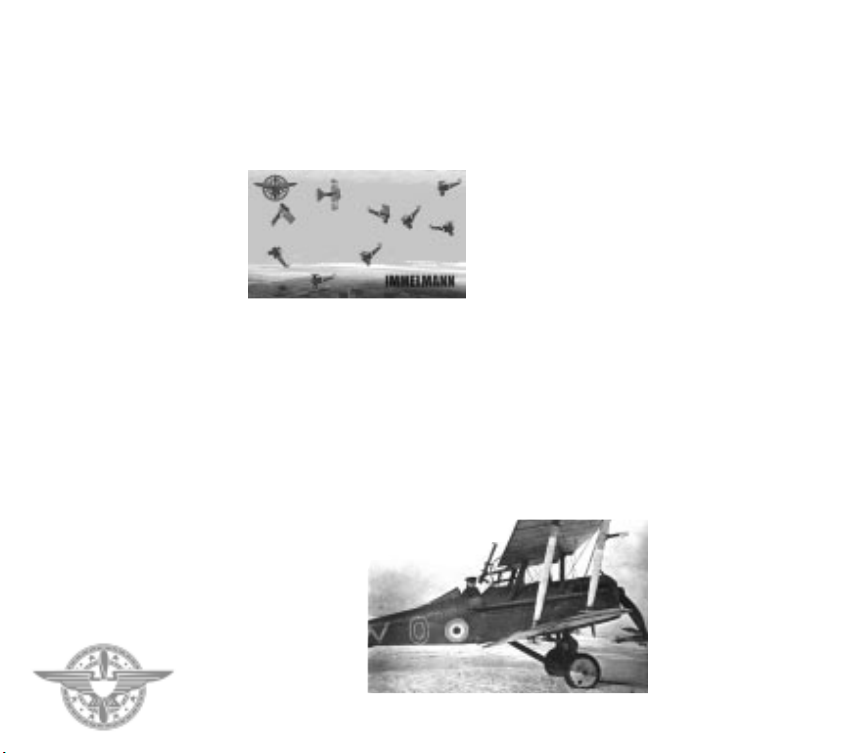
IMMELMANN TURN
This maneuver is used to reverse your direction and
there are two versions. In the first, pull back on the
stick and keep it back, as if you were going to loop.
When the aircraft is inverted and facing in the
opposite direction to which it commenced the
manoeuvre, roll the aircraft the right way up. This is,
in effect, the half roll in reverse.Although it has the
advantage of gaining height whilst reversing
direction, it should be used with circumspection in
combat, as the aircraft is slow and vulnerable near the
top of the manoeuvre.
There are many variations of the second version of
the manoeuvre. In its purest aerobatic form it
becomes the “Hammerhead”. However, this is no
good in combat because it involves going very slowly
at the top of the climb. In fact, the combat maneuver
is more like a Wingover: pull back on the stick and
immediately apply rudder and aileron in the same
direction. It is possible to intentionally stall the lower
wing to increase the rollrate. On rotary engined
aircraft, the pull back will result in a yaw to the right
which will make right turns faster.
DIVE AND ZOOM
This maneuver consists of diving down on your
opponent and opening fire at about 150m. When the
range is about 50m, stop firing and pull out of the
dive.As you fly over your opponent, he could pull up
sharply and get in a snapshot at you. To avoid this,
apply a little roll when pulling out of the dive.At the
end of the maneuver you should have regained your
height advantage over your opponent.
Dive and Zoom tactics suit the stationary engined set
of aircraft. These aircraft have a high performance
and can outclimb the lower powered rotary engined
aircraft. However, rotary engined aircraft are better
in turning fights.
CHAPTER 2 - FLYING
24
 Loading...