


 Loading...
TABLE OF CONTENTS |
|
Understand Your Enemy ................... |
2 |
Getting Started ............................... |
4 |
Playing the Game ............................ |
6 |
Multiplayer Game .......................... |
22 |
Advanced Controls ......................... |
32 |
GDI Units ...................................... |
35 |
GDI Structures ............................... |
44 |
Nod Units ..................................... |
52 |
Nod Structures .............................. |
62 |
GDI Tutorial .................................. |
70 |
Nod Tutorial ................................. |
79 |
Credits ......................................... |
87 |
"We have waited centuries for this moment.
The rivers will flow with the blood of those who oppose us."
-- Kane, suspected leader of the Brotherhood of Nod
(Global Net Interpol, file #GEN4:16)
 HISTORY
THE BROTHERHOOD OF NOD
Commonly, The Brotherhood, The Ways of Nod, ShaÆSeer among the tribes of Godan; see INTERPOL File ARK936, Aliases of the Brotherhood, for more.
FOUNDED: Date unknown: exaggerated reports place the Brotherhood’s founding before 1,800 BC
IDEOLOGY: To unite third-world nations under a pseudo-religious political platform with imperialist tendencies. In actuality it is an aggressive and popular neo-fascist, antiWest movement vying for total domination of the world’s peoples and resources. Operates under the popular mantra, “Brotherhood, unity, peace”.
CURRENT HEAD OF STATE: Kane; also known as Caine, Jacob (INTERPOL, File TRX11-12Q); al-Quayym, Amir (MI6 DR-416.52)
BASE OF OPERATIONS: Global. Command posts previously identified at Kuantan, Malaysia; somewhere in Ar-Rub’ al-Khali, Saudi Arabia; Tokyo; Caen, France.
MILITARY STRENGTH: Previously believed only to be a smaller terrorist operations, a recent scandal involving United States defense contractors confirms that the Brotherhood is well-equipped and supports significant land, sea, and air military operations.
ECONOMIC STRENGTH: Considerable operating assets believed to be in excess of US$255.2 billion, based on audits of seized financial records (see CIA Docket 3231.54776 FIA).
POLITICAL STRENGTH: Believed to be the sole backers of the Fist of Allah party in Jordan (52%); United We Stand America party in the United States (12%); Albion First! party in the United Kingdom (25+%), among others. (See Brookings Institution publication A42962-94 for full disclosure.)
AFFILIATIONS: Irish Republican Party; Islamic Jihad; Khmer Rouge; others. (See document: Brotherhood of Nod Splinter Groups.)
SEE ALSO: Mobius, Dr. R.H.; terrorist activities; United States Global Defense Act; Report of World Energy Radical Redistribution, US Congressional Report, 1994, File XXY22.
2
GLOBAL DEFENSE
INITIATIVE
Commonly, GDI. Before 1990, known as Special Operations Group Echo, Black Ops 9.
FOUNDED: 12 October 1995, in accordance with the United Nations Global Defense Act (UNGDA)
IDEOLOGY: To enforce the United Nations Global Defense Act and uphold the ideals as outlined in the United Nations Charter.
CURRENT HEAD OF STATE: Brigadier General Mark Jamison Shepherd, Chief of Staff, United Nations Military Command.
BASE OF OPERATIONS: United Nations Military Command Center, location CLASSIFIED.
MILITARY STRENGTH: Within parameters of the UNGDA, Article V, Section 3A, Paragraph 12.
ECONOMIC STRENGTH: Funded by United Nations and various national governments, public organizations, and private enterprise.
POLITICAL STRENGTH: Not applicable: operates within parameters of the UNGDA and under the orders of the United Nations Security Council.
AFFILIATIONS: United Nations.
SEE ALSO: Shepherd, M.J.; United Nations, 1995 to present; United Nations Global Defense Act, 1995; Mobius, Dr. R.H.
HISTORY
3

 GETTING STARTED
System Requirements
An IBM or 100% compatible computer with Pentium CPU required
Windows ’95® or Windows 98®required
8MB of RAM (16MB strongly recommended)
Digital Audio via Windows ‘95-supported Sound Cards
Double-speed CD-ROM or faster
40MB free Hard Drive space
14.4 (28.8 recommended) modem for modem play
IPX network for Local Area Network play
Keyboard
Mouse
1MB PCI or local bus video accelerator card (ISA video cards not supported)
Internet Requirements
28.8 modem or direct Internet connection
A valid account with an Internet service provider (ISP) and a valid Internet e-mail address
Winsock 1.1 compliant TCP/IP stack
8MB RAM (16MB strongly recommended)
Command & Conquer supports Westwood’s DDA™ (Direct Digital Audio). DDA provides 100% digital audio, giving you premium quality music and sound. With DDA, PC audio is no longer restricted to FM or General MIDI limitations.
4

Setup & Installation
Insert any C&C95 CD into the CD-ROM drive.
Command & Conquer for Windows ’95 uses the “Windows ’95 Autoplay” feature to present you with installation and gameplay options as appropriate. Inserting any C&C95 CD into your CD-ROM drive should cause the Autoplay dialog to appear. If you have not installed C&C95 before you will be presented with an INSTALL option from this dialog. Click this and follow the onscreen instructions.
In the event that the “Windows ’95 Autoplay” feature does not work on your system, you should install the product by clicking on the START button on the Windows ’95 taskbar, located in the lower left-hand corner of the screen. Click RUN…, type “D:\SETUP” (where D is the letter that designates your CD-ROM drive), and then click the OK button. Please follow the onscreen instructions which appear.
Once Setup is complete, you will be returned to Windows where a Westwood program group containing icons for C&C95 and the Setup program will be added to the Start menu. By default, C&C95 is installed into a directory named C:\WESTWOOD\C&C95.
Loading Instructions
Insert any C&C CD into the CD-ROM drive.
C&C95 uses the “Windows 95 Autoplay” feature to present you with installation and gameplay options as appropriate. Inserting any C&C95 CD into your CD-ROM drive should cause the Autoplay dialog to appear. If you have previously installed C&C95 you will be presented with a PLAY option from this dialog. Click this to launch the game. The Introduction to the Game will follow.
Alternatively, C&C95 can be launched by clicking the START button on the Windows 95 taskbar, clicking PROGRAMS, then WESTWOOD, and then clicking “COMMAND & CONQUER WINDOWS ’95 EDITION”.
GETTING STARTED
5
 PLAYING
Starting the Game
If you have never played Command & Conquer before, be sure to read the Tutorial on pages 70 and 79.
CHOOSING YOUR SIDE: GDI OR THE BROTHERHOOD OF NOD
Near the end of the introduction, you are asked to choose a side to ally with. One is GDI— the United Nations’ Global Defense Initiative peacekeeping force. The other is The Brotherhood of Nod, a secretive terrorist organization that has remained hidden for centuries… until now. Choose whichever one suits your tastes by left clicking on the logo of the appropriate side.
If you choose the Brotherhood, you will fight against GDI. If you choose GDI, you will fight against the Brotherhood. Each side has its own characteristics and style of playing, as well as radically different units, buildings, and tactics.
GDI |
Nod |
Title Screen menu
Title Screen Menu
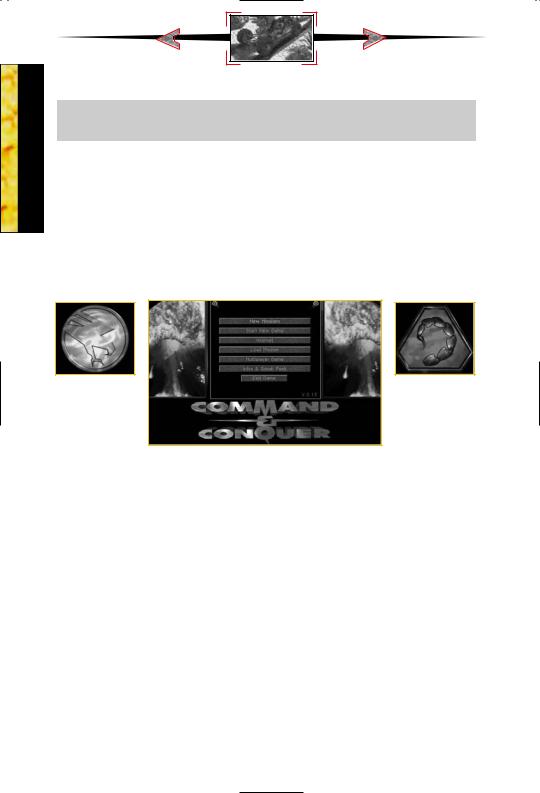
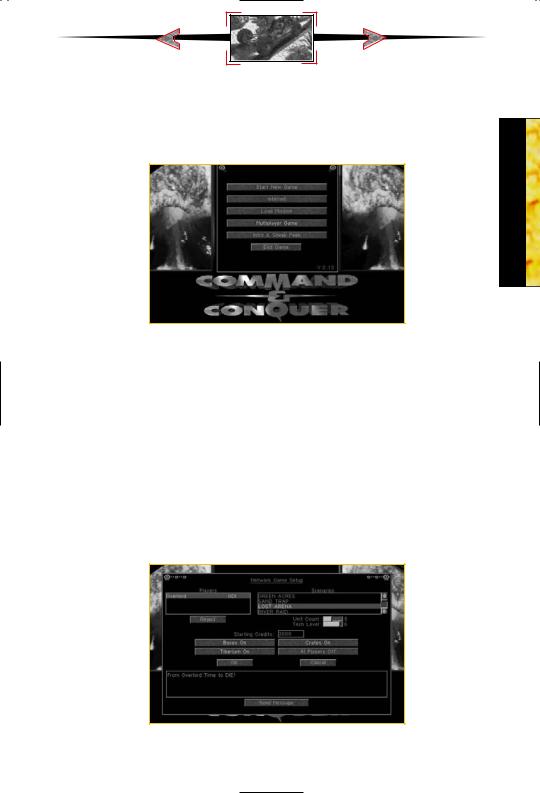
When you start the game for the first time, you’ll be treated to C&C95’s spectacular introduction. In subsequent games, you’ll be taken directly to the Title Screen menu:
START NEW GAME
To start a new game, choose this option. You’ll go straight to the screen for choosing your side. When starting a new game, the introduction is not shown again.
INTERNET
If you’d like to play an Internet game , choose this option. (See page 22 for more information.)
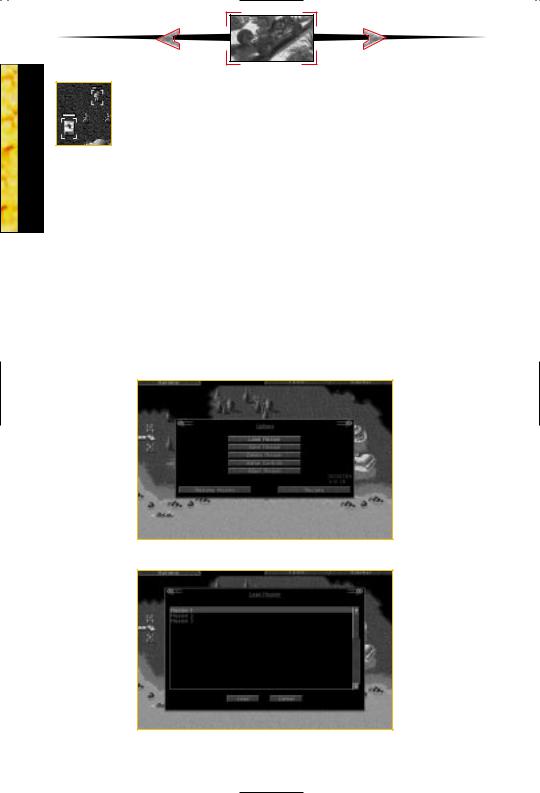
LOAD A MISSION
If you want to play a previously saved mission, choose this option. (See page 19 for saving missions.)
6
PLAYING
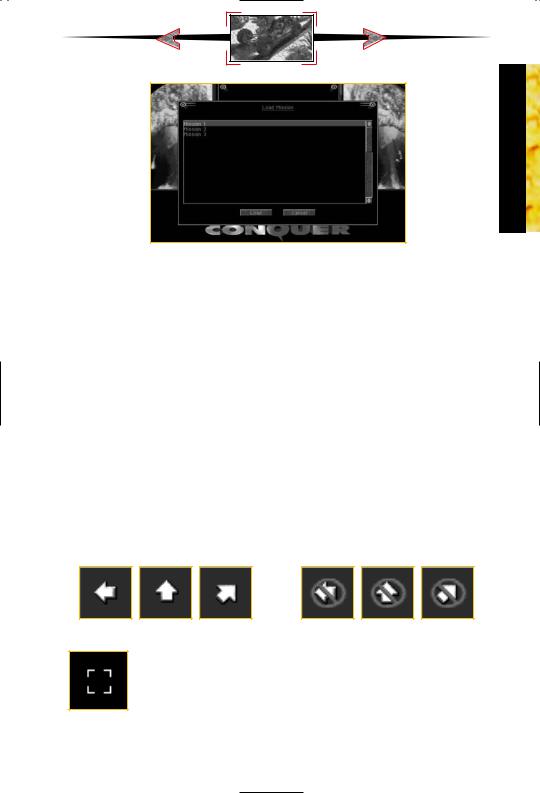
Load Mission screen
Load Mission screen
From this Load Mission screen, click on the up-arrow or down-arrow to scroll through your saved missions. Select the saved mission you wish to reload and left click on LOAD.
MULTIPLAYER GAME
This option allows you to select a multiplayer network game (if detected) or serial game (null modem or modem). See the Multiplayer Game section (page 22) for more details.
INTRO & SNEAK PEAK
If you want to see the introduction again, select this option.
EXIT GAME
Select this option to exit back to the Windows 95 desktop.
Playing the Game
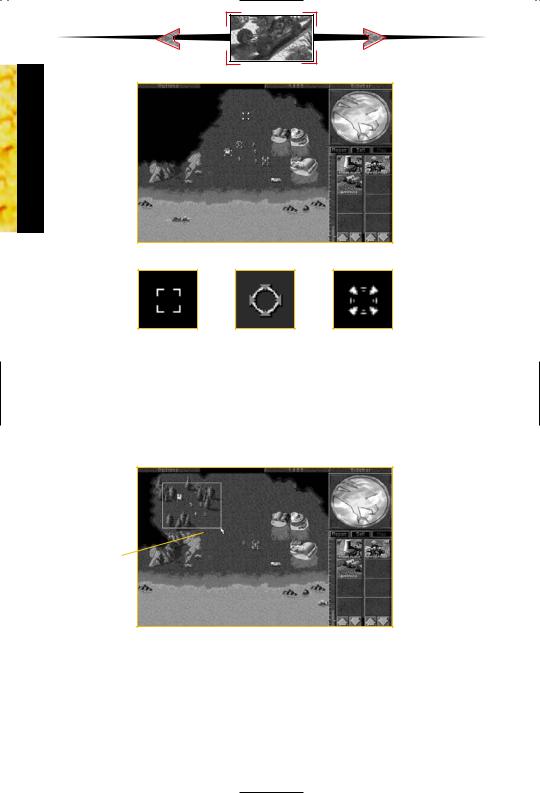
SCROLLING AROUND
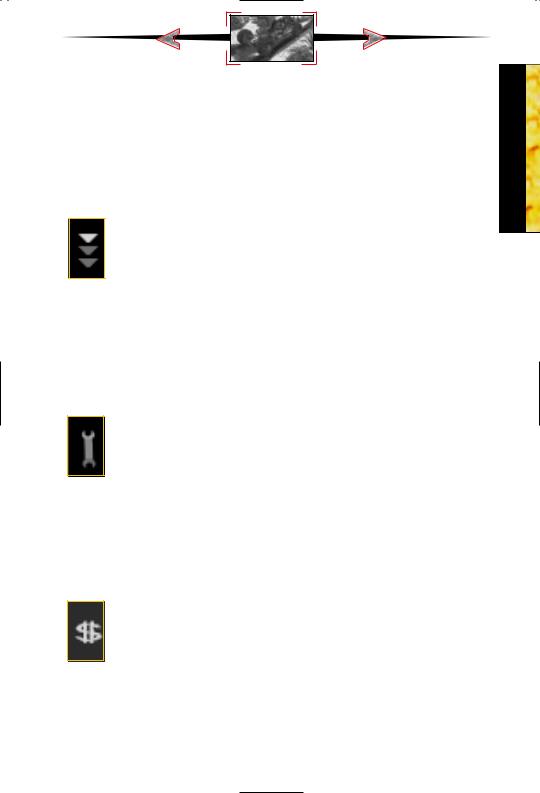
To scroll the main viewing window around the battlefield, move the cursor to the edge of the screen. The cursor will become a white solid arrow and the view will scroll in the indicated direction. If you’re at the edge of the battlefield, a slash will appear over the arrow indicating that this is as far as you can go.
Scroll arrows |
Can’t Scroll arrows |
ORDERING YOUR TROOPS AROUND
To get your troops to act, select a unit by left clicking on it. A bracket will appear around the selected unit and the unit’s health will be displayed above the unit. Move the cursor to the location on the game map where you want the unit to go. If the cursor is over a potential target, it will change to
the targeting cursor. Left clicking here will cause the unit to attack the target. Otherwise, it will move the unit to that location, unless it is impassible (i.e. a cliff or trees).
To cancel out of this mode (or any mode), right click and the unit will be deselected.
7
PLAYING
Main Game screen
Selection |
Targeting |
Movement |
cursor |
cursor |
cursor |
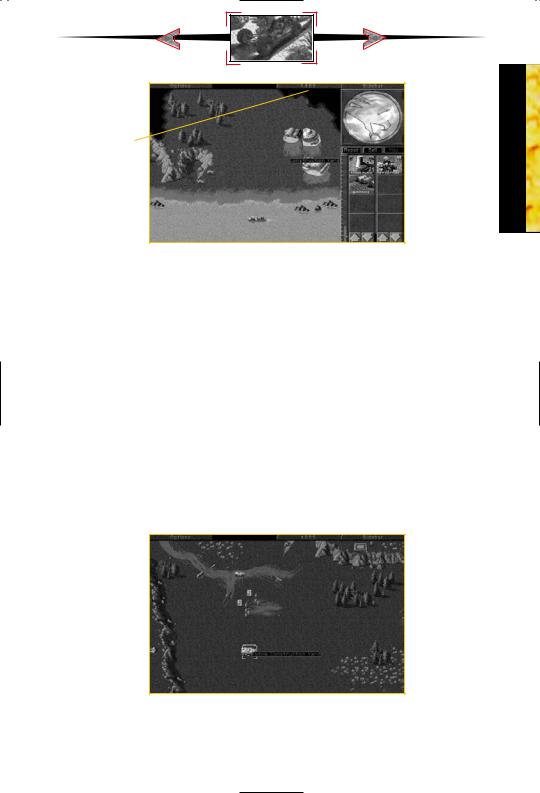
Group Activities
To save time, you can combine your troops into groups. To select several units simultaneously, left click and hold the mouse button down. Drag the mouse cursor to include all the troops you want selected. A white box outline indicates the range of this selection. Then, release the mouse button, and all the units within the white box will be selected. You can give that group an order the same way you’d give a single unit an order.
Left click and hold  button down,
then drag the cursor to include desired units
Selecting many units at once
Sidebar
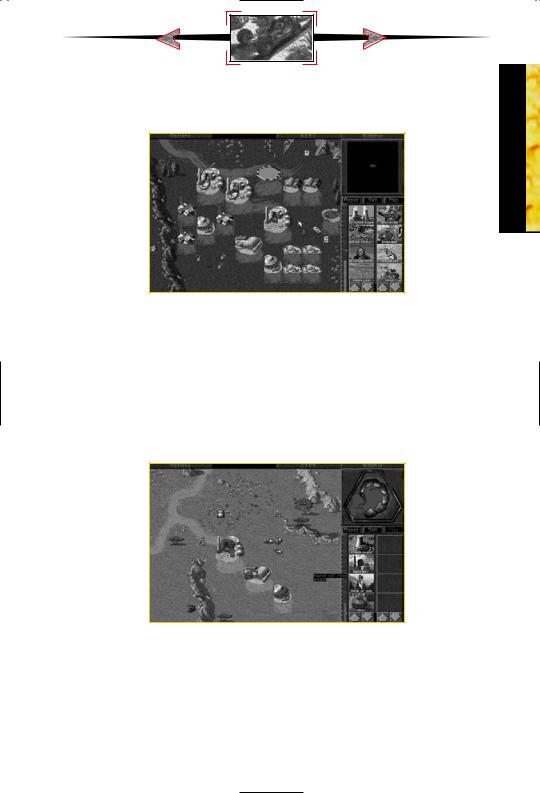
From the Main Game screen, the Sidebar may be opened by left clicking the sidebar button in the upper right corner. If you have a Construction Yard, or, if you deploy an MCV, the Sidebar will open automatically. Click on the Sidebar once more to close it.
From the Sidebar, you can build units and buildings by left clicking on the corresponding icons. The sidebar will also show you a radar map of the area (if you have radar stations) and also tells you how much power your base is producing vs. how much it needs.
8
Credits
Sidebar open
Credit Indicator
To the left of the sidebar, and above the main game screen is the amount of credits you may spend. This indicator keeps track of the amount of money you have available to build structures and units. Your total credits will decrease as you build or repair units and structures. Credits will increase when a building is sold or when a harvester unloads Tiberium at a refinery.
Production vs. Non-Production Missions
There are two types of missions: production and non-production. In production missions, you are given either a construction site or a Mobile Construction Vehicle (MCV).
In non-production missions, you must finish the mission with units you begin with. (This may sometimes lead to production situations. For instance, if you begin with an engineer unit and manage to capture an enemy production structure, then the mission type may change.)
Building Things
Critical to the success of many missions is constructing your own field base, and constantly maintaining and defending this base during combat. A strong base is often necessary to win.
Deploying your MCV
PLAYING
9
PLAYING
Construction Yard complete
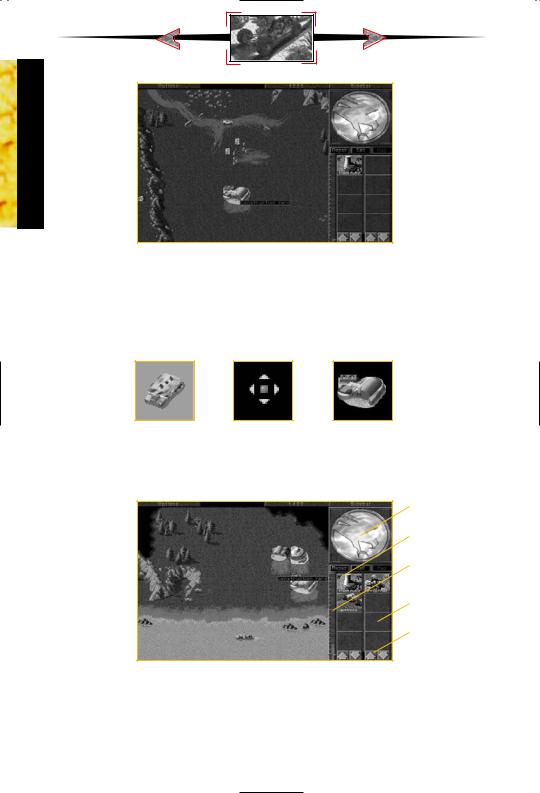
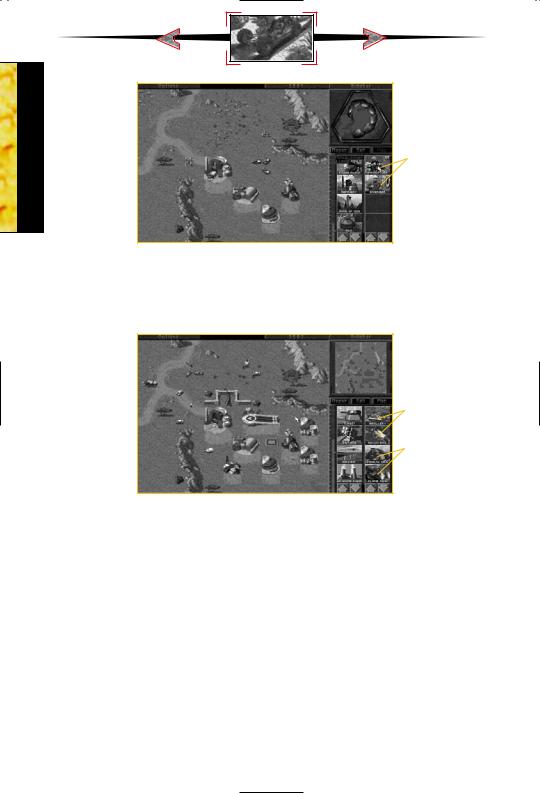
To begin building your base, you must have a Construction Yard. Unless the Construction Yard is set up when the mission begins, you’ll have to deploy the Mobile Construction Vehicle (MCV). Left click on the MCV and move it to where you want the Construction Yard to be placed. If you try to deploy the MCV where there isn’t enough room, the deploy cursor will not appear. If there is enough room, left click to deploy the MCV, and it’ll turn into a Construction Yard.
MCV |
Deploy |
Construction |
|
cursor |
Yard |
Once the Construction Yard is set up, the Sidebar will pop up. In the upper portion of the Sidebar, you will see the symbol of your side (GDI or Nod). Later, this area becomes a radar display, when you’ve built a Radar Facility and have enough power to support it.
Your side
Building icons
Power bar
Unit icons
Scroll buttons
Below the radar display is a row of three buttons. These are the REPAIR, SELL, and MAP buttons. Each of the buttons has a specific game function that is discussed later in this section.
Underneath the REPAIR, SELL, and MAP buttons are two columns of icons. The left column displays which structures your Construction Yard can build; the right column displays the units you can create. The arrow buttons at the bottom of these icons allow you to scroll through these when there are more than four available.
10
PLAYING
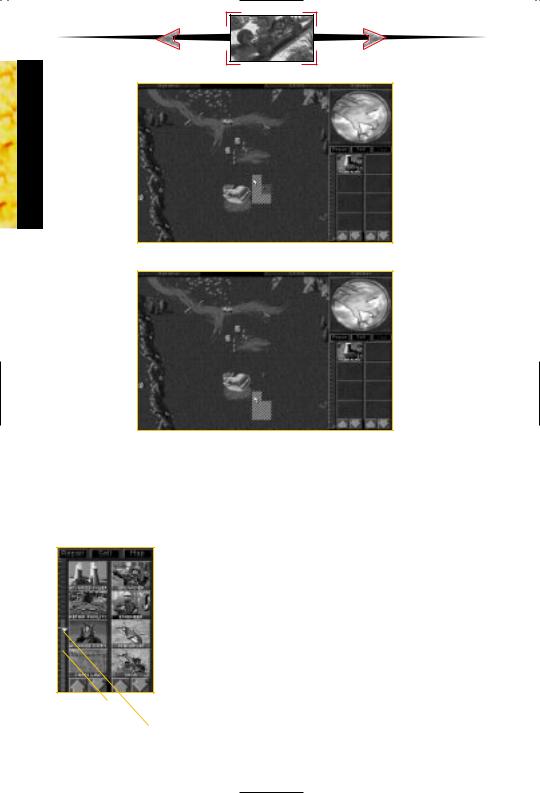
Choosing a structure in the Sidebar
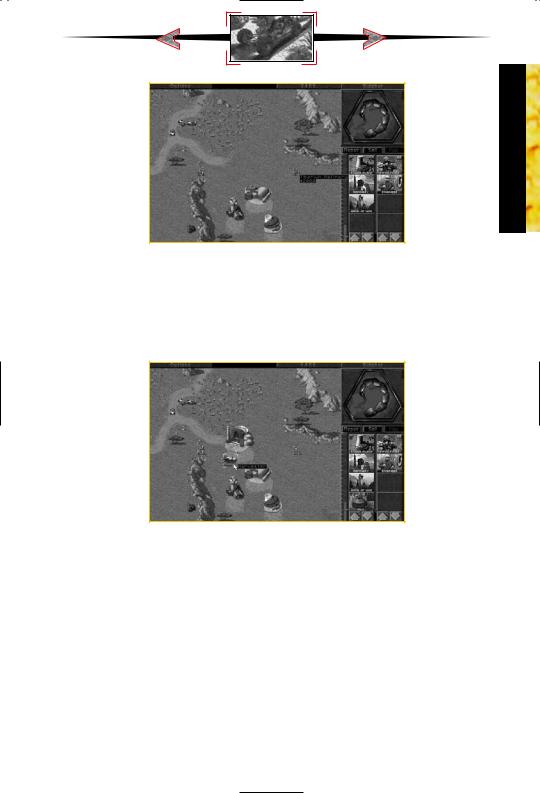
To build a structure or unit, left click on the appropriate icon. Construction will take a period of time, as indicated by the sweeping arc over the icon. Cost for construction and/or purchasing will be automatically deducted from your available credits. Only one unit and one structure can be built at any one time. If you move the mouse cursor over the icon (without clicking), you’ll see what that icon represents and how much it would cost you to build, buy, or train it.
Ready to place
To place a completed structure, first select a structure and left click on it. Once construction is completed, the word READY will appear across the bottom of the icon in the Sidebar. Left click on the icon, and the mouse cursor will turn into a placement grid on the battlefield. The grid gives you an idea of how large the building will be on the field. Move the grid to where you want the building placed. The grid should be entirely white. Any red in the grid indicates that the placement area is blocked, and you will not be able to
deploy the building. Once you’ve found a suitable location, left click and the building will be placed where you indicated. Your new building must be adjacent to one of your existing structures or the entire placement grid will be red.
11
PLAYING
Area blocked
Area clear!
While there is a grid on the field, you will not be able to build anything else. You’ll have to either place the building or cancel its placement. To cancel, right click while the placement grid is still up. The grid will disappear, and READY will appear on the building icon (in the sidebar) again. Right clicking again on the icon in the Sidebar will cancel the building and refund your credits.
Power production
Blue “threshold” bar
Power
To the left of the construction icons is a narrow bar with a horizontal indicator on it. This is your power bar—keep an eye on it! Every building that you place requires power to run. Knowing how much power you have and how much power you are using is very important.
The blue “threshold” bar shows how much power your base (and all its structures) needs to function optimally, while the vertical power production bar shows how much power your base is producing. If the vertical power production bar is yellow or red, your base doesn’t have enough power! If it’s green, your base has enough power to run all the structures you have built.
Lack of full power will cause construction to go slower, and will also shut down radar (if it was built), as well as deactivating some of the
12
high-tech base defenses available in the game. Power Plants are good targets to go after if the enemy has defenses that are tough to destroy. Without power, the enemy is denied information, quick response time, and base defense.
Low power
The output of any power plant depends on how well it is functioning. Make sure to keep all of your Power Plants fully repaired, or you may find yourself losing power at an inopportune moment. Build an extra power plant or two to be safe.
Creating Additional Units
If you have a Construction Yard and enough credits, build a Power Plant and then build a Barracks or Hand of Nod, which will allow you to train infantry. At first, the type of troops you can train will be limited. As you win missions you’ll receive new technologies and upgrades. Once you do this, new troops with unique abilities will become available.
Ready to build barracks (Hand of Nod)
PLAYING
13
 PLAYING
Infantry
With Hand of Nod built, now you can train infantry
As the game progresses and you build up your base, you’ll have a chance to construct a Weapons Factory or an Airfield. With these, you can acquire new and more powerful units like Hum-vees, Attack Cycles, Dune Buggies, and eventually, Tanks. Keep in mind that all the units and buildings mentioned above won’t be available for both sides.
Vehicles
Tanks
Airfield built: Now you can order vehicles and tanks
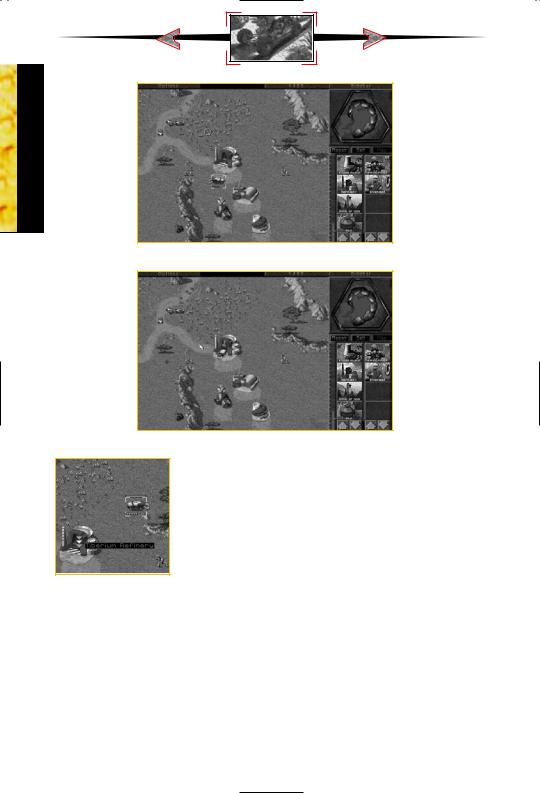
Tiberium and Harvesting
In order to make money, you need to harvest Tiberium. To harvest Tiberium, you need to build a Refinery and a Harvester. Every Refinery that you build comes with a Harvester, and you can build extra ones if you want to collect Tiberium faster. Once construction of the Refinery is complete, place it in a clearing. The closer the Refinery is to Tiberium, the faster you will make additional credits.
14
PLAYING
Building a refinery
When the Refinery is built, a Harvester will appear with it. The Harvester will move to the nearest patch of Tiberium visible on your map, and proceed to harvest it. The Harvester will try to remember where it was collecting from, and after dumping all of the collected Tiberium into the Refinery, it will attempt to return to the Tiberium patch and continue harvesting from it. This process is automatic, but can be interrupted by you at any time by redirecting the Harvester to another location or by any obstacles which get in the way.
Getting your harvester
If there is no visible Tiberium around when you place your Refinery, the Harvester will appear, but will not move. Take one of your other units and scout around your base until you find some Tiberium. Once you find some, select the Harvester by left clicking on it, and the move the cursor over the Tiberium. You will see it change to an Attack cursor. Since the Harvester doesn’t have a weapon, this cursor tells it to start harvesting. Left click again, and the Harvester will proceed to the Tiberium and begin to harvest it. The automatic harvesting process will be started.
15
PLAYING
Telling your harvester where to harvest
Automatic harvesting has begun
You can force the Harvester to return to the Refinery early. To do this, left click on the Harvester, move your cursor over the Refinery, and left click on the Refinery when the cursor changes into an Enter cursor. If the Enter cursor does not appear, this means there is a Harvester already on its way back to this particular Refinery. Select another Refinery or wait until the returning Harvester has delivered its load.
NOTE: If you move the Harvester somewhere, and do not tell it Enter cursor to collect Tiberium, it won’t. When it reaches its destination, it will stop there until you order it to move again. The automatic collection only happens when you
have a Refinery, a Harvester and Tiberium in sight.
KEEP AN EYE ON YOUR HARVESTER! There is nothing worse than not watching your Harvester, only to have it wander into enemy territory in order to collect Tiberium. It is the weakest link in your financial operations—remember to protect it with additional units to keep it safe!
Managing Your Money
Always be sure your base has enough storage space for excess Tiberium. Your Refinery can only hold 1000 credits worth of Tiberium, but a Silo can hold up to 1500 credits worth. If you don’t have enough storage space, any new credits brought in by your Harvester will be lost!
16
Loading Units Into Transports
Some units are capable of carrying infantry. These are the APC and the Chinook, each of which can carry five infantry. To load infantry into these units, select a group (or individual), and then move the cursor over the APC or Chinook. This should give you the Enter cursor. Click on the APC or Chinook, and the troops will move to, then enter the unit. You can then click on the APC or Chinook and move them to any area you wish. To deploy these troops, move the cursor over the unit. (This should give you a Deploy cursor.) Double click on the unit and your troops will leave the unit, ready for fighting.
Capturing Enemy Buildings
As the game advances, a special infantry unit, the Engineer, will become available. Engineers are unarmed, but they allow you to capture enemy buildings. To do this, left click on the Engineer and place the cursor over an enemy building. Some buildings cannot be captured. If it is one you can take, you will see an Enter
cursor. Left click if you want the engineer to try and capture the building. If you are successful, the color of the building you targeted will change to the color of your side.
This building is now part of your base. You can build base structures around it, or sell it, or just leave it there, denying your enemy of its use. Depending on the structure you captured, you may be able to build some units or structures that are normally unavailable to you! Your enemy may attempt to re-take the building, so if you don’t plan on attacking from within, sell it or be prepared to defend it!
Repairing Structures
To repair a damaged building and keep it operating at full efficiency, left click on the REPAIR button in the Sidebar. The mouse cursor will turn into a Wrench. Left click the Wrench on the building you want repaired. Repair will begin immediately, indicated by a large, blinking wrench. The cost of repair will be
deducted from your account automatically. Several buildings can be repaired simultaneously by left clicking the spinning wrench on them.
If you wish to stop the repair process on a structure, left click the Wrench icon on the building under repair. If you run out of credits while repairing, the repair process will cease. The repair process will not start up again if you get more credits—you must start the process again. Right click when you want to cancel out of Repair mode.
Selling Structures
To sell a building, left click on the SELL button in the Sidebar. The mouse cursor will turn into a $ sign. Left click on the building you want to sell. It will deconstruct, and you’ll be credited half of the structure’s original cost.
BE CAREFUL! As long as the cursor is in $ mode, any building you left click on will be deconstructed and sold! To cancel out of $ mode, right click.
PLAYING
17
 PLAYING
Check-Up
To check the health status of a unit or structure, select it by left clicking on it when the cursor is in Select mode (deselect with a right click). As long as the bar is green, it’s healthy. As the bar shrinks and turns red, it’s closer to being destroyed. This will affect the speed of the unit. In later missions, vehicles can
be repaired if you build a repair facility and send them to it.
Some units (APCs, Harvesters, Orcas, Apaches) and some structures (Refineries, Silos) have a carrying capacity or a limited ammo supply, indicated by a series of tiny boxes in the lower left corner of the unit (when selected). This will tell you at a glance how much your unit is carrying. When all the boxes are full, so is the unit.
Options
Choosing the Options mode will stop all the action on the field while you adjust your visual, audio, and game controls. To access the Options Menu, left click on the OPTIONS tab in the upper left-hand corner of the screen. You can also hit the ESC key or Spacebar.
LOAD MISSION
Select LOAD MISSION from the Options menu if you want to play a previously saved mission. The mission you are currently playing will be lost unless you save it first.
Choose Load Mission from the Options menu
Load Mission menu
18
Left click on the up or down arrow to scroll through your saved games. Then left click on LOAD to load the selected game. If you wish to leave this screen without loading a game, left click on CANCEL.
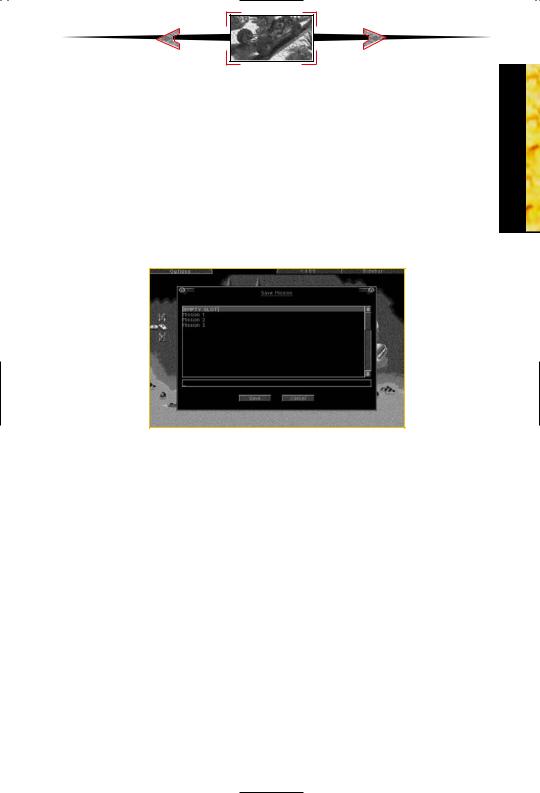
SAVE MISSION
Select SAVE MISSION from the Options menu when you want to save the mission you’re currently playing.
In the Save Mission menu, choose the saved mission slot you wish to use. If you save a game over a slot already used, you’ll overwrite the selected game. If you want to save into a new slot, choose [Empty Slot] and name your mission. The number of saved games available depends on your hard drive space. If you’re out of room, [Empty Slot] won’t appear: You’ll have to save over a previously saved game or delete some games.
Save Mission menu
Left click on the up or down arrow to scroll through your saved games. Then left click on SAVE to save the selected game.
If you wish to leave this screen without saving a game, left click on CANCEL.
DELETE MISSION
Select DELETE MISSION from the Options menu when you want to get rid of some saved games. This is especially useful if you need to free up space on your hard drive.
In the Delete Mission menu, choose the mission you want to get rid of by left clicking on it. Then left click on DELETE to get rid of that mission.
A confirmation window will pop up just to make sure this is what you want. If you’re intent on ridding yourself of that mission, left click on OK. If not, left click on CANCEL.
ABORT MISSION
Select ABORT MISSION if you decide you don’t like how things are going and want to escape to the Title Screen. A confirmation window will come up, just to make sure.
PLAYING
19
GAME CONTROLS
PLAYING
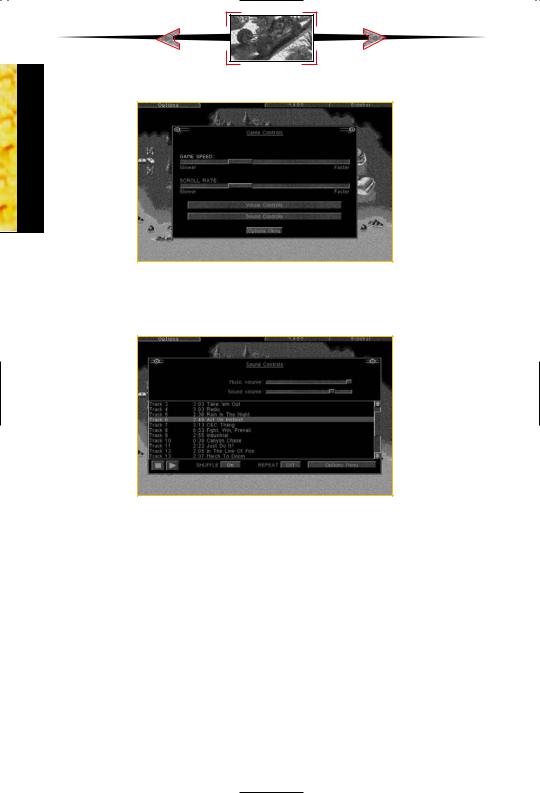
Game Controls
Sound Controls
Select GAME CONTROLS, then SOUND CONTROLS, to adjust the volume of the music or sound effects, or to change the song currently playing.
Sound Controls
To control the volume of music or sound effects, drag the knob left or right. Going right will make that audio track louder. Going left will make it softer. If you want to shut off music or sounds, drag the control knob all the way to the left.
Music
To hear a new song, left click on any track (as shown above) and then left click on the PLAY button. To stop a song from playing, left click on the STOP button.
Clicking the OPTIONS MENU button at the bottom of the menu will return you to the Options Menu, saving any changes you have made in the Sound Controls panel.
20
Visual Controls
PLAYING
Visual Controls gives you display options. To adjust any of the controls, drag the control knob left or right. Going right increases a setting. Going left decreases a setting.
You can reset the Visual Controls to their default normal settings by clicking the RESET VALUES button.
Click on the OPTIONS MENU button to return to the Options Menu. The changes made in the Visual Controls take immediate effect.
RESUME
left click on RESUME to get back to the main game.
RESTATE
left click on RESTATE if you forget what your mission objective is. This will display a text version of the mission’s objectives. If you want to see the video of the briefing again, left click on the VIDEO button. When you are ready to go back to the Options Menu, left click on the OPTIONS button.
21

 MULTIPLAYER
Multiplayer Game
C&C95 supports several different types of multiplayer support, each of which is described in this section.
MULTIPLAYER GAME OPTIONS
When playing a multiplayer game, the game host (the player who starts the game session) can choose several game settings:
Credits ■ Credits each player begins with.
Bases ■ Enables/disables production and building bases. Crates ■ Enables/disables weapon pick-ups and bonuses.
Tiberium ■ Enables/disables Tiberium growth.
AI Players ■ This activates the non-human players and lets the computer play any extra side for a total of 4 players.
INTERNET GAME
C&C95 supports Head-to-Head play over the Internet right out of the box.
In order to play in Internet Head-to-Head mode, make sure you have the following:
1.28.8 (minimum) modem, ISDN or direct connection to the Internet.
2.Winsock 1.1 compliant TCP/IP stack (included in Windows 95).
3.A valid account with an Internet service provider (ISP) and a valid Internet e-mail address
4.16 MB of RAM strongly recommended.
C&C95 will attempt to connect to your Internet provider if your system is configured correctly. If you are in any doubt, you can initiate your Internet connection prior to loading C&C95.
WESTWOOD ONLINE
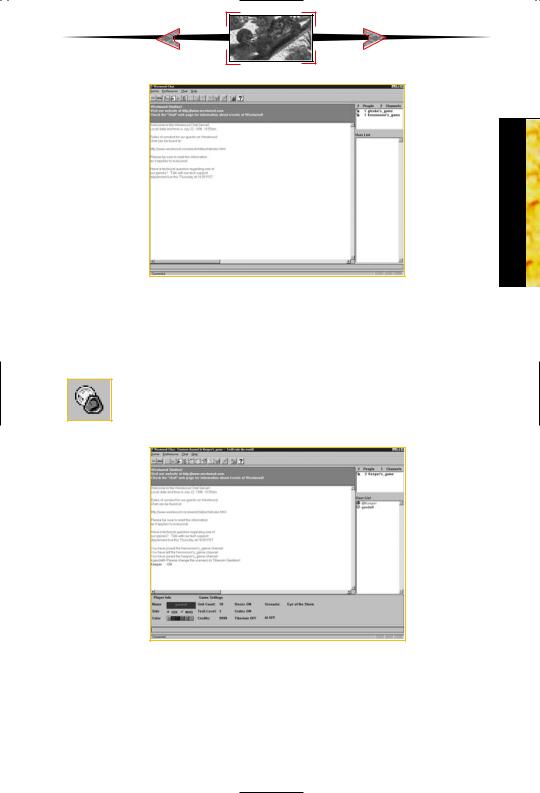
From the Title menu, select Internet. If you have previously registered your copy of C&C95 with Westwood Studios and signed up for an account, the Westwood Online window will open and you’ll be prompted for your user name and password. If you haven’t already registered, you’ll be taken step by step through the registration process. Once you’ve registered and chosen your user name you’ll receive your Westwood Online password via e-mail within a few minutes.
Once at the Westwood Online window you can join various chat “channels” or “rooms” to talk about C&C95 and other topics with other people around the world. You can also host or join a game of C&C95 in Head-to-Head mode over the Internet.
22
MULTIPLAYER
Main Chat window
The main chat window has a scrolling message area (your outgoing messages and incoming messages from other people appear here), a channel (or “room”) list, a user list and a typing area. Once you’ve joined a channel (by double clicking on its name in the channel list) the user list changes to show the user names of other users in that channel.
Joining Internet Head-to-Head Game
Open games are denoted by a C&C icon in the channel list window. Other channels may be chat channels or other types of games. To join an open C&C95 game, simply double click on its name in the window.
Join Internet Head-to-Head Game window
Once you have joined an open game you’ll see the familiar channels list, message area, typing area and user list, along with a game options area. As a joiner you can only select the side you want to play and color; instead you can type messages to the host requesting that other options be changed. If at any time you are not happy with the options you can simply leave the channel. Once you are happy with the game options, indicate this to the host and he can then go ahead and start the game. Once the host clicks on the START THE GAME! button, C&C95 will automatically start.
23
MULTIPLAYER
Host Internet Head-to-Head Game window
If you’d prefer to be in the driver’s seat, you can choose to host a C&C95 game. To do this, click on the C&C95 icon in the tool bar. This will bring up a dialog where you can specify a description for your game. Clicking OK in this dialog will create a new game for others to join. As the host, it is up to you to select the game options (scenario, credits, tech-level, etc). Your opponent may send you messages requesting various options are changed. You should change the appropriate settings if you agree—otherwise you’ll have to debate the options! Once you have both agreed on the game settings, as host, you can start the game by clicking on the “Start the Game!” button. C&C95 will automatically start.
Once the game is under way you can send messages to your opponent by hitting the F1 key.
When the game is over, both you and your opponent will be returned to the Westwood Online window for post-battle debate.
Local Area Network Game (IPX)
C&C95 supports up to four players per game on a local area network (LAN) using the IPX protocol. You must have an IPX compatible network protocol bound to your network adapter card. This setting can be found in the Windows 95 “Network” control panel. If you are in any doubt ask your network administrator to install the correct drivers on your workstation.
C&C95 works better if all multiplayer game participants are connected on the same local network without routers and bridges so that IPX packets have a direct path between systems. This will also ensure minimal load on other network components (such as servers and routers) when a multiplayer game is in progress.
LAN GAME PRELIMINARIES
C&C95 supports an unlimited number of games over one network socket. Westwood Studios uses a registered socket that other software cannot officially use and under normal circumstances you should never need to change this; however if you are experiencing difficulty playing C&C95 over a local network it may be because other software is using our socket.
To resolve this, you can change the socket that C&C95 will use to connect by running the “Command & Conquer Windows 95 Edition Setup” program which can be found under the “Command
24
& Conquer Windows 95” entry in the Windows “Start” menu. Enter a number from 0 to 16383 in the box labeled “Socket Number”. This number represents a socket in the public socket area which any software application may use. You must use the same socket number on all the machines you will be trying to connect with. To return to using the Westwood Studios default socket, delete the number in the “Socket Number” box.
MULTIPLAYER
Choose Multiplayer Game from the Title menu
To begin a multiplayer LAN game select MULTIPLAYER GAME from the Title menu. You should see the Select Multiplayer Game dialog with Modem/Serial and Network options. If you see the Select Serial Game dialog, it means that C&C95 has not detected the presence of IPX drivers and you should verify that these have been installed and configured correctly for your system.
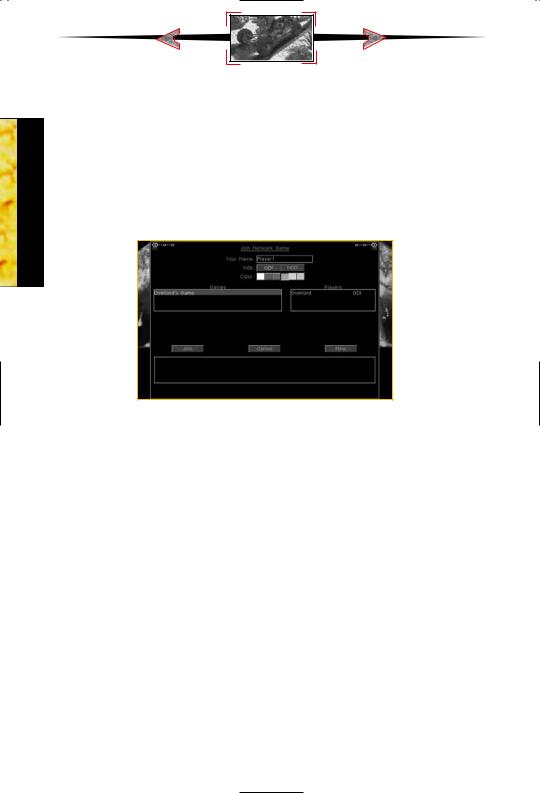
If all is well, select NETWORK. This takes you to the Join Network Game dialog. Here you can enter your name, choose your side (GDI or Nod) and select a color for your units and buildings. There are two windows in the dialog, the Games window and the Players window. The Games window shows all active game sessions on the current socket. Games which are closed (in progress) are in brackets, like this: [Player’s Game].
You have two options from this point: you can choose to Join a game or to host a New game for others to join. You cannot join a closed game.
START NEW NETWORK GAME
New Network Game dialog
Before clicking on NEW game you must enter your name and choose a side and color.
25
 MULTIPLAYER
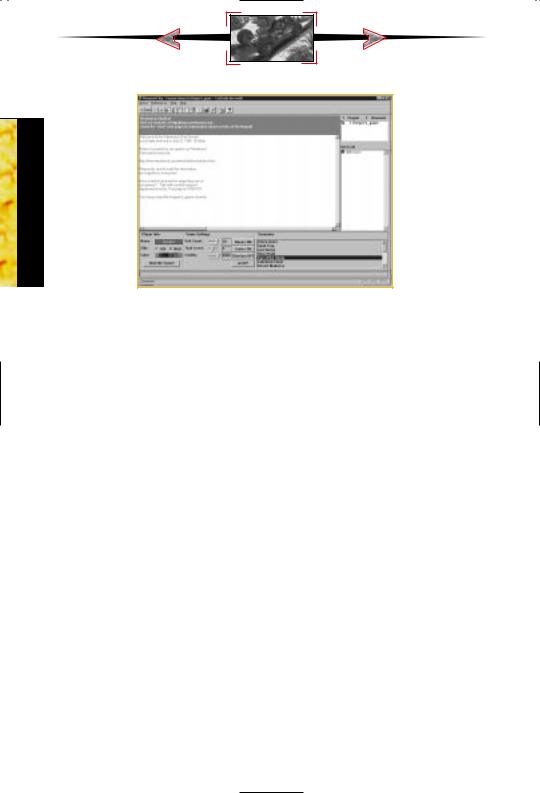
Clicking on NEW makes you the host of the new game and takes you to the Network Game Setup dialog. This dialog has a Players window and a Scenarios window. The Players window shows you which other players are joined to your new game. As the host of the new game you alone have the option to reject other players who might try to join the game.
The Scenarios window shows the available scenarios. As the game host, this is up to you to select, as are the Credits, Bases, Crates, Tiberium and AI Players options.
Once you have 2 or more players, you are able to click OK. As the host, you get to decide when to commence play, you should do this only when all game participants have joined.
JOIN NETWORK GAME
Join Game dialog
Before clicking on JOIN (to join a game), you must enter your name and choose a side and color. Once you have done this, you can select an open game and then click on JOIN. If your name is the same as an existing player you must enter a different name. If your color is the same as an existing player the computer picks an available color for you.
The Join Game dialog has a message window. Messages from the other players in your game appear here, just as your messages appear in the message windows of all the other players.
Once you have clicked JOIN, the dialog changes so that the NEW and JOIN buttons disappear. You are then in a wait state until the host of the game chooses to start the game. In this mode you cannot change your name, side or color. You will be able to see the game options that the host selects.
Sending Messages
From the Join Network Game or Network Game Setup dialog, the SEND MESSAGE button lets you send a message to other players. Press ESC to cancel.
Within the game, keys F1-F3 send a message to one of the other players. Hit one of the “F” keys to find out who that key is assigned to. You will see a message “To Player [Side]:” at the top left side of the screen.
The F4 key sends a message to all other players.
Serial Game
C&C95 is designed to be played as a Head-to-Head game either by modem or null modem link. A null modem link is a special cable which you should be able to purchase at
26
your local computer supplier. Such a link allows two computers which are within 30ft of each other to be connected.
SERIAL GAME PRELIMINARIES
MULTIPLAYER
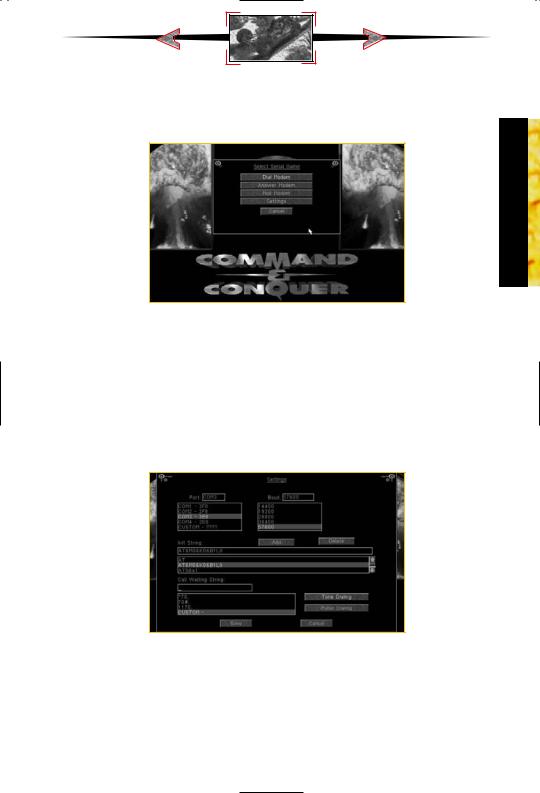
Select Serial Game dialog
Before you can play a serial game you will need to configure C&C95 with the appropriate settings. To do this, select MULTIPLAYER GAME from the Title menu. This will take you to one of two dialogs:
1)Select Multiplayer Game. This dialog comes up if C&C95 detected an IPX network. Select MODEM/SERIAL, then from the Select Serial Game dialog choose SETTINGS.
2)Select Serial Game. This dialog comes up if C&C95 did not detect an IPX network. Select SETTINGS from the Select Serial Game dialog.
SERIAL GAME SETTINGS
Settings dialog
This takes you to the Settings dialog where you can set up your default serial communications settings. Select the COM/PORT which corresponds to your modem or serial port along with the baud rate that you intend to use. It is important that the selected baud rate is at least the speed of your modem. Once you are happy with the settings, click on SAVE and you will be taken back to the Select Serial Game dialog.
Also in this dialog, you can enter a custom Modem Initialization string (separate multiple lines with a “|” [vertical bar or “pipe” character]) as well as a Disable Call Waiting string.
27
Loading...