


A Bridge Too Far

Information in this document is subject to change without notice. Companies, names, and data used in examples herein are fictitious unless otherwise noted. No part of this document may be reproduced or transmitted in any form or by any means, electronic or mechanical, for any purpose, without the express written permission of Microsoft Corporation.
© & 1997 Microsoft Corporation. All rights reserved.
Microsoft, MS, Windows, and the Windows logo are registered trademarks and MSN and Windows NT are trademarks of Microsoft Corporation in the United States and/or other countries.
Macintosh is a registered trademark of Apple Computer, Inc.
Pentium is a registered trademark of Intel Corporation.
IBM is a registered trademark of International Business Machines Corporation.
Your Guide to Microsoft Technical Support
If you have a technical question about Microsoft A Bridge Too Far, see the following brief descriptions of the support options available from Microsoft Technical Support. For more information, please visit Microsoft Technical Support Online at http:// www.microsoft.com/support.
Self-Help Tools to Find Answers Yourself
http://www.microsoft.com/support/
Microsoft Technical Support Online uses innovative features such as Troubleshooting Wizards and a technical Knowledge Base to help you access the most relevant technical information and resources to answer your support questions.
Direct Assistance with a Microsoft Technical Engineer
Standard No-Charge Support
If you still need answers to your technical questions, Microsoft offers unlimited nocharge support for retail versions of this product.
To receive your Standard No-Charge Support, in the U.S., please call (425) 635-7008, 6:00 A.M. to 6:00 P.M. Pacific time, Monday through Friday, excluding holidays. In Canada, please call (905) 568-3503, 5:00 A.M. to 5:00 P.M. Pacific time, Monday through Friday, excluding holidays. In the U.S. and Canada, you can also submit your support question via the Internet with Web Response. For more details, go to Microsoft Technical Support Online at http://www.microsoft.com/support.
After-Hours Support
If you require support after normal business hours, you can purchase Pay-Per-Incident Support as follows:
In the United States, for a fee of $15US per incident, please call (800) 936-5600 or (900) 555-2400, 24 hours a day, 7 days a week, including holidays. In Canada, for a fee of $45CDN plus tax per incident, please call (800) 668-7975, 5:00 A.M. to 9:00 P.M. Pacific time, 7 days a week, excluding holidays.
Note Support fees for the 800# calls will be billed to your VISA, MasterCard, or American Express credit card. Support fees for the 900# calls will appear on your telephone bill.
Note The services and prices listed here are available in the United States and Canada only. Services and prices outside these countries may vary. Microsoft Technical Support is subject to Microsoft’s then-current prices, terms, and conditions, which are subject to change without notice.
Document No. X03-17108 0897

Contents
A Bridge Too Far i
iv Quick Start: Roadmap to Glory vi Your Theater of War
Chapter 1: Introduction |
1 |
|
1 |
The Game |
|
2 |
Gearing Up for Gameplay |
|
Chapter 2: Preparing for Battle 3
3 System Requirements
3Installing A Bridge Too Far
4Setting Options
4Starting A Bridge Too Far
5Choosing the Type of Action
6Choosing Sides
6 Choosing Level of Difficulty
6Customizing Level of Difficulty
7Choosing a One-Player or Two-Player Game
7 Starting the Battle
Chapter 3: On the Battlefield 8
8Reviewing Your Objective
8Surveying the Battlefield
9Deploying Units
10Starting the Battle
10Issuing Orders
11Interpreting Order Dots
13 Using Your Weapons Effectively
15 Taking Prisoners and Rallying Separated Soldiers
15 Using Bridges
17 Ending a Battle
Chapter 4: Using the Toolbar and
Monitors 18
18The Toolbar
19Battle Monitors
20Soldier Monitor: Details
24 Identifying Battlefield Elements
Chapter 5: Fighting Operations and
Campaigns 26
26 Reviewing Your Objectives: Operations
26 Reviewing Your Objectives: Campaigns
27Managing Resources
28Operation Screens
28Campaign Screens
28Starting an Operation or Campaign
29Checking Your Pre-Combat Status
30Choosing Resources
32Fighting the Battles
32Debriefing Screen
33Choosing a Cease-Fire Period
34Allocating Supplies for Sectors (Campaigns Only)
36 Viewing Details of Soldier Status
Chapter 6: Designing Your Own
Scenarios 39
39Starting Battlemaker
40Choosing a Map
41Editing Victory Locations
42Setting Requisition Points
43Setting Resources
44Saving Your Custom Scenario
44Playing Your Custom Scenario
44Giving the Battle to Another Player
Chapter 7: Tactics and Strategy |
45 |
45 Using Units Effectively
50 Battlefield Tactics
53 Campaign Strategy
Chapter 8: Playing Two-Player
Games 57
57Types of Connections
58Starting a Two-Player Game
59Using the Net Status Bar
59 Communicating with Your Opponent
Chapter 9: History 60
60 Situation Report
60 Plans, Politics, and Logistics
65 Operation Market-Garden
Index 82

iv
Quick Start: Roadmap to Glory
This manual, Boot Camp, and Help provide information on how to best lead your troops when playing A Bridge Too Far. But if you just want to jump in and start fighting, here’s how.
Double-click the icon to launch the game.
Choose a battle by clicking the Battles tab. In the list of battles that appears, click the one you want to play.
Click Begin to go to the combat screen.
Deploy your troops by clicking a unit
and dragging it to a new location in your deployment zone—the unshaded portion of the map. Repeat for the rest of your units. (Note: You move entire units, not individual soldiers.)

Start the battle by clicking
Begin!
v
Issue orders to a unit by rightclicking any soldier in the unit and clicking a command on the drop-down menu. (Note: You issue orders only to entire units, not to individual soldiers.)
If the order requires that you designate a position or target, drag the line to this location.
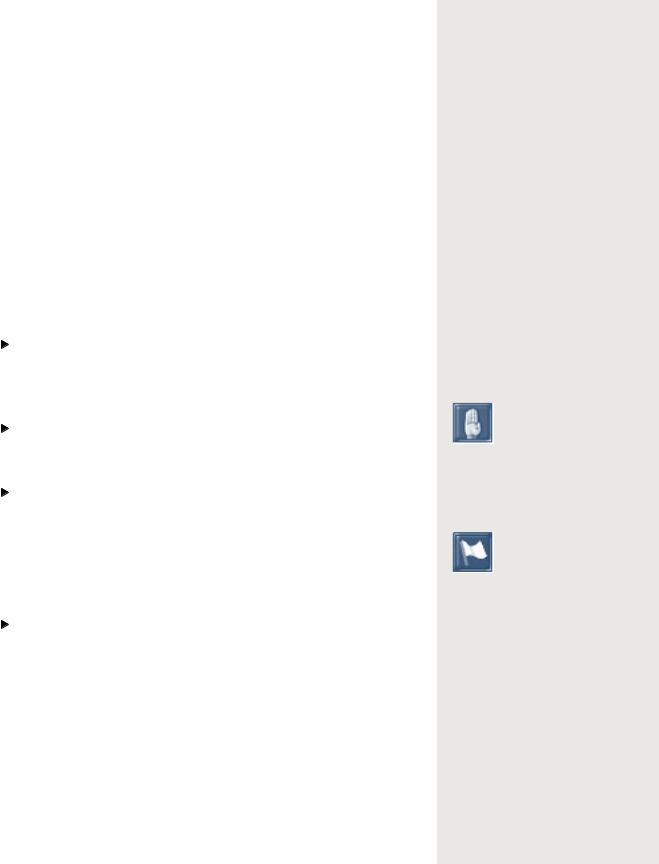
To initiate a cease-fire, click the button showing a hand raised in a “halt” position. The battle ends when your opponent agrees to the ceasefire. If your opponent does not agree, you still want to stop fighting, and you are willing to concede the map, click the button showing a white flag.
vi
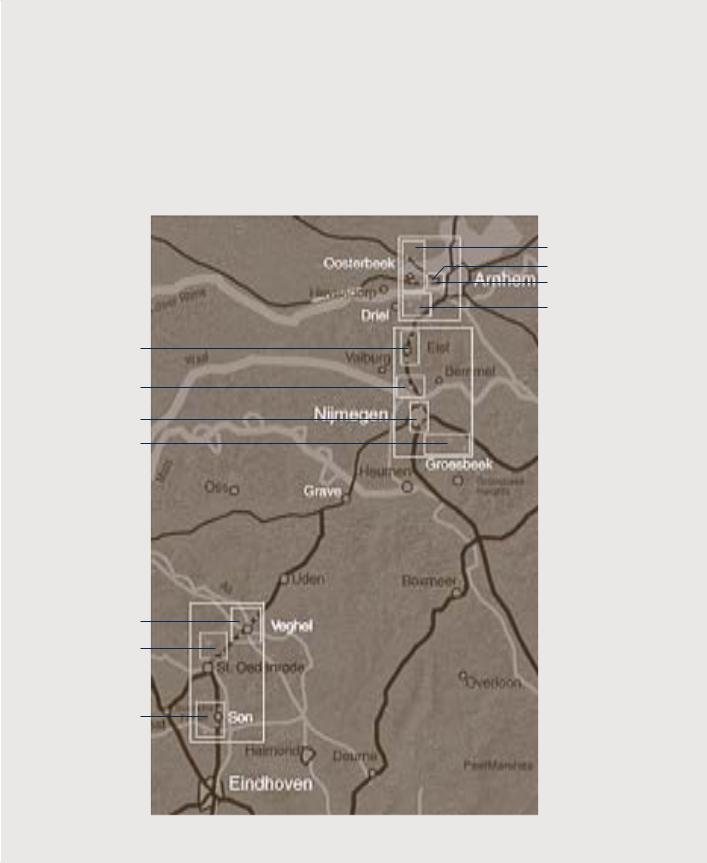
Your Theater of War
The following map of Holland shows the major components of Operation Market-Garden. The operation spans three sectors, which appear on the map as large squares. The Allied paratroopers initially drop in the Eindhoven sector. The operation proceeds northward through the Nijmegen sector, followed by the Arnhem sector.
The smaller squares on the map show the operations within each sector, and the dots within the smaller squares represent the individual maps—battles—within an operation.
Arnhem Sector
Oosterbeek
Arnhem Relief Effort
Arnhem Bridge
Polish Drop
Nijmegen Sector
The Island
Nijmegen Crossing
Nijmegen Bridge
Groesbeek
Heights
Eindhoven
Sector
Veghel
Schijndel
Son

Chapter 1: Introduction |
1 |
||
Chapter 1 |
|
|
|
Introduction |
|
|
|
September 17, 1944 |
|
|
|
The skies of Holland fill with parachutes, and three divisions of Allied |
“Where is the Prince who |
|
|
paratroopers begin landing on Dutch soil. Their objective: seize and hold |
can afford so to cover his |
||
major bridges along a 60-mile corridor stretching from Eindhoven to |
country with troops for |
|
|
Arnhem. Meanwhile, British armored units attack north toward |
its defense, as that |
|
|
10,000 men descending from |
|||
Eindhoven. Their objective: cross the captured bridges, flank the German |
|||
the clouds, might not, in |
|
||
defenses, and take the first stride in a race across the North German Plain |
|
||
many places, do an infi- |
|
||
to Berlin—and the end of World War II in Europe. Operation Market- |
|
||
nite deal of mischief |
|
||
Garden has begun. |
|
||
before a force could be |
|
||
The Germans are taken by surprise but quickly rally. Aided by several |
brought together to repel |
|
|
them?”—Benjamin Franklin, |
|
||
strokes of luck, including capturing a copy of the Allied battle plan, the |
|
||
American statesman, |
|
||
Germans derail the operation’s timetable. These delays place the para- |
|
||
publisher, and inventor, |
|
||
troopers in jeopardy, especially those dropped around Arnhem. If the |
|
||
1784 |
|
||
armored units don’t reach them soon enough, these paratroopers will have |
|
|
|
gone “a bridge too far.” |
|
|
|
The Game |
|
|
|
A Bridge Too Far offers real-time action that makes the battlefield come alive with the sights and sounds of war. Your men in the trenches behave like real soldiers—they react realistically to the stress of combat and are affected by their fatigue level, ability, physical and mental
condition, and other factors. Depending on these factors, your men may respond immediately to your orders, take time to respond, or not respond at all. However, your soldiers’ reactions are not out of your hands. Your ability to take control and make timely decisions determines whether, and how quickly, your men respond to orders.
In addition to battlefield tactics, A Bridge Too Far adds a strategic layer. You are faced with the challenge of managing a limited set of resources, particularly if you are playing the Allied side. In the actual Operation MarketGarden, the Allies outdistanced their supply lines, while the Germans retreated into theirs. Regardless of which side you play, you need to plan an overall strategy, evaluate your status throughout the game, and decide how to best allocate your resources.
When you play the game, your short-term decisions affect your long-term success. Information about supplies, troop morale, health, equipment, and which maps you control is
2A Bridge Too Far
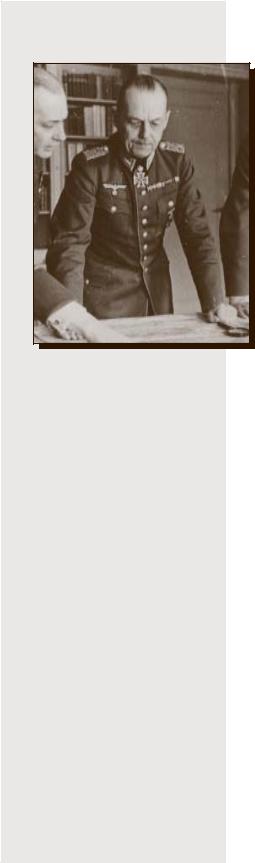
Field Marshal Gerd von Rundstedt (center) is reinstated as Commander in Chief West (Oberbefehlshaber West) just two weeks before Operation Market-Garden begins.
“That 2 Battalion [1st Parachute Brigade, British 1st Airborne] held on for as long as it did is one of the epic tales of the Second World War. That it was required to do so is one of its sorriest blunders.”—John Ellis, author of Brute Force
carried over to the next battle. And any map you win doesn’t remain under your control indefinitely; your opponent can launch a counterattack and take it back from you. You may be forced to retreat and fight for it again.
You are in control of the scope and complexity of your game. You can start simple—with individual battles—and then progress to opera-
tions, campaigns, and finally, the game’s Grand Campaign. You can also design custom scenarios for battles. For example, you can set up a battle in which you are surrounded and outnumbered but have a greater amount of firepower and more-experienced infantry units than your opponent.
Gearing Up for Gameplay
A Bridge Too Far is a complex game with many features you may want to learn about. Chapter 2, “Preparing for Battle,” explains installation procedures and options you can choose prior to actually playing the game. Chapter 3, “On the Battlefield,” explains the
mechanics of the game from the standpoint of a single battle, while Chapter 4, “Using the Toolbar and Monitors,” describes the information you need to successfully monitor and command your forces.
When you have gained enough experience to take on new challenges, move on to Chapter 5, “Fighting Operations and Campaigns.” Chapter 6, “Designing Your Own Scenarios,” tells you how to create custom scenarios, while Chapter 7, “Tactics and Strategy,” helps you win battles as well as operations and campaigns. Chapter 8, “Playing Two-Player Games,” explains how to set up a game against an opponent over a modem, local area network (LAN), or the Internet.
Online Help
Online Help is not just this manual in electronic form. It provides additional reference material, historical information, and tips you can use to best plan your winning strategy.
Boot Camp
To get you started with commanding troops, A Bridge Too Far provides Boot Camp, an online tutorial for learning basic battlefield skills. These topics provide an excellent way to become familiar with the game before risking your men in battle.
Chapter 2: Preparing for Battle |
3 |
Chapter 2
Preparing for Battle
Before you move onto the battlefield, you need to install the game and get it running. You can also set options to determine the game’s look and feel as well as what type of game you want to play.
System Requirements
To run A Bridge Too Far on an IBM®-compatible computer, you need:
•Personal computer with a Pentium® 90 or higher processor
(Pentium 133 recommended), 16 megabytes (MB) of RAM, at least 45 MB of available hard disk space, a 4×-speed CD-ROM drive, and a video card that supports 800 × 600 resolution or higher and 16-bit color.
•Microsoft® Windows® 95 operating system version 4.0 or later, or Windows NTTM version 4.0 or later.
•Microsoft Mouse or compatible pointing device.
•Headphones or speakers.
•28.8 modem for head-to-head play.
To run A Bridge Too Far on a Macintosh® computer, you need:
•Power Macintosh personal computer, 16 megabytes (MB) of RAM, at least 40 MB of available hard disk space, a 4×-speed CDROM drive, and a video card that supports 800 × 600 resolution or higher at “Thousands of colors.”
•System 7.5 operating system or later.
•Apple Mouse or compatible pointing device.
•Headphones or speakers.
•28.8 modem for head-to-head play.
Installing A Bridge Too Far
To install A Bridge Too Far on an IBM-compatible computer
1Insert the game CD into the CD-ROM drive. Setup will run automatically.
Note If Setup does not start, run Setup.exe from the Windows directory on the CD.
2From the screen that appears, click Install.
When Setup is complete, the Play button becomes available.
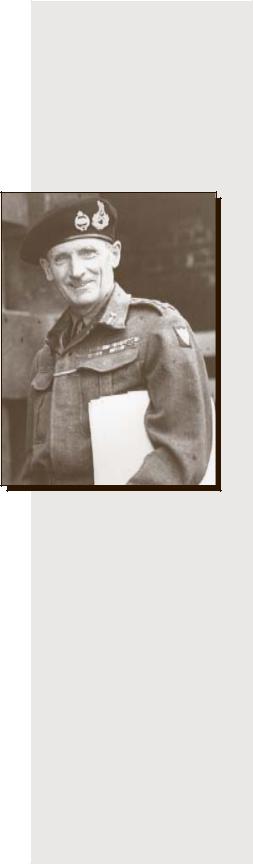
Field Marshal Bernard
Montgomery is the author
of the Operation Market-
Garden plan.

4A Bridge Too Far
“This is a tale you will tell your grandchildren, and mightily bored they’ll be.”—Lieutenant General Brian Horrocks, Commander, British XXX Corps, summarizing Operation Garden to a delighted audience of subordinates on September 16, 1944
“To have the United States at our side was to me the greatest joy. ...
All the rest was merely the proper application of overwhelming force.” —Winston Churchill on the United States entering World War II in December 1941
To install A Bridge Too Far on a Macintosh
1Insert the game CD into the CD-ROM drive.
2Go to the Mac folder and click Install.
Setting Options
You can specify options and preferences to give A Bridge Too Far the look and feel you want.
To begin setting game options
Press F8. Or, on the combat screen’s toolbar, click Options. (For more information on using the combat screen, see Chapter 3, “On the Battlefield.”) The Options dialog box appears.
Use the check boxes in the Options dialog box to adjust the following game options:
•Sounds, such as gunfire and soldiers’ voices.
•Music.
•Game videos.
•Screen resolution. (You can make the combat screen fill your entire screen, hiding all battle monitors.)
Note A game area size of 800 × 600 is recommended. However, if you have more powerful hardware, you can consider a higher setting.
•Whether trees appear on the combat screen. (If you have a slower machine, remove trees for better performance.)
•Whether soldiers killed in action appear on the combat screen. (If you have a slower machine, remove soldiers killed in action for better performance.)
Game Speed
Game speed affects how quickly the game progresses in real time. If you set it to a slower speed, your men will move slower, giving you more time to think about your tactics. If you set it to a faster speed, action on the screen will be faster.
To adjust game speed
In the Options dialog box, in the Game Speed box, select either
Fastest, Fast, Medium, or Slow.
Starting A Bridge Too Far
After you start the game, the Command screen, shown in the following figure, and the Quick Help box appear. Quick Help gives you a brief introduction to the game and your objectives.
Chapter 2: Preparing for Battle |
5 |
“... from the moment the overwhelming industrial capacity of the United States made itself felt in any theater of war, there was no longer any chance of ultimate victory in that theater ...
tactical skill could only postpone the collapse ... .”—Field Marshal Erwin Rommel
after his defeat in North Africa
To start the game |
|
|
|
|
Double-click the A Bridge Too Far icon. |
|
|
|
|
In Windows 95 or Windows NT, you can also click Start, point to |
|
|
||
|
|
|||
Programs, point to Microsoft Games, and then click A |
|
|
|
|
|
|
|
||
Bridge Too Far. |
Norway April 9, 1940 |
|||
Choosing the Type of Action |
||||
In the first airborne operations |
||||
You can play four different types of action in A Bridge Too |
in history, German airborne forces |
|||
land on strategic targets in |
||||
Far. |
||||
Denmark and Norway. In Denmark, |
||||
Boot Camp Interactive examples and explanations of A |
airborne troops quickly secure the |
|||
military airfield near Aalborg. In |
||||
Bridge Too Far. |
||||
Norway, paratroops secure the Oslo |
||||
|
||||
Battles Warfare conducted on individual maps with no |
airport, the military airfield at |
|||
carryover of supplies. You can play any individual map from |
Stavanger, and an important rail- |
|||
road junction near Dombas. |
||||
Operation Market-Garden, or you can create custom battles. |
||||
|
|
|
||
For information on how to customize battles, see Chapter 6, |
By securing the airport and air- |
|||
“Designing Your Own Scenarios.” |
fields, the Germans ensure superi- |
|||
Operations Sets of linked maps from any of the three |
ority in the air, which severely |
|||
hampers Allied efforts. While both |
||||
sectors of battle, each with a specific objective, such as a |
sides score victories on the |
|||
bridge or landing zone. For more information on operations, |
ground, the Allied efforts wane |
|||
see Chapter 5, “Fighting Operations and Campaigns.” |
when the Germans launch their |
|||
Campaigns All operations for any individual sector in the |
attack against France, Belgium, |
|||
and Holland on May 10. By June 10, |
||||
game, or the Grand Campaign, which is fought on all three |
the Allies have evacuated their |
|||
fronts simultaneously. For more information on operations |
forces from Norway. |
|||
and campaigns, see Chapter 5, “Fighting Operations and |
|
|
|
|
Campaigns.” |
|
|
|
|
|
|
|
||
6 A Bridge Too Far
|
|
|
To choose the type of action |
||||
|
“Whether or not America |
On the Command screen, click one of the following tabs: Boot Camp, |
|||||
|
enters the war is a |
Battles, Operations, or Campaigns. |
|||||
|
matter of indifference |
To choose the specific game you want to play |
|||||
|
... .”—Adolf Hitler to |
||||||
|
Benito Mussolini June 21, |
In the game description box beneath the tab, click the Boot Camp |
|||||
1941 |
|||||||
topic, battle, operation, or campaign you want to play. |
|||||||
|
|
|
|||||
|
|
|
–or– |
||||
|
“It is bluff. They can |
In the saved games box in the left-center portion of the screen, click |
|||||
|
make cars and refrigera- |
the saved battle, operation, or campaign you want to play. |
|||||
|
tors, but not aircraft.” |
Choosing Sides |
|||||
|
—Reichsmarshall Hermann |
||||||
|
Göring in regard to |
To choose the side you want to play |
|||||
|
American industrial |
||||||
|
capabilities in 1941 |
To switch between Allies and Germans, click Player Side. |
|||||
|
|
|
|||||
|
|
|
Choosing Level of Difficulty |
||||
|
|
|
You can determine the relative strength of both sides, regardless of |
||||
|
|
|
whether you choose one-player or two-player mode. |
||||
|
|
|
|
|
|
Recruit Your side is given every advantage in |
|
|
|
|
|
|
|
||
|
|
|
|
|
|
strength, morale, and supplies. However, you can |
|
|
|
|
|
|
|
still lose the game if you don’t plan carefully. |
|
|
|
|
|
|
|
Veteran The sides are balanced as they were |
|
|
|
|
|
|
|
historically. |
|
|
|
|
|
|
|
Hero Your side is initially at a disadvantage in |
|
|
|
|
|
|
|
strength and, in campaign mode, has far fewer |
|
|
|
|
|
|
|
resources available. |
|
|
|
|
|
|
|
Custom You define the difficulty level more |
|
|
|
|
|
|
|
specifically, as described in the following section. |
|
|
|
|
|
|
|
To choose the level of difficulty |
|
|
|
|
|
|
|
To cycle through the four levels, click Difficulty. |
|
|
|
|
|
|
|
||
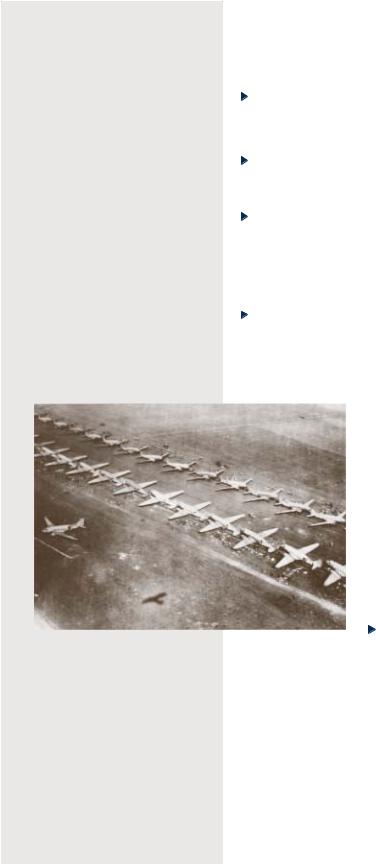
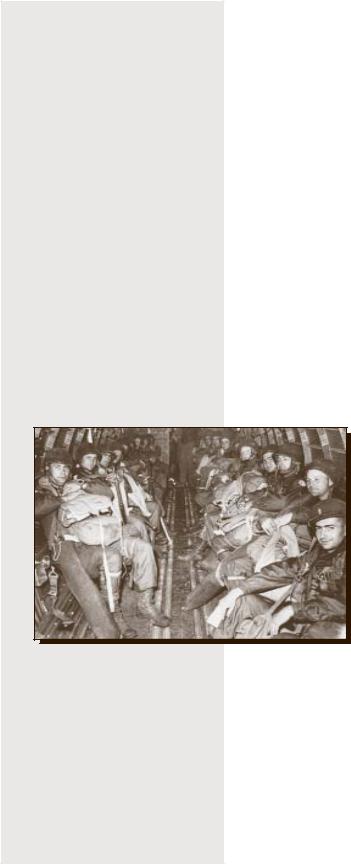
|
Allied paratroopers begin |
Customizing Level of Difficulty |
|||||
|
loading into American |
||||||
|
C-47s. Known as the |
If you choose Custom as your level of difficulty, you can adjust additional |
|||||
|
Skytrain to the Americans |
||||||
|
and the Dakota to the |
options of gameplay. |
|||||
|
British, this plane is |
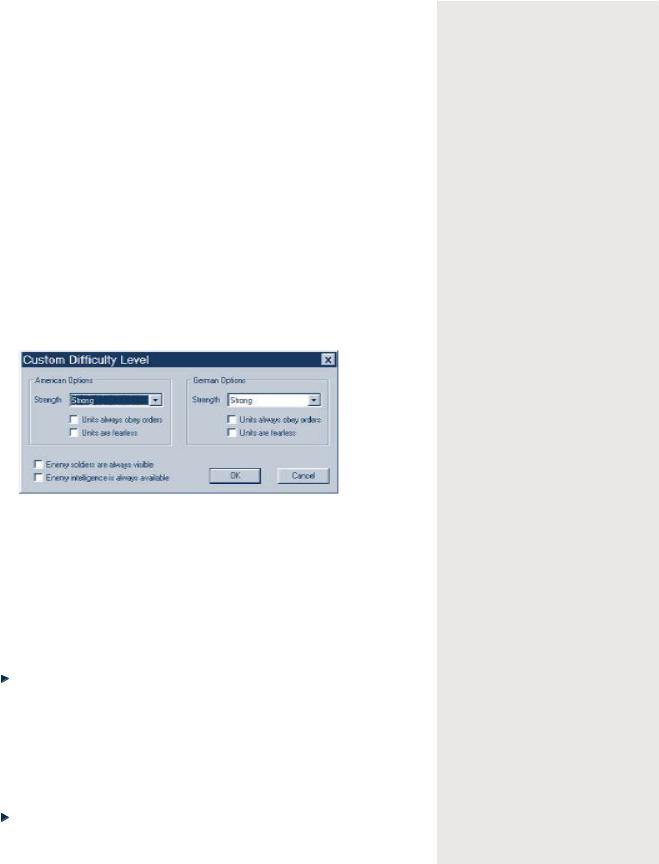
Strength Allied and German strength is not interdependent. You can |
|||||
|
the workhorse of Allied |
||||||
|
adjust each separately. |
||||||
|
transport aircraft. |
||||||
|
|
|
|
|
|||
|
|
|
Units always obey orders Your units will obey whatever you tell them to |
||||
|
|
|
do. |
||||
|
|
|
Units are fearless Your units will not panic regardless of their situation. |
||||
|
|
|
|
|
|
|
|
Chapter 2:
Enemy soldiers are always visible Enemy units will always appear on your screen. Normally, A Bridge Too Far gives you a limited—but realistic—
view of the battlefield. Enemy soldiers that your troops have not noticed will not appear, although you can sometimes spot the smoke of their guns.
Enemy intelligence is always available You will receive all information on the enemy just as you do for your own teams. For more information, see “Gathering Intelligence,” in Chapter 4, “Using the Toolbar and Monitors.”
To customize the level of difficulty
1To cycle to Custom, click Difficulty.
2Click Set Custom.
3In the Custom Difficulty Level dialog box, shown in the following figure, click the check box corresponding to the option or options you want.
Note It is assumed throughout this manual and Help that none of these custom options have been set.
Choosing a One-Player or
Two-Player Game
In a one-player game, the computer is your opponent. In a two-player game, you fight another player over a modem, local area network (LAN), or the Internet. For more information on two-player games, see Chapter 8, “Playing Two-Player Games.”
To choose a one-player or two-player game
To switch between the two options, click Players.
Starting the Battle
Now that you have selected and customized the type of game you want to play, you are ready to march onto the battlefield. For information on how to command your troops, see Chapter 3, “On the Battlefield.”
To start playing the game
Click Begin.
Preparing for Battle |
7 |
“If we do our stuff properly and no mistakes are made, then I believe that Germany will be out of the war this year.” —Field Marshal Bernard Montgomery, Commander, Allied 21st Army Group, two months before Operation Overlord in Normandy
8A Bridge Too Far
“If you see a white plane it’s American, if you see a black plane it’s RAF.
If you see no planes at all it’s the Luftwaffe.” —German soldier on the Western Front, 1944
Chapter 3
On the Battlefield
This chapter provides information on the mechanics of gameplay. It describes how to survey the battlefield, deploy your units and issue orders to them, use your weapons, and destroy bridges.
However, remember that playing A Bridge Too Far involves more than just mechanics. To best use the material in this chapter, study the corresponding sections in Chapter 7, “Tactics and Strategy.” Also, be sure to learn how to use the information coming back from the field, as explained in Chapter 4, “Using the Toolbar and Monitors.”
This chapter does not cover information on playing battles within the context of an operation or campaign. If you are playing either of these larger scales of warfare, see Chapter 5, “Fighting Operations and Campaigns,” after you absorb the material in this basic chapter.
Reviewing Your Objective
Your objective is to control the map. You must capture all of a map’s victory locations and be able to hold them until the enemy offers a cease-fire, flees, or retreats off the map. For more information on victory locations, see “Victory Locations,” later in this chapter.
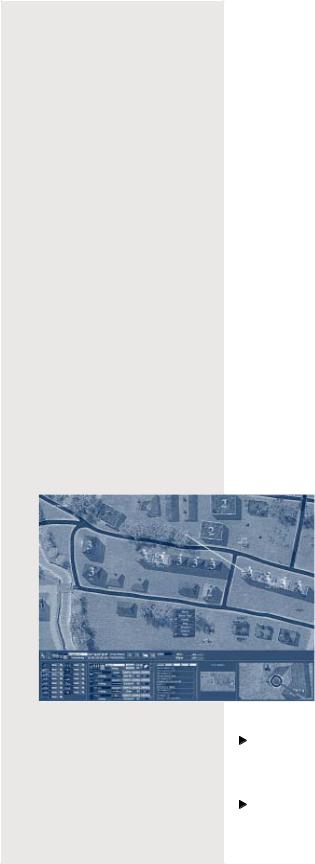
Surveying the Battlefield
When you click Begin! the combat screen appears. The following figure shows an example of one of the combat screens in the game. Some areas of the combat screen appear either dark or light gray. The dark gray areas are enemy-controlled and the light gray areas indicate neutral territory. The unshaded area is the portion of the map that you currently control. After you start the battle, the shading disappears.
You can zoom in or out of the map, as well as scroll to different areas of the map. It is a good idea to zoom out prior to deploying troops to see a complete picture of the map and determine potential areas of strength and weakness.
To zoom in
On the toolbar, click the zoom-in button (magnifying glass with a plus sign).
To zoom out
On the toolbar, click the zoom-out button (magnifying glass with a minus sign).
Chapter 3: On the Battlefield |
9 |
To scroll through the map |
|
|
|
|
|
|
|
||
Move the mouse to the right, left, top, or bottom edge of the screen. |
“There is no longer |
||||||||
You can also use the arrow keys to scroll. |
|
anything we can do. Every |
|||||||
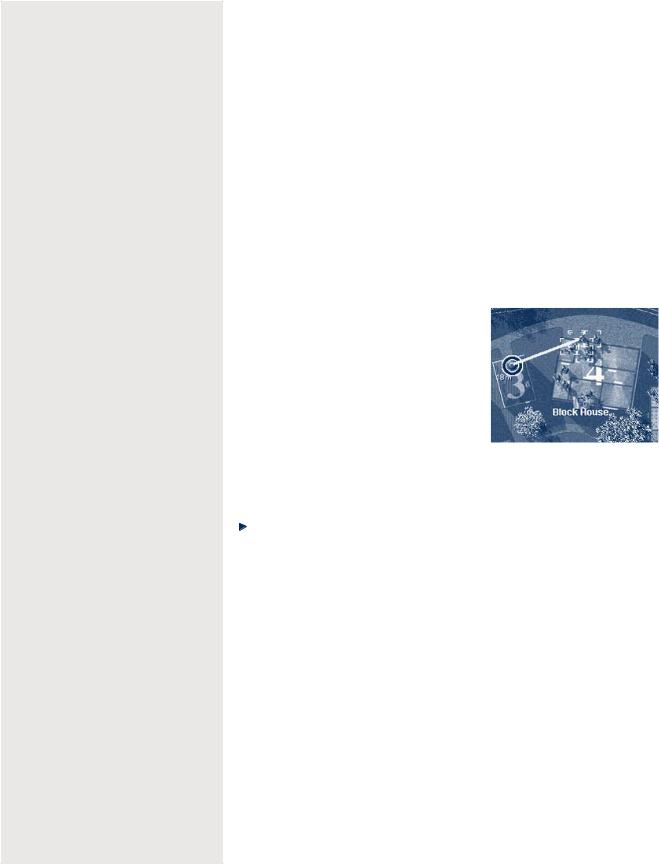
Victory Locations |
|
shot we fire now is |
|||||||
|
harming ourselves, for it |
||||||||
Victory locations are buildings or terrain elements of strategic importance. |
will be returned a hun- |
||||||||
dred-fold.”—Field Marshal |
|||||||||
They are designated by the symbol of the side that controls them—a star |
|||||||||
Erwin Rommel, Commander, |
|||||||||
for Allies and a cross for Germans. If both sides are currently engaged in |
|||||||||
German Army Group B, in |
|||||||||
battle for a particular victory location, half of each flag is shown. You need |
|||||||||
July 1944, on the Allies’ |
|||||||||
to fight for the victory locations belonging to the other side and replace |
massive advantage in men, |
||||||||
their symbol with yours. |
|
machines, and materiél |
|||||||
A victory location has either primary, secondary, or tertiary importance. |
|
|
|
|
|
|
|||
The larger a victory location’s name appears, the more points it is worth |
|
|
|
|
|
|
|||
relative to other victory locations. A primary victory location is worth four |
|
|
|
|
|
|
|||
|
|
|
|
|
|
||||
times more than a tertiary victory location, and a secondary two times |
|
|
|
|
|
|
|||
|
|
|
|
|
|
||||
more than a tertiary. |
|
|
|
|
|
|
|
||
|
|
|
|
|
|
|
|||
Buildings and Terrain |
|
|
|
|
|
|
|
||
|
|
|
|
|
|
|
|||
Most maps include a number of buildings as well as natural terrain |
|
|
|
|
|
|
|
||
|
|
|
|
|
|
|
|||
features such as hills, ditches, and foliage. Multistory buildings are |
|
|
|
|
|
|
|
||
indicated by numerals (2, 3, or 4) that represent the number of floors in |
|
|
|
|
|
|
|||
the building. |
|
|
|
|
|
|
|
||
Use terrain to your best advantage. For example, controlling |
|
|
|
|
|
|
|
||
the high ground and occupying multistory buildings is usually |
|
|
|
|
|
|
|
|
|
a preferable position. It makes scouting easier, offers better |
|
Holland May 10, 1940 |
|||||||
fields of fire, and is more difficult to attack—and easier to |
|
||||||||
|
German airborne troops leap into |
||||||||
defend and keep secure. For more information on using terrain, |
|
||||||||
see “Using Cover,” in Chapter 7, “Tactics and Strategy.” |
|
combat for the second time as |
|||||||
|
part of Operation Sicklestroke— |
||||||||
When your soldiers take a building, they control all floors of |
|
||||||||
|
the German attack on France, |
||||||||
the building. They have the advantages of the highest floor |
|
Belgium, and Holland. As in |
|||||||
while guarding the ground floor against attacks. |
|
Norway, relatively small forces |
|||||||
Deploying Units |
|
achieve success by subduing |
|||||||
|
strategic targets. A gliderborne |
||||||||
|
force lands on the Belgian |
||||||||
|
|
||||||||
The computer initially deploys your troops for you. Although |
|
fortress at Eben Emael, blasts |
|||||||
the default deployment may be satisfactory, you may want to |
|
its way through the roof, and |
|||||||
|
forces the garrison to surren- |
||||||||
change it to fit your own battle plan. |
|
||||||||
|
der. The capture of this fort |
||||||||
|
|
||||||||
To move your units to a starting position |
|
crumples the Belgian line. |
|||||||
Drag your units to the location you want. |
|
As a result of the German’s |
|||||||
You can position your troops only on the unshaded areas of |
|
airborne successes, British |
|||||||
|
Prime Minister Winston Churchill |
||||||||
the map. If you attempt to drop units on a shaded portion, |
|
orders the creation of a para- |
|||||||
they snap back to their original position. |
|
chute unit “on a scale equal to |
|||||||
You usually issue orders after the battle starts, but you can |
|
five thousand.” |
|||||||
|
|
|
|
|
|
|
|
||
issue one preliminary order for each team during deployment. |
|
|
|
|
|
|
|
|
|
10 A Bridge Too Far
“I have temporarily changed my basic plan of attacking both north and east in order to help Montgomery seize tremendously important objectives in the north- east.”—General Dwight Eisenhower, Supreme Commander of Allied Troops, in a letter to General George Marshall, U.S. Chief of Staff, in August 1944
For information on issuing orders, see “Issuing Orders,” later in this chapter. If you don’t issue a preliminary order, all teams are automatically in Hide mode, and all vehicles are in Defend mode.
To issue an initial order
Follow the procedure described in “Issuing Orders,” later in this chapter.
Only one order can be issued per team prior to starting the battle. Issuing a second order cancels the first order.
Starting the Battle
To start the battle
On the toolbar, click Begin!
After you start the battle, the shaded portions of the map become available. After this point, you cannot drag your troops to new locations; you must issue orders to reposition them, as explained in the next section.
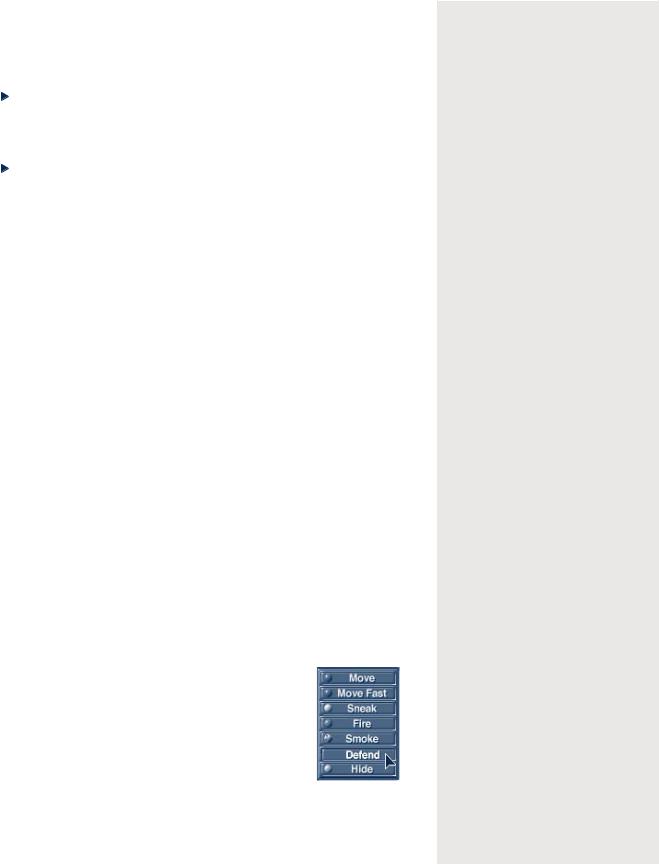
Issuing Orders
In A Bridge Too Far, you use a menu to issue any of three types of orders: those that initiate movement (Sneak, Move, and Move Fast), those that
require a target (Fire and Smoke), and those that have your units hold their ground and dig in (Defend and Hide).
Any order you issue remains in effect until your unit carries it out completely. If you issue a new order before the first one is completed, the first order is canceled and the new one is carried out.
Note that you issue orders to an entire unit, not to individual soldiers.
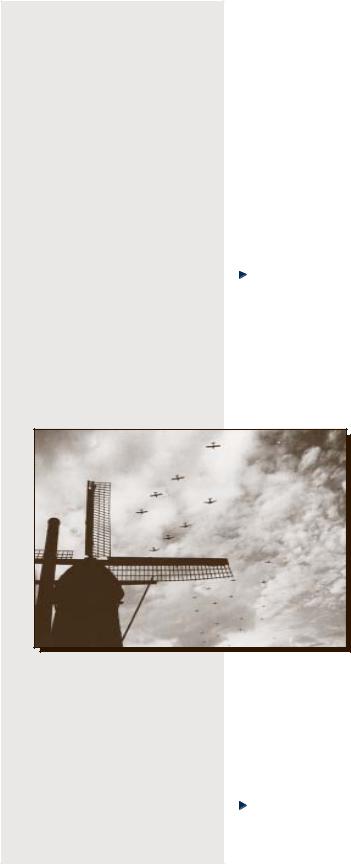
In England the thunder of aircraft engines disrupts church services; in Holland the formations roar across the sky for nearly three hours.
To issue an order
1 In Windows, right-click any soldier in the unit to which you want to issue an order.
The orders menu appears.
On the Macintosh, use OPTION+CLICK and hold.
2On the menu, drag to the order you want and click it.
3If the order requires you to designate a position or target (Sneak, Move, Move Fast, Fire, or Smoke), click the location on the combat screen where you want the order to take place or end.
An order dot appears, as explained in the following section.
To change an order you’ve already issued
Issue a new order, using the procedure for issuing orders described previously. The original order is countermanded.
Chapter 3:
To cancel an order
Issue the Defend order.
Defend is the default state.
To change the target or destination of an order
Drag the order dot to a new location.
Using Keyboard Shortcuts
You can use keyboard shortcuts to issue orders, set options, get Help, and pause or stop the game.
Key(s) |
Order/Command |
Z |
Move |
X |
Move Fast |
C |
Sneak |
V |
Fire |
B |
Smoke |
N |
Defend |
M |
Hide |
Arrow keys |
Scroll the map during battle |
CTRL+G |
Expand game area |
CTRL+T |
Remove trees |
CTRL+K |
Remove KIA soldiers |
CTRL+A |
Quit a battle |
ALT+F4 |
Exit |
F1 |
Help |
F3 |
Pause |
F8 |
Set game options |
Interpreting Order Dots
After you issue an order, an order dot appears on the map to remind you which order you issued. The following table shows orders and the corresponding colors of the order dot. (Because the Defend order is in effect by default, no order dot appears for this order.)
Order |
Color |
Move |
Blue |
Move Fast |
Purple |
Sneak |
Yellow |
Fire (Shoot) |
Beige (for indirect fire) |
|
Red (for target fire) |
Smoke |
Gray |
Hide |
Green |
(For information on indirect fire and target fire, see “Using Your Weapons Effectively,” later in this chapter.)
On the Battlefield |
11 |
“... grotesque improvisation on a grand scale.” —Colonel General Kurt Student, Commander, German First Parachute Army, on assembling his force in September 1944
“The danger of new reverses ... can be removed only by speeding up the dispatch of the reinforcements that have repeatedly been re- quested.”—Field Marshal Gerd von Rundstedt, German Commander in Chief West, writing to OKW in September 1944
12 A Bridge Too Far
“Until the middle of October the enemy could have broken through at any point he liked with ease, and would have been able to cross the Rhine and thrust deep into Germany almost unhin- dered.”—General Siegfried Westphal, Rundstedt’s Chief of Staff, referring to the state of German defenses in September 1944
Moving your Units (Sneak, Move, Move Fast)
The Sneak, Move, and Move Fast orders designate the speed of movement as well as how alert your troops are to danger around them as they move.
Sneak is your troops’ slowest and safest rate of movement. Sneaking soldiers crawl to their destination, stick to the best cover, watch carefully for signs of the enemy, and try to avoid detection. When the unit reaches its destination, the Hide order is in effect by default.
If you give a Sneak order to move a unit to an enemy location, they will crawl to the location and hide.
Move is the normal movement rate. When issued a Move order, the unit attempts to reach the destination while watching for, and defending against, possible attack. When the unit reaches its destination, the Defend order is in effect by default.
If you give a Move order to move a unit to an enemy location, they will try to get close and shoot it out with the enemy.
Move Fast is the maximum movement rate. Soldiers moving fast are less concerned with attack than they are with getting to their destination. This order is most effective when a unit has cover fire from one or more units.
Soldiers given a Move Fast order run to their destination.
If you give a Move Fast order to move a unit to an enemy location, they will assault and try to engage the enemy in hand-to-hand combat.
Targeting (Fire, Smoke)
A “stick” of 18 American paratroopers inside a C-47 on their way to Holland. Paratroopers often carried their own body weight (150 το 200 pounds) in equipment and supplies.
Fire and Smoke are the targeting orders. If you attempt to lay a smoke screen or fire on a target that you can’t reach, the order is ignored. Most infantry other than mortar units cannot throw smoke grenades farther than 30 meters.
Because the targeting orders are important elements of the game, make sure you are fully
informed on how and when to use your weapons. For more information, see “Using Your Weapons Effectively,” later in this chapter, and the effectiveness chart on the back of this manual.
Digging In (Defend, Hide)
Defend and Hide are your “dig-in” orders. Defend tells your men to take cover and stand their ground. They will return fire as necessary, although they may decide to take the offensive on their own.
Hide tells members of a unit to keep their heads down at all cost. This is particularly valuable when your unit is out of ammunition or too injured

|
Chapter 3: On the Battlefield |
13 |
|
|
|
Crete May 20, 1941 |
|
|
German airborne forces (7th Paratroop |
The Germans build their strength by |
|
Division, XI Fliegerkorps) land on the |
flying in the 5th Mountain Division. |
|
island of Crete. The largest German air- |
This force helps defeat an Allied coun- |
|
borne operation of the war is preceded by |
terattack at Máleme; by May 23 the |
|
four days of bombing. On the morning of |
Germans are landing artillery to pound |
|
May 20 landings take place near Máleme and |
the lighter-armed Allies and flying in |
|
Caneá, followed by afternoon landings at |
fighter aircraft to cement their superi- |
|
Rétimo and Herákloin. The battle for the |
ority in the air. By the next day, the |
|
island quickly becomes a battle for the |
Allies are being gradually pushed back. |
|
airfields; unless the Germans can secure |
The Germans continue to reinforce and |
|
an airfield, they will not be able to |
resupply (both by air and sea), while |
|
resupply and reinforce the paratroops |
the Allies fight with what supplies they |
|
already on the ground. |
have. |
|
The fighting on the first day is fierce; |
By May 27, both Caneá and Suda are in |
|
the forces and weapons are fairly equal. |
German hands and the now-disorganized |
|
At Rétimo and Herákloin the Allies succeed |
Allied forces are moving toward evacua- |
|
in holding the Germans at bay; at Caneá |
tion points. By June 1 the last Allied |
|
the Germans are driven inland. However, at |
resistance ends. While the Allies evacu- |
|
Máleme the luck of war turns for the |
ate nearly 19,000 men, losses are heavy; |
|
invaders. |
over 21,000 are killed, wounded, miss- |
|
The day’s bitter fighting has left the |
ing, or captured. |
|
German losses are much lower. Out of the |
|
|
airfield at Máleme a wasteland. During the |
|
|
night, a New Zealand battalion is with- |
23,000 men Student sends into battle, |
|
drawn from its position; its commander is, |
only 7,000 are killed, wounded, or |
|
through no fault of his own, unclear on |
missing. But despite the relatively low |
|
the overall tactical picture. The Germans |
number of casualties, the percentage |
|
quickly seize the initiative at daylight; |
killed (nearly 5,700) is unacceptable to |
|
Colonel General Kurt Student quickly |
Hitler; consequently, he forbids any |
|
seizes the battle by changing his plan to |
further airborne operations. However, |
|
fit the conditions. Student shifts all the |
Student is allowed to continue recruit- |
|
resupply and reinforcement flights into |
ing and training airborne units. The |
|
the captured airfield at Máleme. |
Allies considered any airborne units |
|
|
they faced to be formidable opponents. |
|
|
|
|
to be of much use to you in the current battle. If they still have ammunition, your men will fire only if fired upon or if enemy soldiers pass very close to their hiding place. Hide is the default order at the beginning of the battle, although no order dot appears unless you specifically give the Hide order.
Using Your Weapons Effectively
Your supply of ammunition is finite, particularly if you are fighting as the Allies. You’ll want to evaluate which targets are worth shooting at before you open fire.
A Bridge Too Far has two types of fire: target and area. You use target fire when you want to hit a specific enemy target. You use area (suppres-
14 A Bridge Too Far
“Both Antwerp and Rotterdam are highly vulnerable to mining and blocking. If the enemy succeeds in these operations, the time it will take to open [these] ports cannot be estimated. ...
It will be necessary for coastal batteries to be captured before approach channels to the river route can be estab- lished.”—Admiral Sir Bertram Ramsay, Commander in Chief, Naval Operations, SHAEF, to Field Marshal Bernard Montgomery, Commander, Allied 21st Army Group, on September 3, 1944
sion) fire at an entire area, not just one object. The pointer becomes a crosshair for target fire and a circle for area fire. Mortars, which fire indirectly, can only use area fire.
Determining Range
Range is the distance from a weapon to a target. Most weapons diminish in effectiveness as the distance increases. Some weapons, such as smoke and hand grenades, can be used only at very close range. If you try to target an area out of the effective range of your weapon, the order will be ignored.
Weapons have different range capabilities. When you issue a Fire order, a range indicator (in meters) appears at the end of the fire line. The color of the range indicator tells you if you are in range: green = good, yellow = adequate, red = bad, and black = out of range.
Using the Line of Sight
The color of the line tracing to the target indicates your team’s view of the target.
Bright green The unit can see the target.
Dark green The unit cannot clearly see the target or is firing through obstructions.
Red The unit cannot fire through the obstruction; the order will be ignored.
To determine range and line of sight
Issue the Fire order, and then point to the target.
A read-out (in meters) appears about the target, and the color-coded line indicates the line of sight.
Using Indirect Fire
When you’re using weapons such as mortars, you may see an orange line instead of a red or green line stretching to your target as you point to it. This tells you that it is indirect fire—that you are lobbing the explosive at your target instead of firing at it directly. An orange order dot appears on the combat screen above the target for mortars. With indirect fire, accuracy depends on the experience of your team, as well as whether it can actually see the target from its position.
Using Suppression Fire
You don’t have to hit a target directly; suppression fire can be effective at sapping enemy morale. As you concentrate fire in an area, it starts to turn red. The heavier the fire, the greater the suppression effects on any enemies in the area. Make sure you don’t move your own soldiers into an area that is being actively suppressed, as they too may get shot.
Chapter 3: On the Battlefield |
15 |
Checking Status of Teams |
|
|
Before issuing a Fire order, you can check the position of your |
|
North Africa November 8, 1942 |
|
The Allies launch Operation |
|
soldiers on the combat screen to make sure they are ready to use |
|
|
their weapons: |
|
Torch—the invasion of French |
• A prone soldier can throw a grenade only one-third its |
|
North Africa. On November 12, |
|
a combined air and seaborne |
|
normal range. |
|
assault captures the port city |
• A soldier must be crouched or standing to fire a bazooka or |
|
of Bône, Algeria. Four days |
|
later, another airborne as- |
|
Panzerschreck. |
|
|
|
sault captures Souk el Arba, |
|
• A crawling soldier cannot fire any weapon. |
|
|
|
Tunisia. The British 1st and |
|
Soldiers who are moving also have limitations: |
|
3rd Parachute Brigades, and |
|
the U.S. 509th Parachute |
|
|
|
|
• A moving soldier cannot fire weapons that require setup to |
|
Regiment, all take part in the |
fire, such as a machine gun or mortar. |
|
action. |
|
|
|
• A moving soldier cannot load his weapon unless it is a |
|
|
semiautomatic or automatic weapon, and he cannot reload |
|
|
(put a new clip in) any weapon. |
|
|
You can also check the soldier monitor to see if a team still has its loader |
||
and assistants. Any weapon aided by a loader has a higher rate of fire and |
||
requires less time to reload than a weapon handled by just one man. |
|
|
Likewise, any weapon aided by assistants has greater accuracy than one |
||
without. For information on the soldier monitor, see Chapter 4, “Using the |
||
Toolbar and Monitors.” |
|
|
Taking |
Prisoners and Rallying |
|
|
Separated Soldiers |
|
||
When enemy soldiers surrender to you, they become your prisoners. They |
“... composed entirely of |
||
stand in place and do not participate in the battle. |
elderly gentlemen who |
||
To get enemy soldiers to surrender, you can try bracketing or surrounding |
hitherto had been guard- |
||
ing the north coast of |
|||
them with suppression fire and then move into close range for an assault. |
Holland and had never |
||
Soldiers can get separated from their units. A soldier may rejoin his group |
heard a shot fired in |
||
anger.”—Colonel General |
|||
without encouragement if given enough time. To encourage a separated |
|||
Kurt Student, Commander, |
|||
soldier to rally with his original team, you can move the team closer to |
|||
German First Parachute |
|||
him. |
|
Army, describing the |
|
Using |
Bridges |
German 719th Division |
|
guarding the north bank |
|||
Bridges are especially important in A Bridge Too Far because the rivers in |
of the Scheldt Estuary |
||
when the British captured |
|||
Holland are too cold, deep, and swift to ford on foot. |
Antwerp on September 4, |
||
The action you take toward bridges differs greatly depending on what side |
1944 |
||
|
|||
you choose to play. Only the German army can demolish a bridge and |
|
||
only the Allies can build one. |
|
||

16 A Bridge Too Far
|
|
Securing and Repairing Bridges (Allies Only) |
|||
|
|
If you are playing as the Allies, your progress is severely delayed when the |
|||
|
|
Germans demolish a bridge. To keep a bridge from being destroyed, gain |
|||
|
|
control of both sides. |
|
|
|
|
|
If you are playing an operation or campaign, you can “repair” a bridge. |
|||
|
|
You do not have to do anything for this to happen; just wait until the next |
|||
|
|
battle. A pontoon bridge is built in place of the bridge that was de- |
|||
|
|
stroyed. |
|
|
|
|
|
Blowing Bridges (Germans Only) |
|
||
|
|
If you are playing as the Germans, destroy a bridge only as a last resort. |
|||
|
|
After the bridge is blown, you will be forced to retreat while the Allies |
|||
|
|
repair the bridge. |
|
|
|
|
|
The demolition timer determines when you can demolish a bridge. This |
|||
|
|
timer counts down from the beginning of the battle. After it hits zero, the |
|||
|
|
Blow Bridge button is active (your explosives are fully wired and authori- |
|||
|
|
zation to blow the bridge has been received). Allied fighting forces can see |
|||
|
|
||||
|
|
the timer counting, but they cannot use the Blow Bridge button. Note that |
|||
|
|
if the Allies control any of the bridge approaches, the bridge may not |
|||
|
|
successfully blow. If it fails to blow, the timer will increment by one |
|||
|
|
||||
|
|
minute. After a minute passes, you can try to destroy the bridge again. |
|||
|
|
After you have successfully blown a bridge and the battle has ended, a |
|||
|
|
message appears telling you to leave the battlefield. Because the Allies |
|||
|
|
have overwhelming air and artillery superiority, holding an exposed |
|||
|
|
bridge position is too dangerous. |
|
||
|
|
If a bridge is repaired, you can try to retake it and destroy it again. |
|||
|
|
To blow a bridge (Germans only) |
|
||
|
|
Wait until the demolition timer counts down to zero, and then click |
|||
|
|
Blow Bridge. |
|
|
|
|
|
|
|||
Sicily July 9/10, 1943 |
The airborne forces enjoy both success |
||||
|
|
and failure. High winds cause the Ameri- |
|||
Allied airborne forces next saw action |
|
|
|||
|
|
can paratroopers to be widely scattered. |
|||
during Operation Husky—the invasion of |
|
|
|||
|
|
Assembly is difficult, and while some |
|||
Sicily. On the night of July 9/10, 1943, |
|
|
|||
|
|
objectives are not secured, the para- |
|||
the U.S. 82nd Airborne Division, commanded |
|
|
|||
|
|
troopers do disrupt the German and Ital- |
|||
by Lieutenant General Matthew Ridgeway, is |
|
|
|||
|
|
ian defenders. Although the British |
|||
to drop on targets behind the American |
|
|
|||
|
|
paratroopers land successfully, they lose |
|||
landing beaches. At the same time, the |
|
|
|||
|
|
one-third of their gliders; many are |
|||
British 1st Airborne Division, commanded by |
|
|
|||
|
|
released too soon (by inexperienced |
|||
Lieutenant General Frederick Browning, will |
|
|
|||
|
|
pilots) and crash at sea. However, once |
|||
float down on targets behind the British |
ground, all |
the airborne forces |
|||
landing beaches. |
on the |
||||
acquit |
themselves |
well. |
|||
|
|
||||
|
|
|
|
|
|
Chapter 3:
Ending a Battle
A battle ends either when both sides press the cease-fire button, one side flees, or neither side has any soldiers on the map left alive or able to fight. However, you can signal that you are willing to end a battle at any time. When both you and your opponent agree to a cease-fire, each side retains the territory it took during the battle, although neither side wins the map.
If your opponent does not agree to a cease-fire, you can either stay and fight, retreat, or flee. When you retreat, you do not surrender your teams; you just issue orders for them to move off the map. When you flee, the game ends immediately. The computer calculates the teams kept or lost, and the enemy takes control of the entire map.
After you end the battle, the Debriefing screen appears. For information on this screen, see Chapter 5, “Fighting Operations and Campaigns.”
To signal that you are willing to disengage
On the toolbar, click the cease-fire button (which shows a depiction of a dove).
The battle ends when both sides have clicked the cease-fire button.
To retreat without surrendering
Use the Move command to move your teams off the right or left edge of the map.
To end the battle and surrender
On the toolbar, click the flee button (which shows a white flag).
To quit the game after you cease-fire, retreat, or flee
1On the Debriefing screen, click Command Screen.
2On the Command screen, click Quit. You can also quit using ALT+F4.
To stop a battle
In Windows, press CTRL+A. The battle stops and is not saved.
On the Battlefield |
17 |
“I consider we have now reached the stage where one really powerful and full blooded thrust toward Berlin is likely to get there and thus end the German war. ... In my opinion the thrust likely to give the best and quickest results is one via the Ruhr.”—Field Marshal Bernard Montgomery, Commander, Allied 21st Army Group, writing to General Dwight Eisenhower, Supreme Allied Commander, on September 4, 1944
18 A Bridge Too Far
Chapter 4
Using the Toolbar and Monitors
A Bridge Too Far provides two-way communication with your troops. You send them orders, and they keep you up-to-date on their situation and condition as well as provide information on the enemy. Your troops’ means of communication are the toolbar and the game’s battle monitors.
The Toolbar
The toolbar provides you with various types of information about your troops while you are fighting a battle.
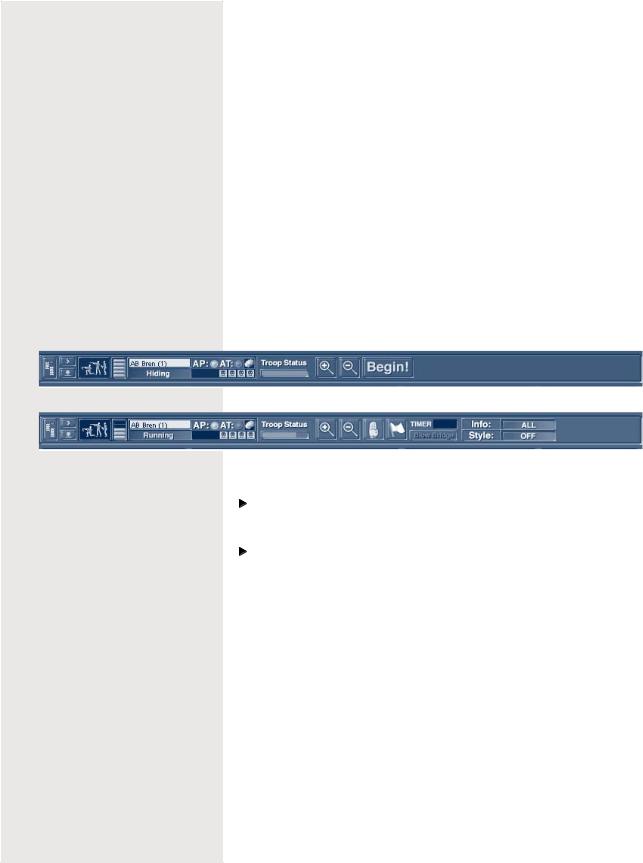
Before you click Begin! to start a battle, the toolbar provides only preliminary information, as shown in the following figure. After you start the battle, the toolbar shows its full range of data.
Pre-Battle Toolbar
Battle Toolbar
“[You must] supervise the refitting and rehabilitation of the 9th and 10th SS Panzer Divisions ...
slowly disengage from the battle and immediately head north.”—Field Marshal Walter Model, Commander, German Army Group B, to Lieutenant General Wilhelm Bittrich, Commander, II SS Panzer Corps, at Model’s headquarters near Liège on September 4, 1944
To view a summary of a particular team
Point to the team, either in the team monitor or on the map.
To get a summary of an enemy unit
Click or point to the unit.
Information appears in the soldier monitor.
Team Summary
On the left of the toolbar is the team summary. This summary consists of the following information:
The bars at the far left of the toolbar indicate the team’s degree of experience: no bars = no experience; 5 bars = highly experienced.
To the right of the bars is the team type, such as AB Rifle or Mortar.
Beneath the team type is the order the team is currently following. If the text is green, the team is following the orders you issued. Red text indicates the team is intentionally acting against the command you issued due to battlefield conditions. White text indicates you have issued no commands to the team or the command you previously issued has been completed.
|
Chapter 4: |
Using the |
Toolbar and Monitors |
19 |
|||
AP Team’s effectiveness against personnel: green = good, red = bad, and |
|
|
|
|
|||
black = none. |
|
|
|
|
|
|
|
AT Team’s effectiveness against tanks: green = good, red = bad, and |
|
|
|
|
|||
black = none. |
|
|
|
|
|
|
|
The boxes under AP and AT indicate the health of each man on the team. |
|
|
|
|
|||
Troop Status Bar |
|
“I’ll tell you what I’ll |
|||||
|
do, Monty. I’ll give you |
||||||
|
|
|
|||||
The Troop Status bar shows the current health of all your troops as a |
whatever you ask to get |
|
|
||||
whole (not just the team you’re pointing to). The bar is green at the |
you over the Rhine be- |
|
|
||||
cause I want a bridgehead |
|||||||
beginning of a game, indicating good health. As men are wounded, the bar |
|||||||
... but let’s get over |
|
|
|||||
turns yellow; as killed, red. |
|
|
|
||||
|
the Rhine first before we |
||||||
|
|
|
|||||
Information from the Field |
|
discuss anything else.” |
|
|
|||
|
|
|
—General Dwight |
|
|
||
You can use the toolbar to get immediate feedback about a number of |
Eisenhower, Supreme |
|
|
||||
states and abilities applying to each soldier. However, you can track only |
Commander, SHAEF, to |
|
|
||||
one state at a time. The indicators use color as a guide to status: green = |
Field Marshal Bernard |
|
|
||||
Montgomery, Commander, |
|
|
|||||
good, yellow = functional, and red = useless. |
|
|
|
||||
|
Allied 21st Army Group, |
|
|
||||
|
|
|
|
|
|||
To choose a state to track |
|
at their meeting on |
|
|
|||
Click Info, and then drag to the state you want to track. |
|
September 10, 1944 |
|
|
|||
|
|
|
|
|
|||
Battle |
Monitors |
|
|
|
|
|
|
You use the four monitors below the toolbar to track detailed information: |
|
|
|
|
|||
team information, soldier information, messages, and maps. (If you have |
|
|
|
|
|||
set your screen resolution to 1,024 × 768, the spyglass monitor also |
|
|
|
|
|||
appears.) The following figure shows the battle monitors. |
|
|
|
|
|
||
Using the Team Monitor |
|
|
|
|
|
||
The team monitor displays the team type, its current order, and a summary |
|
|
|
|
|||
of its overall health. The color-coding of the text is the same as that in the |
|
|
|
|
|||
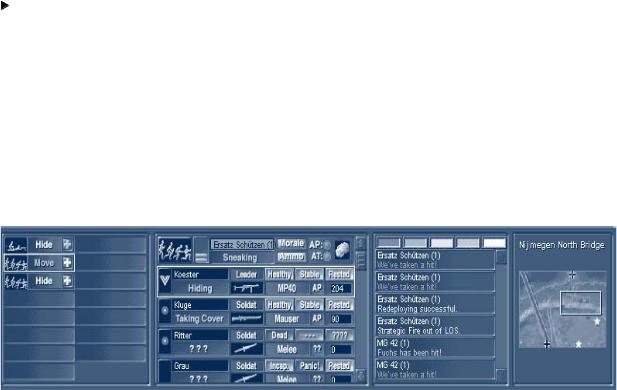
Team Monitor |
Soldier Monitor |
Message |
Monitor |
Map Monitor |
|
|
|
|
|
|
|
|
|
|
|
|
|
|
|
|
|
|
|

20 A Bridge Too Far
“While agreeing with your conception and fullblooded thrust toward Berlin, I do not agree that it should be initiated at this moment to the exclusion of all other maneuvers.”—General Dwight Eisenhower, Supreme Commander, SHAEF, writing to Field Marshal Bernard Montgomery, Commander, Allied 21st Army Group, regarding Montgomery’s singlethrust plan
“The object is to lay a carpet of airborne troops down over which our ground forces can pass.” —Lieutenant General Frederick Browning, Commander, British I Airborne Corps, to the officers responsible for planning Operation Market on September 10, 1944
team summary, described earlier in this chapter. The plus sign (+), indicating overall health, uses the same scheme as that in the toolbar: green = good, yellow = functional, red = useless.
To get information on a team
Click the team.
To go to that team on the map
Double-click the team in the monitor.
Using the Soldier Monitor
The soldier monitor gives information on each soldier in the selected team.
Each field in the soldier monitor can display one of a large number of different states and conditions. For a listing of all possible settings in the soldier monitor, see the next section, “Soldier Monitor: Details.”
If you are viewing information on an enemy team, the monitor may show blanks or question marks in some areas. This means that your men have not been able to determine certain information about the enemy. To get more enemy intelligence, see “Gathering Intelligence,” later in this chapter.
At the far left of the soldier monitor is an insignia that indicates the team leader’s rank. The higher ranked a soldier is, the more likely that soldier can keep his men from panicking and can rally other soldiers near him. Also, the higher the rank, the larger the range in which soldiers are affected by that leader.
To the right of the insignia is the soldier’s name and current action. The color of the text showing the action provides the same information as that in the toolbar, as described earlier in this chapter.
To the right of the soldier’s name is his function in the team. Beneath the team function is a graphical display of the soldier’s weapon, followed by the name of the weapon and its ammunition type. Above the weapon information are indicators showing the physical state, emotional state, and fatigue level of each soldier.
To get information on an individual soldier in a team
Click the soldier.
Soldier Monitor: Details
The soldier monitor shows several aspects of your men’s states and conditions. The following tables show all the possible values for these different aspects.
|
Chapter 4: Using the |
Toolbar and Monitors |
21 |
||
Current action |
Description |
|
|
||
|
|
|
|
|
|
Moving |
Soldier is moving. |
|
|
||
Resting |
Soldier is too tired to do anything but rest. |
|
|
||
Loading |
Soldier is loading his weapon. |
|
|
||
Aiming |
Soldier is aiming his weapon or waiting for |
|
|
||
|
loader to finish loading. |
|
|
||
Firing |
Soldier is firing his weapon. |
|
|
||
Taking Cover |
Soldier is looking for better cover. |
|
|
||
Assaulting |
Soldier is moving forward and firing. |
|
|
||
On Watch |
Soldier is looking for targets. |
|
|
||
Holding Fire |
Soldier has loaded weapon and sees a target |
“The OKW will henceforth |
|||
|
but chooses not to fire. |
often be no longer able |
|
||
Suppressed |
Soldier is suppressed by enemy fire (takes |
to meet demands, however |
|||
|
cover) but will still fire. |
urgent and justifiable, |
|
||
|
for air, armor, and |
|
|||
Pinned |
Soldier is pinned down by enemy |
|
|||
artillery support, even |
|
||||
|
fire; hides more than he shoots. |
|
|||
|
when enemy superiority is |
||||
|
|
|
|||
Cowering |
Soldier is pinned down but rarely |
overwhelming. Any short- |
|||
|
fires and refuses to move. |
age of weapons, there- |
|
||
Routed |
Soldier is running away from the battlefield. |
fore, must be made good |
|
||
by strengthening the |
|
||||
Panicked |
Soldier is panicked and is seeking |
|
|||
morale of the troops.” |
|
||||
|
cover out of sight of the enemy. |
—Oberkommando der |
|
||
Unjamming |
Soldier is trying to clear a jammed weapon. |
Wermacht, August, 1944 |
|
||
Assisting |
Soldier is assisting another soldier with a |
|
|
||
|
crew weapon. |
|
|
||
Firing/Target |
Soldier is firing at a specific target. |
|
|
||
Firing/Area |
Soldier is firing at an area or location. |
|
|
||
Firing Blind |
Soldier is firing at a target he cannot see. |
“Owing to the reduced |
|
||
Out of Ammo |
Soldier is out of ammunition. |
hours of daylight and the |
|||
Can’t See |
Soldier cannot see target. |
distances involved, it |
|
||
would not be possible to |
|||||
Friend Block |
Soldier’s line of fire is blocked by friendly |
||||
consider more than one |
|
||||
|
soldiers. |
lift per day ... casual- |
|||
Gun Broken |
Soldier’s gun is damaged. |
ties would result from |
|
||
No Target |
Soldier cannot see a target at which to fire. |
pilot and crew fatigue.” |
|||
—Major General Paul |
|
||||
Crawling |
Soldier is crawling toward cover or destination. |
|
|||
Williams, Commander, U.S. |
|||||
Ambushing |
Soldier is ambushing the enemy. |
IX Troop Carrier Command, |
|||
Hiding |
Soldier is hiding from the enemy. |
responsible for Operation |
|||
Market’s air operations, |
|||||
Bad Shot |
Soldier has a shot that is a waste of ammunition. |
||||
commenting on the number |
|||||
In Building |
Soldier (mortar team) is inside building and |
of drops that can be made |
|||
|
cannot fire. |
on D-Day |
|
||
|
|
|
|||
No Weapon |
Soldier has no usable weapon. |
|
|
||
|
|
|
|
|
|

22 A Bridge Too Far
“... a narrow corridor through ... swampy heath, all the way to Arnhem ...
a single two-lane highway, bounded immediately by small, open cultivated fields hedged in by poplar trees and surrounded by drainage ditches. Occasionally the road ran past thick pine forests. Up the road the Irish Guards would lead XXX Corps on a front two tanks wide.”—Brute Force page 417
“... the British ... seem ignorant of the significance Arnhem has for the Fatherland. ... [Arnhem represents] the gateway to Germany, and I did not expect the Germans to leave it open.”—Major General Stanislaw Sosabowski, Commander, Polish 1st Parachute Brigade, recalling his assessment of Operation Market-Garden
Current action |
Description |
Repairing |
Soldier is repairing his weapon. |
Can’t Target |
Target is outside the gun’s firing arc. |
Conserving |
Soldier is running low on ammunition so he’s |
|
conserving it. |
Too Close |
Soldier is too close to the target to fire. |
Separated |
Soldier is separated from his team. |
Stunned |
Soldier has been stunned by the concussion |
|
effect of a grenade or other explosive, and can |
|
take no actions. |
Function in team |
Description |
Leader |
Leader of an infantry team. |
Assistant |
Assists the driver of a vehicle and fires bow |
|
machine gun or is second in command on an |
|
infantry team. |
Soldat |
German infantryman. |
G.I. |
American infantryman. |
Cmdr. |
Commander; leader of a vehicle team. |
Driver |
Driver of a vehicle. |
Gunner |
Fires vehicle’s main weapon. |
Loader |
Loads vehicle’s main weapon. |
Ammo type |
Description |
AP |
Armor piercing. |
HE |
High explosive; used against infantry, light |
|
vehicles, and structures. |
HEAT |
High explosive, antitank; used against tanks, tank |
|
destroyers, and motorized artillery. Not effective |
|
against infantry in the open but can be effective |
|
against infantry in structures. |
Smoke |
Smoke shells or grenades. |
SP |
Special; includes canister and high-velocity AP. |
Physical state |
Description |
Healthy (green |
Physically able to obey all commands. |
background) |
|
Hurt (yellow |
Soldier is slightly wounded; able to |
background) |
physically obey orders at a reduced level of |
|
performance. |
Incap. (orange |
Incapacitated; soldier is severely |
background) |
wounded and unable to obey commands. |
Dead (red background) |
Soldier is dead. |
|
Chapter 4: Using the Toolbar and Monitors |
23 |
||
Emotional state |
Description |
|
|
|
|
|
|
|
|
Berserk (red text on |
Soldier will sacrifice personal safety |
|
|
|
black background) |
to attack the enemy. |
|
|
|
Fanatic (orange text on |
Soldier is slightly irrational and takes |
|
|
|
black background) |
chances to be a hero. |
|
|
|
Heroic (yellow text on |
Soldier fights aggressively and is capable |
“It was absolutely impos- |
||
black background) |
of heroic acts. |
sible to get them to face |
||
Stable (black text on |
Soldier is emotionally stable. |
the realities of the |
|
|
situation; their personal |
||||
green background) |
|
|||
|
longing to get into the |
|
||
Panic (black text on |
Soldier is emotionally unstable and must |
|
||
campaign before it ended |
||||
red background) |
be rallied to become effective. |
completely blinded |
|
|
Routed (black text on |
Soldier is running away from the battlefield. |
them.”—Major Brian |
|
|
red background |
|
Urquhart, Chief of Intel- |
||
|
ligence, British I Air- |
|
||
|
|
|
||
Fatigue level |
Description |
borne Corps, commenting |
|
|
|
|
on state of mind among |
|
|
Rested |
Soldier is well rested. |
|
||
the officers planning |
|
|||
Winded |
Soldier is temporarily out of breath but will |
Operation Market |
|
|
|
recover quickly if given a chance to rest. |
|
|
|
Fatigued |
Soldier is so tired that his performance is |
|
|
|
|
affected. |
|
|
|
Using the Message Monitor
The message monitor displays the messages you receive from the field. The panels at the top represent the priority of the information coming in. Red is highest priority and white is lowest.
To select the unit that sent a particular message
Click the message.
To filter out certain messages
Click the colored panel at the top of the message monitor corresponding to the messages you want to filter out.
For example, to see messages only of the highest priority (red), click all four panels other than the red panel.
Using the Map Monitor
The map monitor provides a quick way to jump around the map. This monitor is constantly updated to show you the positions and dispositions of known units and victory locations. Your troops appear blue, and enemy teams are red.
Originally developed for use against aircraft (FlaK 18-37, FlaK41), the German 88mm gun achieves lasting fame as a tank killer. It is the main gun on the Tiger tanks and JagdPanther tank destroyer.
 Loading...