


ELECTRONIC OVEN CONTROL
Self-Cleaning Models
NOTE: The basic timer is externally arranged in different configuration in various appliance models. This does not change the way it operates.
NOTE: Some models have a touch pad control. To activate it, you just have to touch the pad with a finger. Take care to have a good contact between the finger and the touch pad. Long nails can make the activation difficult. It is a good idea to clean the control panel after each use or as soon as possible after a spill, boil over or spatter because some ionic or salty ingredients as ketchup, tomatoes sauce, etc. can operate the control.
Bake |
Speed bake Nettoyage |
Bake time |
|
Clock |
|
||
Cuisson |
Speed |
Temps de |
|
|
|||
Cuire |
|
Horloge |
|
||||
rapide |
clean |
cuisson |
|
|
|||
|
|
|
|
||||
|
|
|
|
Oven |
|
|
|
|
|
|
|
Four |
|
|
|
Broil |
Keep warm |
Clean |
Start time |
Preheat |
Timer |
Clear/Off |
|
Préchauffage |
|||||||
Griller |
Garder |
Nettoyer |
Heure de |
Door Locked |
On/Off |
Annuler |
|
chaud |
départ |
Minuterie |
|||||
|
|
Porte Verrouillée |
|
||||
|
|
|
|
Speed Bake Oven |
|
|
|
|
|
|
|
Four à Cuisson Rapide |
|
|
|
Model A |
|
|
|
Model B |
|
|
|
ELECTRONIC OVEN CONTROL Control Pad Functions (Model A)
Read the instructions carefully before using the oven. For satisfactory use of your oven, become familiar with the various functions of the oven as described below.
Note: The oven function will not work if the time of day clock is not set.
Clock Pad- |
Cook Time |
Up and Down arrow pads- Used |
Add 1 minute Pad - Used to add |
Bake Pad Used to enter |
|||||||||||||||||
Used to set the |
Pad- Used to |
along with the function pads to select |
1 minute to the timer countdown. |
the normal baking |
|||||||||||||||||
time of day. |
enter the |
|
|
oven temperature, cooking time, start |
This feature works with the Timer |
mode temperature. |
|||||||||||||||
|
length of the |
time (when programming an |
and does not affect any cook time |
|
|
||||||||||||||||
Oven Interior |
baking time. |
automatic start time), time of day, |
or start time functions. |
|
Broil Pad- Used to |
||||||||||||||||
|
|
|
|
clean time and minute timer. |
|
|
|
|
|
|
|
|
|
select the variable |
|||||||
Light Pad- Used |
|
|
|
|
|
|
|
|
|
|
|
|
|
||||||||
|
|
|
|
|
|
|
|
|
|
|
|
|
|
|
|
|
|
|
|
broil function. |
|
to turn oven |
|
|
|
|
|
|
|
|
|
|
|
|
|
|
|
|
|
|
|
|
|
|
|
|
|
|
|
|
|
|
|
|
|
|
|
|
|
|
|
|
|
|
|
interior light ON |
|
|
|
|
|
|
|
|
|
|
|
|
|
|
|
|
|
|
|
|
Keep Warm Pad- |
and OFF. |
|
|
|
|
|
|
|
|
|
|
|
|
|
|
|
|
|
|
|
|
|
|
|
|
|
|
|
|
|
|
|
|
|
|
|
|
|
|
|
|
|
||
Feature |
|
|
|
|
|
|
|
|
|
|
|
|
|
|
|
|
|
|
|
|
Used to set the Keep |
|
|
|
|
|
|
|
|
|
|
|
|
|
|
|
|
|
|
|
|||
|
|
|
|
|
|
|
|
|
|
|
|
|
|
|
|
|
|
|
|||
|
|
|
|
|
|
|
|
|
|
|
|
|
|
|
|
|
|
|
|
Warm feature. |
|
indicator lights- |
|
|
|
|
|
|
|
|
|
|
|
|
|
|
|
|
|
|
|
|
|
|
|
|
|
|
|
|
|
|
|
|
|
|
|
|
|
|
|
|
|
|
|
These light show |
|
|
|
|
|
|
|
|
|
|
|
|
|
|
|
|
|
|
|
|
Clear/Off Pad- |
|
|
|
|
|
|
|
|
|
|
|
|
|
|
|
|
|
|
|
|
||
which feature is |
|
|
|
|
|
|
|
|
|
|
|
|
|
|
|
|
|
|
|
|
|
|
|
|
|
|
|
|
|
|
|
|
|
|
|
|
|
|
|
|
|
Used to clear any |
|
in use. |
|
|
|
|
|
|
|
|
|
|
|
|
|
|
|
|
|
|
|
|
function previously |
|
|
|
|
|
|
|
|
|
|
|
|
|
|
|
|
|
|
|
|
|
|
Select Clean Pad- |
|
|
|
|
|
|
|
|
|
|
|
|
|
|
|
|
|
|
entered except the |
||
Used to select the |
|
|
|
|
|
|
|
|
|
|
|
|
|
|
|
|
|
|
|
|
time of day and |
self-cleaning cycle. |
|
|
|
|
|
|
|
|
|
|
|
|
|
|
|
|
|
|
minute timer. Push |
||
|
|
|
|
|
|
|
|
|
|
|
|
|
|
|
|
|
|
|
|
|
Clear/Off pad to |
Timer On/Off Pad- Used |
Delay Start Pad- Used to |
|
|
|
|
|
|
|
|
|
|
|
|
||||||||
Oven, Preheat & Lock lights- The "oven" light |
|
stop cooking. |
|||||||||||||||||||
to set or cancel the minute |
set the desired start time |
indicates that the oven is functioning. The "Preheat" |
|
|
|||||||||||||||||
timer. The minute timer |
for baking. Can be used |
light will glow when the oven is first set to operate, or |
|
|
|||||||||||||||||
does not start or stop |
with COOK TIME to |
if the desired temperature is reset higher than the |
|
|
|||||||||||||||||
cooking. |
|
|
program a delayed bake |
actual oven temperature. The "Door Locked" light will |
|
|
|||||||||||||||
|
|
|
cycle. |
|
|
|
flash until the door locks when the self-clean cycle is in |
|
|
||||||||||||
|
|
|
|
|
|
|
|
use. It glows constantly after the door locks. |
|
|
|||||||||||
318204142 (0802) Rev. A
1

ELECTRONIC OVEN CONTROL Control Pad Functions (Model B)
Read the instructions carefully before using the oven. For satisfactory use of your oven, become familiar with the various functions of the oven as described below. Note: The graphics on your timer may not look exactly like the one shown. This doesn't change the way it operates.
Note: The oven function will not work if the time of day clock is not set.
Bake Pad |
Speed Bake |
Speed Clean |
||||
Used to enter |
Pad Used to |
Pad Used to |
||||
the normal |
enter the speed |
select the |
||||
baking mode |
bake mode |
Speed Clean |
||||
temperature. |
temperature. |
cycle. |
|
|||
Feature |
|
|
|
|
|
|
indicator lights- |
|
|
|
|
||
These light show |
|
|
|
|
||
which feature is |
Bake |
Speed bake Nettoyage |
||||
in use. |
|
|
Cuisson |
Speed |
||
|
|
Cuire |
rapide |
clean |
||
|
|
|
|
|||
Broil Pad- Used to |
|
|
|
|
||
select the variable |
|
|
|
Keep warm |
Clean |
|
|
Broil |
|||||
|
|
|
||||
broil function. |
|
|
Griller |
Garder |
Nettoyer |
|
|
|
chaud |
||||
|
|
|
|
|
|
|
Keep Warm Pad- Used to set the Keep Warm feature.
Bake Time |
Up and Down arrow pads- Used |
|
Pad- Used to |
along with the function pads to select |
|
enter the length |
oven temperature, cooking time, start |
|
of the baking |
time (when programming an automatic |
|
time. |
start time), time of day, clean time and |
|
|
|
minute timer. |
|
|
|
|
|
|
Clock Pad- Used to set the time of day.
Oven Interior Light Pad- Used to turn oven interior light ON and OFF.
Bake time |
|
Clock |
|
|
Temps de |
|
|
||
|
Horloge |
|
||
cuisson |
|
|
||
|
|
|
||
|
Oven |
|
|
|
|
Four |
|
|
|
Start time |
Preheat |
Timer |
Clear/Off |
|
Préchauffage |
||||
Heure de |
Door Locked |
On/Off |
Annuler |
|
départ |
Minuterie |
|||
Porte Verrouillée |
|
Speed Bake Oven
Four à Cuisson Rapide
Clear Off Pad- Used to clear any function previously entered except the time of day and minute timer. Push Clear pad to stop cooking.
Clean Pad Used to select the selfcleaning cycle.
Start Time Pad- Used to set the desired start time for baking. Can be used with BAKE TIME to program a delayed bake cycle.
Oven, Preheat & Lock lights- The "oven" light indicates that the oven is working. The "Preheat" light will glow when the oven is first set to operate, or if the desired temperature is reset higher than the actual oven temperature. The "Door Locked" light will flash until the door locks when the self-clean cycle is in use. It glows constantly after the door locks (some models).
Timer Pad- Used to set or cancel the minute timer. The minute timer does not start or stop cooking.
The oven can be programmed to:
Bake normally, Keep warm, Time Bake, Delayed Timed Bake (delayed start), Broil and Clean.
Note: Push buttons or pads may be shaped differently.
For a silent control panel:
When choosing a function, a beep will be heard each time a pad is pushed. If desired, the controls can be programmed for silent operation.
To tell if your oven is set for normal or silent operation push and hold DELAY START or START TIME pad for 7 seconds. "- -" or "SP" appears in the display. Within 5 seconds, press the UP or DOWN ARROW pad to switch between normal sound operation and silent operation mode. The display will show either "- -" or "SP". Wait 5 seconds to return to normal operating mode.
Note: If "SP" appears, the control will operate with normal sounds and beeps. If "- -" appears, the control is in the silent operation mode.
Temperature Conversion (Fahrenheit / Celsius)
The electronic oven control is set to operate in °F (Fahrenheit) when shipped from the factory. The oven can be programmed for any temperature from 170°F to 550°F (77°C to 288°C).
To change the temperature to °C (Celsius) or from °C to °F (control should not be in a Bake or Clean mode):
1.Press and hold BROIL pad for 7 seconds until °F or °C appears in the display.
2.Press the UP or DOWN ARROW pad to change °F to °C or °C to °F.
3.Wait 5 seconds to accept the changes or press STOP or CLEAR/OFF pad to accept the changes.
2

Setting the Clock and Minute Timer
Bake |
Speed bake Nettoyage |
Bake time |
|
Clock |
|
||
Cuisson |
Speed |
Temps de |
|
|
|||
Cuire |
|
Horloge |
|
||||
rapide |
clean |
cuisson |
|
|
|||
|
|
|
|
||||
|
|
|
|
Oven |
|
|
|
|
|
|
|
Four |
|
|
|
Broil |
Keep warm |
Clean |
Start time |
Preheat |
Timer |
Clear/Off |
|
Préchauffage |
|||||||
Griller |
Garder |
Nettoyer |
Heure de |
Door Locked |
On/Off |
Annuler |
|
chaud |
départ |
Minuterie |
|||||
|
|
Porte Verrouillée |
|
||||
Speed Bake Oven
Four à Cuisson Rapide
Model A Model B
Note: The time of day must first be set in order to operate the oven.
To set the Clock
When the range is first plugged in, or when the power supply to the appliance has been interrupted, the display will flash "12:00".
1.Press the  or CLOCK pad once (do not hold pad down).
2.Within 5 seconds, push and hold the UP or DOWN ARROW pad until the correct time of day appears in the display.
3.Press the  or CLOCK pad to accept the new time of day. If the
  or CLOCK pad is not pressed, the timer will return
automatically to the new time of day after 7 seconds.
Note: The clock cannot be changed during any bake, timed bake, delayed time bake, clean cycle or delayed clean cycle.
Changing between 12 or 24 Hour Time of Day Display
1.Press and hold the  or CLOCK pad for 7 seconds. After 7 seconds, "12Hr" or "24Hr" will appear in the display and the control will beep once.
2.Press the UP or DOWN ARROW pad to switch between the 12 and 24 hour time of day display. The display will show either "12Hr" or "24Hr".
3.Wait 5 seconds or press the STOP or CLEAR/OFF pad to return to the time of day display.
4.Reset the correct time as described in To set the Clock above. Please note that if the 24 hour time of day mode was chosen, the clock will now display time from 0:00 through 23:59 hours.
To Set the Minute Timer
1.Press the TIMER ON/OFF pad.
2.Press the UP ARROW pad to increase or DOWN ARROW pad to decrease the time in one minute increments. The timer can be set for any amount of time from 1 minute to 11 hours and 59 minutes.
3.The display shows the timer count down in minutes if more than 1 hour remains. When less than 1 hour remains, the display will count down in seconds.
4.When the set time has run out, the timer will beep 3 times. It will continue to beep 3 times every 8 seconds until the TIMER ON/OFF pad is pressed.
Note: The indicator light located above the TIMER ON/OFF pad will glow while the minute timer is active.
Note: The minute timer does not start or stop cooking. It serves as an extra timer in the kitchen that will beep when the set time has run out. The minute timer can be used alone or during any of the other oven functions. When the minute timer is in use with any other mode, the minute timer will be shown in the display. To view other functions, press the function pad for that mode.
To Cancel the Minute Timer before the set time has run out: Press the TIMER ON/OFF pad.
To Set Add 1 Minute Feature (Model A Only)
The ADD 1 MINUTE pad is used to set the Add 1 Minute feature. When the
 pad is pressed, 1 minute is added to the
Minute Timer feature if this feature is already active. If the Minute Timer feature is not active and the 

 pad is pressed, the
Minute Timer feature will become active and will begin counting down from 1 minute. For further information on how to set the Minute Timer feature see To Set the Minute Timer instructions above.
3

Setting Oven Controls
Adjusting the Oven Temperature
Your oven thermostat has been precisely set at the factory. This setting may differ from your previous oven, however, so your recipe times may not give you the results you expect. If you think that the oven is cooking too hot or cool for your recipe times, you can adjust the thermostat so that the oven cooks hotter or cooler than the temperature displayed.
To Adjust Oven Temperature:
1.Press and hold the BAKE pad for 8 seconds. The display now indicates the amount of degrees offset between the original factory temperature setting and the current temperature setting. If the oven control has the original factory calibration, the display will read "0".
2.The temperature can now be adjusted up or down 35°F or 19°C, in 1°F or 1°C steps by pushing and holding the UP or DOWN ARROW pad. Adjust until the desired amount of degrees offset appears in the display. When lowering the oven temperature, a minus sign (-) will appear before the number to indicate that the oven will be cooler by the displayed amount of degrees.
3.When you have made the desired adjustment, wait 5 seconds and the display will go back to the time of day.
Note: Oven temperature adjustment made will not change the Self-Cleaning or Broil feature temperature.
To Set Control for Continuous Bake or 12 Hour Energy Saving
The oven control has a built-in 12 Hour Energy Saving feature that will shut off the oven if the control is left on for more than
11 hours and 59 minutes. The oven can be programmed to override this feature for continuous baking.
To set control for continuous baking:
1.Press and hold the STOP (Model A) or TIMER ON/OFF (Model B) pad for 7 seconds until a tone is heard.
2.Within 5 seconds, press the UP or DOWN ARROW pad to switch between Continuous Bake and 12 Hour Energy Saving mode. The display will show either "— — hr" or "12hr".
If "- - hr" appears, the oven will be set to continuous baking. If "12hr " appears, the oven is set to 12 hour energy saving mode.
3.Wait 5 seconds or press the STOP or CLEAR/OFF pad to accept the changes.
To Set or Change the Temperature for Normal Baking
The oven can be programmed to bake at any temperature from 170°F to 550°F (77°C to 288°C).
To Set the Controls for Baking:
1.Press the BAKE pad."— — —°" appears in the display.
2.Within 5 seconds, Press the UP or DOWN ARROW pad. The display will show "350°F (177°C)." By holding the UP or DOWN ARROW pad, the temperature can then be adjusted in 5°F (1°C if control is set to display Celsius) increments.
3.8 seconds after the UP or DOWN ARROW pad is released, the oven will begin heating to the selected temperature. When the displayed temperature reaches the desired baking temperature, the preheat indicator light will turn OFF.
4.To cancel the baking function, press the STOP or CLEAR/OFF pad.
To Change the Oven Temperature after Baking has Started:
Press the UP or DOWN ARROW pad to increase or decrease the set temperature.
4
Setting Oven Controls
Note: The time of day must first be set in order to operate the oven.
Speed BakeTM Cooking System (Model B Only)
Speed BakeTM Cooking System uses a fan to circulate the oven’s heat uniformly and continuously around the oven. This improved heat distribution allows for fast, even cooking and browning results. It also gives better baking results when using two racks at the same time.
Heated air flows around the food from all sides, sealing in juices and flavors. Meats cooked with Speed BakeTM Cooking System are juicer. Poultry is crisp on the outside while staying tender and moist on the inside. Breads and pastry brown more evenly. Speed BakeTM Cooking System cooks most foods faster and more evenly than conventional baking.
Benefits of Speed BakeTM Cooking System
-Foods cook up to 30% faster, saving time and energy.
-Two racks can be used with more even cooking and browning.
-No special pans or bakeware needed; but for most bakery pan without sides have better results.
General Cooking Instructions
1. To convert baking times from normal recipes to Speed Bake times, start with a 30% reduction in time and increase the time until desired doneness is obtained. Time reductions will vary depending on the amount and type of food.
2. Preheating is not necessary when cooking with Speed Bake, except with items such as cakes, cookies, biscuits, breads, etc.
3. When using two racks at the same time, place them in positions 1 and 3 for the best results. 4. When baking pastries with Speed Bake, set temperature 25°F (13°C) degrees lower than
the recommended setting for best results.
To Set or Change the Temperature for Speed Baking (Model B only)
The oven can be programmed to bake at any temperature from 170°F to 550°F (77°C to 288°C).
To Set the Controls for Normal or Speed Baking:
1.Press the SPEED BAKE pad."— — —°" appears in the display.
2.Within 5 seconds, Press the UP or DOWN ARROW pad. The display will show "350°F (177°C)." By holding the UP or DOWN ARROW pad, the temperature can then be adjusted in 5°F (1°C if control is set to display Celsius) increments.
3.8 seconds after the UP or DOWN ARROW pad is released, the oven will begin heating to the selected temperature. When the displayed temperature reaches the desired baking temperature, the preheat indicator light will turn OFF.
4.To cancel the baking function, press the CLEAR/OFF pad.
To Change the Oven Temperature after Baking has Started:
Press the UP or DOWN ARROW pad to increase or decrease the set temperature.
5

Setting Oven Controls (continued)
Bake |
Speed bake Nettoyage |
Bake time |
|
||
Cuisson |
Speed |
Temps de |
|
||
Cuire |
rapide |
clean |
cuisson |
|
|
|
|
|
|
Oven |
|
|
|
|
|
Four |
|
Broil |
Keep warm |
Clean |
Start time |
Preheat |
|
Préchauffage |
|||||
Griller |
Garder |
Nettoyer |
Heure de |
Door Locked |
|
chaud |
départ |
||||
|
|
Porte Verrouillée |
|||
Speed Bake Oven
Four à Cuisson Rapide
Model A
Broil
Broiling is a method of cooking tender cuts of meat by direct heat under the broil element of the oven. Preheat the oven for 2 minutes. Be sure you center the broiler pan directly under the broil element for best results.
Arrange oven rack while oven is still cool. Position the rack as needed.
The broiler pan and its insert allow dripping grease to drain and be kept away from the high heat of the broiler. DO NOT use the pan without its insert. DO NOT cover the insert with foil. The exposed grease could ignite.


 Should an oven fire occur, close the oven door and turn off the oven. If the fire continues, throw baking soda on the fire or use a fire extinguisher. DO NOT put water or flour on the fire. Flour may be explosive and water can cause a grease fire to spread and cause personal injury.
To set for broiling:
1.Arrange the oven rack while oven is still cool.
2.Press the BROIL pad. "- -" will appear in the display.
3.Press the UP or DOWN ARROW pad until the desired broil setting level appears in the display. Press the UP ARROW pad for HI broil or the DOWN ARROW pad for LO broil. Most foods may be broiled at the HI broil setting. Select the LO broil setting to avoid excess browning or drying of foods that should be cooked to the well-done stage.
4.Place the insert on the broiler pan, then place the food on the insert. DO NOT use the pan without the insert or cover the insert with aluminum foil. The exposed grease could ignite.
5.Place the pan on the oven rack. Open the oven door to the broil stop position when broiling.
6.Broil on one side until food is browned. Turn and broil food on 2nd side. Note: Always pull the rack out to the stop position before turning or removing food.
7.When broiling is finished, press the STOP or CLEAR/OFF pad.
To Operate the Oven Light(s)
The interior oven light(s) will automatically turn ON when the oven door is opened.
Press the  or
or  pad to turn the interior light(s) ON and OFF whenever the door is closed.
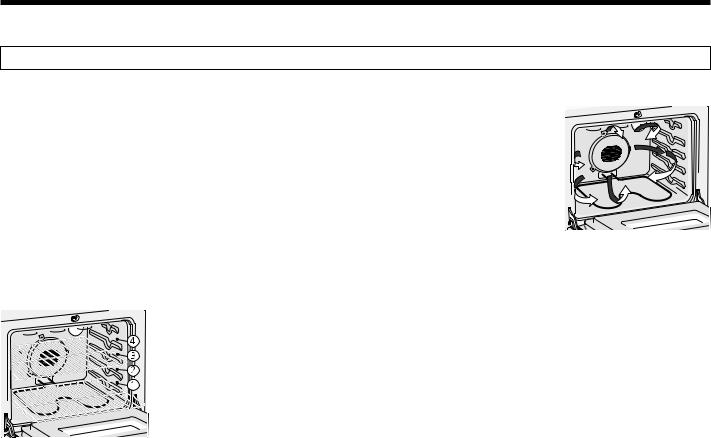
The interior oven light(s) is (are) located at the upper left (and right, some models) rear wall of the oven interior and is covered with a glass shield held by a wire holder. The glass shield must be in place whenever the oven is in use. To change the interior oven light(s), see changing the Oven Light in the General Care & Cleaning section in the Owner's Guide.
Model B
Grid
Clock
Horloge
Timer Clear/Off
On/Off
Minuterie Annuler
Broiler Pan
6
 Loading...