


Installation and Operating Instructions
Wall Fire SP4
Model No: SP4
08/18936/0 Issue 0
Dimensions
(millimetres)
Fig. 1
THESE INSTRUCTIONS SHOULD BE READ CAREFULLY AND RETAINED FOR FUTURE REFERENCE.
Important Safety Advice:
When using electrical appliances, basic precautions should be followed to reduce the risk of fire, electric shock, and injury to persons, including the following :
•If the appliance is damaged, check immediately with the supplier before installation and operation.
•Do not use this heater in the immediate surroundings of a bath, shower or swimming pool.
•Do not use outdoors.
•This heater must not be located immediately above or below a fixed socket outlet or connection box.
•Do not cover - Overheating will result if the heater is accidentally covered.
•In the event of a fault unplug the heater.
•Unplug the heater when not required for long periods.
•Although this heater complies with safety standards, we do not recommend its use on deep pile carpets or on long hair type of rugs.
•Do not leave young children, the elderly, or the infirm unsupervised in the vicinity of the heater.
•The appliance must be positioned so that the plug is accessible.
•If the supply cord is damaged it must be replaced by the manufacturer or service agent or similarly qualified person in order to avoid a hazard.
Electrical
WARNING – THIS APPLIANCE MUST BE EARTHED
This heater must be used on an AC ~ supply only and the voltage marked on the heater must correspond to the supply voltage.
Do not switch the appliance on until properly installed. Please read all the safety warnings and operating instructions.
General
Unpack the heater carefully and retain the packaging for possible future use, in the event of moving or returning the fire to your supplier.
Contents of Carton.
•SP4 Heater.
•Wall fixing bracket.
•Six fixing screws and six wall plugs.
•Remote control and batteries ( 3 AAA’s type).
•Spare bulb.
Do not connect the heater to an electricity supply until it is installed on a wall correctly. - see ‘Installation’.
When in operation there is a 300 watt heat output from the fuel effect, and an additional 120 watt output when the heated glass panel is in operation.
The heater can be used remotely or manually. - see ‘Operation’.
General features of remote control are:
•Activate/Deactivate heated glass panel.
•The illumination of fuel effect can be increased or decreased.
•Programmable timer.
Please note: Used in an environment where background noise is very low, it may be possible to hear the motor which operates the flame effect. This is normal and should not be a cause for concern.

Installation
Do not connect appliance until properly fixed to the wall and the Instruction leaflet is read fully.
This model is designed to be permanently fixed to a wall at a minimum height of 300mm.
The wall bracket must be fitted horizontally and the cable routed to the bottom right of the heater as in Fig 1.
|
|
|
|
|
|
|
|
outline of wall |
|
|
|
480 |
|
|
|
fixing bracket |
|||
|
|
240 |
|
|
|
|
|
||
|
|
|
|
|
|
|
|
|
|
|
|
|
|
|
|
|
|
|
|
|
|
|
|
|
|
|
|
|
|
|
|
|
|
|
|
|
|
|
|
|
|
|
|
|
|
|
|
|
|
566 |
|
558 |
|
||
|
|
|
1158
|
|
|
|
|
|
|
|
|
|
|
|
|
|
|
|
|
|
|
|
|
|
|
|
|
|
|
|
|
|
|
|
|
|
|
|
|
|
8 |
|
|
|
|
|
||||
|
|
outline of |
600 |
|
|
||||||||||
|
|
|
|||||||||||||
wall fire |
|
|
|
|
|
|
|
|
|
|
|||||
|
|
|
|
|
|
|
|
|
|
||||||
|
|
|
|
|
|
|
|
|
|
|
|
|
|
|
|
Recommended Fixing Dimensions - Fig. 2
 a
a
lift appliance |
ledge |
|
above wall |
||
fixing bracket |
|
|
wall |
|
ensure ledge |
bracket |
at back of |
|
|
|
fire engages |
|
|
wall bracket |
see |
|
|
detail ’1’ |
|
Detail ’1’ |
wall bracket
slide down over b bracket, ensure
that ledge of appliance engages behind wall bracket and is central
d |
c |
|
bring level |
rotate bottom |
|
with wall |
||
fixing bracket |
||
|
||
|
down from its |
|
|
transit position |
Fig. 4
A height of 600mm from bottom of heater to floor is recommended for optimum viewing of fuel bed (see Fig. 2 for recommended fixing dimensions).
For optimum viewing mark the top four screw fixing positions on wall in accordance with the recommended fixing dimensions - see Fig. 2.
wall |
wall |
||
plugs |
fixing |
||
|
|
bracket |
|
|
|
||
|
|
|
|
|
|
|
|
screws
Fig. 3
Drill holes with a 6mm drill bit. Fix the wall bracket using the four plugs and screws provided - see Fig 3.
Carefully lift the heater up ensuring that the top rear ledge of heater engages the wall bracket and is sitting centrally positioned. - see Fig 4 (b).
Rotate the bottom fixing bracket down. - see Fig 4 (c). Gently bring the heater level with the wall. - see Fig 4 (d).
mark hole centre with  pencil
Fig. 5
Mark the bottom hole position (see Fig. 5), remove the heater ensuring that the bottom fixing bracket is rotated up.
Drill and fit wall plug.
Refit the heater to the wall fixing bracket (i.e. follow steps as in Fig. 4 a,b,c and d above) and rotate the bottom fixing bracket down again and use the screw provided to permanently fix the heater in place.
The heater should not be connected until the instruction leaflet is read fully.
Manual Operation
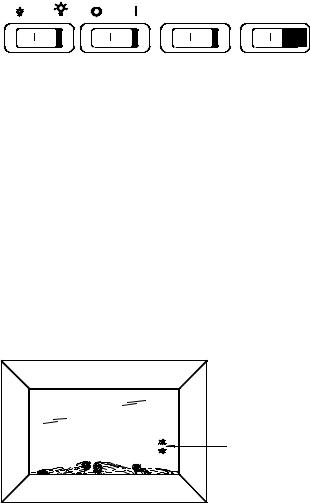
The Standby Switch (Switch 1) must be first turned ‘ON’ and the AUTO/MAN (Switch 2) switch set to ‘MANUAL’ to operate the manual controls - see Fig 6.
Note : When the fire is put in Manual mode the first time the flame effect will come on indicated by the Bottom neon coming on for 3 seconds - see Fig 7.
MAN AUTO ON OFF
Manual Controls
Fig. 6
Setting |
Operation |
Indication |
Flame Effect only |
Press the ‘ I ’ button (Switch 3) |
Top Neon |
Flame Effect & Heat On |
Press the ‘ I ’ button again (Switch 3) |
Bottom Neon |
Neons for |
indicating |
operation level |
Fig. 7
To go to the previous settings press the ‘ O ‘ button (Switch 3).
To increase or decrease the brightness of the flames, use the dimmer button (Switch 4). You can have any setting between full brightness and the flames totally off. The heat setting will remain the same.
To turn off the power the Standby Switch (Switch 1) must be turned ‘OFF’.
Note : Every time that manual mode is selected the previous light and heat settings come on automatically.
 Loading...