


TOC Two Color.fm Page i Tuesday, July 25, 2006 2:51 PM
Important Safety Precautions |
v |
||
1 Introduction |
|
|
|
WELCOME 2 |
|
|
|
HOW TO USE THIS GUIDE |
2 |
|
|
ABOUT YOUR DISH NETWORK ACCOUNT 4 |
|||
WATCHING TV NOW |
5 |
|
|
ADDITIONAL SERVICES |
6 |
|
|
ABOUT SATELLITE TV RECEPTION |
6 |
||
WHY CONNECT TO A PHONE LINE |
7 |
||
MOVING LOGO 7 |
|
|
|
2 Receiver and Remote Controls |
|||
SATELLITE RECEIVER OVERVIEW |
10 |
||
DUAL AND SINGLE MODES |
11 |
|
|
REMOTE CONTROLS |
14 |
|
|
SATELLITE RECEIVER FRONT PANEL |
19 |
||
SATELLITE RECEIVER BACK PANEL |
19 |
||
USING THE MENUS |
20 |
|
|
USING TEXT FIELDS |
22 |
|
|
i

TOC Two Color.fm Page ii Tuesday, July 25, 2006 2:51 PM
Table of Contents
3 Finding Programs to Watch |
||
CHANGING CHANNELS 26 |
|
|
USING THE PROGRAM GUIDE |
26 |
|
USING THE BROWSE BANNER |
28 |
|
USING SEARCH TO FIND A PROGRAM |
29 |
|
FINDING A PROGRAM BY ITS THEME |
30 |
|
USING PICTURE-IN-PICTURE |
30 |
|
4 |
Pay-Per-View |
|
|
|
|
|
BUYING A PAY-PER-VIEW PROGRAM |
34 |
|
|
|
|
REVIEWING PAY-PER-VIEW PURCHASES |
|
34 |
|
|
5 |
Favorites Lists |
|
|
|
|
|
WHAT ARE FAVORITES LISTS? 38 |
|
|
|
|
|
CREATING OR CHANGING FAVORITES LISTS |
39 |
|
||
|
NAMING FAVORITES LISTS |
39 |
|
|
|
|
USING FAVORITES LISTS |
39 |
|
|
|
6 |
Parental Controls |
|
|
|
|
|
WHAT ARE PARENTAL CONTROLS? 42 |
|
|
||
|
CREATING OR CHANGING A PASSWORD |
43 |
|
||
|
LOCKING AND UNLOCKING YOUR RECEIVER |
43 |
|
||
|
CREATING OR CHANGING RATINGS LOCKS |
44 |
|
||
|
CREATING OR CHANGING CHANNEL LOCKS |
45 |
|
||
|
LOCKING OR UNLOCKING PAY-PER-VIEW CHANNELS |
45 |
|||
|
HIDING ADULT CONTENT OR LOCKED CHANNELS |
46 |
|||
|
LOCKING OR UNLOCKING THE FRONT PANEL |
47 |
|
||
ii

TOC Two Color.fm Page iii Tuesday, July 25, 2006 2:51 PM
Table of Contents
7 |
Interactive TV |
|
|
|
|
|
|
DISHHOME 50 |
|
|
|
|
|
|
CUSTOMER SUPPORT |
|
50 |
|
|
|
8 |
Timers |
|
|
|
|
|
|
TIMERS 52 |
|
|
|
|
|
|
USING THE TIMERS LIST |
54 |
|
|
|
|
|
SETTING UP AN AUTOMATIC TIMER |
54 |
|
|||
|
SETTING UP A MANUAL TIMER |
55 |
|
|
||
|
DELETING A TIMER |
56 |
|
|
|
|
|
OVERLAPPING TIMERS |
56 |
|
|
|
|
9 |
Remote Control Setup |
|
|
|
||
|
IMPROVING RECEIVER CONTROL |
58 |
|
|||
|
CONTROLLING OTHER COMPONENTS |
61 |
|
|||
|
THE RECOVER BUTTON |
68 |
|
|
|
|
|
SENDING DISCRETE POWER ON AND OFF |
70 |
||||
10 |
Receiver Customization |
|
|
|||
|
USING SHARED VIEW |
|
74 |
|
|
|
|
MODULATOR SETUP |
|
74 |
|
|
|
|
USING CALLER ID |
75 |
|
|
|
|
|
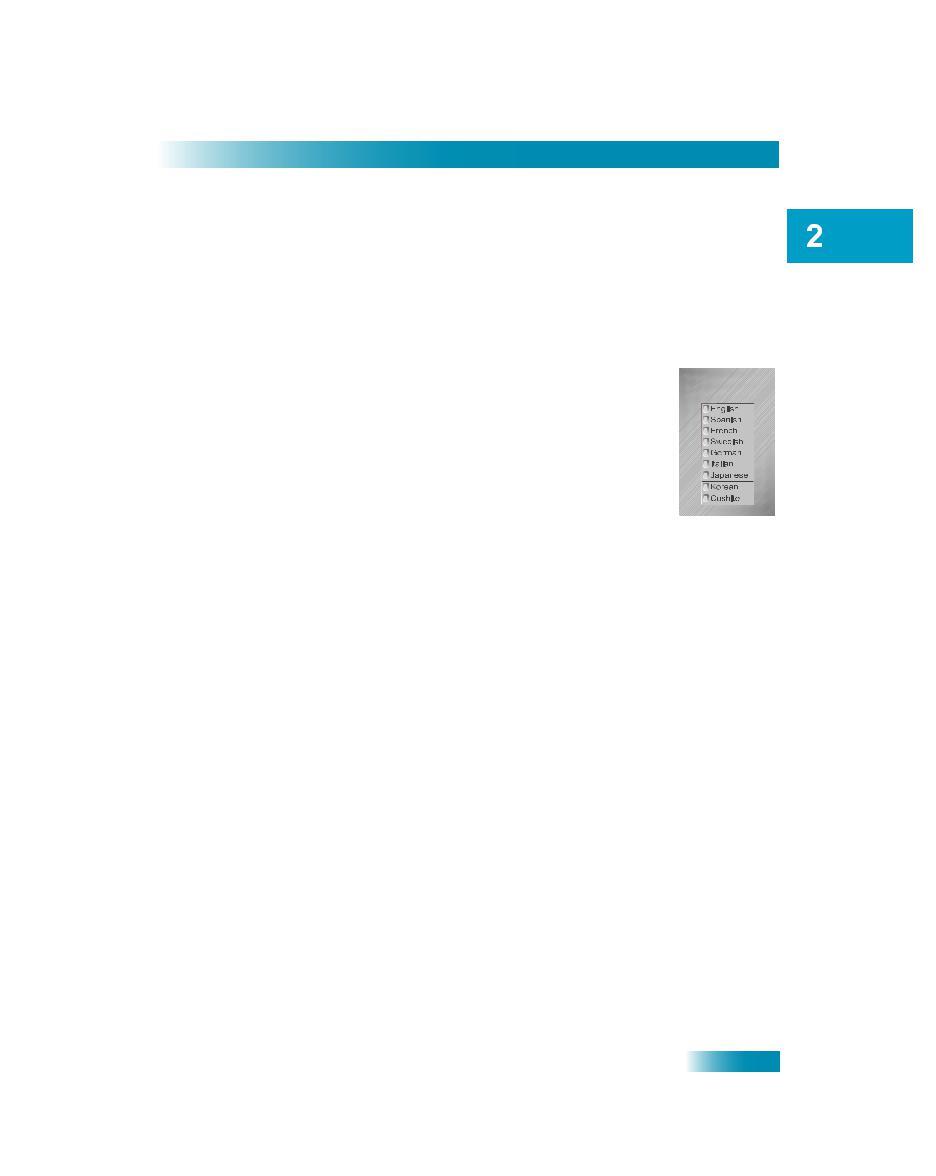
CHANGING LANGUAGES |
76 |
|
|
|
|
|
USING CLOSED CAPTIONING |
77 |
|
|
||
|
USING DOLBY® SURROUND SOUND |
78 |
|
|||
|
CHANGING THE PROGRAM GUIDE ORDER |
79 |
||||
|
CHANGING THE GUIDE DISPLAY |
79 |
|
|||
|
RESETTING TO FACTORY DEFAULTS |
80 |
|
|||
|
SCHEDULING RECEIVER UPDATES |
81 |
|
|||
|
INACTIVITY STANDBY |
|
81 |
|
|
|
iii

TOC Two Color.fm Page iv Tuesday, July 25, 2006 2:51 PM
Table of Contents
11 Connections and Setup
CONNECTING TO THE NEARBY TV (TV1) |
84 |
|
CONNECTING TO THE REMOTE TVS (TV1 OR TV2) 87 |
||
CONNECTING TO YOUR DISH ANTENNA |
91 |
|
CONNECTING THE PHONE LINE |
92 |
|
CONNECTING A VCR TO THE REMOTE TV |
94 |
|
CONNECTING OVER-THE-AIR ANTENNA |
95 |
|
USING TROUBLESHOOTING TOOLS |
100 |
|
Reference
TROUBLESHOOTING TABLES 104
REMOTE CONTROL DEVICE CODES 116
Appendix 119
Index 129
iv

222.book Page v Tuesday, July 25, 2006 1:30 PM
Important Safety Instructions
1Read these instructions.
2Keep these instructions.
3Heed all warnings.
4Follow all instructions.
5Do not use this apparatus near water.
6Clean only with a dry cloth.
7Do not block any ventilation openings. Install in accordance with the manufacturer’s instructions.
8Do not install near any heat sources such as radiators, heat registers, stoves, or other apparatus (including amplifiers) that produce heat.
9Do not defeat the safety purpose of the polarized or grounding-type plug. A polarized plug has two blades with one wider than the other. A grounding-type plug has two blades and a third grounding prong. The wide blade or the third prong are provided for your safety. If the provided plug does not fit into your outlet, consult an electrician for replacement of the obsolete outlet.
10Protect the power cord from being walked on or pinched, particularly at plugs, convenience receptacles, and the point where they exit from the apparatus.
11Use only attachments/accessories specified by the manufacturer.
12Unplug this apparatus during lightning storms or when unused for long periods of time.
13Refer all servicing to qualified service personnel. Servicing is required when the apparatus has been damaged in any way, such as the power supply cord or plug is damaged, liquid has been spilled or objects have fallen into the apparatus, the apparatus has been exposed to rain or moisture, does not operate normally, or has been dropped.
Apparatus shall not be exposed to dripping or splashing and no objects filled with liquids, such as vases, shall be placed on the apparatus.
v
222.book Page vi Tuesday, July 25, 2006 1:30 PM
Safety
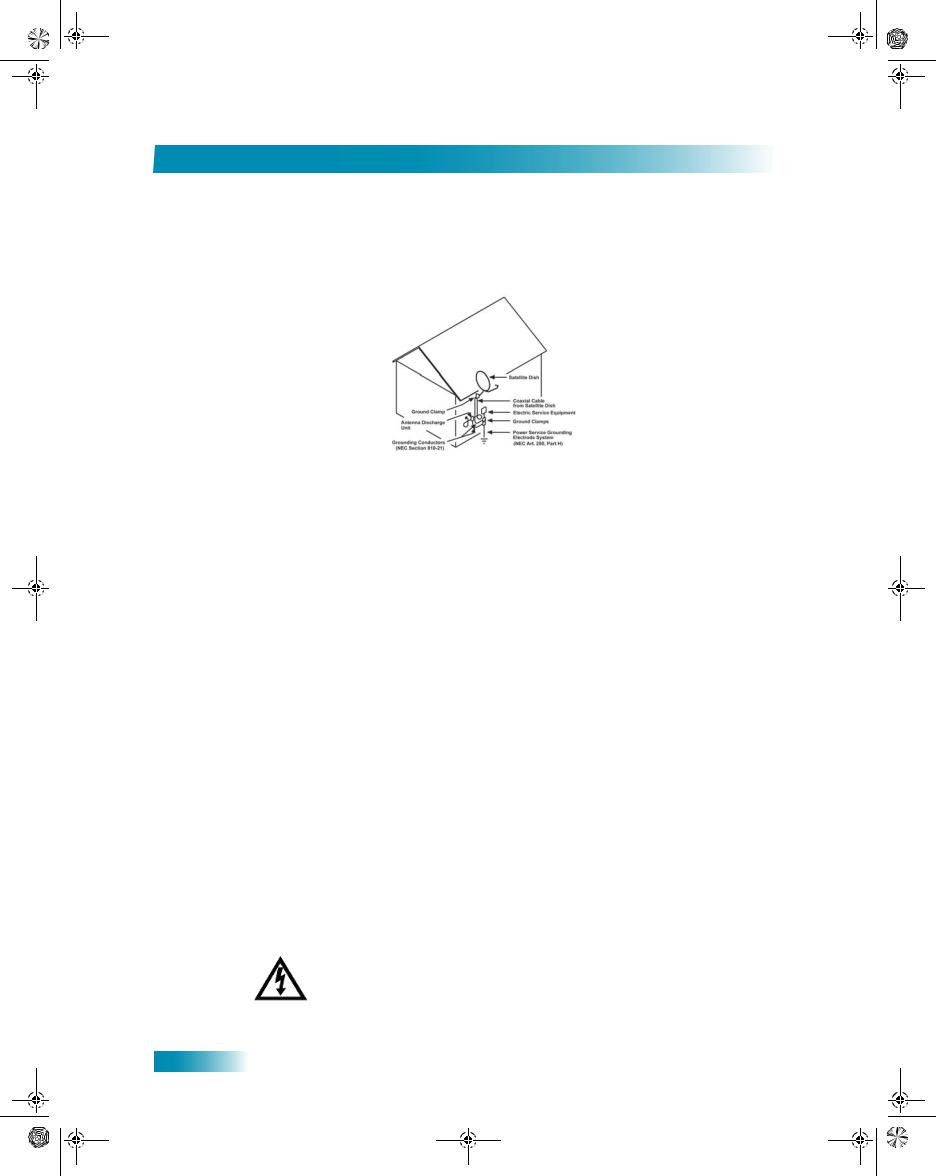
Note to Satellite TV System Installer: This reminder is provided to call the satellite TV system installer’s attention to Article 820-40 of the National Electrical Code (NEC) that provides guidelines for proper grounding and, in particular, specifies that the cable ground shall be connected to the grounding system of the building as
close to the point of cable entry as practical.
•Operate the receiver using only the type of power source indicated on the marking label. Unplug the receiver power cord by gripping the power plug, not the cord.
•Do not overload wall outlets or extension cords, as this can result in a risk of fire or electrical shock.
•Never insert objects of any kind into the receiver through openings, as the objects may touch dangerous voltage points or short out parts. This could cause fire or electrical shock.
•Do not locate the antenna near overhead light or power circuits, or where it can fall into such power lines or circuits. When installing the antenna, take extreme care to avoid touching such power lines or circuits, as contact with them can be fatal.
•Do not attempt to service the receiver yourself, as opening or removing covers may expose you to dangerous voltage, and will void the Limited Warranty. Refer all servicing to authorized service personnel.
Proper Care of Your Equipment
•Always handle the satellite receiver carefully. Avoid excessive shock and vibration at all times as this can damage the hard drive.
•Unplug the receiver from the AC power outlet before cleaning.
•If you have the receiver turned on and need to move it, be sure to unplug the receiver and let it sit for at least 30 seconds before moving it.
•The use of accessories or attachments not recommended by the receiver manufacturer will void the Limited Warranty.
•Do not place the receiver in an enclosure such as a cabinet without proper ventilation.
•Do not stack the receiver on top of or below other electronic devices as this can cause heat build-up and vibration.
•Do not install the receiver in any area where the temperature can be less than 40°F or more than 113°F. If the receiver is cold to the touch, do not plug it in immediately. Let it sit unplugged at room temperature for at least 45 minutes before plugging it in.
•Use an outlet that contains surge suppression or ground fault protection. For added protection during a lightning storm, or when the receiver is left unattended and unused for long periods of time, unplug the power cord from the wall outlet, disconnect the lines between the receiver and the antenna, and disconnect the telephone line. This will provide some protection against damage caused by lightning or power line surges.
On some TVs, the presence of fixed images for extended periods of time may cause them to be permanently imprinted on the screen. Consult your TV user guide for information on whether this is a problem for your TV, what operating/viewing restrictions apply to avoid this problem, and associated TV warranty coverage.
vi

Chapter 01 Two Color.fm Page 1 Tuesday, July 25, 2006 2:58 PM
Introduction
Introduction to DISH Network
So you bought yourself a new receiver and you want to know how it works, right? Take a look through this guide and you’ll quickly learn how to use all of the features. This chapter familiarizes you with your DISH Network satellite TV receiver.
• WELCOME
• HOW TO USE THIS GUIDE
• ABOUT YOUR DISH NETWORK ACCOUNT
• WATCHING TV NOW
• ADDITIONAL SERVICES
• ABOUT SATELLITE TV RECEPTION
• WHY CONNECT TO A PHONE LINE
1

Chapter 01 Two Color.fm Page 2 Tuesday, July 25, 2006 2:58 PM
Chapter 1
Welcome
WELCOME
Thank you for choosing DISH Network. You are about to experience the excitement and convenience of our Direct Broadcast Satellite (DBS) service, which delivers the very best picture and sound quality. DISH Network consistently provides the latest products and satellite-delivered services — with high performance, ease of operation, and a wide variety of entertainment options.
HOW TO USE THIS GUIDE
This section explains how the guide is divided and the conventions used throughout.
Guide Overview
The information in this guide is separated into several chapters to make it easy for you to find exactly what you’re looking for:
•Chapter 1 - Introduction gives you a brief overview of DISH Network and your new receiver.
•Chapter 2 - Receiver and Remote Controls explains the basic features of your system and how to use the remote controls, front panel buttons, and back panel connections.
•Chapter 3 - Finding Programs to Watch describes how to change channels and look for programs.
•Chapter 4 - Pay-Per-View shows you how to order and watch Pay-Per-View programs.
•Chapter 5 - Favorites Lists explains how to create, name, and use favorites lists.
•Chapter 6 - Parental Controls explains how to set locks and passwords.
•Chapter 7 - Interactive TV describes how to use the DishHOME Interactive TV features of your satellite TV system.
•Chapter 8 - Timers shows you how you can record and play back your favorite programs when you want to watch them.
•Chapter 9 - Remote Control Setup contains instructions for programming your remote to control your satellite receiver and equipment like a TV or VCR.
•Chapter 10 - Receiver Customization shows you how to customize your receiver.
•Chapter 11 - Connections and Setup explains how to connect your satellite receiver to your TV and equipment like a VCR.
Tips and Questions
At then end of most chapters, you’ll find two important sections that are there to give you additional information:
Tips that let you in on secrets of using your satellite TV system more efficiently.
Answers to Questions you might have about the features described in the chapter.
2
Chapter 01 Two Color.fm Page 3 Tuesday, July 25, 2006 2:58 PM
Introduction
How to Use this Guide
Guide Conventions
•The names of remote control buttons are all uppercase. Example: Press SAT.
•Select means to move the highlight to an on-screen option or choice in a list and press SELECT on the remote control.
Example: Select the Locks option.
•Where this guide mentions nearby TV, it refers to the TV near the receiver. The nearby TV receives TV1 menus and programming from the receiver’s TV1 outputs and is connected using short audio/video cables.
•Where this guide mentions remote TV, it refers to the cable-ready TV(s) located in rooms away from the receiver. The remote TV receives TV2 menus and programming from the receiver’s TV2 outputs through your in-home cable system.
•Where this guide mentions remote control, it refers to either Remote Control 1 when viewing a nearby TV or Remote Control 2 when viewing the remote TV(s). If a specific remote control must be used, this guide will refer directly to Remote Control 1 or Remote Control 2.
•The instructions in this guide are shown in two ways:
–Instructions in the form of pictures are handy if you’d like to learn something quickly. These instructions are numbered left to right as shown in the sample below.
–Instructions that are written out are helpful if you’d like to learn more details.
3
Chapter 01 Two Color.fm Page 4 Tuesday, July 25, 2006 2:58 PM
Chapter 1
About Your DISH Network Account
ABOUT YOUR DISH NETWORK ACCOUNT
This section describes how to order your packages and provides information on how to find information about your DISH Network account.
Ordering Your Programming Packages
Before you can enjoy your new receiver, order your programming packages.
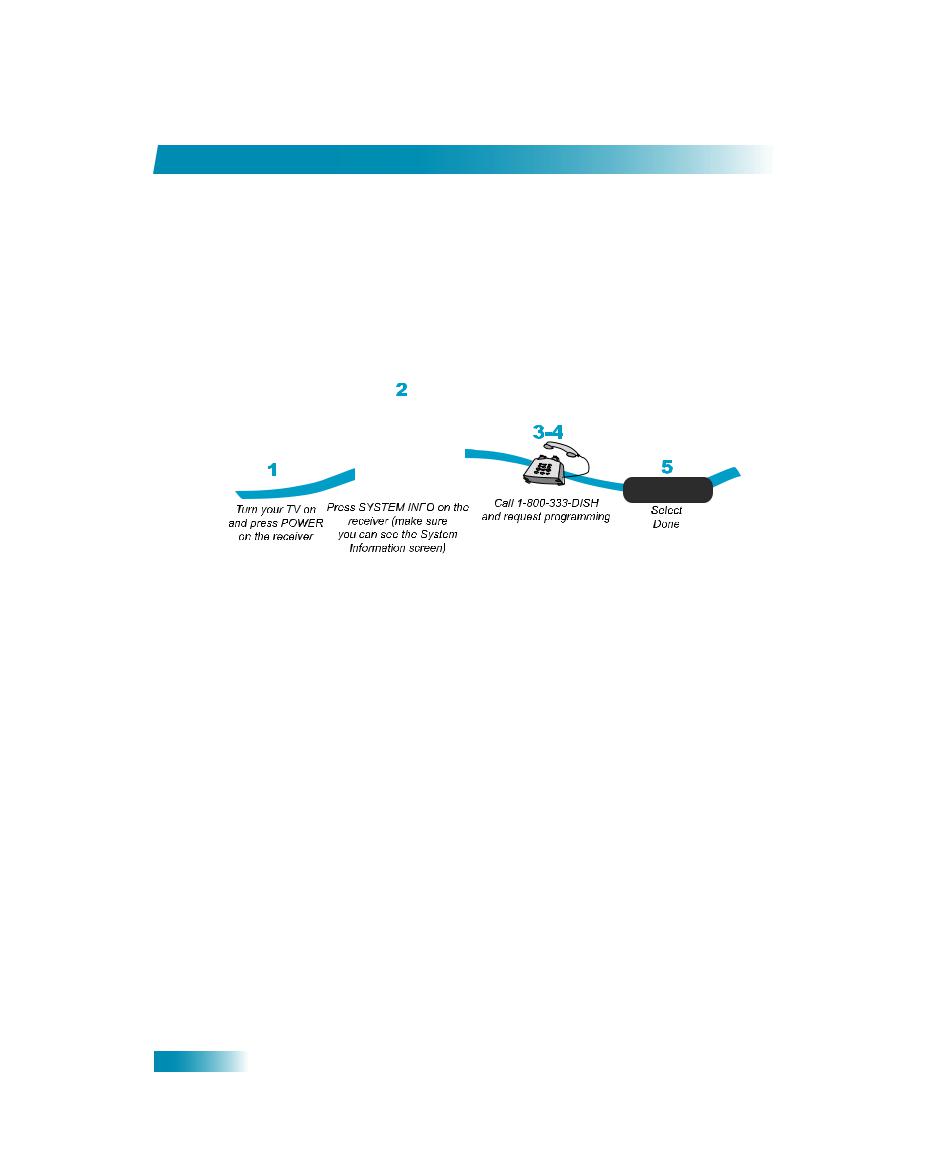
1Press POWER on the front panel to turn on the receiver.
2Press SYSTEM INFO on the front panel to display the receiver’s System Information menu on the nearby TV screen.
3Call 1-800-333-DISH (3474) and tell the Customer Service Center the system has been installed and you would like to begin receiving services. A representative will explain the available program packages. Give the representative information from the System Information screen, as requested.
4Your services will be turned on via the satellite signal. This process usually takes just a few minutes.
5Select DONE.
Where to Find Information on Your Account
If you want to know about charges to your DISH Network account or if you would like to make changes to your programming packages, be sure to have your account information handy and choose one of the following:
•Go to our website at www.dishnetwork.com/my account.
•Press MENU on your remote control to open the Main Menu and then select Customer Support.
•Call DISH Network by calling 1-800-333-DISH (3474).
Note: Additional authorization may be required before high definition programming and/or over- the-air broadcasts can be viewed; additional fees may apply.
4

Chapter 01 Two Color.fm Page 5 Tuesday, July 25, 2006 2:58 PM
Introduction
Watching TV Now
WATCHING TV NOW
After you have ordered your programming package, you can begin enjoying the features of your new satellite TV receiver. When you complete these simple tours, you’ll be familiar with the remote control and be able to find a program to watch; pause live TV; and record your favorite shows.
Finding a Program to Watch
You’re already itching to use your remote control, so pick it up now and find something to watch. If you want to know more about watching TV, see Chapter 3 - Finding Programs to Watch starting on page 25.
5
Chapter 01 Two Color.fm Page 6 Tuesday, July 25, 2006 2:58 PM
Chapter 1
Additional Services
ADDITIONAL SERVICES
Pay-Per-View
Catch all the action on Pay-Per-View. Take a break from regular TV and order the latest movies, sports, and special events. For details on ordering Pay-Per-View events, see page 33. Be sure to connect an active phone line to your receiver before you order a Pay-Per-View event (see the instructions on page 92).
DishHOME
At DishHOME (press DISH on your remote control), you’ll find news, sports scores, weather information, TV and movie buzz, customer service, games, and more.
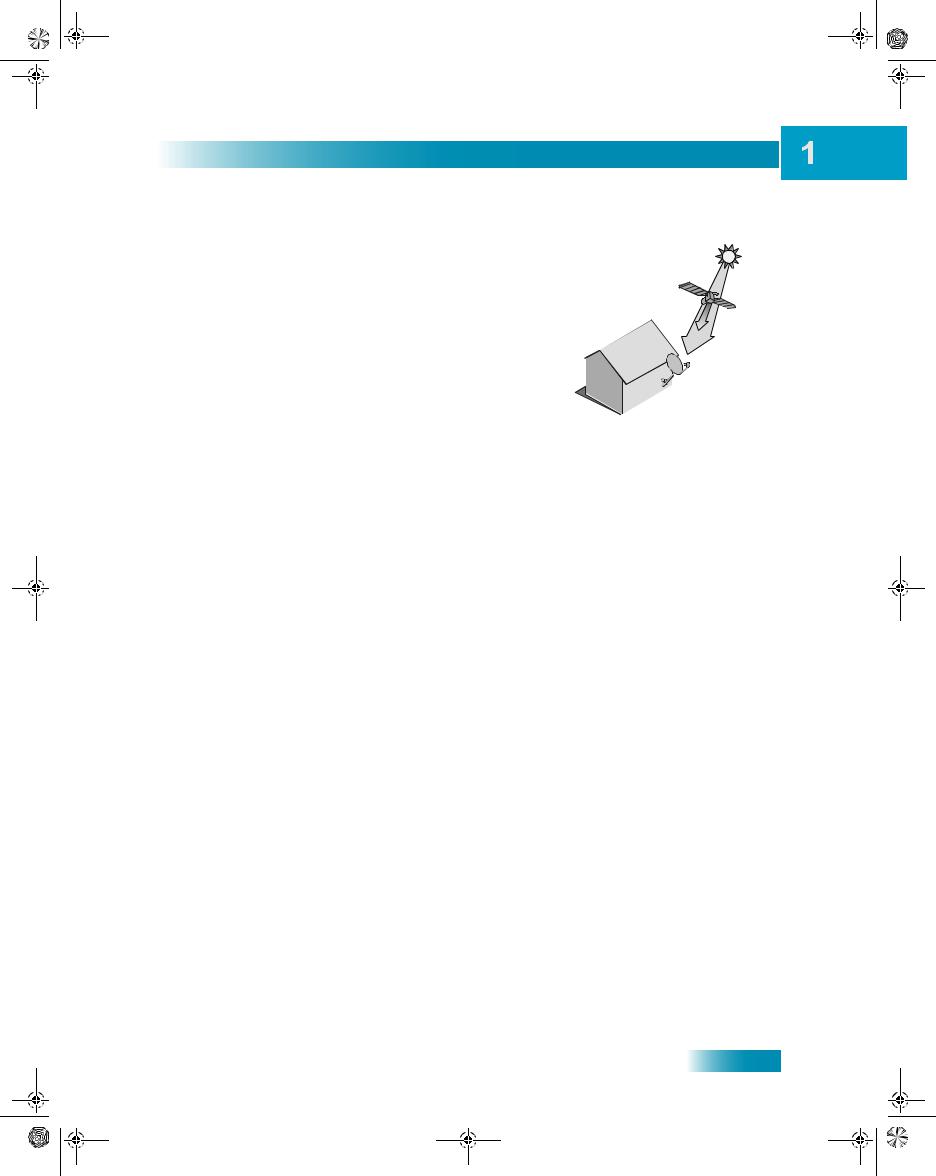
ABOUT SATELLITE TV RECEPTION
Satellite television uses satellites in a stationary orbit over the Earth to deliver television and audio programming. This type of orbit enables the satellites to stay aligned over one place on the surface of the Earth. Once the satellite dish is aimed at the satellite, the dish does not have to move to follow it.
Here’s something interesting! Noted science fiction author Arthur C. Clarke calculated the orbit that causes satellites to remain stationary in the sky. To this day the 22,000 mile high orbit bears the name Clarke Belt.
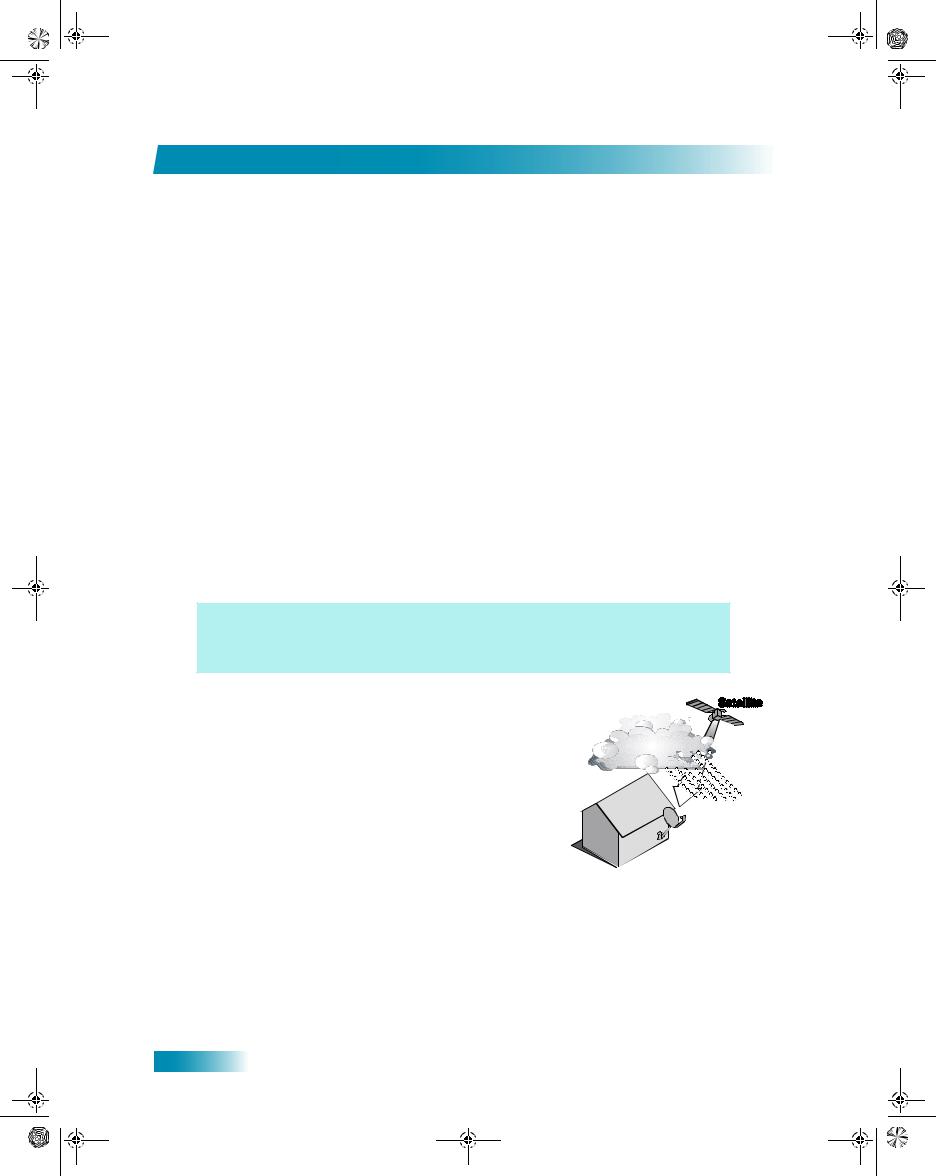
Rain and Snow Fade
Heavy rain, snow, or dense cloud cover can reduce the satellite signal, which may interrupt your programming service. Your service will return after the weather condition has passed. Aiming the satellite dish to get the strongest signal during installation, will help prevent rain and snow from interrupting the signal.
6
Chapter 01 Two Color.fm Page 7 Tuesday, July 25, 2006 2:58 PM
Introduction
Why Connect to a Phone Line
Solar Interference
Twice a year, the sun moves to a position behind the DISH Network satellite as it orbits the Earth. This event occurs during a few days at the beginning of the spring and the beginning of the autumn and lasts only a few minutes.
During these brief periods, you will not be able to see programs on DISH Network. When the sun has moved from behind the satellite, the programs will reappear. This is an unavoidable natural event for all television involving the use of satellites and has an adverse effect on many program providers.
WHY CONNECT TO A PHONE LINE
Your satellite receiver is equipped with a standard telephone jack that you use to connect to an active telephone line. Keep the receiver connected to an active telephone line so that you will be able to order pay-per-view programs using your remote control, use all of the DishHOME Interactive TV features, and other services from DISH Network (see the instructions on page 92).
MOVING LOGO
Whenever the receiver is turned off using the remote control or front panel POWER button, you will see the DISH Network logo moving around on your TV screen. This feature is included with your receiver to assure you that the connections between your receiver and TV(s) are not lost. Press POWER or SELECT on the remote control to resume watching satellite TV programming.
7

Chapter 01 Two Color.fm Page 8 Tuesday, July 25, 2006 2:58 PM
Chapter 1
Tips
TIPS
•Always have the latest software - Turn off the receiver when you’re not using it.
•Order Pay-Per-View with your remote control - Keep an active phone line connected to the receiver. Not only will you have Pay-Per-View at your fingertips, but you’ll also avoid unnecessary charges.
QUESTIONS
•How do I find something to watch? Refer to page 5. For more information on finding something to watch, see Chapter 3 - Finding Programs to Watch.
•Why are some of the channels red in the Program Guide? The channels that are red in the Program Guide are those which are not currently in your subscription. If you’d like to watch those channels, call 1-800-333-DISH (3474) or go to www.dishnetwork.com.
•I’m looking at program information in a guide I bought at the grocery store, but nothing matches what’s on my DISH Network receiver, is something wrong? No. DISH Network programming may vary from what you’ll find in a local publication. For best results, use the Program Guide on your receiver or order DISH Entertainment.
8

Chapter 02 Two Color.fm Page 9 Tuesday, July 25, 2006 3:02 PM
Receiver and Remote Controls
About Your Satellite Receiver
This chapter helps you get to know your remote control, which lets you use all the functions of your receiver. After you read the information here, be sure to practice what you learn so that you can quickly understand what’s presented in later chapters.
What you’ll find in this chapter:
•SATELLITE RECEIVER OVERVIEW
•DUAL AND SINGLE MODES
•REMOTE CONTROLS
•SATELLITE RECEIVER FRONT PANEL
•SATELLITE RECEIVER BACK PANEL
•USING THE MENUS
•USING TEXT FIELDS
9

Chapter 02 Two Color.fm Page 10 Tuesday, July 25, 2006 3:02 PM
Chapter 2
Satellite Receiver Overview
SATELLITE RECEIVER OVERVIEW
This section gives you an overview of your DISH Network satellite TV receiver system.
Satellite Receiver
Use this dual-tuner satellite receiver to watch different programs in two locations:
•Nearby TV (TV1) - Programming from the receiver is delivered to the nearby TV using short audio/video cables.
•Remote TV(s) (TV2) - Programming from the receiver is delivered to the remote TV(s) using existing in-home coaxial cable.
Remote Controls
Two remote controls come with your receiver:
•Remote Control 1 - An Infrared (IR) remote to control programming for the nearby TV (TV1). This remote is labeled with a green number 1, which matches similar markings on the receiver output connections and the menus for the nearby TV.
•Remote Control 2 - An Ultra-High Frequency Pro (UHF Pro) remote to control programming at a remote TV (TV2). This remote is labeled with blue number 2,
which matches similar markings on the receiver output connections and the menus for the remote TV. Be sure to set up the remote to control the receiver (see page 58).
10
Chapter 02 Two Color.fm Page 11 Tuesday, July 25, 2006 3:02 PM
Receiver and Remote Controls
Dual and Single Modes
DUAL AND SINGLE MODES
Your satellite receiver includes two modes of operation: Dual and Single. These modes increase your entertainment options because you’ll be able to choose how you watch your favorite programs.
Dual Mode
While in Dual Mode, you can use this dual-tuner satellite receiver to watch different programming in two separate locations:
•Nearby TV - Programming from the receiver is delivered to the TV near the receiver using short audio/video cables and is controlled using Remote Control 1. The Nearby TV is also referred to as “TV1.”
•Remote TV - Programming from the receiver is delivered to a TV located in another room using existing in-home coaxial cable and is controlled using Remote Control 2. The video displayed on the remote TV is always in standard definition (SD). The Remote TV is also referred to as “TV2.”
You can tell your receiver is in Dual Mode because the Mode front panel indicator will light and the menu and other screens will display Dual Mode (as shown below).
11
Chapter 02 Two Color.fm Page 12 Tuesday, July 25, 2006 3:02 PM
Chapter 2
Dual and Single Modes
Single Mode
Single Mode provides dual-tuner receiver features—like Picture-in-Picture (PIP)—to all connected TVs.
Single Mode delivers the same programming to all of the TVs connected to the satellite receiver and allows this programming to be controlled by either remote control. The format of the programming shown on the remote TV(s) is standard definition (SD) and high definition (HD) is shown only on the nearby TV. You can tell you are in Single Mode because the Mode front panel indicator will light and the menus and other screens will display Single Mode (as shown below).
12
Chapter 02 Two Color.fm Page 13 Tuesday, July 25, 2006 3:02 PM
Receiver and Remote Controls
Dual and Single Modes
Switching Between Dual and Single Mode
Put the satellite receiver in Single or Dual Mode by pressing the front panel MODE button. Keep the following items in mind when switching the satellite receiver between Dual and Single Mode:
|
|
|
|
|
|
|
|
|
|
|
|
|
|
|
|
|
|
|
Dual Mode |
|
|
|
|
Single Mode |
|
|
|
|
|
|
|
|
|
|
|
|
||
|
|
|
|
|
|
|
|
|
|
|
||
|
|
|
|
|
|
|
|
|
|
|
||
|
|
|
|
|
|
|
|
|
|
|
||
|
|
|
|
|
|
|||||||
|
|
|
|
|
|
|
|
|
|
|
|
|
|
Indications |
Dual Mode front panel |
Single Mode front panel |
|
||||||||
|
indicator lights. |
indicator lights. |
|
|||||||||
|
|
|
||||||||||
|
|
|
|
|
|
|
|
|
|
|
|
|
|
|
Favorites Lists set up for |
Only Favorites Lists set up |
|
||||||||
|
Favorites |
both outputs (TV1 and TV2) |
for TV1 are available. The |
|
||||||||
|
are available. |
lists for TV2 are not lost, |
|
|||||||||
|
Lists |
|
||||||||||
|
|
|
|
|
|
they are simply unavailable |
|
|||||
|
|
|
|
|
|
|
|
|||||
|
|
|
|
|
|
|
in Single Mode. |
|
||||
|
|
|
|
|
|
|
|
|
|
|
|
|
|
|
Parental Controls set up for |
Parental Controls set up for |
|
||||||||
|
Parental |
both outputs (TV1 and TV2) |
only TV1 are available. The |
|
||||||||
|
are available. |
Parental Controls for TV2 |
|
|||||||||
|
Controls |
|
||||||||||
|
|
|
|
|
|
are not lost, they are simply |
|
|||||
|
|
|
|
|
|
|
|
|||||
|
|
|
|
|
|
|
unavailable in Single Mode. |
|
||||
|
|
|
|
|
|
|
|
|
|
|
|
|
|
|
Closed Captioning (CC) |
CC from the receiver is |
|
||||||||
|
Closed |
from SD and HD |
available on both outputs |
|
||||||||
|
programming is available on |
(TV1 and TV2). |
|
|||||||||
|
Captioning |
TV1. CC is available on TV2 |
|
|
|
|
|
|
||||
|
|
only when enabled on the |
|
|
|
|
|
|
||||
|
|
TV). |
|
|
|
|
|
|
||||
|
|
|
|
|
|
|
|
|
|
|
|
|
|
|
|
|
|
|
|
|
|
|
|
|
|
Note about changing from Dual to Single Mode: If someone is using the TV2 outputs in Dual Mode, you will see a popup on the nearby TV warning you that you are about to disrupt the use of the TV2 outputs.
13

Chapter 02 Two Color.fm Page 14 Tuesday, July 25, 2006 3:02 PM
Chapter 2
Remote Controls
REMOTE CONTROLS
The two remote controls give you access to all the features of your satellite receiver. You can set up each remote to control the satellite receiver and up to three other devices (see page 61). These devices can be a TV, a VCR or DVD player, and a third device.
This section describes how to use the various features on the two types of remote controls included with your satellite TV system.
Types of Remote Controls
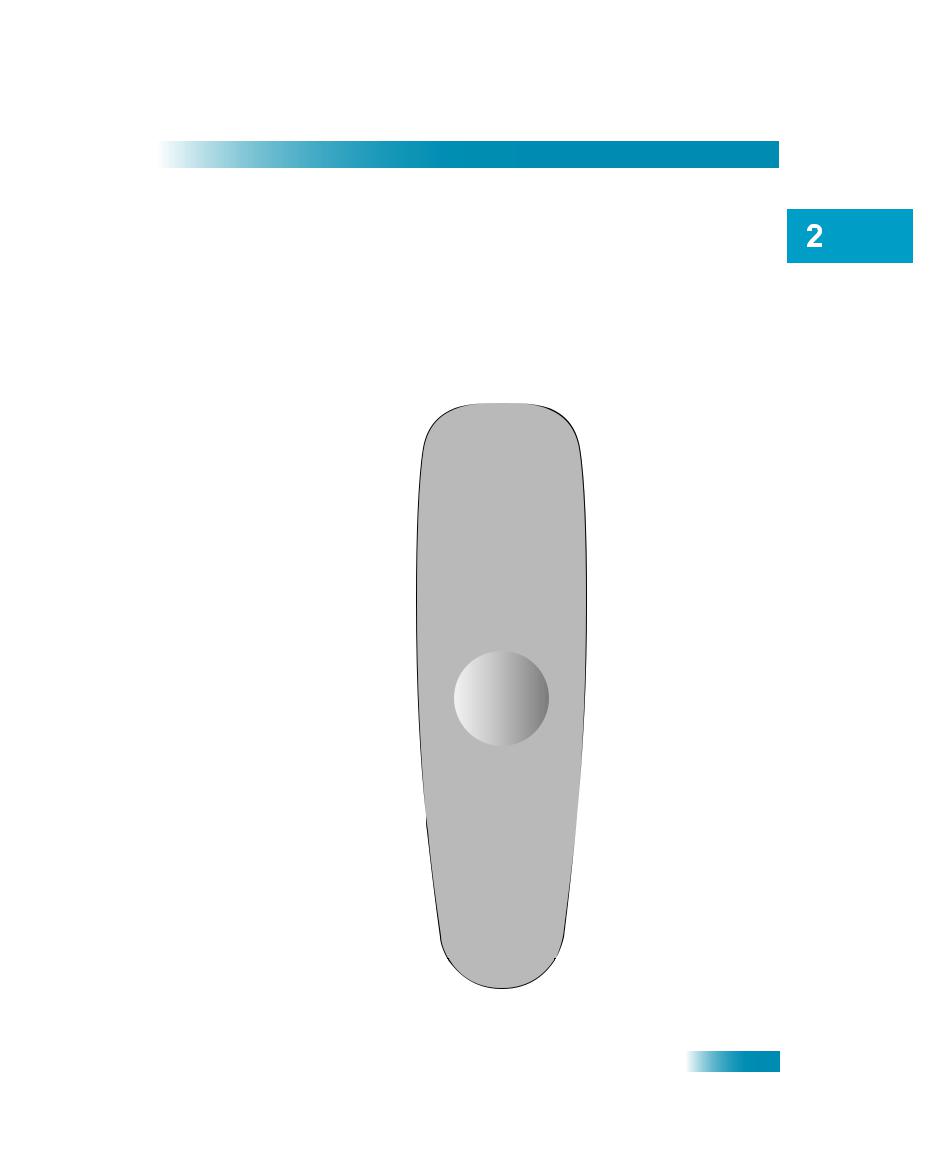
Remote Control 1 uses infrared (IR) signals to:
•Control TV1 menus for the nearby TV in Dual Mode.
•Control the satellite receiver in Single Mode.
IR signals travel only short distances (60 feet or less), and cannot go through walls or other solid objects. You must point the remote control directly at the device, with no objects blocking the line of sight.
Remote Control 1 uses IR signals
to control both the receiver and other devices programmed into the remote.
This remote control is identified by the green number 1 at the bottom of the remote control.
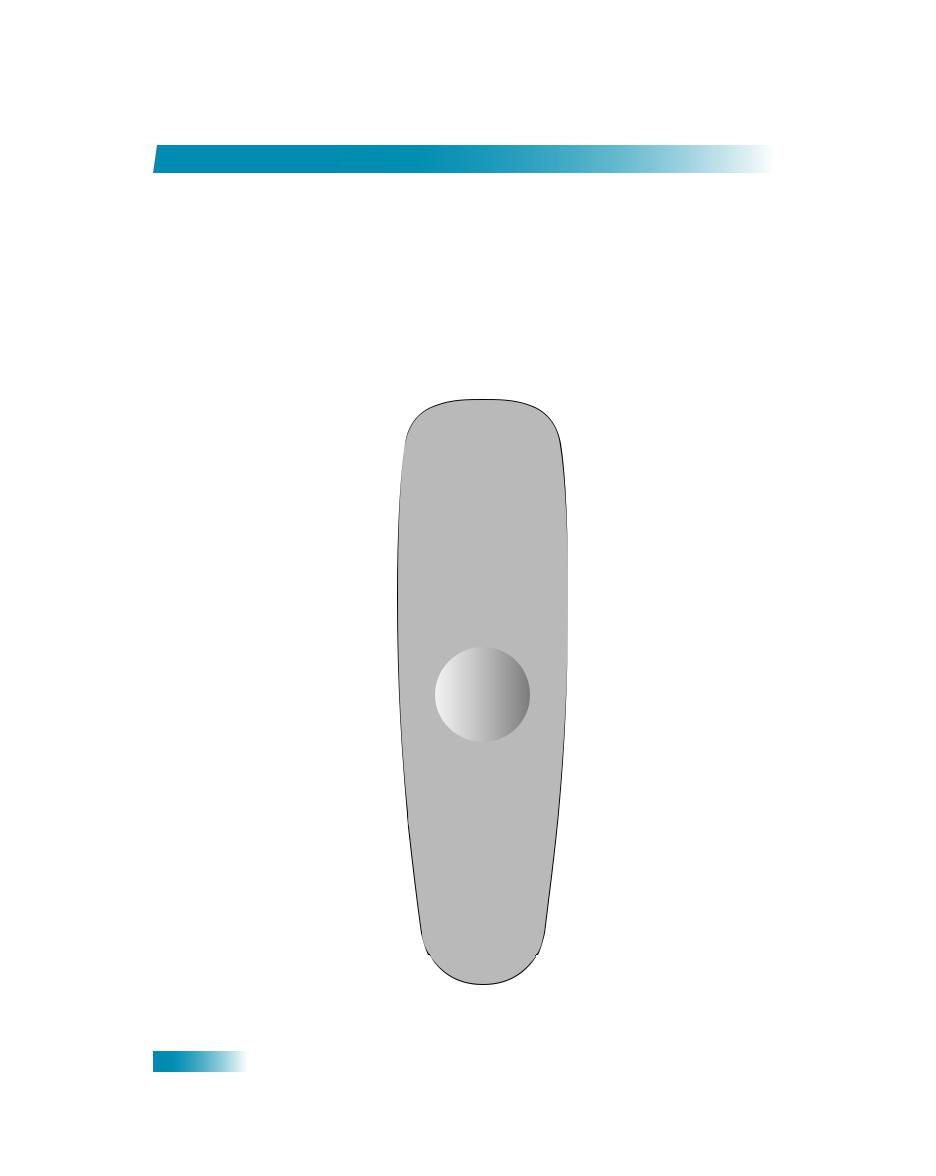
2 UHF
UHF
PRO
Remote Control 2 uses UHF Pro signals to:
•Control TV2 menus for the remote TVs in Dual Mode.
•Control the satellite receiver in Single Mode.
UHF Pro signals travel long distances and go through walls and other solid objects.
To use Remote Control 2 to control the receiver, you must attach the UHF antenna to the receiver back panel (see page 15).
Remote Control 2 uses IR signals to control other devices programmed into the remote. You must point the remote control directly at these devices, with no objects blocking the line of sight.
This remote control is identified by the blue number 2 at the bottom of the remote control.
14
Chapter 02 Two Color.fm Page 15 Tuesday, July 25, 2006 3:02 PM
Receiver and Remote Controls
Remote Controls
Remote Control Batteries
The remote control comes with AAA batteries. When you replace old batteries, you should replace all of the batteries. Use batteries of the same kind, for example, alkaline or carbon zinc. Don’t mix batteries of different kinds. Alkaline batteries last longer.
1Press down on the top of the battery cover and slide the cover off.
2Take out all of the old batteries.
3Put the new batteries in. Make sure you match the plus (“+”) ends with the plus markings on the battery case.
4Slide the cover back into place.
Low Battery Warning
When you see a low battery warning message on your screen below the Program Banner, the batteries in your remote control are weak and need to be replaced.
Here's a helpful hint...Don’t wait until you see this warning to change the remote control batteries. If your remote control doesn’t seem to be working very well (for example, you have to press POWER more than once to turn the receiver on or off), it’s a good indication that the batteries are getting weak.
Attach the Remote Antenna
Attach the UHF remote antenna to the receiver's back panel Remote Antenna input so you can use your UHF Pro Remote Control 2. Without the UHF antenna, you cannot use the remote to control the receiver. See Adjusting the Remote Antenna on page 60 for more detailed information about improving the performance of your UHF Pro remote control.
15

Chapter 02 Two Color.fm Page 16 Tuesday, July 25, 2006 3:02 PM
Chapter 2
Remote Controls
Remote Control Buttons
16
Chapter 02 Two Color.fm Page 17 Tuesday, July 25, 2006 3:02 PM
Receiver and Remote Controls
Remote Controls
17
Chapter 02 Two Color.fm Page 18 Tuesday, July 25, 2006 3:02 PM
Chapter 2
Remote Controls
18
Chapter 02 Two Color.fm Page 19 Tuesday, July 25, 2006 3:02 PM
Receiver and Remote Controls
Satellite Receiver Front Panel
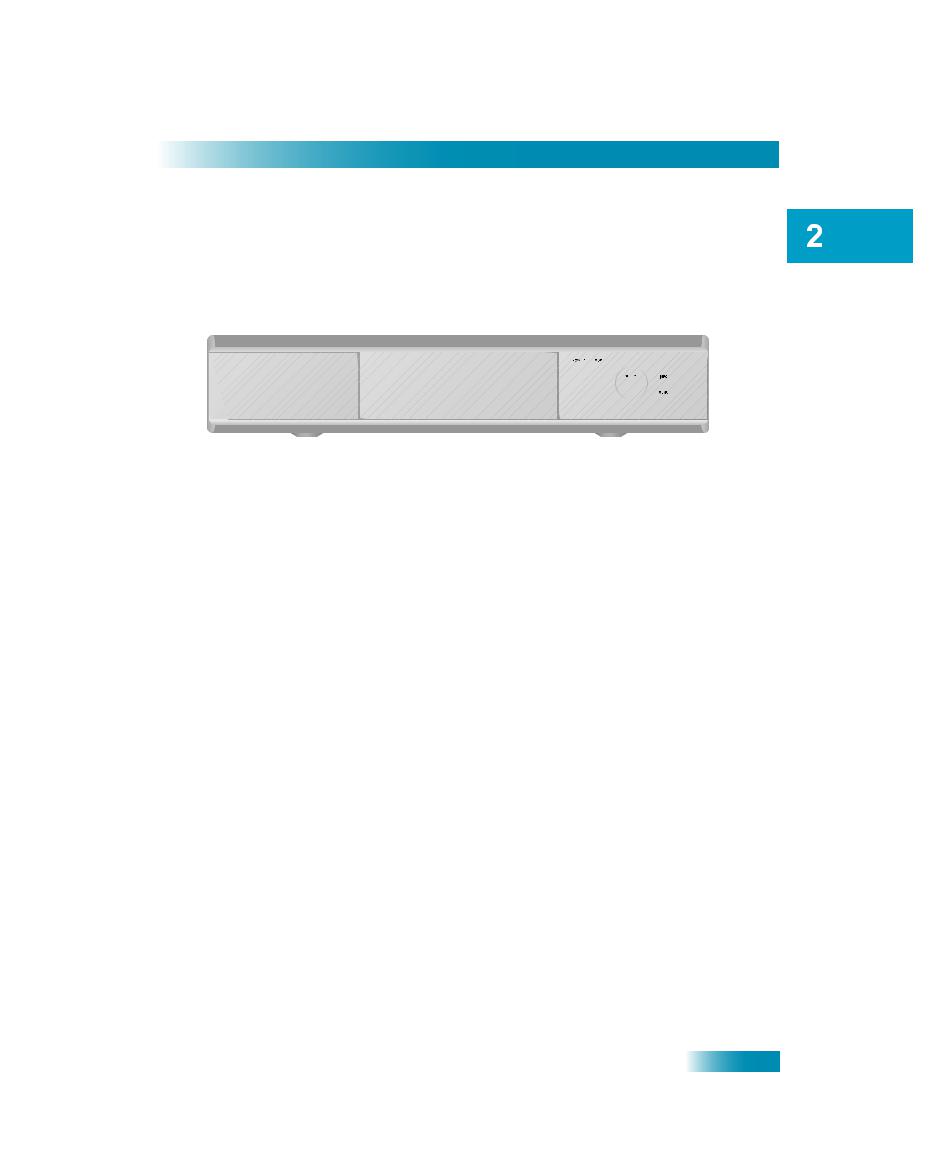
SATELLITE RECEIVER FRONT PANEL
SATELLITE RECEIVER BACK PANEL
19
Chapter 02 Two Color.fm Page 20 Tuesday, July 25, 2006 3:02 PM
Chapter 2
Using the Menus
USING THE MENUS
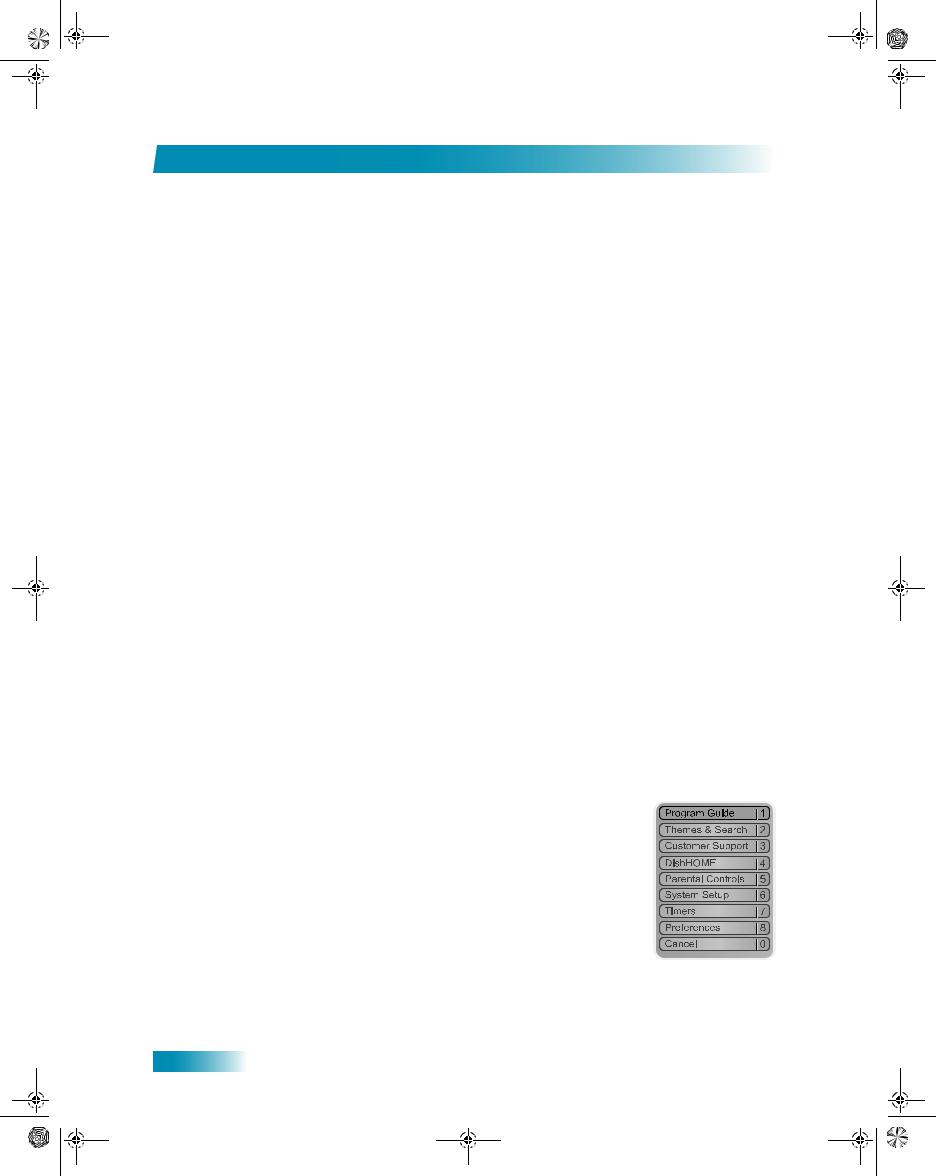
The menus make using the receiver and selecting programs quick and easy. Use the menus to control the receiver and to use its features, such as setting locks, choosing a program, or creating a favorites list.
Open and Close Menus
You can open the menus in either of two ways:
•Press MENU to open the Main Menu, then open any of the other menus from the Main Menu.
•Use the following buttons on the remote control:
–Press GUIDE to open the Program Guide.
–Press THEMES (LEFT ARROW) when watching a program to open the Themes and Search menu.
–Press BROWSE (RIGHT ARROW) to display the Browse Banner.
To close a menu and return to watching a program, press VIEW LIVE TV.
Highlighting Menu Options
Use the remote control ARROWS to move the on-screen highlight to the menu option. When you move the on-screen highlight, the option becomes amber.
Selecting Menu Options
When you select a menu option, that option takes effect right away. You can select a menu option in either of two ways:
•Move the highlight to the menu option using the remote control
ARROWS. Then press SELECT. In the example, Program
Guide is highlighted.
•If the option has a number next to it, press the number on the NUMBER PAD button that matches this number. When you use the NUMBER PAD, you do not need to highlight the option
first.
20
Chapter 02 Two Color.fm Page 21 Tuesday, July 25, 2006 3:02 PM
Receiver and Remote Controls
Using the Menus
List of Choices in the Menus
When you make a choice in a list, the receiver does not apply the change until you select Save or Done. If you do not want to save any changes, select Cancel to discard all the changes made in the menu.
There are two types of lists:
•A single choice list allows you to select only one choice at a time.
If you select another choice, your previous choice is deselected.
•A multiple choice list allows you to select more than one choice
at one time. If you select another choice, your previous choice(s) stays selected.
Canceling a Procedure
You can cancel a procedure in any of three ways:
•If you want to return to watching a program, press VIEW LIVE TV.
•If you want to return to the previous menu, press CANCEL.
•Wait a few moments and the menu will close automatically, discarding any changes you have made.
21

Chapter 02 Two Color.fm Page 22 Tuesday, July 25, 2006 3:02 PM
Chapter 2
Using Text Fields
USING TEXT FIELDS
When you use features on the receiver, you might be required to enter information, such as the name of a movie when using Search, into areas known as text fields. Your receiver has two basic ways to enter the information:
•Virtual Keyboard
•Remote Control NUMBER PAD
Using the Virtual Keyboard
Use the virtual keyboard letters to type the information. Use the LEFT, RIGHT, UP, and DOWN ARROWS to navigate around the keyboard. Select the characters you want.
Using the Number Pad
Use the letters above the NUMBER PAD on the remote control— just like on a telephone—while the highlight is in the field. For example, when looking for the channel and times to watch Rudy Friml Presents, you press 7 three times for an R, 8 two times for a U, 3 one time for a D, and 9 three times for a Y to spell the word “Rudy.”
While in the Text Field
When the cursor is in the text field:
Press the LEFT ARROW to delete characters.
Press FORMAT/* to backspace without deleting characters.
Press 0 to enter a blank space, such as between words.
Use the RIGHT ARROW to forward space without deleting characters.
22
Chapter 02 Two Color.fm Page 23 Tuesday, July 25, 2006 3:02 PM
Receiver and Remote Controls
Tips
TIPS
•You can use the Front Panel Locks to prevent the mode from being changed accidentally. See page 47 for instructions.
•The only way to turn off the TV2 outputs is by using POWER on Remote Control 2.
•In Dual Mode, Remote Control 1 is used to control TV1 menus on the nearby TV. Remote Control 2 is used to control TV2 menus on the remote TV(s).
•If you do not do anything in a menu for several minutes, the menu automatically closes. This will discard any changes you made, and display the program you were watching.
•To use Remote Control 2, be sure to attach the UHF Remote Antenna. See page 15 for details.
•On Remote Control 2, press FORMAT/* to change the aspect ratio (display shape) of HD channels displayed on remote TV(s).
QUESTIONS
•Why put the receiver in Single Mode? So you can use the PIP functions. While the receiver is in Single Mode, you can watch the same program on all the TVs connected to the receiver.
23

Chapter 02 Two Color.fm Page 24 Tuesday, July 25, 2006 3:02 PM
Chapter 2
Questions
Notes
24
 Loading...