


RPx400 USB Drivers and
Software Installation Guide
Congratulations on your purchase of a DigiTech RPx400. This installation guide contains the information to install the required USB drivers, X-Edit editor/librarian and Pro Tracks recording software for use with the RPx400. Please follow these instructions carefully to ensure smooth installation of each of these components.
A. Installing Pro Tracks
1.Start your computer. Close any open programs you have running. Place the Pro Tracks CD-ROM in your CD-ROM drive.
2.If you have autorun enabled, the Pro Tracks installation menu opens automatically, showing you several buttons. If the menu does not appear automatically, you can open it by selecting Start>Run and entering d:\Autorun.exe (where d:\ is the letter of your CD-ROM drive).
3.Click the Install Pro Tracks button and follow the installation instructions on the screen. If DirectX 8.1+ is not installed, the installer will automatically install it for you. If DirectX is installed at this time, you will need to restart your computer and return to Step 1.
NOTE: If you exit Setup without completing the installation, choose Start>Run, type d:\Autorun.exe (where d:\ is your CD-ROM drive), and click OK. This will reopen the installation menu. Click Install Pro Tracks to start installation again.
4.When the Installation Complete window appears deselect Launch Pro Tracks and Read Me check boxes and click Finish.
5.Click Exit from Pro Tracks Installation screen.
B. Installing DigiTech USB Drivers
You must install the USB drivers to use the RPx400’s USB connection with your computer. There are different installation procedures for Windows XP users and Windows 2000 users. Follow the directions in the section that applies to your operating system.
Windows XP Users
1.Take the RPx400 out of the box and plug the power in.
2.Remove the USB Warning sticker covering the RPx400’s USB port.
3.Connect the included USB cable to your computer and to the RPx400.
4.You will see multiple messages pop up from the task bar indicating that your computer has found a new USB device. There are multiple messages because there are four USB devices in the RPx400, two MIDI devices and two audio devices.
5.Wait until Windows has found and identified all of the USB devices from the RPx400. When the message "Your new hardware is installed and ready to use" appears,Windows has completed identifying your new hardware. however, installation of the software IS NOT complete.
6.Put the X-Edit software CD into your CD-ROM drive. The installation menu should

automatically appear (if installation does not start automatically, go to Start>Run, click on Browse, type d:\instmenu.exe (where d:\ is your CD-ROM drive), and click OK.
7.Now select USB Audio MIDI Drivers from the menu. You will see the following window appear:
8. Click Next. Installation of the drivers could take several minutes.
NOTE: If you don’t have the USB cable connected to the RPx400 you will see this:
If you see this message, cancel the installation and connect the USB cable to the RPx400 then restart the installation and begin with Step 1 of this section.
9.If the RPx400 is connected correctly to the computer you will see the following message from Windows:
10. Click Continue Anyway and you will see:
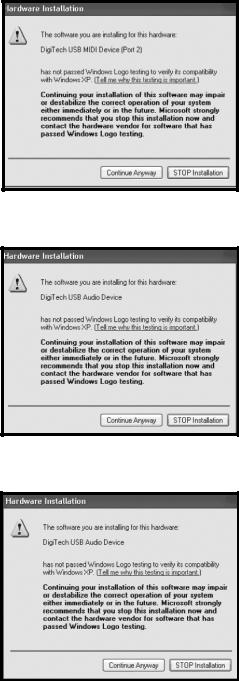
11. Click Continue Anyway and you will see:
12. Click Continue Anyway and you will see:
 Loading...