


 Loading...
C H A P T E R 2
Setting Up BBSM Hotspot
This chapter provides step-by-step procedures for setting up BBSM Hotspot. After you complete the procedures in this chapter, your BBSM Hotspot server should be fully operational.
The following two chapters, Chapter 3, “Advanced Configuration Options,” and Chapter 4, “System Operation,”, provide more detailed information and advanced options for configuring and using BBSM Hotspot.
Read the Before You Start section, then follow the step-by-step procedures to set up your BBSM Hotspot.
•Before You Start, page 2-1
•Running the Setup Wizard, page 2-2
•Changing the Default Security Passwords, page 2-23
•Configuring Windows for Multinet, page 2-26
•Configuring DNS Forwarding, page 2-30
•Feature Considerations, page 2-32
Before You Start
This section describes the prerequisites that you need to complete or check before setting up the software. After running the Setup Wizard in this chapter, you perform all operations from the Dashboard.
Before you configure BBSM, make sure that you complete the following tasks:
•First, read the ReadMeFirst web page, which launches the first time you start your BBSM Hotspot server.
•Then, read the first chapter to this guide, and the cautions below to avoid costly problems.
•From your BBSM Hotspot server desktop, open the BBSM Hotspot Configuration Requirements Checklist and complete it to make sure that you have all of the networking information you need to configure your server.
•Assemble the BBSM Hotspot server using the instructions in the Cisco BBSM Hotspot Hardware Assembly Guide. For information on obtaining this guide and other Cisco documentation, refer to the Obtaining Documentation section in the preface to this user guide.
•If you will be using secured (https) pages, obtain and install a Certificate Authority (third-party SSL). (Refer to Appendix B, “Installing an SSL Certificate.”)
Cisco BBSM Hotspot 1.0 User Guide
|
78-15293-01 |
2-1 |
|
|
|

Chapter 2 Setting Up BBSM Hotspot
Running the Setup Wizard
Caution
Caution
Caution
•Before beginning the basic configuration of your BBSM Hotspot server, be sure to determine if any service packs or patches need to be installed. We recommend that you install all available service packs and patches to maximize the functionality of your BBSM Hotspot server. For instructions on performing these installations, refer to Chapter 4, “System Operation.”
Do not change the Windows 2000 computer name of your BBSM Hotspot server, because the BBSM Hotspot MSDE database has the name embedded in the application. Changing the name breaks MSDE functionality, and you will see SQL server errors reported on your BBSM Hotspot server. This problem is a Microsoft issue and not one that the Cisco software team can change.
We recommend using the latest version of Internet Explorer to perform functions accessed through the BBSM Hotspot Dashboard.
When running the wizards, making any changes to BBSM Hotspot, or rebooting the BBSM Hotspot server, make sure that there are no active sessions. The Client Deactivation tool, located on the Dashboard, can be used to deactivate any active sessions.
Running the Setup Wizard
This section explains how to configure the BBSM Hotspot server by using the Setup Wizard. This wizard prompts you for your server’s basic configuration parameters and then configures the server with these settings.
It also prompts you to decide if you would like to create a custom web page at this time:
•If you decide to use a custom web page, the Custom Web Page Wizard launches after the Setup Wizard completes.
•If you decide not to create a custom web page, the first time you run the Setup Wizard, it applies the FreeAccess web page to all ports. If you run the Setup Wizard again at a later time, it will not change the port settings.
Note the following configuration and custom web page options that you can use:
•To configure your server using the Address Change Wizard and Switch Discovery Wizard, refer to Appendix A, “Advanced Wizards.”
•To configure your server manually on a per-port basis or change your configurations after the initial setup, refer to Configuring Your Server (Hotspot Configuration), page 3-1.
•To change your port settings after the initial setup, refer to Configuring Ports (Port Configuration), page 3-27.
•To create a custom web page after the initial setup, refer to Adding Custom Web Pages to BBSM Hotspot, page 3-24.
Note Be sure to complete the BBSM Hotspot Configuration Requirements Checklist before running the Setup Wizard.
Cisco BBSM Hotspot 1.0 User Guide
2-2 |
78-15293-01 |
|
|
Chapter 2 Setting Up BBSM Hotspot
Running the Setup Wizard
Caution Be sure to disconnect all active end-user sessions before running any BBSM Hotspot wizard, including the Setup Wizard. Refer to the “Deactivating Client Sessions” section on page 4-21.
Follow these steps to run the wizard.
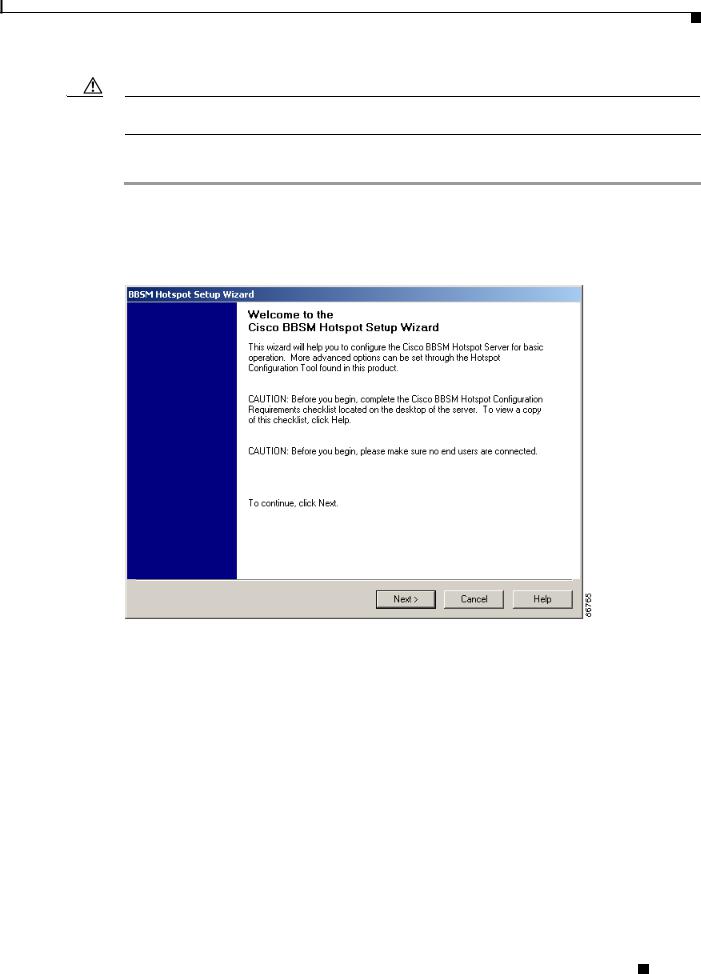
Step 1 From the Windows desktop, double-click the BBSM Hotspot Setup Wizard icon. (From the Windows desktop, you can also choose Start > BBSM Hotspot Wizards > BBSM Hotspot Setup Wizard.) The BBSM Hotspot Setup Wizard Welcome window appears. (See Figure 2-1.)
Figure 2-1 BBSM Hotspot Setup Wizard Welcome Window
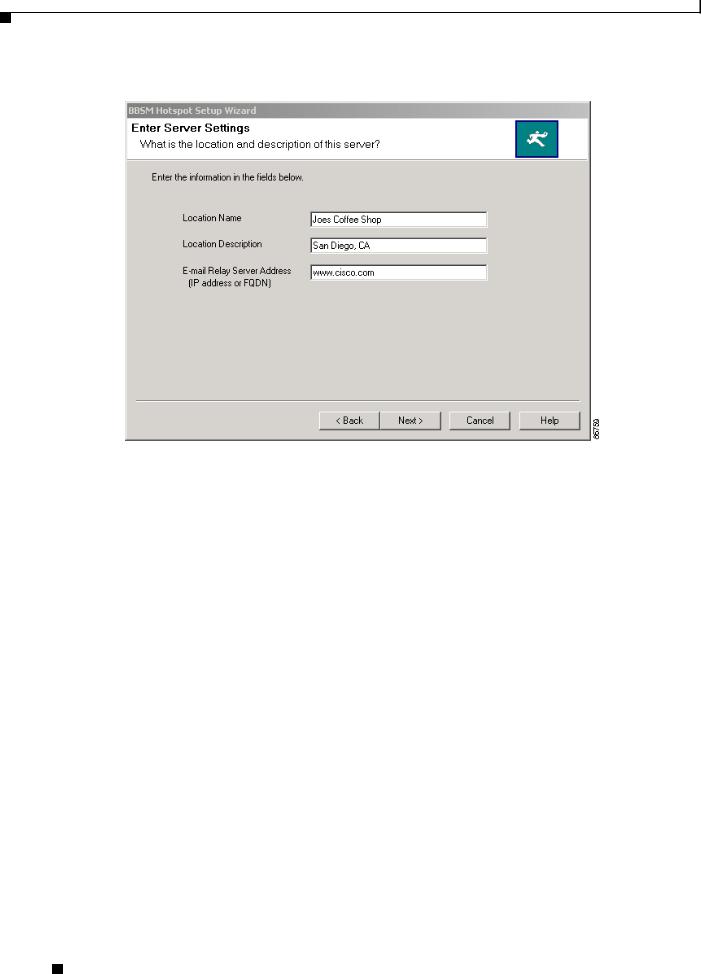
Step 2 Click Next. The Enter Server Settings window appears. This window lets you enter location information and the server address for relaying e-mail messages sent out through BBSM Hotspot. (See Figure 2-2.)
Cisco BBSM Hotspot 1.0 User Guide
|
78-15293-01 |
2-3 |
|
|
|
Chapter 2 Setting Up BBSM Hotspot
Running the Setup Wizard
Figure 2-2 Enter Server Settings Window
Step 3 Enter the field data, as described in Table 2-1. This location data is used globally by BBSM Hotspot.
Table 2-1 Enter Server Settings Field Descriptions
Field |
Description |
|
|
Location Name |
Enter a specific property name. Use up to 50 alphanumeric characters, |
|
such as “Joes Coffee Shop” or “2nd Level Conference Rooms.” This |
|
field is required. |
|
|
Location Description |
Enter descriptive text for the location, such as the city or address. You |
|
can use any alphanumeric word or phrase to a maximum of |
|
100 characters, such as “San Diego, CA,” or “Guest cubicles in the |
|
northeast annex.” This field is optional. |
|
|
E-mail Relay Server Address |
Enter the IP address or the fully qualified domain name (FQDN) for |
(IP address or FQDN) |
the e-mail relay server that is used by your Internet service provider |
|
(ISP) to forward non–web-based e-mail, such as Microsoft Outlook or |
|
Eudora mail programs, from public locations. An example FQDN is |
|
www.ispemail.com. The FQDN can contain a maximum of |
|
100 characters. |
|
This field is optional. Use it only if you want to provide your end users |
|
with e-mail support. |
|
Typical e-mail servers block traffic from unknown sources for security |
|
purposes. The BBSM Hotspot server, as with any public location, is |
|
considered an unknown source that requires an e-mail relay server to |
|
forward end-user mail. |
|
|
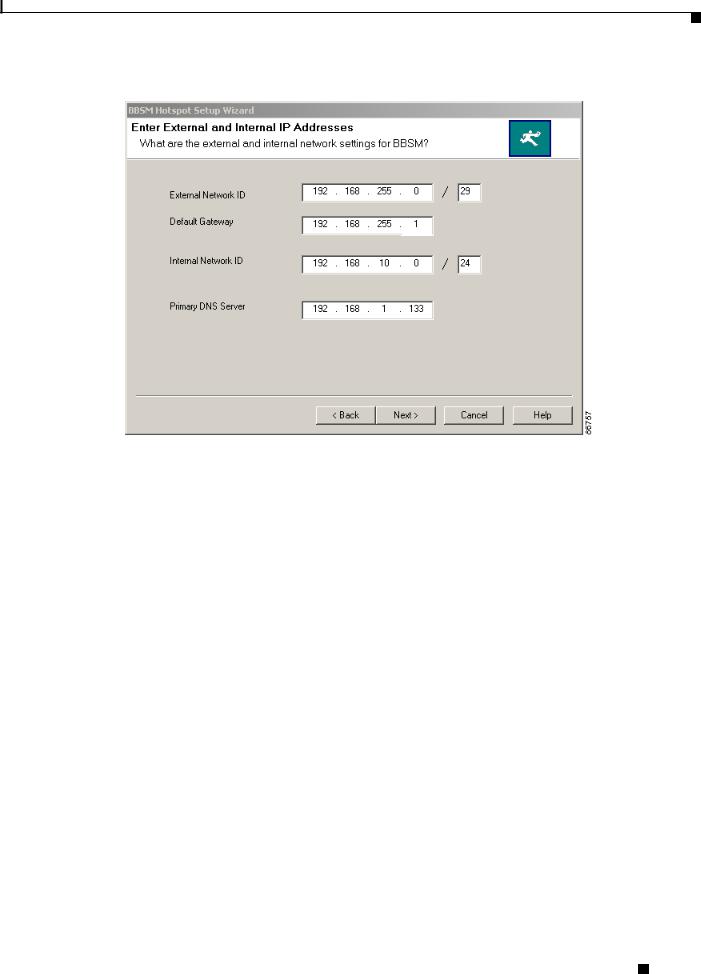
Step 4 Click Next. The Enter External and Internal IP Addresses window appears. (See Figure 2-3.)
Cisco BBSM Hotspot 1.0 User Guide
2-4 |
78-15293-01 |
|
|
Chapter 2 Setting Up BBSM Hotspot
Running the Setup Wizard
Figure 2-3 Enter External and Internal IP Addresses Window
Step 5 Enter the IP addresses, as described in Table 2-2. The wizard uses this data to determine BBSM Hotspot external and internal NIC addresses, the router address, and allocation of the network device, static, and DHCP client address pools. Note that the wizard requests the external and internal network IDs and subnet masks and then calculates the external and internal IP addresses automatically. Obtain the network IDs from your ISP. (An internal network of size Class C or smaller is supported.)
Table 2-3 shows the number of IP addresses available to you based on the subnet code number you enter after the slash. The table shows the subnet codes that you would most likely use.
Cisco BBSM Hotspot 1.0 User Guide
|
78-15293-01 |
2-5 |
|
|
|

Chapter 2 Setting Up BBSM Hotspot
Running the Setup Wizard
Table 2-2 Enter External and Internal IP Addresses Field Descriptions
|
|
|
|
Field |
|
Description |
||
|
|
|
|
|
|
|
|
|
|
|
|
|
External Network ID |
Enter the external network IP address block assigned by your ISP. The number |
|||
|
|
|
|
|
|
after the slash is the subnet code for the number of IP addresses available in the |
||
|
|
|
|
|
|
block. |
||
|
|
|
|
|
|
|
|
|
|
|
|
|
Default Gateway |
|
This IP address is automatically generated based on the external network ID |
||
|
|
|
|
|
|
that you entered. You cannot change the first three sets of numbers in this |
||
|
|
|
|
|
|
address. This IP address is the address of the gateway (router) assigned by the |
||
|
|
|
|
|
|
ISP and used to access the Internet. Here’s what can and cannot be changed in |
||
|
|
|
|
|
|
this field: |
||
|
|
|
|
|
|
• You cannot change the first three sets of numbers in the IP address. |
||
|
|
|
|
|
|
• The fourth set defaults to the number 1. You can change this fourth octet |
||
|
|
|
|
|
|
after the Setup Wizard populates the Default Gateway based on the |
||
|
|
|
|
|
|
External Network ID. |
||
|
|
|
|
|
|
Your router needs to be configured for the internal network to point to the |
||
|
|
|
|
|
|
external NIC of the BBSM Hotspot server. If you are using a private IP address, |
||
|
|
|
|
|
|
you will also need to create a network address translation (NAT) pool for end |
||
|
|
|
|
|
|
users and one-to-one NAT statements for remote access to internal network |
||
|
|
|
|
|
|
devices. |
||
|
|
|
|
|
|
|
|
|
|
|
|
|
Internal Network ID |
This is the Network ID for the subnet that end users use to connect to the BBSM |
|||
|
|
|
|
|
|
Hotspot network and, through it, the Internet. The internal subnet consists of the |
||
|
|
|
|
|
|
network devices, end-user clients (such as laptops and PDAs), and the BBSM |
||
|
|
|
|
|
|
Hotspot internal NIC. The number after the slash is the subnet code for the |
||
|
|
|
|
|
|
number of IP addresses available in the block. |
||
|
|
|
|
|
|
You can enter your own private network ID, or you can input a public network |
||
|
|
|
|
|
|
ID. |
||
|
|
|
|
|
|
|
|
|
|
|
|
|
Primary DNS Server |
Enter the IP address for the primary domain name system (DNS) server |
|||
|
|
|
|
|
|
provided by your ISP. Because BBSM Hotspot is not configured as a DNS |
||
|
|
|
|
|
|
server, DNS forwarding is enabled to forward all DNS requests to a remote |
||
|
|
|
|
|
|
DNS server. BBSM Hotspot acts as a DNS forwarder for end-user DNS requests |
||
|
|
|
|
|
|
as well as its own DNS requests. These requests, such as www.cisco.com, are |
||
|
|
|
|
|
|
resolved into IP addresses so the Internet routers can locate the web server with |
||
|
|
|
|
|
|
the content. |
||
|
|
|
|
|
|
|
|
|
|
|
|
|
Table 2-3 Subnet Code Conversions |
||||
|
|
|
|
|
|
|
||
|
|
|
|
|
Number of |
|||
|
|
|
|
Subnet Code |
IP Addresses |
|||
|
|
|
|
|
|
|||
/29 |
6 |
|
|
|
||||
|
|
|
|
|
|
|||
/28 |
14 |
|
|
|
||||
|
|
|
|
|
|
|||
/27 |
30 |
|
|
|
||||
|
|
|
|
|
|
|||
/26 |
62 |
|
|
|
||||
|
|
|
|
|
|
|||
/25 |
126 |
|
|
|
||||
|
|
|
|
|
|
|||
/24 |
254 |
|
|
|
||||
|
|
|
|
|
|
|
|
|
|
|
|
Cisco BBSM Hotspot 1.0 User Guide |
|
|
|
||
|
|
|
|
|
|
|||
|
|
|
|
|
|
|
|
|
|
2-6 |
|
|
|
|
78-15293-01 |
|
|
|
|
|
|
|
|
|||
Chapter 2 Setting Up BBSM Hotspot
Running the Setup Wizard
Step 6 Click Next. The Calculating TCP/IP Addresses window appears. BBSM Hotspot uses the information provided in the Enter External and Internal IP Addresses window to calculate TCP/IP addresses for the server.
Note If you need to change the IP addresses of the NICs from the defaults generated by the Setup Wizard, you must use the Address Change Wizard to make these changes. Continue with and complete the Setup Wizard, then use the Address Change Wizard to change the NIC addresses to the desired settings. Refer to the “Running the Address Change Wizard” section on page A-1.
(See Figure 2-4 and Table 2-4 for field descriptions.)
Figure 2-4 Calculating TCP/IP Addresses Window
Cisco BBSM Hotspot 1.0 User Guide
|
78-15293-01 |
2-7 |
|
|
|
Chapter 2 Setting Up BBSM Hotspot
Running the Setup Wizard
Table 2-4 BBSM Hotspot Setup Wizard, Calculating TCP/IP Addresses Field Descriptions
Field |
Description |
External Network ID |
The network ID used for your BBSM external network. |
|
|
External Broadcast IP |
The IP address used to broadcast data within the external network. |
|
|
External NIC IP |
The IP address of the external NIC on BBSM Hotspot. BBSM Hotspot |
|
assigns the first host address that is not the default gateway, as |
|
calculated from the External Network ID field in Step 5. |
|
|
External NIC Subnet Mask |
The subnet mask calculated from the External Network ID subnet code |
|
(after the slash) in Step 5. |
|
|
Default Gateway |
The default gateway address entered in the Default Gateway field in |
|
Step 5. |
|
|
Internal NIC IP |
The IP address on the internal NIC on BBSM Hotspot, as calculated |
|
from the Internal Network ID in Step 5. It is set to the first host address |
|
calculated from the Internal Network ID. |
|
|
Internal NIC Subnet Mask |
The subnet mask on the internal NIC, as calculated from the Internal |
|
Network ID subnet code (after the slash) in Step 5. |
Range of Available Addresses The range of IP addresses available for internal network devices and end-user connections on the internal network. The range is from the second host ID through the last host ID calculated.
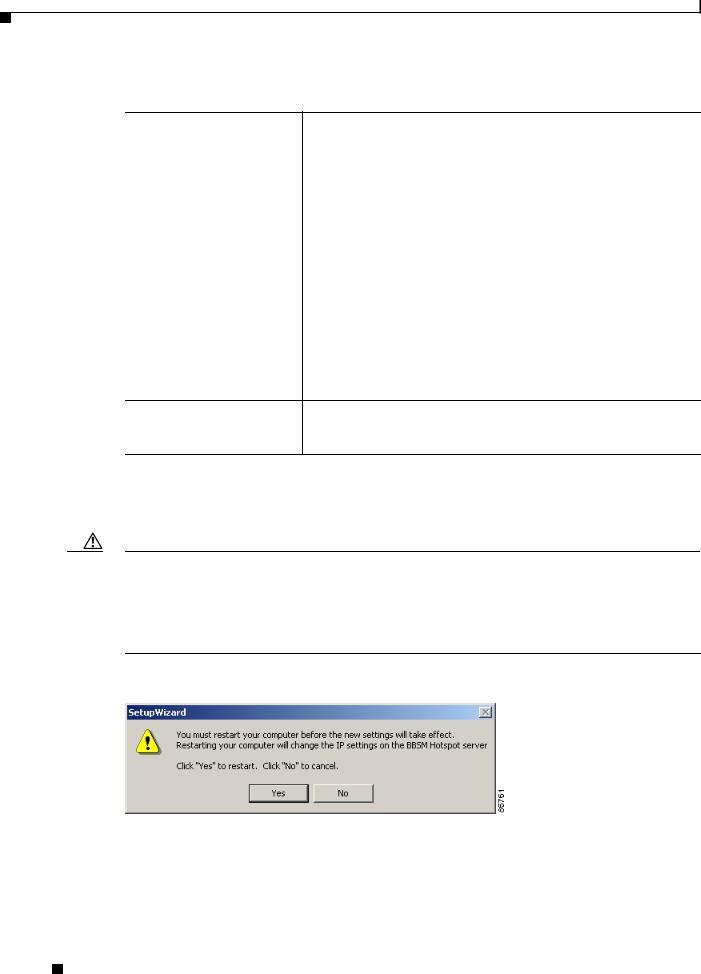
Step 7 Click Next. The Restart Computer dialog box appears on top of the Setup Wizard. This dialog box gives you the option to restart BBSM now or cancel. (See Figure 2-5.) You must restart or reboot for the
IP address settings to take place. If you do not restart, you cannot continue with the setup.
Caution Restarting the BBSM Hotspot server at this point will save all of the settings entered for your server up to this point. Click No to close the dialog box, which returns you to the Calculating TCP/IP Addresses window. If you click Cancel at any point after the restart, the server settings and IP addresses that you have entered at this time will be retained, while settings entered after the restart will be cancelled. If you run the Setup Wizard a second time and do not change the IP address settings (a reboot is unnecessary), if you click Cancel, all settings entered at that time, including the server settings, will be cancelled.
Figure 2-5 Restart Computer Dialog Box
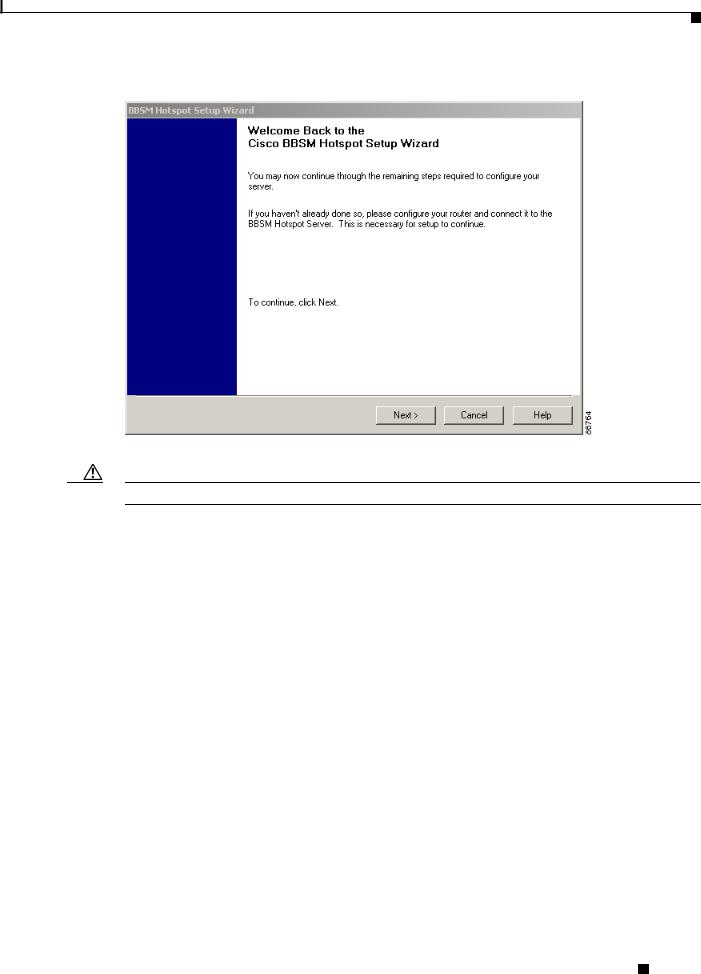
Step 8 For the IP address configuration settings to take effect, click Yes. The BBSM Hotspot server configures the new settings, then restarts. After you log in to BBSM Hotspot as Administrator, the Welcome Back window appears. (See Figure 2-6.)
Cisco BBSM Hotspot 1.0 User Guide
2-8 |
78-15293-01 |
|
|
Chapter 2 Setting Up BBSM Hotspot
Running the Setup Wizard
Figure 2-6 Welcome Back Window
Caution Before continuing, make sure that your router is configured and connected to the Internet.
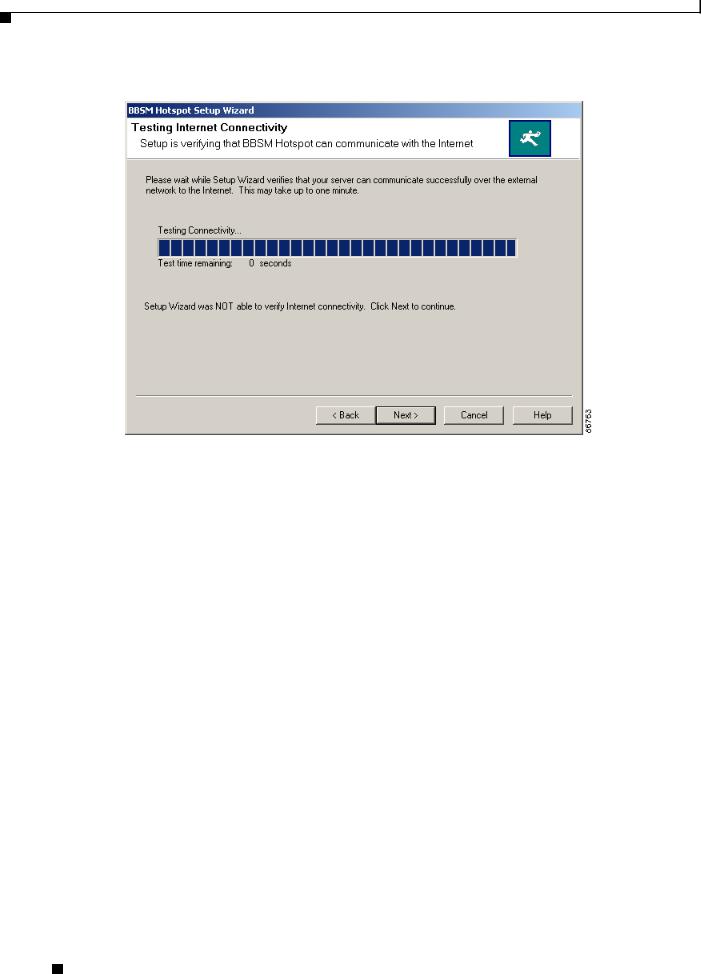
Step 9 Click Next. The Testing Internet Connectivity window appears and begins testing the connection from BBSM Hotspot through the router to the Internet. A progress bar shows the test time remaining. The test should take less than a minute. The Back and Next buttons are disabled until the test is complete.
(See Figure 2-7.)
•If the test is successful, a Test Success window pops up with a message telling you that the connection test was successful. Click OK to close the window, then go to Step 11.
•If the test was unsuccessful, this message appears on the Testing Internet Connectivity web page: “Setup Wizard was NOT able to verify Internet connectivity. Click Next to continue.” Go to Step 10.
Cisco BBSM Hotspot 1.0 User Guide
|
78-15293-01 |
2-9 |
|
|
|
Chapter 2 Setting Up BBSM Hotspot
Running the Setup Wizard
Figure 2-7 BBSM Hotspot Setup Wizard, Testing Internet Connectivity Window
Step 10 Click Next. The Test Failure window appears (Figure 2-8) and provides you with options. Note the following reasons that the test may have failed and the options for correcting errors:
•Failure to communicate with the default gateway IP address:
–Verify the physical connection from BBSM Hotspot to the router.
–Make sure that a cross-over cable has been used.
–Verify that the link status light is on for both the internal connection of the router and the BBSM Hotspot external NIC.
–Verify that the router IP address was configured correctly. You may need to contact your ISP so they can verify this setting.
•Failure to communicate with the DNS server IP address:
–Verify the physical connection from the router to the Internet.
–Verify that the link status light is on for the external connection of the router.
–Verify that the ISP provided the correct DNS address and that it was entered correctly.
–Contact the ISP to verify this address.
•Failure to resolve the DNS name: www.yahoo.com—Contact the ISP to verify that the DNS is operational.
The following are the options available to you from the Test Failure window:
–Check your physical connections. Then click Back to rerun the test.
–After the question asking if you want to change your IP addresses, click Yes. Then click Next to continue. You are returned to the Enter External and Internal IP Addresses window where you can enter new IP addresses. Then continue with the setup.
Cisco BBSM Hotspot 1.0 User Guide
2-10 |
78-15293-01 |
|
|
Chapter 2 Setting Up BBSM Hotspot
Running the Setup Wizard
–After the question asking if you want to change your IP addresses, click No to ignore the connectivity issues and continue with the setup. A warning message pops up to tell you that you must resolve the IP address issue for BBSM Hotspot to work properly. (See Figure 2-9.) You are then taken to the Enter Network Device Configuration Parameters window.
(See Figure 2-10.)
–Click Cancel to stop the setup.
Figure 2-8 Test Failure Window
Figure 2-9 You Must Resolve This Issue Dialog Box
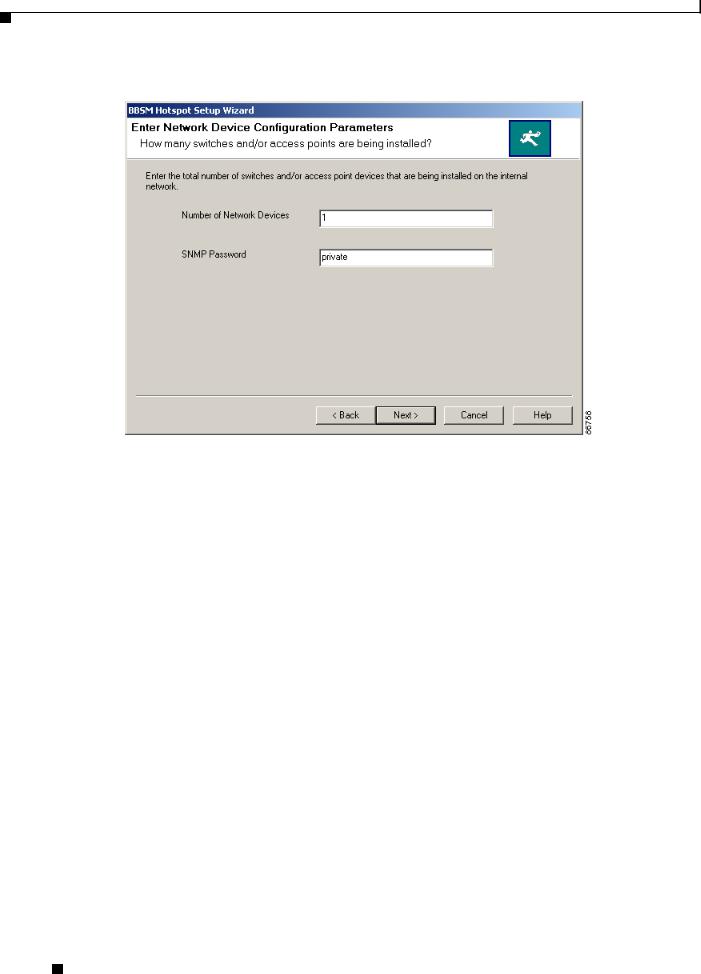
Step 11 Click Next. The Enter Network Device Configuration Parameters window appears. (See Figure 2-10.)
Cisco BBSM Hotspot 1.0 User Guide
|
78-15293-01 |
2-11 |
|
|
|
Chapter 2 Setting Up BBSM Hotspot
Running the Setup Wizard
Figure 2-10 Enter Network Device Configuration Parameters Window
Step 12 Enter the network device parameters, as described in Table 2-5. The wizard uses this data to determine the number of IP addresses to allocate to the network device range. (This may have been familiar to current BBSM customers as the “Management Range.”) This information will also be used in the switch discovery part of the wizard.
Table 2-5 Enter Network Device Configuration Descriptions
Field |
Description |
|
|
Number of Network Devices |
Enter the total number of switches and wireless access points that will |
|
be installed on the BBSM internal network. You can also enter a larger |
|
number than the current amount of network devices in anticipation of |
|
additional devices in the future. |
|
|
SNMP Password |
Enter the SNMP password that is used to access network devices. |
|
BBSM Hotspot needs this information to run switch discovery. Note |
|
that on Cisco Catalyst switches, the SNMP password is also known as |
|
the SNMP community read/write string. |
|
|
Step 13 Click Next. The Calculating Internal Network Address Ranges window appears, providing you with a list of the internal IP address ranges that have been calculated and assigned by the BBSM Hotspot server. These include the following:
•Network Device Addresses—These addresses are allocated to the network devices. This address range is allocated from the “Number of Network Devices” number entered in Step 12.
Cisco BBSM Hotspot 1.0 User Guide
2-12 |
78-15293-01 |
|
|

Chapter 2 Setting Up BBSM Hotspot
Running the Setup Wizard
Caution The IP addresses of your switches and access points must be set to addresses that are within this Network Devices Address range. To increase performance, we recommend using the numbers in this range consecutively so that any unused IP addresses are at the end of the range.
•DHCP Client Addresses—These addresses are allocated to the DHCP client address pool. Because most network devices are configured as DHCP, after the BBSM NIC and the network device addresses have been allocated, BBSM Hotspot allocates 90 percent of the available end-user addresses to the DHCP pool. You can modify this address range in the Hotspot Configuration tool on the Dashboard or by using the Address Change Wizard.
•Static Client Addresses—These addresses are allocated to the statically configured client address pool. Because static configurations are not common, this range is allocated by BBSM Hotspot to 10 percent of the total remaining pool after the BBSM NIC and the Network Device addresses have been allocated.
(See Figure 2-11.)
Figure 2-11 Calculating Internal Network Address Ranges Window
Step 14 Click Next. The Discovering Network Devices window appears, showing that BBSM Hotspot is running switch discovery to find network devices connected to the BBSM Hotspot internal network.
(See Figure 2-12.) As each device is discovered, BBSM Hotspot is automatically configured to work with the device. The progress bar shows the number of devices found based on the number entered in Step 12. The Back and Next buttons are disabled until the process is complete.
Cisco BBSM Hotspot 1.0 User Guide
|
78-15293-01 |
2-13 |
|
|
|
Loading...