


SELF-CLEANING BUILT-IN ELECTRIC OVEN
for residential use only
Model: DEBIE 24 SS
DEBIE 24 E
•USERS OPERATING INSTRUCTIONS
•INSTALLATION ADVICE
IMPORTANT - PLEASE READ AND FOLLOW
Before beginning, please read these instructions completely and carefully.
Do not remove permanently affixed labels, warnings, or plates from the product. This may void the warranty.
Please observe all local and national codes and ordinances.
Please ensure that this product is properly grounded.
The installer should leave these instructions with the consumer who should retain for local inspector's use and for future reference.
Electrical installation must be in accordance with the National Electrical Code, ANIS/NFPA70 - latest edition and/or local codes.
IN CANADA: Electrical installation must be in accordance with the current CSA C22.1 Canadian Electrical Codes Part 1 and/or local codes.

Dear Customer,
Thank you for having purchased and given your preference to our product.
The safety precautions and recommendations reported below are for your own safety and that of others. They will also provide a means by which to make full use of the features offered by your appliance.
Please preserve this booklet carefully. It may be useful in future, either to yourself or to others in the event that doubts should arise relating to its operation.
This appliance must be used only for the task it has explicitly been designed for, that is for cooking food. Any other form of usage is to be considered as inappropriate and therefore dangerous.
The manufacturer declines all responsibility in the event of damage caused by improper, incorrect or illogical use of the appliance.
This appliance is designed and manufactured solely for the cooking of domestic (household) food and in not suitable for any none domestic application and therefore should not be used in a commercial environmement.
The appliance warranty will be void if the appliance is used within a none domestic environmement i.e. a semi commercial, commercial or communal environment.
2
USER INSTRUCTIONS
IMPORTANT PRECAUTIONS AND RECOMMENDATIONS
After having unpacked the appliance, check to ensure that it is not damaged. If you have any doubts, do not use it and consult your supplier or a professionally qualified technician.
Packing elements (i.e. plastic bags, polystyrene foam, nails, packing straps, etc.) should not be left around within easy reach of children, as these may cause serious injuries.
The packaging material is recyclable and is marked with the recycling symbol

 .
.
Do not attempt to modify the technical characteristics of the appliance as this may become dangerous to use.
The manufacturer cannot be considered responsible for damage caused by unreasonable, incorrect or rash use of the appliance.
If you should decide not to use this appliance any longer (or decide to substitute an older model), before disposing of it, it is recommended that it be made inoperative in an appropriate manner in accordance to health and environmental protection regulations, ensuring in particular that all potentially hazardous parts be made harmless, especially in relation to children who could play with old appliances.
The appliance should be installed and all the electrical connections made by a qualified technician in compliance with local regulations in force and following the manufacturer's instructions
IMPORTANT PRECAUTIONS AND RECOMMENDATIONS FOR USE OF ELECTRICAL APPLIANCES
Use of any electrical appliance implies the necessity to follow a series of fundamental rules. In particular:
Never touch the appliance with wet hands or feet;
Do not operate the appliance barefooted;
Do not allow children or disabled people to use the appliance without your supervision.
The manufacturer cannot be held responsible for any damages caused by improper, incorrect or unreasonable use of the appliance.
USING THE OVEN FOR THE FIRST TIME
You are advised to carry out the following operations:
Assemble the interior of the oven as described under the heading “Cleaning and maintenance”
Switch the empty oven ON at maximum temperature for about two hours to eliminate traces of grease and smell from the components.
Let the oven cool down, switch off the electrical supply, then clean the inside of the oven with a cloth soaked in water and neutral detergent and dry thoroughly.
3
|
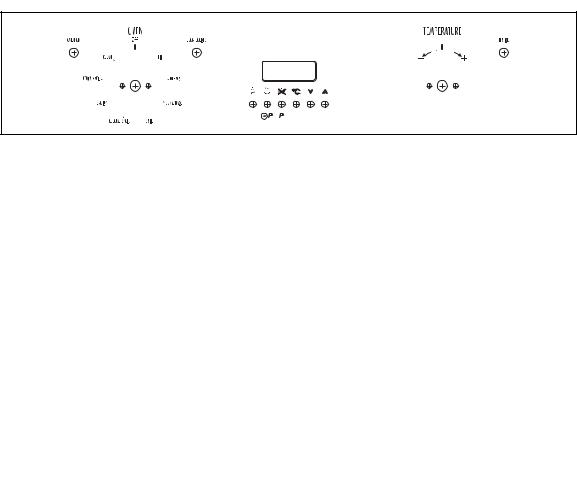
control panel |
|
|
|
|
6 |
|
4 |
|
5 |
A
U
T
O
Fig. 1.1 |
2 |
3 |
1 |
Oven controls:
1.Function selector knob
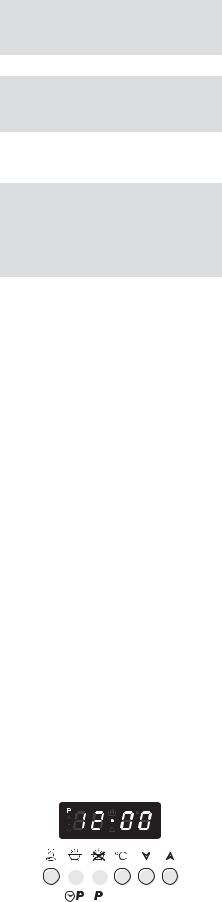
2.Electronic programmer
3.Temperature knob (potentiometer)
4.Door locked pilot light
5.Oven heating pilot light
6.Oven on pilot light
WARNING - VERY IMPORTANT NOTE:
The temperature knob (potentiometer) turns to right and left only to symbols + and -. Forcing the turning could damage the temperature knob.
4
how to use the self cleaning oven |
|
|
|
|
|
GENERAL FEATURES
The oven has special operating features.
Five different functions can be used to satisfy all cooking needs; it also has a self cleaning function which can clean the oven cavity at high temperature, a defrost function and an oven light function.
These functions are managed by an electronic programmer which keeps the temperature set constant by means of a probe inside the oven cavity.
The oven has the following heating elements:
- Lower heating element (double) 500 + 1300 W
- Upper heating element |
1000 W |
- Grill heating element |
2000 W |
- Circular heating element |
2200 W |
USING THE OVEN FOR THE FIRST TIME
-Put the shelf and the tray in the oven.
-Switch the oven on when it is empty (on any cooking function – NOT SELF CLEANING) at maximum power for about 2 hours to remove traces of grease and smells from the components.
-When the oven has cooled down and the appliance, unplugged clean the inside of the oven with a cloth soaked in water and neutral detergent and dry it completely.
WARNING:
The door is hot, use the handle.
Attention: the oven door becomes very hot during operation.
Keep children away.
VERY IMPORTANT
The oven shall be used always with the door closed.
WHEN THE SELF CLEANING MODE HAS BEEN COMPLETED:
• do not start immediately a new self cleaning cycle: LET THE OVEN TO COOL DOWN.
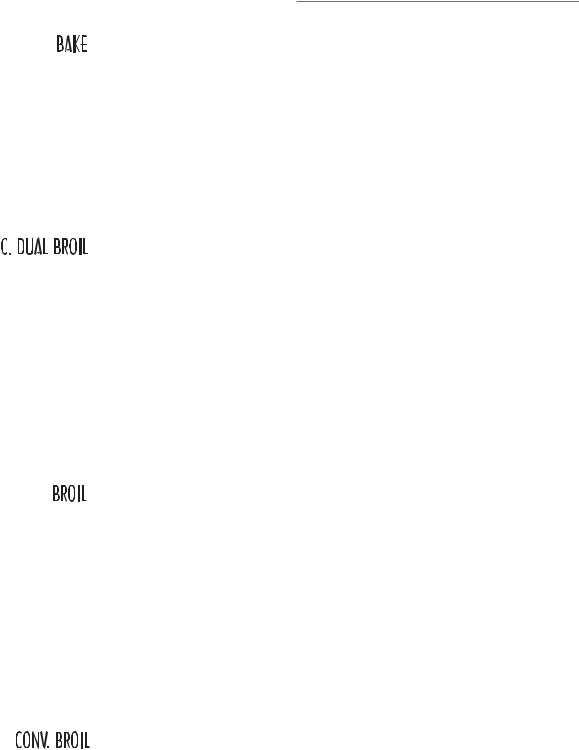
OPERATING PRINCIPLES
Heating and cooking in the multifunction self cleaning oven takes place as follows:
•by normal convection
The heat is produced by the upper and lower heating elements.
•by forced convection
The heat produced by the circular element is distributed throughout the oven by the fan.
•by radiation
The heat is radiated by the infra red broil element.
•by radiation and fan
The radiated heat from the infra red broil element is distributed throughout the oven by the fan.
•by double radiation and fan
The fan distributes the heat radiated by the broil heating element and the upper heating element in the oven.
•by ventilation
The food is defrosted by using the fan only function without heat.
•by self cleaning
The heat produced by the heating elements cleans the internal oven cavity removing all residue of grease.
THIS IS NOT A COOKING FUNCTION
NOTES ON OVEN WORKING
A cooling fan starts automatically when selecting a cooking or self cleaning mode. It stops when turning the selector knob to OFF or light or defrosting position and th inside oven cavity temperature drops below 100 °C (212 °F).
The purpose of this fan is to reduce the temperature inside/outside the appliance.
Note: The first time the oven is used or after a black-out the program must be started by pressing keys 2 and 3 simultaneously. See the section on the use of the electronic programmer.
I |
I |
I |
I |
I I |
I |
I |
I |
I |
I |
I |
I |
|
|
|
|
|
|
|
|
|
I |
I |
|
|
|
|
|
|
|
|
|
I |
I |
|
|
|
|
|
|
|
|
|
I |
I |
I |
I |
I |
II |
I |
I |
I |
I |
I |
I |
I |
I |
2 3
5
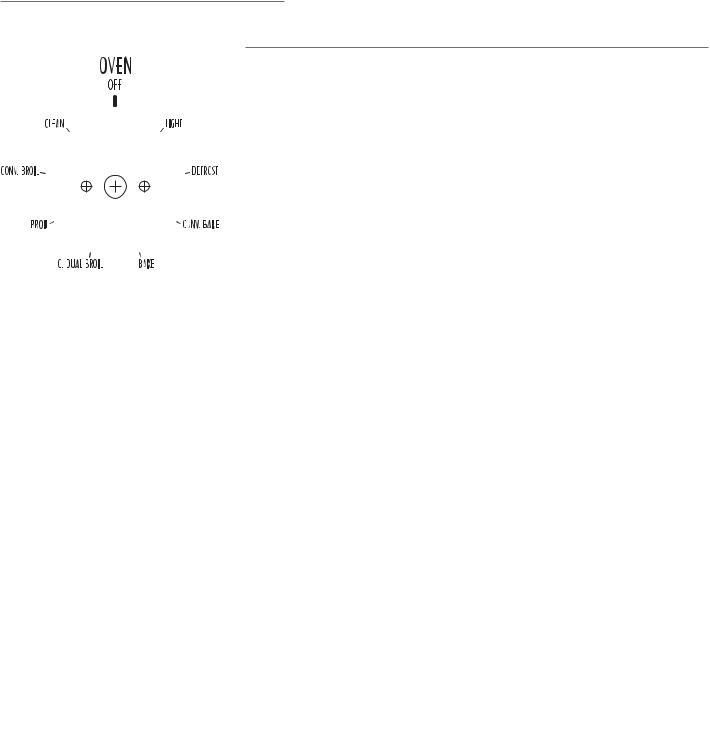
Fig. 2.1
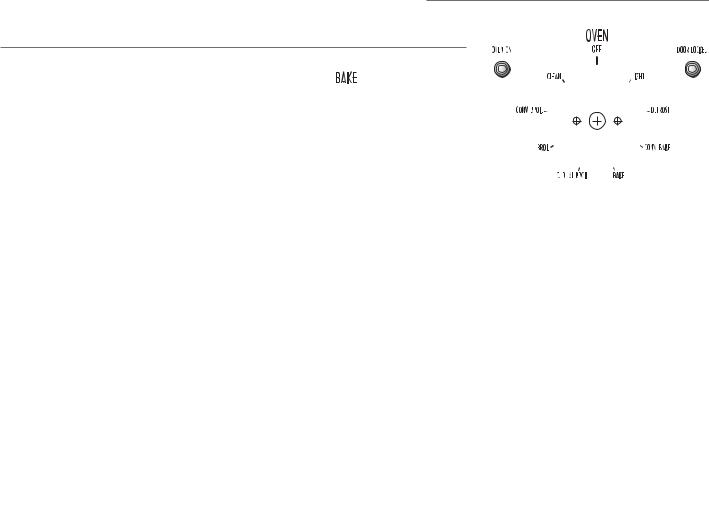
SELECTING THE FUNCTIONS (fig. 2.1)
The cooking function is selected by turning the function selector knob and matching the mark with the symbol printed on the print (or the symbol with the mark printed on the print).
Important: In all cooking functions the oven must always be used with the DOOR CLOSED.
I |
I |
If the door stays open “door” appears on the programmer dis- |
|
I I I I I I I I I I I I |
|
I |
I |
play and after five minutes an audible warning sounds for 30 |
I |
I |
|
I |
I |
|
|
|
|
|
I I I I I I I I I I I I |
seconds and “door” flashes. |
|
|
To silence the audible warning press any programmer pushbutton.
NOTE: The heating elements work even with the door open and this signal just indicates that energy is being wasted and the control panel/knobs are excessively heated.
OVEN LIGHT (this is not a cooking function)
Turning the knob to this position, only the oven lamp lights up.
The lamp is always on in all the cooking functions (not for the self cleaning).
DEFROSTING FROZEN FOODS (this is not a cooking function)
Only the fan and the oven lamp switch on. Defrosting takes place by fan, without heating. The electronic program shows dEF
Recommended for:
To rapidly defrost frozen foods; 2.2 lbs (1 kg) requires about one hour.
The defrosting times vary according to the quantity and type of foods to be defrosted.
CONVECTION COOKING WITH VENTILATION
The circular element and the fan switch on. The heat from the back is diffused by fan convection. The temperature can be set between 120 °F (50 °C) and 480 °F (250 °C). On selecting this function the electronic program starts cooking with a pre-heating temperature set at 320 °F (180 °C). To vary the temperature see the “Setting the cooking” section.
Recommended for:
For foods of large volume and quantity which require the same internal and external degree of cooking; for ex: rolled roasts, turkey, legs, cakes, etc.
6
TRADITIONAL CONVECTION COOKING
The upper and lower heating elements switch on.
The heat is diffused by natural convection and the temperature must be set between 120 °F (50 °C) and 480 °F (250 °C). On selecting this function the electronic programmer starts cooking with a pre-heating temperature set at 350 °F (200 °C). To vary the temperature see the “Setting the cooking” section.
Recommended for:
For foods which require the same cooking temperature both internally and externally, i. e. roasts, spare ribs, etc.
VENTILATED COOKING WITH DOUBLE BROIL
The infrared element, the upper heating element and the fan switch on. The heat is mainly diffused by radiation and the fan distributes it in the whole oven. The temperature can be set between 120 °F (50 °C) and 480 °F (250 °C).
On selecting this function the electronic program starts cooking with a pre-heating temperature set at 480 °F (240 °C).
To vary the temperature see the “SETTING THE COOKING” section. For correct use see the “VENTILATED BROILING” section.
Recommended for:
Meats which are to be cooked at a high temperature but which must remain tender. Fish remains more tender; turn it once during cooking.
BROILING
The infrared heating element switches on.
The heat is diffused by radiation. The temperature can be set between 120 °F (50 °C) and 480 °F (250 °C). On selecting this function the electronic program starts cooking with a pre-heating temperature set at 480 °F (210 °C).
To vary the temperature see the “SETTING THE COOKING” section. For correct use see the “BROILING” section.
Recommended for:
Intense broiling action for cooking with the broiler; browning, crisping, toasting, etc. For correct use see the “BROILING” section.
VENTILATED BROILING
The infrared heating element and the fan switch on. The heat is mainly diffused by radiation and the fan distributes it in the whole oven.
The temperature can be set between 120 °F (50 °C) and 480 °F (250 °C). On selecting this function the electronic program starts cooking with a pre-heating temperature set at 480 °F (220 °C). To vary the temperature see the “SETTING THE COOKING” section.
Recommended for:
For grill cooking when a fast outside browning is necessary to keep the juices in, i. e. veal steak, steak, hamburger, etc. For correct use see the “VENTILATED BROILING” section.
7

SELF CLEANING FUNCTION (this is not a cooking function)
CAUTION: During the self cleaning cycle the accessible parts may become hot. Keep children away.
IMPORTANT:
The health of some birds is extremely sensitive to the fumes given off during the self-cleaning cycle.
Exposure to the fumes may result in death to certain birds.
Always move birds to another closed and well ventilated room.
WHEN THE SELF CLEANING MODE HAS BEEN COMPLETED:
• do not start immediately a new self cleaning cycle on the same oven: LET THE RANGE TO COOL DOWN.
IMPORTANT NOTES:
This is not a cooking function but is only used to clean the oven.
Before starting the self cleaning cycle:
-Take all the accessories out of the oven (broiling pan and shelves).
-Clean any traces of liquid which have overflowed.
-Close the oven door and make sure that it is closed properly.
If there are cracks or flaws on the oven door glass (inside/outside) or if the gaskets are ruined or worn or if the door does not close perfectly, unplug the appliance and contact the Service Centre.
GENERAL INFORMATION
•In this function the residual cooking greases on the inside walls of the oven cavity are pulverised by the high temperature. The fumes produced during this process are filtered by a special catalyst in the upper part of the appliance.
•Smells and fumes produced during self cleaning are not a cause of alarm. Adequate ventilation should however be provided in the room where the range is installed, e.g. by opening a window.
•Do not wait for the oven to be very greasy before performing this cleaning. It should not be performed after every cooking, either, but only when the level of dirt justifies it (on average 1 – 2 times a month depending on oven use).
•For safety reasons (high temperature of the oven cavity), when the self cleaning starts, the oven door is automatically locked by an electronic device (after about 30 seconds on the control panel the door locked pilot light lights up). The door can no longer be opened and is only unlocked at the end of the cleaning cycle or, stopping the cycle, when the oven cavity has cooled to a temperature lower than 570 °F (300 °C).
•When the self cleaning function starts an internal fan starts automatically to cool the oven walls. It only stops at the end of the cycle, when the oven cavity temperature has dropped below 212 °F (100 °C).
•The procedures for starting, stopping and completing the self cleaning cycle and dealing with any problems are described in the following section:
-“How to start the self cleaning cycle”
-“Problems on starting and during the self cleaning cycle”
-“How to stop the self cleaning cycle”
-“What to do when the self cleaning cycle has finished”
-“Abnormal situations and/or operating problems”
8
SELECTING °F/°C ON THE DISPLAY
1. |
Turn the oven selector knob to a cooking function (i.e. |
). |
|
2. |
Press key 5 on the programmer to reduce the temperature until you reach the min- |
|
|
|
imum value (120 °F/50 °C). |
|
|
3. |
With °F/°C flashing on the display press key 5 again (if °F/°C is not flashing press |
|
|
|
key 4 before pressing key 5) until OFF appears on the display. |
|
|
4.Keep key 4 pressed for about 3/5 seconds until the display changes from °C to °F or vice versa. During selection °C or °F is flashing.
5.When OFF appears again on the display turn the selector knob to OFF position; the selection to °C or °F has been completed.
I |
I |
I |
|
I |
|
I |
|
I |
I |
|
I |
I |
|
|
I |
|
I |
I |
I |
|
|
|
5
5
4
9
 Loading...