


DKVM-8E
8- Port Keyboard, Video,
and Mouse Switch
User’s Guide
Rev. 2.0

TABLE OF CONTENTS |
|
Introduction........................................................................ |
1 |
Product Feature ............................................................... |
1 |
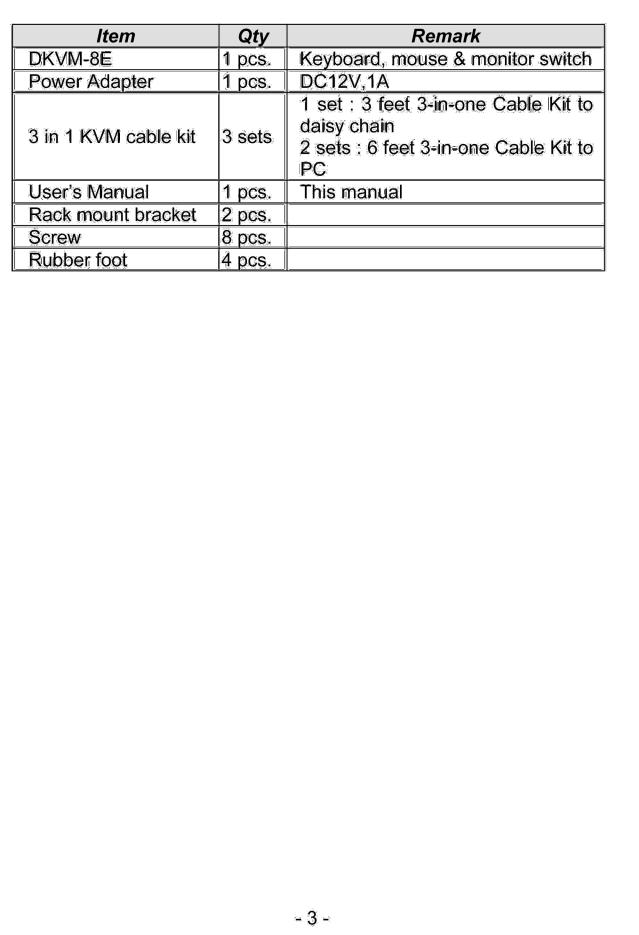
Package Content ............................................................. |
2 |
Hardware Installation ...................................................... |
4 |
Front Panel Layout......................................................... |
4 |
Real Panel Layout.......................................................... |
5 |
Installation...................................................................... |
5 |
Usage .......................................................................... |
11 |
Daisy Chain Diagram ................................................... |
15 |
Hot Plug ....................................................................... |
16 |
On Screen Display Operation....................................... |
18 |
Trouble Shooting........................................................... |
23 |
General Problems ........................................................ |
23 |
Monitor/Video Problems............................................... |
24 |
Keyboard Problems ..................................................... |
24 |
PS/2 Mouse Problems ................................................. |
25 |
Problems with power supply ........................................ |
27 |
Specification .................................................................. |
28 |

Introduction
The DKVM-8E gives you the ultimate in control of 8 PCs from one keyboard, mouse and monitor. To expand control ability, the Daisy-Chain allows eight DKVM-8E stack up for control 64 PCs from one keyboard, mouse and monitor. OSD (On-Screen Display) menu provides human friendly interface for naming each PCs and selecting one of them.
Product Feature
Allows users to control eight computers from one keyboard, mouse and monitor
No software required, each channel contains a microprocessor emulation to intelligently manage the boot-up process for all your attached PCs boot-up transparently and simultaneously.
Daisy-Chain ports allows control over as many as 64 computers through 8 banks of DKVM-8E units
Hot plug—Add PCs or remove connected PCs for maintenance without powering down the KVM Switch or PCs
No DIP-switch setting needed and auto detect daisy chain bank.
On-Screen Display menu gives the user a visual interface to name and select computers
Supports eight characters password protection and search PC Server name.
Switches PCs by On-Screen Display, push button or
- 1 -

Hardware Installation
This section will explain how to connect the console and the computers to the DKVM-8E switch unit. First the layout of front and rear panel will be shown.
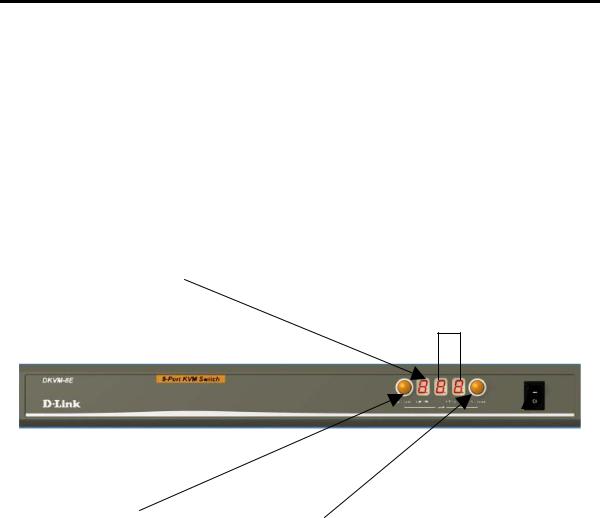
Front Panel Layout
Current Active Bank Display
Current Active Port Display
Bank Select |
Port Select |
|
|
Power Switch |
|||
- 4 -
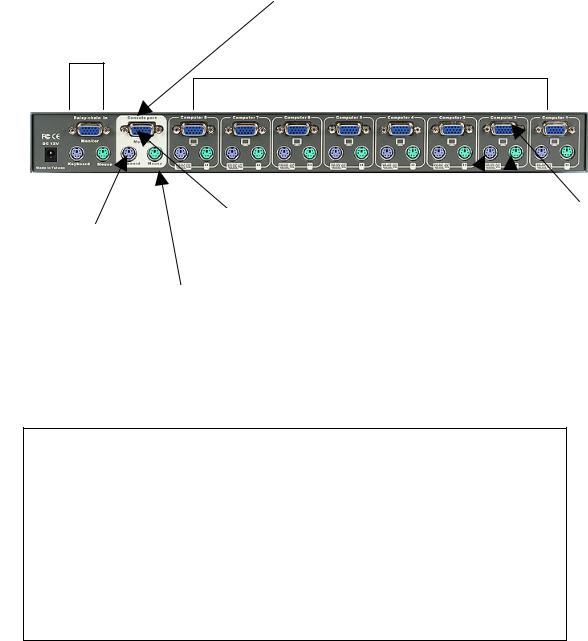
Real Panel Layout
Console Port Connectors
Daisy Chain Port
PC Port Connectors
VGA monitor |
PS/2 Keyboard |
|
VGA signal |
PS/2 keyboard connector |
output |
|
output |
connector |
|
|
|
PS/2 mouse |
PS/2 |
|
mouse |
|
|||
connector |
output |
||
Installation
WARNING!
Before attempting to connect anything to the DKVM-8E or the computers, make sure everything is powered off . Otherwise, plugging and unplugging cables may cause irreversible damage to your computers and the DKVM-8E.
Please follow the steps below closely and in the order as shown, otherwise, keyboard and/or mouse errors may occur.
- 5 -

Step 1
Find a convenient place to put your DKVM-8E. Its 19” rack mount form factor makes it ideal mountable on 19” rack. When mounting to a rack, attach the included brackets to the sides of the DKVM-8E. Take note of the length of your cables so that your computers, DKVM-8E, keyboard, mouse and monitor are distanced properly.
Step 2
Connect the monitor to the DKVM-8E. Using the attached cable, or the one included with your monitor, connect it to the HD DB-15 female port on the back of the DKVM-8E labeled with the monitor symbol at the CONSOLE connector.
- 6 -
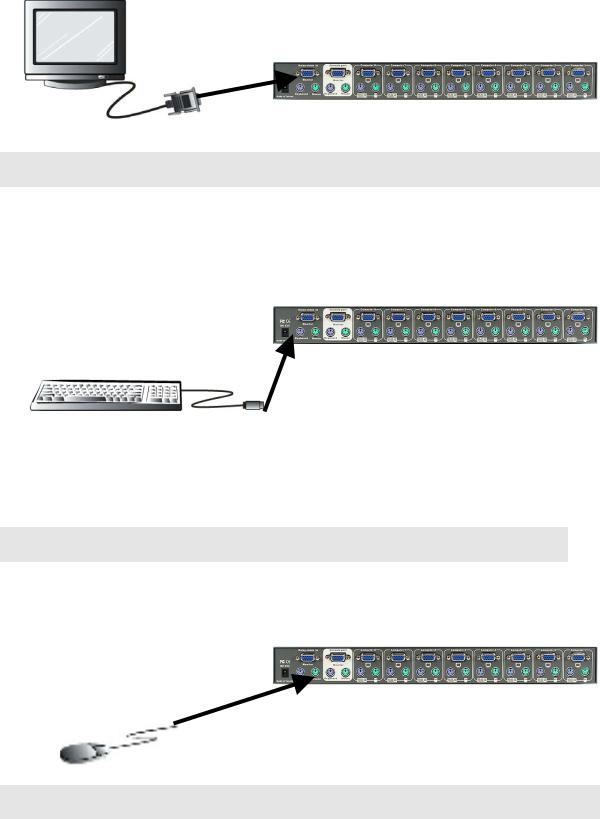
Step 3
Connect the keyboard to the DKVM-8E.
Step 4
Connect the mouse to the DKVM-8E.
Step 5
- 7 -
 Loading...