


■ Contents |
|
|
1. |
PRECAUTIONS ................................. |
2 |
2. |
FEATURES ........................................ |
2 |
3. |
CONTROLS ....................................... |
3 |
4. |
BUTTON TERMINOLOGY ................. |
3 |
5. |
WIRED REMOTE CONTROL UNIT |
|
|
OPERATIONS .................................... |
4 |
6. |
HANDLING COMPACT DISCS ......... |
5 |
7. |
OPERATION ...................................... |
6 |
8. |
TROUBLESHOOTING ..................... |
10 |
9. |
ERROR DISPLAYS .......................... |
11 |
10.SPECIFICATIONS ........................... |
12 |
|
|
Simple Guide .................................. |
13 |
Owner’s manual
XMD1
XMD2
AM/FM CD PLAYER
WITH CD CHANGER CONTROL
(XMD1 ONLY)
1.PRECAUTIONS
1.When it is very cold in the boat and the unit is used soon after switching on the heater, the disc and the optical components may become fogged and not operate properly. Wipe fogged discs with a soft cloth. Fogged optical components will naturally return to normal when the unit is left for about one hour after which it will operate normally.
2.When the boat is traveling in the rough seas the sound may skip as a result of intense vibrations and shock.
3.This unit uses a precision mechanism. Even in the event that trouble arises, never open the case, disassemble the unit, or lubricate the rotating parts.
This equipment has been tested and found to comply with the limits for a Class B digital device, pursuant to Part 15 of the FCC Rules. These limits are designed to provide reasonable protection against harmful interference in a residential installation. This equipment generates, uses, and can radiate radio frequency energy and, if not installed and used in accordance with the instructions, may cause harmful interference to radio communications. However, there is no guarantee that interference will not occur in a particular installation. If this equipment does cause harmful interference to radio or television reception, which can be determined by turning the equipment off and on, the user is encouraged to consult the dealer or an experienced radio/TV technician for help.
 CAUTION
USE OF CONTROLS, ADJUSTMENTS, OR PERFORMANCE OF PROCEDURES OTHER THAN THOSE SPECIFIED HEREIN, MAY RESULT IN HAZARDOUS RADIATION EXPOSURE.
THE COMPACT DISC PLAYER SHOULD NOT BE ADJUSTED OR REPAIRED BY ANYONE EXCEPT PROPERLY QUALIFIED SERVICE PERSONNEL.
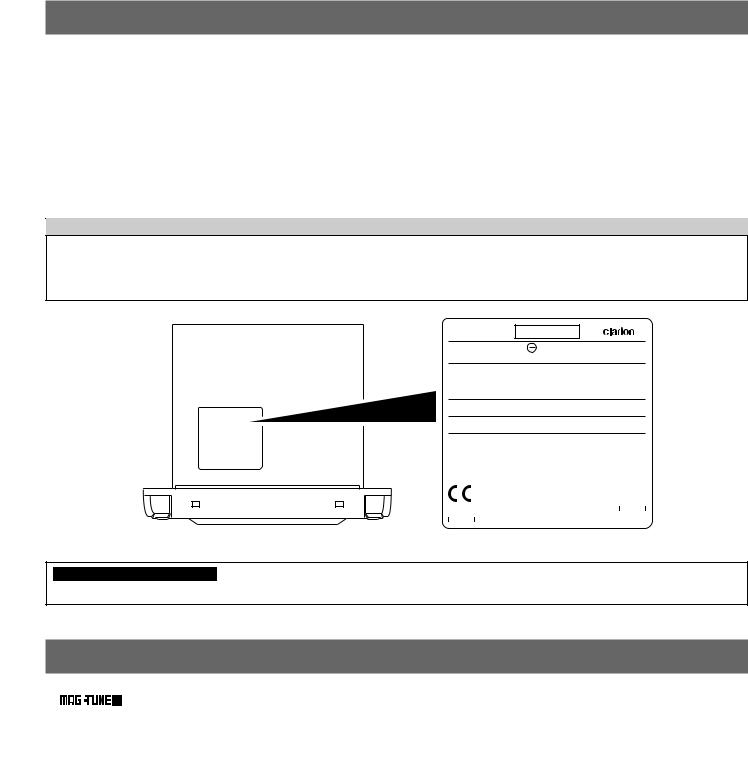
MODEL
12V GROUND
AM 530-1710kHz/FM 87.9-107.9MHz
THIS DEVICE COMPLIES WITH PART 15 OF THE FCC RULES.
OPERATION IS SUBJECT TO THE FOLLOWING TWO CONDITIONS: (1)
THIS DEVICE MAY NOT CAUSE HARMFUL INTERFERENCE, AND (2) THIS
DEVICE MUST ACCEPT ANY INTERFERENCE RECEIVED, INCLUDING
T H I S P R O D U C T I O N C O M P L I E S W I T H D H H S R U L E S 2 1 C F R
SUBCHAPTER J APPLICABLE AT DATE OF MANUFACTURE.
CLARION CO.,LTD.
50 KAMITODA , TODA-SHI, SAITAMA-KEN, JAPAN.
MANUFACTURED:
|
|
|
|
|
SERIAL No. |
|
|
||
|
|
|||
Clarion Co.,Ltd. |
||||
|
|
|
MADE IN CHINA |
|
Bottom view of source unit
INFORMATION FOR USERS:
CHANGES OR MODIFICATIONS TO THIS PRODUCT WILL VOID THE WARRANTY AND WILL VIOLATE FCC APPROVAL.
2.FEATURES
■ Z-Enhancer with 3 Mode Sound Selector
■ |
® FM Reception System |
■AM/FM Bands-1 AM, 3 FM/18 FM/6 AM Touchbutton Memory
■8-Times Oversampling Digital Filter and Dual 1-Bit D/A Converters
■Zero-Bit Detector™ Mute Circuit
■Repeat/Random Play/Intro Music Scan
■Multi-Color LC Display
■4-Channel RCA Line Level Output with Fader Control (XMD2 2-Channel RCA)
■180 W (45 W × 4) Maximum Power Output
■Wire Remote Control
■Water Resistance Escutcheon
2 XMD1/XMD2
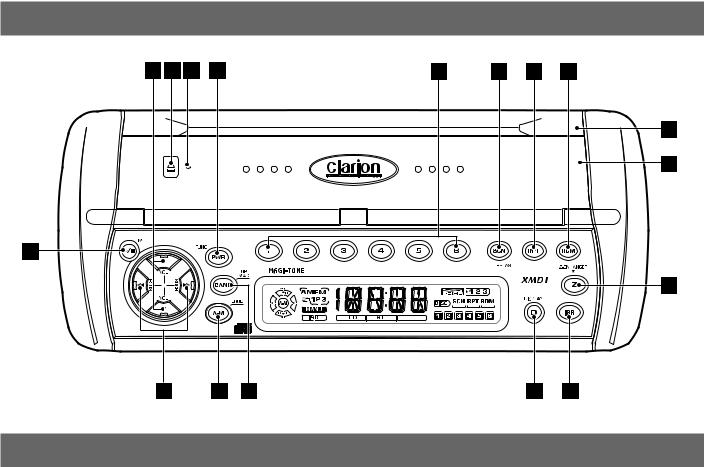
3.CONTROLS
Source Unit
4.BUTTON TERMINOLOGY
1 VOL (Volume) up and Down Button |
! Play / Pause (s) Button |
2 Eject (Q) Button |
MUTE Button |
3 Reset Button |
@ SRCH (Search) Left and Right (a and d) Button |
4 Power Button |
# A-M (Audio Mode) Button |
FUNC (Function) Button |
LOUD (Loudness) Button |
5 Preset Buttons (1 to 6) |
$ BAND Button |
Direct Button (1 to 6) |
Top (Top Play) Button |
6 SCN (Scan) Button |
MAG (Magazine) Button (Only XMD1) |
PS/AS (Preset Scan/Auto Store) Button |
% D (Display) Button |
7 RPT (Repeat) Button |
¥ ISR (Instant Station Recall) Button |
8 RDM (Random) Button |
& Z (Z-enhancer) Button |
9 Hook |
|
0 Door |
|
XMD1/XMD2 3
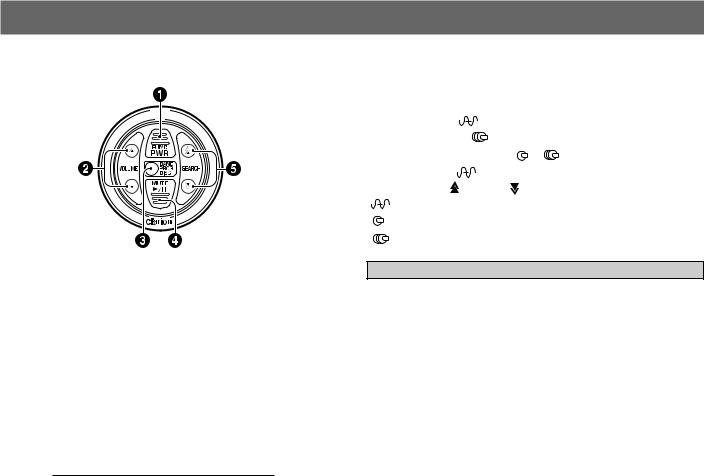
5.WIRED REMOTE CONTROL UNIT OPERATIONS
XMD1/XMD2 following operations are enabled by remote control with the Wired Remote Control Unit M101RC (sold separately).
WIRED REMOTE CONTROL UNIT |
1PWR (Power) Button |
|
FUNC (Function) Button |
|
2VOLUME Up (w) / Down (z) Buttons |
|
3BAND Button [ ] |
|
DISC Up Button [ |
] |
|
4Play/Pause (s) Button [ |
] [ ] |
||
|
MUTE Button [ |
] |
|
5SEARCH Up( ) / Down ( |
) Buttons |
||
[ |
] : In the Radio Mode |
|
|
[ |
] : In the CD Mode |
|
|
[ |
] : In the CD Changer Mode |
||
 CAUTION
Be careful about adjusting the volume, as turning on the power while the volume is raised to its maximum may harm your hearing.
PWR / FUNC Button 1
Turning on and off the power
Press the PWR button 1 to turn the power on and press and hold it for 1 second or longer to turn the power off.
Changing the operation mode
Each time the FUNC button 1 is pressed, the mode switches in the following order:
 Radio CD CD changer (XMD1 only)
Notes:
•If the above equipment is not connected, corresponding mode cannot be selected.
•In CD mode, if no CD is loaded in XMD1/XMD2, “DISC” flashes on the display and the radio mode is selected.
VOLUME Up (w) / Down ( z) Buttons 2
Adjusting the volume
Press the VOLUME Up button 2 to increase the volume and press the VOLUME Down button 2 to decrease the volume.
BAND / DISC Up Button 3
Changing the band (in the Radio mode)
Each time the BAND button 3 is pressed, the band switches in the following order:
FM1 FM2 FM3 AM FM1.....
Top function (in CD mode)
Press the button 3, then the CD will start from the first song (track number 1).
Changing the disc (in the CD changer mode) XMD1 only
Each time the DISC Up button 3is pressed, the disc switches in the following order:
1 2 3 4 5 6 1.....
Play/Pause ( s) / MUTE Button 4
Pause (in the CD mode or CD changer mode)
Press the Play/Pause button 4. Playback pauses. To resume playback, press the Play/Pause button 4 again.
Mute (in Radio mode)
Press the MUTE button 4. The sound is muted immediately.To cancel, press the MUTE button 4 again.
SEARCH Up ( ) / Down (
  ) Buttons 5
Selecting tracks (in CD changer mode or CD mode)
Press the SEARCH Up button 5 to start playback from the beginning of the following track. Press the SEARCH Down button 5 to start playback from the beginning of the current track. If pressed again, the track moves to the previous one.
Fast-forward and fast-backward (in CD changer mode or CD mode)
Press and hold the SEARCH Up button 5 to fast-forward the disc. Press and hold the SEARCH Down button 5 to fast-backward the disc.
*Pressing and holding the SEARCH Up/Down buttons for 1 second or longer will move forward or backward 3 times faster than normal play, and pressing and holding it for 3 seconds or longer will do the operation 30 times faster.
Changing preset stations (in the Radio mode)
Each time the SEARCH Up/Down buttons 5 are pressed, the preset station switches in the following order:
1 2 3 4 5 6 1.....
or
6 5 4 3 2 1 6.....
4 XMD1/XMD2

6. HANDLING COMPACT DISCS
This unit has been designed specifically for playback of compact discs bearing the  mark. No other discs can be played.
To remove the compact disc from its storage case, press down on the center of the case and lift the disc out, holding it carefully by the edges.
Removing the disc |
Proper way to hold |
|
the compact disc |
Always handle the compact disc by the edges. Never touch the surface.
To remove fingermarks and dust, use a soft cloth, and wipe in a straight line from the center of the compact disc to the circumference.
Note on Compact Discs
Never stick labels on the surface of the compact disc or mark the surface with a pencil or pen.
No
Do not use any solvents such as commercially available cleaners, anti-static spray, or thinner to clean compact discs.
No
No
New discs may have some roughness around the edges. The unit may not work or the sound may skip if such discs are used. Use a ball-point pen, etc. to remove roughness from the edge of the disc.
Ball-point pen
Roughness
Do not use compact discs that have large scratches, are misshapen, or cracked, etc. Use of such discs will cause misoperation or damage.
No
Do not expose compact discs to direct sunlight or any heat source.
No
Note:
•Do not use commercially available CD protection sheets or discs equipped with stabilizers, etc. These may get caught in the internal mechanism and damage the disc.
XMD1/XMD2 5
 Loading...