


Operation & Service Manual
FRY-SAVER® Oil Filtration System
MODEL # |
OIL CAPACITY |
VOLTAGE |
SHIP WT. |
|
|
|
|
F-60 |
60 lbs. |
120v/60/1 |
85 lbs. |
|
|
|
|
F-100 |
120 lbs. |
120v/60/1 |
95 lbs. |
|
|
|
|
F-150 |
150 lbs. |
120v/60/1 |
105 lbs. |
|
|
|
|
STANDARD FEATURES:
•All stainless steel body and filter housing construction.
•1/4 HP heavy-duty reversible pump & motor.
•Built-in suction line heater with indicator light for solid shortening.
•5-foot (1.5 meter) flexible, sanitary, high temperature hose and heat proof handle assembly.
•Easy to remove pleated filter cartridge for super fine filtering.
•Built-in thermal reset switch.
•Four heavy-duty swivel casters allow easy movement.
•Filters 50 lbs. of oil in 5 minutes.
®
Since 1911
Cecilware Corporation |
|
|
43-05 20th Avenue ~ Long Island City, NY 11105 |
|
|
Tel: 800.935.2211 |
718.932.1414 Fax: 718.932.7860 |
|
www.cecilware.com |
customer.service@cecilware.com |
NM47A |
|
|
|

FILTER CARTRIDGE DIRECTIONS:
To insert or replace the filter cartridge in the unit, follow these simple steps:
1)Remove cartridge support assembly by lifting straight up, and applying a twisting motion. Discard the used cartridge. Wipe machine down with a clean cloth.
DO NOT USE WATER OR OTHER CLEANING SOLUTIONS WHEN CLEANING THE FRY-SAVER®.
2)Place the cartridge support assembly over the center tube in the filter tank. Push down until the cartridge support rests on the bottom of the tank.
3)Place the pleated filter cartridge (pleats facing up) over the cartridge support. Push down on the outer rim until the cartridge rests on the support bead.
BE CAREFUL NOT TO DAMAGE PLEATS. Improper handling will crush them.
NOTE: Each filter cartridge can be used to filter up to 1,000 pounds of oil before a new cartridge must be used. This equates to the cartridge being entirely covered with foreign matter.
It is recommended that you only remove and re-insert the cartridge when it needs to be replaced. By continuously removing and re-inserting the cartridge, you will lessen its efficiency by breaking the seal formed around the cartridge diameter. This allows for oil and particles to flow into the filtered oil and recontaminate the oil.
OPERATING INSTRUCTIONS
Before operating the filter, check the control lever and heater switch to see that they are in the "OFF" position. The drain valve should be in the “CLOSED” position too. The filter cartridge should be inserted as well (SEE FILTER CARTRIDGE DIRECTIONS).
NOTE: The FRY-SAVER® is equipped with a circuit breaker to protect against electric overload or shortcircuiting. If the unit is plugged in and does not operate, simply push the circuit breaker button located on the face of the control panel and hold in for a few seconds. If the unit still does not operate, unplug and call either a service technician or our office at 1-800-935-2211 or 718-932-1414. DO NOT CONTINUE TO PUSH THE BUTTON! THIS WILL HARM THE MOTOR.
1)Turn off the fryer. Wait for the temperature of the oil to cool down to approximately 250° F. If you are using solid shortening, see below.
2)Plug the FRY-SAVER® into the correct service outlet.
The FRY-SAVER® is equipped with an additional "pre-heat" feature for when the cooking oil is solidified or thick.
A)Pre-heat the unit by turning the heater switch to "ON" and allow the unit to heat for approximately 15 minutes. You will know the unit is ready because suction is felt at the nozzle when the control switch is turned to "FILL."
B)When the machine is pre-heated, turn the heater switch to "OFF" and proceed with filtering.
Page 2
3)Place the nozzle in the cooking oil approximately 2 inches. DO NOT REST THE NOZZLE ON THE BOTTOM OF THE FRYER. This will prevent the nozzle from becoming clogged with solid particles.
4)Turn the control switch to "FILL", keeping the nozzle tip submerged as oil is pumped into the filter.
5)When most of the oil is transferred from the fryer to the filter, turn the control switch to "OFF" and clean the fryer as you normally would. DO NOT TRANSFER WATER AND SOLID PARTICLES FOUND ON THE BOTTOM OF THE FRYER. You do not want to mix water and oil together.
6)Place the nozzle in the filter tank through the hole in the cover. DO NOT rest the nozzle on the cartridge. Turn the control switch to "filter" and allow the oil to pass through the cartridge while you clean the fryer.
7)After you have removed most of the oil, only sediment and water is left. Place a container under the drain valve in front of the fryer and open the valve to empty the unit. When the fryer is empty, follow the manufacturer's instructions for cleaning.
8)Once the fryer is cleaned, the oil in the FRY-SAVER® tank can be transferred back to the fryer.
9)Turn the control switch on the FRY-SAVER® to "OFF" and position the nozzle in the fryer. Switch the control lever to "FILTER" and run until all the cooking oil is transferred back into the fryer. When finished, turn the control switch "OFF" and replace the nozzle in the cover for storage.
Even though you have emptied the FRY-SAVER® of oil, there will still be some residual oil in the valve and hose. This oil must be drained so it does not cause any clogging.
Place a pan or other suitable container under the valve located below the flexible hose connection at the bottom of the filter tank. Turn the valve cock open until dripping stops. Then close the drain valve. THE DRAIN VALVE MUST BE
CLOSED BEFORE FILTERING.
FRY-SAVER® FILTER CARTRIDGES:
The filter cartridge has an average life of approximately 1,000 pounds of oil before needing to be replaced. If you are uncertain how many pounds you have filtered, the easiest rule of thumb is to replace the cartridge when the pleats are completely filled with sediment.
NOTE: DO NOT CONTINUOUSLY REMOVE AND RE-INSERT THE FILTER CARTRIDGE, AS THIS WILL CAUSE THE SEAL AROUND THE EDGE OF THE PAN TO BECOME STRIPPED.
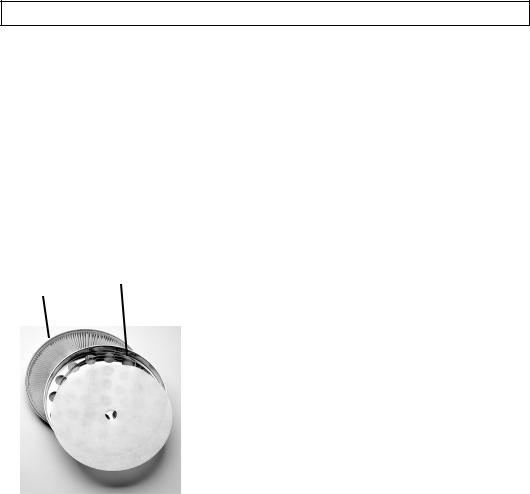
Two Ways To Extend The Life Of The Cartridge
1.Use the stainless steel pre-filter assembly and pre-filter paper that is available as an accessory
2.Re-use the old cartridge as well as a new one
Filter |
Pre-Filter |
Paper |
The pre-filter assembly and paper are available from your local dealer and highly |
||
recommended to further eliminate larger particles during the filtering process. |
|||||
Cartridge |
|
|
|
||
|
|
|
|||
|
|
|
|
To re-use the old cartridge, first remove it from the unit and install a new cartridge. |
|
|
|
|
|
Take the used cartridge and empty out all the particles that have collected in the |
|
|
|
|
|
pleats. Remove the cloth wick around the outside edge of the old cartridge and |
|
|
|
|
|
place it on top of the new cartridge. This will extend the life of the new cartridge. |
|
|
|
|
|
On the next change of cartridges, remove both the old and the newer discarding the |
|
|
|
|
|
||
|
|
|
|
top cartridge. Install the new cartridge on the bottom and place the cartridge that |
|
|
|
|
|
was on the bottom, on the top. This process can be continued indefinitely. |
|
Page 3
 Loading...