


PUB.DIM-637
English 
Français 
Español 
Please read also the following instruction manuals.
Veuillez lire aussi les modes d’emploi suivants.
Lea también los manuales de instrucciones siguientes.
•Digital Video Software
•DV Network Software
|
|
PUB. DIM-627 |
||
|
Digital Video Software |
|
||
|
Version 12 |
E |
||
|
Instruction Manual |
|
|
|
|
Mode d’emploi |
|
|
|
|
Manual de Instrucciones |
|
|
F |
|
|
|
|
|
|
|
|
|
Es |
|
|
|
|
|
|
|
|
|
|
|
|
|
|
|
|
PUB. DIM-629 |
|
DV Network Software |
|
|
Version 2 |
E |
|
Instruction Manual (Installation and Preparation) |
|
|
|
|
|
Mode d’emploi (Installation et préparation) |
F |
|
|
|
Es |
Manual de Instrucciones (Instalación y preparativos)
This software is for use with Windows® XP only.
Ce logiciel ne peut être employé que sous Windows® XP. Este software solamente es compatible con Windows® XP.
NTSC
Important Usage Instructions
|
|
|
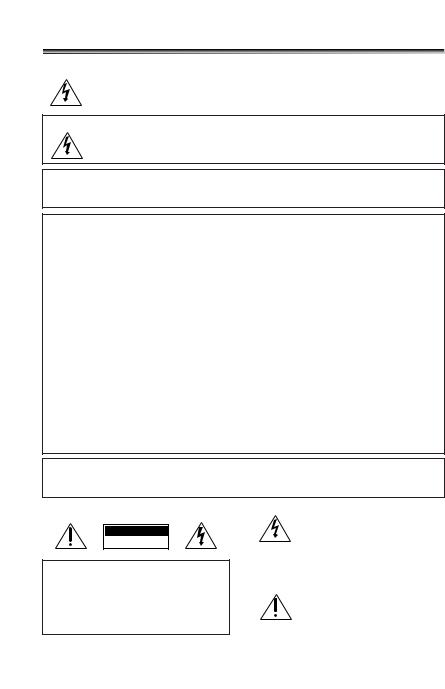
WARNING: |
|
E |
|
|
|
|
TO REDUCE THE RISK OF FIRE OR ELECTRIC SHOCK, DO NOT EXPOSE THIS |
|
|
|
|
PRODUCT TO RAIN OR MOISTURE. |
|
|
||
|
|
|
|
WARNING:
TO REDUCE THE RISK OF ELECTRIC SHOCK AND TO REDUCE ANNOYING INTERFERENCE, USE THE RECOMMENDED ACCESSORIES ONLY.
COPYRIGHT WARNING:
Unauthorized recording of copyrighted materials may infringe on the rights of copyright owners and be contrary to copyright laws.
Digital Video Camcorder, OPTURA40/OPTURA30 systems
This device complies with Part 15 of the FCC Rules. Operation is subject to the following two conditions: (1) This device may not cause harmful interference, and (2) this device must accept any interference received, including interference that may cause undesired operation.
Note: This equipment has been tested and found to comply with the limits for class B digital device, pursuant to Part 15 of the FCC Rules. These limits are designed to provide reasonable protection against harmful interference in a residential installation. This equipment generates, uses and can radiate radio frequency energy and, if not installed and use in accordance with the instructions, may cause harmful interference to radio communications. However, there is no guarantee that interference will not occur in a particular installation. If this equipment does cause harmful interference to radio or television reception, which can be determined by turning the equipment off and on, the user is encouraged to try to correct the interference by one or more of the following measures:
•Reorient or relocate the receiving antenna.
•Increase the separation between the equipment and receiver.
•Connect the equipment into an outlet on a circuit different from that to which the receiver is connected.
•Consult the dealer or an experienced radio/TV technician for help.
Use of shielded cable is required to comply with class B limits in Subpart B of Part 15 of FCC Rules.
Do not make any changes or modifications to the equipment unless otherwise specified in the manual.
If such changes or modifications should be made, you could be required to stop operation of the equipment.
Canon U.S.A. Inc.
One Canon Plaza, Lake Success, NY 11042, U.S.A.
Tel No. (516)328-5600
CAUTION:
TO PREVENT ELECTRIC SHOCK, MATCH WIDE BLADE OF PLUG TO WIDE SLOT, FULLY INSERT.
Important Warning
CAUTION
RISK OF ELECTRIC SHOCK
DO NOT OPEN
CAUTION:
TO REDUCE THE RISK OF ELECTRIC SHOCK, DO NOT REMOVE COVER (OR BACK). NO USER-SERVICEABLE PARTS INSIDE. REFER SERVICING TO QUALIFIED SERVICE PERSONNEL.
The lightning flash with arrowhead symbol, within an equilateral triangle, is intended to alert the user to the presence of uninsulated “dangerous voltage” within the product’s enclosure, that may be of sufficient magnitude to constitute a risk of electric shock to persons.
The exclamation point, within an equilateral triangle, is intended to alert the user to the presence of important operating and maintenance (servicing) instructions in the literature accompanying the product.
2

IMPORTANT SAFETY INSTRUCTIONS
In these safety instructions the word “product” refers to the Canon Digital Video Camcorder OPTURA40/OPTURA30 A and all its accessories.
1.Read Instructions — All the safety and operating instructions should be read before the product is operated.
2.Retain Instructions — The safety and operating instructions should be retained for future reference.
3.Heed Warnings — All warnings on the product and in the operating instructions should be adhered to.
4.Follow Instructions — All operating and maintenance instructions should be followed.
5.Cleaning — Unplug this product from the wall outlet before cleaning. Do not use liquid or aerosol cleaners. The product should be cleaned only as recommended in this manual.
6.Accessories — Do not use accessories not recommended in this manual as they may be hazardous.
7.Avoid magnetic or electric fields — Do not use the camera close to TV transmitters, portable communication devices or other sources of electric or magnetic radiation. They may cause picture interference, or permanently damage the camera.
8.Water and Moisture — Hazard of electric shock — Do not use this product near water or in rainy/moist situations.
9.Placing or Moving — Do not place on an unstable cart, stand, tripod, bracket or table. The product may fall, causing serious
injury to a child or adult, and serious damage to the product.
A product and cart combination should be
moved with care. Quick stops, excessive force, and uneven surfaces may
cause the product and cart combination to overturn.
10.Power Sources — The CA-570 Compact Power Adapter should be operated only from the type of power source indicated on the marking label. If you are not sure of the type of power supply to your home, consult your product dealer or local power company. Regarding other power sources such as battery power, refer to instructions in this manual.
11.Polarization — The CA-570 Compact Power Adapter is equipped with a polarized 2- prong plug (a plug having one blade wider than the other).
The 2-prong polarized plug will fit into the power outlet only one way. This is a safety feature. If you are unable to insert the plug fully into the outlet, try reversing the plug. If the plug still fails to fit, contact your electrician to replace your obsolete outlet. Do not defeat the safety purpose of the polarized plug.
12.Power Cord Protection — Power cords should be routed so that they are not likely to be walked on or pinched by items placed upon or against them. Pay particular attention to plugs and the point from which the cords exit the product.
13.Outdoor Antenna Grounding — If an outside antenna is connected to the product, be sure the antenna is grounded so as to provide some protection against voltage surges and built-up static charges. Section 810 of the National Electrical Code, ANSI / NFPA No. 70—1984, provides information with respect to proper grounding of the mast and supporting structure, grounding of the lead-in wire to an antenna discharge unit, size of grounding conductors, location of antenna discharge unit, connection to grounding electrodes, and requirements for the grounding electrode. See figure 1.
E 
Introduction
3

Fig. 1 |
EXAMPLE OF ANTENNA GROUNDING AS |
PER NATIONAL ELECTRICAL CODE |
ANTENNA
LEAD IN
WIRE
GROUND
CLAMP
ANTENNA DISCHARGE UNIT
(NEC SECTION 810-20)
ELECTRIC
SERVICE
EQUIPMENT GROUNDING CONDUCTORS (NEC SECTION 810-21)
GROUND CLAMPS
POWER SERVICE
GROUNDING ELECTRODE SYSTEM
(NEC ART 250. PART H)
NEC - NATIONAL ELECTRICAL CODE
14.Lightning — For added protection of this product during a lightning storm, or when it is left unattended and unused for long periods of time, disconnect it from the wall outlet and disconnect the antenna. This will prevent damage to the product due to lightning and power-line surges.
15.Overloading — Do not overload wall outlets and extension cords as this can result in a risk of fire or electric shock.
16.Objects and Liquid Entry — Never push objects of any kind into this product through openings as they may touch dangerous voltage points or short out parts that could result in a fire or electric shock. Be careful not to spill liquid of any kind onto the product.
17.Servicing — Do not attempt to service this product yourself as opening or removing covers may expose you to dangerous voltage or other hazards. Refer all servicing to qualified service personnel.
18.Damage Requiring Service — Disconnect this product from the wall outlet and all power sources including battery, and refer servicing to qualified service personnel under the following conditions:
a.When the power-supply cord or plug is damaged.
b.If any liquid has been spilled onto, or objects have fallen into, the product.
c.If the product has been exposed to rain or water.
d.If the product does not operate normally even if you follow the operating instructions. Adjust only those controls that are covered by the operation instructions. Improper adjustment of other controls may result in damage and will often require extensive work by a qualified technician to restore the product to its normal operation.
e.If the product has been dropped or the cabinet has been damaged.
f.When the product exhibits a distinct change in performance. This indicates a need for service.
19.Replacement Parts — When replacement parts are required, be sure the service technician has used replacement parts that are specified by Canon or that have the same characteristics as the original part. Unauthorized substitutions may result in fire, electric shock or other hazards.
20.Safety Check — Upon completion of any service or repairs to this product, ask the service technician to perform safety checks to determine that the product is in safe operating order.
When replacement of power supply is required, please return it to the responsible nearest Canon Service Center and please replace it with the same type number CA-570.
The Adapter can be used with a power supply between 100 and 240 V AC. For areas where 120 V AC power is not used, you will need a special plug adapter. Contact your nearest Canon Service Center for further information.
Use only CSA/UL Certified power supply cord set, Polarized, Type SPT-2 or heavier, minimum No. 18 AWG copper, rated 125 or 250 V, minimum ‚P A, minimum 6 ft (1.8 m), maximum 10 ft (3 m) long.
4
Using this Manual
Thank you for purchasing the Canon OPTURA40/OPTURA30. Please read this manual carefully before you use the camcorder and retain it for future reference.
Change the display language before you begin ( 78).
78).
Symbols and References Used in This Manual
 : Precautions related to the camcorder operation.
 : Additional topics that complement the basic operating procedures.
 : Reference page number.
Capital letters are used to refer to buttons on the camcorder or the wireless controller.
[ ] are used to refer to menu items displayed on the screen.
“Screen” refers to the LCD and the viewfinder screen.
Please note that the illustrations mainly refer to the OPTURA40.
|
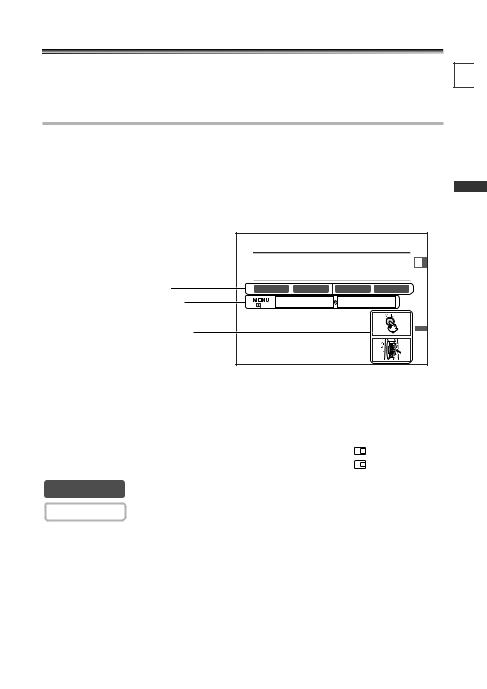
Setting the Time Zone, Date and Time |
|
||||
|
Set the time zone, date and time when you first start using your camcorder, or when |
E |
||||
|
you have replaced the backup battery. |
|
|
|||
|
|
|
|
|||
Operating modes (see below) |
Setting the Time Zone/Daylight Saving Time |
|
|
|||
CAMERA |
|
PLAY (VCR) |
CARD CAMERA |
CARD PLAY |
|
|
Menu item and its default setting |
( 37) |
|
|
T.ZONE/DST•••N.Y. |
|
|
|
SYSTEM |
|
|
|
||
|
1. Press the MENU button to open the menu. |
|
|
|||
Button and switches to be operated |
the SET dial. |
|
|
|
|
-FunctionsBasic Preparations |
|
2. Turn the SET dial to select [SYSTEM] and press the |
|
|
|||
|
SET dial. |
|
|
|
|
|
|
3. Turn the SET dial to select [T.ZONE/DST] and press |
|
|
|||
|
Th ti |
tti |
( t bl |
th t ) Th d f lt |
tti i N |
|
The operating modes are determined by the position of the POWER switch and the
TAPE/CARD switch.
Operating Mode |
POWER Switch |
TAPE/CARD Switch |
CAMERA |
CAMERA |
b (TAPE) |
PLAY (VCR) |
PLAY (VCR) |
b (TAPE) |
CARD CAMERA |
CAMERA |
(CARD) |
CARD PLAY |
PLAY (VCR) |
(CARD) |
CAMERA : Function can be used in this mode.
CAMERA : Function cannot be used in this mode.
Trademark Acknowledgements
•Canon and Bubble Jet are registered trademarks of Canon Inc.
•D is a trademark.
•
 is a trademark.
•Windows® is either a registered trademark or trademark of Microsoft Corporation in the United States and/or other countries.
•Macintosh and Mac OS are trademarks of Apple Computer, Inc., registered in the United States and other countries.
•Other names and products not mentioned above may be registered trademarks or trademarks of their respective companies.
E 
Introduction
5

Table of Contents
Introduction
|
Important Usage Instructions ........................................................................................ |
2 |
|
Important Safety Instructions ........................................................................................ |
3 |
|
Using this Manual .......................................................................................................... |
5 |
|
Checking Supplied Accessories ...................................................................................... |
8 |
|
Components Guide ........................................................................................................ |
9 |
|
Basic Functions |
|
|
|
|
|
Preparations |
|
|
Preparing the Power Supply........................................................................................ |
13 |
|
Loading/Unloading a Cassette .................................................................................... |
16 |
|
Installing the Backup Battery ...................................................................................... |
17 |
|
Preparing the Camcorder ............................................................................................ |
18 |
|
Using the Wireless Controller...................................................................................... |
20 |
|
Setting the Time Zone, Date and Time...................................................................... |
21 |
|
Recording |
|
|
Recording Movies on a Tape ...................................................................................... |
24 |
|
Zooming ........................................................................................................................ |
28 |
|
Tips for Making Better Videos .................................................................................... |
30 |
|
Playback |
|
|
Playing Back a Tape ...................................................................................................... |
31 |
|
Adjusting the Volume .................................................................................................. |
33 |
|
Playing Back on a TV Screen........................................................................................ |
34 |
|
Advanced Functions |
|
|
Menus and Settings ...................................................................................................... |
37 |
|
Recording |
|
|
Using the Recording Programs.................................................................................... |
45 |
|
Using the Night Modes ................................................................................................ |
48 |
|
Skin Detail Function...................................................................................................... |
50 |
|
Adjusting Exposure Manually...................................................................................... |
51 |
|
Adjusting the Focus Manually .................................................................................... |
52 |
|
Setting the White Balance .......................................................................................... |
54 |
|
Setting the Shutter Speed............................................................................................ |
56 |
|
Using the Self-Timer...................................................................................................... |
58 |
|
Changing the Recording Mode (SP/LP) ...................................................................... |
59 |
|
Audio Recording .......................................................................................................... |
60 |
|
Using Digital Effects...................................................................................................... |
64 |
|
Playback |
|
|
Magnifying the Image.................................................................................................. |
71 |
|
Displaying the Data Code ............................................................................................ |
72 |
|
End Search...................................................................................................................... |
74 |
|
Returning to a Pre-marked Position .......................................................................... |
75 |
|
Date Search .................................................................................................................... |
76 |
|
Other Functions |
|
6 |
Customizing the Camcorder ........................................................................................ |
77 |
|
|

Changing the Display Language ................................................................................ |
78 |
Changing the Remote Sensor Mode .......................................................................... |
79 |
Other Camcorder Settings .......................................................................................... |
80 |
Editing
Recording to a VCR or Digital Video Device ............................................................ |
83 |
Recording from Analog Video Devices (VCR, TV or Camcorder) .......................... |
85 |
Recording from Digital Video Devices (DV Dubbing).............................................. |
86 |
Converting Analog Signals into Digital Signals (Analog-Digital Converter) ........ |
87 |
Audio Dubbing.............................................................................................................. |
89 |
Connecting to a Computer Using a DV (IEEE1394) Cable ...................................... |
92 |
Using a Memory Card
Inserting and Removing a Memory Card .................................................................. |
93 |
Selecting the Image Quality/Size ................................................................................ |
94 |
File Numbers .................................................................................................................. |
96 |
Recording Still Images on a Memory Card ................................................................ |
97 |
Using the Flash ............................................................................................................ |
101 |
Reviewing a Still Image Right after Recording ...................................................... |
104 |
Recording Motion JPEG Movies on a Memory Card.............................................. |
105 |
Selecting the Focusing Point .................................................................................... |
107 |
Selecting the Drive Mode .......................................................................................... |
108 |
Recording Panoramic Images (Stitch Assist Mode) ................................................ |
110 |
Playing Back a Memory Card .................................................................................... |
112 |
Protecting Images ...................................................................................................... |
115 |
Erasing Images ............................................................................................................ |
116 |
Combining Images (Card Mix) .................................................................................. |
117 |
Formatting a Memory Card ...................................................................................... |
121 |
Creating a Start-up Image ........................................................................................ |
122 |
Direct Printing
Printing Still Images .................................................................................................... |
123 |
Selecting the Print Settings........................................................................................ |
126 |
Trimming Settings ...................................................................................................... |
131 |
Printing with Print Order Settings ............................................................................ |
132 |
Transferring Images
Connecting to a Computer Using a USB Cable |
......................................................134 |
Direct Transfer Windows OS Only .............................................................................. |
135 |
Selecting Images for Transfer (Transfer Order) ...................................................... |
138 |
Additional Information
About the NETWORK Mode |
....................................................................................139 |
Screen Displays ............................................................................................................ |
140 |
List of Messages .......................................................................................................... |
143 |
Maintenance/Others .................................................................................................. |
146 |
Troubleshooting .......................................................................................................... |
152 |
System Diagram ........................................................................................................ |
156 |
Optional Accessories .................................................................................................. |
157 |
Specifications .............................................................................................................. |
160 |
Item Codes .................................................................................................................. |
162 |
Index ............................................................................................................................ |
163 |
E 
Introduction
7
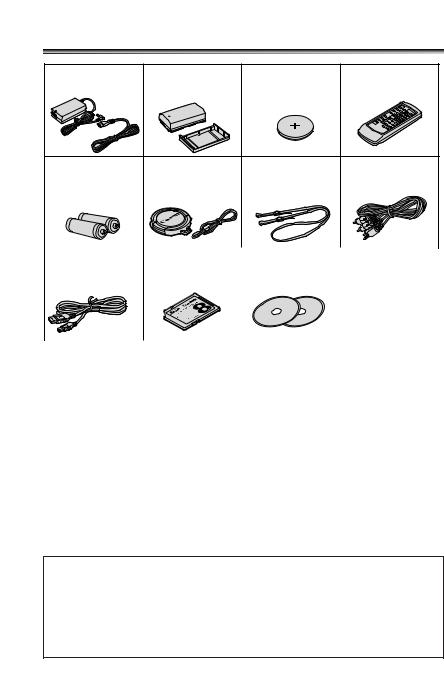
Checking Supplied Accessories
CA-570 Compact |
NB-2LH Battery Pack Lithium Button |
WL-D83 Wireless |
Power Adapter |
Battery CR2025 |
Controller |
(incl. power cord) |
|
|
Two AA (R6) Batteries Lens Cap and Lens |
SS-900 Shoulder Strap STV-250N Stereo |
Cap Cord |
Video Cable |
IFC-300PCU USB Cable SDC-8M SD Memory |
DIGITAL VIDEO |
|
Card (containing |
SOLUTION DISK |
|
sample images) |
For Windows |
|
|
For Macintosh |
|
|
|
|
The serial number of this product can be found at the battery attachment unit of the camcorder. Write down the number and other information here and retain this book as a permanent record of your purchase to aid identification in case of theft.
Date of Purchase: |
Model Name: OPTURA40/OPTURA30 A |
Purchased From: |
Serial No.: |
Dealer Address: |
|
Dealer Phone No.: |
|
8

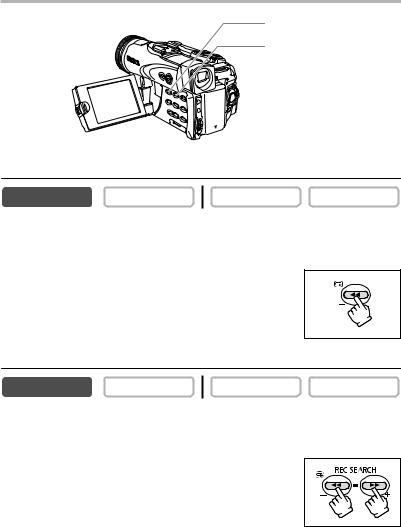
Components Guide
OPTURA40/OPTURA30 |
E |
|
REC SEARCH + button ( |
27) / |
|
|
|
|
|
|||
(fast forward) button ( 32) / |
|
|
|
|
|
||||
CARD + button ( |
112) |
|
|
|
|
|
|
||
REC SEARCH – button ( |
27) / |
|
|
|
|
|
|||
(record review) button ( |
27) / |
DRIVE MODE button ( |
108) / |
||||||
(rewind) button ( |
31) / |
|
|||||||
|
(stop) button ( |
31) |
|
||||||
CARD – button ( |
112) |
|
|
|
|||||
|
|
|
|
|
|
|
|||
|
|
|
|
|
(flash) button ( |
|
101) / |
||
|
|
|
|
|
|
(play/pause) |
|
|
|
|
|
|
|
|
button ( 31) |
|
|
|
|
|
|
|
|
|
(self-timer) button ( |
58) / |
|||
|
|
|
|
|
REC PAUSE button ( |
85) |
|||
AUDIO LEVEL button* ( |
60) |
|
|
|
|
|
|||
DIGITAL EFFECTS button ( |
64) |
|
|
|
|
|
|||
DIGITAL EFFECTS |
|
|
|
CARD MIX button ( |
|
117) / |
|||
ON/OFF button ( |
64) |
|
|
|
|||||
|
|
|
|
|
SLIDE SHOW button ( |
113) / |
|||
|
|
|
|
|
(stitch assist) button ( |
110) |
|||
NIGHT MODE |
|
|
|
|
|
|
|
|
|
button ( |
48) / |
|
|
|
|
|
|
|
|
(print/share) |
|
|
|
|
|
|
|
||
button ( |
123, 135) |
|
|
BATTERY RELEASE button |
|||||
|
|
|
|
|
( |
13) |
|
|
|
LCD screen |
|
|
|
|
|
|
|
|
|
( 24) |
|
|
|
|
|
|
|
|
|
|
|
|
|
|
Battery attachment unit |
||||
|
|
|
|
|
( |
13) / Serial number |
|||
|
|
|
|
|
EXP button ( |
51) / |
|
||
|
|
|
|
|
END SEARCH button ( |
74) |
|||
OPEN button( 24) |
|
|
MENU button ( |
37) |
|
||||
|
|
|
|
|
|
||||
|
|
|
|
|
Memory card slot ( 93) |
|
|
|
|
|
|
|
|
|
SET dial ( 37) |
|
|
|
|
|
|
|
|
|
Card access indicator ( 93) |
||||
FOCUS button ( 52) / DATA CODE button (
 72)
72)
* OPTURA40 only.
Introduction
9
Dioptric adjustment lever ( 18)
18)
Viewfinder ( 18)
18)
Strap mount ( 19)
19)
CHARGE indicator ( 13)
13)
Power indicator ( 13)
13)
Start/stop button ( 24, 105)
Power switch ( 5)
5)
CAMERA
OFF
PLAY(VCR)
NETWORK
TAPE/CARD switch ( 5)
5)
b Using a tape
Using a memory card
PHOTO button ( 97)
97)
Zoom lever ( 28)
28)
Program selector ( 46)
46)
Easy recording
Program AE
Speaker ( 33)
33)
Grip belt ( 18)
18)
Strap mount ( 19)
19)
Cassette compartment ( 16)
16)
OPEN/EJECT switch
 Cassette compartment cover (
 16)
16)
10
Terminal cover
DC IN terminal ( 13)
13)
Backup battery compartment ( 17)
17)
S |
S-video terminal ( 35)
35)
Terminal cover
MIC terminal ( 63)
63) 

AV terminal ( 34) /
34) /  (phones) terminal (
 33, 62)
DV terminal ( 83, 92)
USB terminal ( 123, 134)
* OPTURA40 only.
E 
Advanced Accessory shoe |
Introduction |
|
( 159) |
||
|
||
Flash ( 101) |
|
|
Focus ring ( 52) |
|
Stereo microphone ( 89)
89)
Remote sensor ( 20)
20)
Assist lamp (White LED)* ( 48)
48)
Tripod socket ( 30)
30)
11
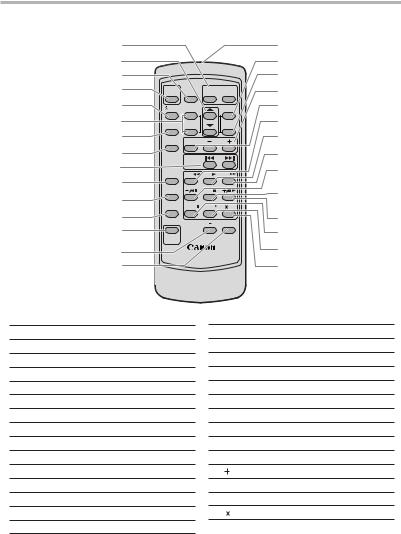
WL-D83 Wireless Controller
q w e r t y u
i o
!0
!1
!2
!3
!4
!5
START |
PHOTO |
ZOOM |
|
/STOP |
W |
T |
|
SELFT. |
D.EFFECTS |
|
MENU |
TVSCREEN |
ON/OFF |
|
SET |
DATA CODE |
SLIDE SHOW |
CARD |
|
|
DATESEARCH |
|
|
ZERO SET |
REW |
PLAY |
FF |
MEMORY |
|||
12bit |
|
STOP |
|
AUDIO OUT |
|
|
|
AUDIO DUB. |
PAUSE |
SLOW |
2 |
|
|
AV DV |
REMOTESET |
REC |
|
|
|
PAUSE |
|
|
|
WIRELESS CONTROLLER WL-D83
!6
!7
!8
!9
@0
@1
@2
@3
@4
@5
@6
@7
@8
@9
q Zoom buttons ( 28)
28)
w Select buttons ( 37)
37)
e PHOTO button ( 97)
97)
r START/STOP button ( 24, 105)
t  SELF T. button (
 58)
58)
y D. EFFECTS button, ON/OFF button ( 64)
64)
u TV SCREEN button ( 140)
140)
i DATA CODE button ( 72)
72)
o DATE SEARCH -/+ buttons ( 76)
76)
!0ZERO SET MEMORY button ( 75)
75)
!112bit AUDIO OUT button ( 91)
91)
!2AUDIO DUB. button ( 89)
89)
!3REC PAUSE button ( 85)
85)
!4AV  DV button (
 88)
88)
!5REMOTE SET button ( 79)
79)
!6Transmitter
!7MENU button ( 37)
37)
!8SET button ( 37)
37)
!9CARD 

 buttons (
 112)
112)
@0SLIDE SHOW button ( 113)
113)
@1REW button (
 31)
31)
@2PLAY  button (
 31)
31)
@3FF  button (
 32)
32)
@4


 button (
 32)
32)
@5STOP  button (
 31)
31)
@6 

 button (
 32)
32)
@7PAUSE  button (
 32)
32)
@8SLOW  button (
 32)
32)
@9 2 button ( 32)
32)
12
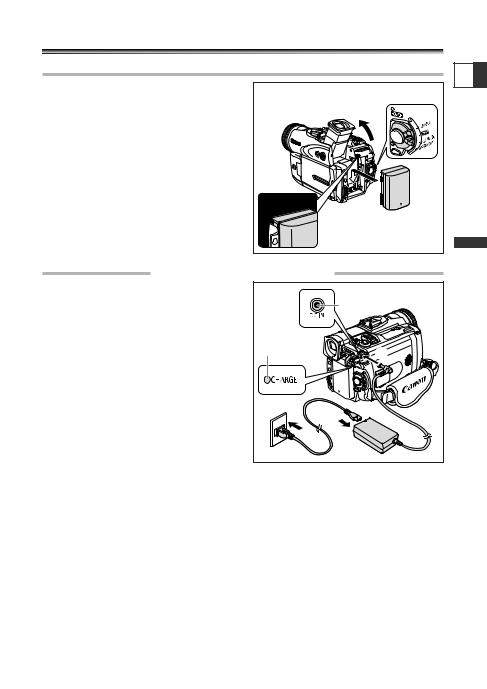
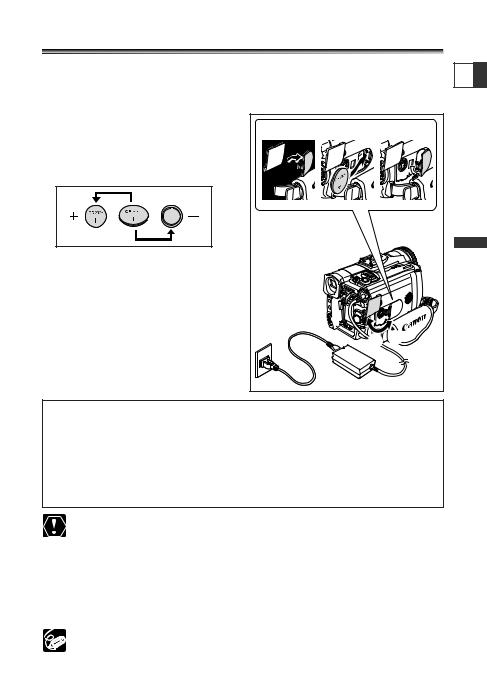
Preparing the Power Supply |
|
|
|
||
Attaching the Battery Pack |
|
|
E |
|
|
1. |
Turn the POWER switch to OFF. |
|
|
|
|
|
q |
|
|
||
2. |
Move the viewfinder upward. |
|
|
|
|
|
w |
|
|
||
3. |
Attach the battery pack to the |
|
|
|
|
|
|
|
|
||
|
camcorder. |
|
|
|
|
|
• Remove the terminal cover of the battery |
|
|
|
|
|
pack. |
|
|
|
|
|
• Press lightly and slide it in the direction of |
|
e |
|
|
|
the arrow until it clicks. |
|
|
|
|
|
|
|
|
-FunctionsBasic |
|
2. |
Plug the power cord into a power |
|
|
Preparations |
|
Charging the Battery Pack |
|
|
|
|
|
1. |
Connect the power cord to the |
|
|
|
|
|
adapter. |
|
DC IN terminal |
|
|
|
outlet. |
CHARGE |
|
|
|
3. |
Connect the power adapter to the |
indicator |
e |
|
|
|
camcorder’s DC IN terminal. |
|
|
|
|
|
The CHARGE indicator starts flashing. It |
|
|
|
|
|
glows steadily when charging is complete. |
q |
|
|
|
4. |
When charging is complete, |
|
|
|
|
|
|
|
|
||
|
disconnect the power adapter from |
w |
|
|
|
|
the camcorder. Unplug the power |
|
|
|
|
|
cord from the power outlet and |
|
|
|
|
|
disconnect it from the adapter. |
|
|
|
|
5. |
Remove the battery pack after use. |
|
|
|
|
|
Press the BATTERY RELEASE button to remove the battery. |
|
|
|
|
13
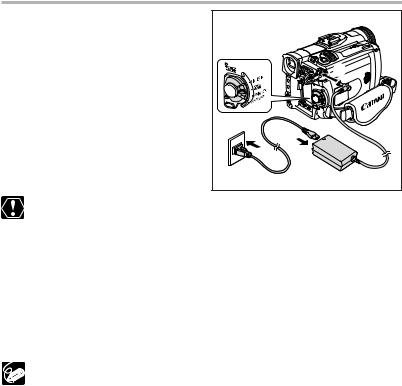
Using a Household Power Source
1.Turn the POWER switch to OFF.
2.Connect the power cord to the power adapter.
3.Plug the power cord into a power outlet.
4.Connect the power adapter to the camcorder’s DC IN terminal.
q |
|
|
r |
e |
w |
|
Turn off the camcorder before connecting or disconnecting the power adapter.
If the adapter is used close to a TV, it may cause picture interference. Move the adapter away from the TV or the antenna cable.
Do not connect any products that are not expressly recommended to the camcorder’s DC IN terminal or to the power adapter.
You may hear some noise from the power adapter during use. This is not a malfunction.
Do not disconnect and reconnect the power cord while charging a battery pack. Charging may stop. The battery pack may not be charged correctly even if the CHARGE indicator glows steady. The battery pack may also not be charged correctly when a power outage occurs during charging. Remove the battery pack and attach it back to the camcorder.
When the power adapter or battery pack is defective, the CHARGE indicator
flashes rapidly (at about 2 flashes/second) and charging stops.The CHARGE indicator informs you about the charge status.
0-50%: Flashes once every second More than 50%: Flashes twice every second 100%: Glows steadily
Charging, Recording and Playback Times
Below times are approximate and vary according to the charging, recording or playback conditions.
|
|
NB-2LH |
NB-2L |
BP-2L12 |
BP-2L14 |
Charging Time |
|
115 min. |
110 min. |
180 min. |
210 min. |
Max. Recording |
Viewfinder |
90 min. |
70 min. |
145 min. |
185 min. |
Time |
LCD |
75 min. |
55 min. |
120 min. |
155 min. |
Typical Recording |
Viewfinder |
50 min. |
40 min. |
80 min. |
100 min. |
Time* |
LCD |
40 min. |
30 min. |
70 min. |
85 min. |
Playback Time |
|
105 min. |
85 min. |
175 min. |
220 min. |
*Approximate times for recording with repeated operations such as start/stop, zooming, power on/off. Actual time may be shorter.
14

We recommend charging the battery pack in temperatures between 50 ˚F and 86 ˚F (10 ˚C and 30 ˚C). Outside the temperature range of 32 ˚F to 104 ˚F (0 ˚C to 40 ˚C), the CHARGE indicator flashes rapidly and charging stops.
A lithium ion battery pack can be charged at any charge state. Unlike conventional battery packs, you do not need to completely use or discharge it before charging.
We recommend that you prepare battery packs 2 to 3 times longer than you think you might need.
To conserve battery charge, turn off the camcorder instead of leaving it in record pause mode.
E 
|
|
Preparations |
Functions Basic |
|
- |
15
Loading/Unloading a Cassette
Use only videocassettes marked with the D logo.
1.Slide the OPEN/EJECT switch and open the cassette compartment cover.
The cassette compartment opens automatically.
2.Load/unload the cassette.
•Load the cassette with the window facing the grip belt.
•Unload the cassette by pulling it straight out.
3.Press the P mark on the cassette compartment until it clicks.
4.Wait for the cassette compartment to retract automatically and close the cassette compartment cover.
Tape |
w |
|
protection tab |
||
q |
||
|
||
e |
|
r
Do not interfere with the cassette compartment while it is opening or closing automatically, or attempt to close the cover before the cassette compartment has fully retracted.
Be careful not to get your fingers caught in the cassette compartment cover.
If the camcorder is connected to a power source, cassettes can be loaded/ unloaded even if the POWER switch is set to OFF.
16
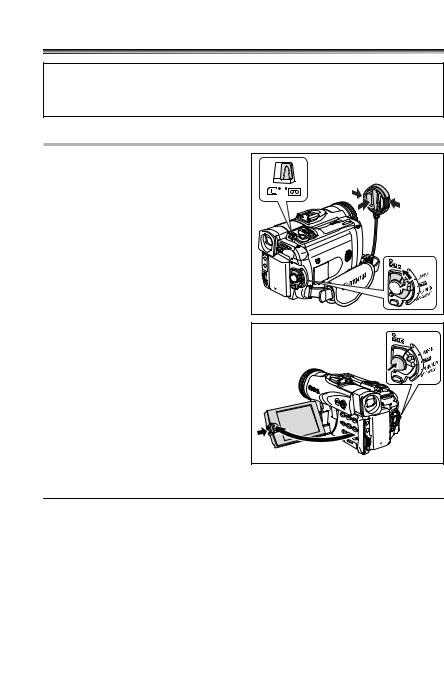
Installing the Backup Battery
The backup battery allows the camcorder to retain date, time ( 21) and other camcorder settings while the power source is disconnected. Connect a power source to E the camcorder when replacing the backup battery to retain the settings.
1. |
Open the terminal cover. |
w |
e |
r |
|
2. |
Open the backup battery cover. |
|
|||
|
|
|
|
||
3. |
Insert the lithium battery with the |
|
|
|
|
|
+ side facing outward. |
|
|
|
|
4. |
Close the backup battery cover. |
|
|
Preparations |
FunctionsBasic |
|
|
|
|
||
5. |
Close the terminal cover. |
|
|
|
|
|
|
|
|
|
- |
|
|
|
|
q t |
|
WARNING!
•The battery used in this device may present a fire or chemical burn hazard if mistreated. Do not recharge, disassemble, heat above 212 °F (100 °C) or incinerate the battery.
•Replace the battery with a CR2025 made by Panasonic, Hitachi Maxell, Sony, Sanyo, or with Duracell2025. Use of other batteries may present a risk of fire or explosion.
Do not pick up the battery using tweezers or other metal tools as this will cause a short circuit.
Wipe the battery with a clean dry cloth to ensure proper contact.
Keep the battery out of reach of children. If it is swallowed, seek medical assistance immediately. The battery case may break and the battery fluids may damage stomach and intestines.
Do not disassemble, heat or immerse the battery in water to avoid the risk of explosion.
The backup battery has a life span of about a year. “j” flashes in red to inform you that it needs to be replaced.
17
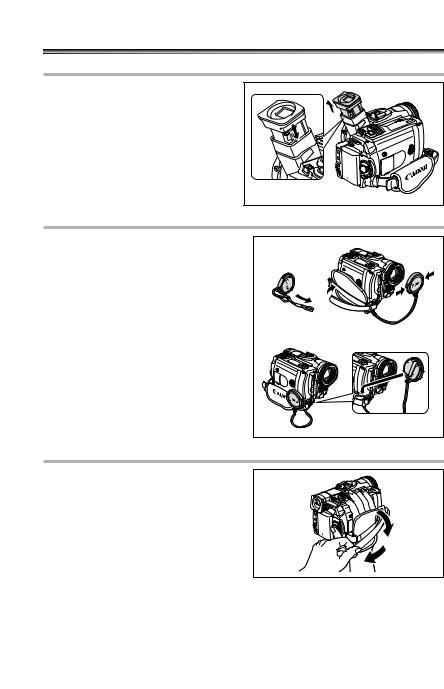
Preparing the Camcorder
Adjusting the Viewfinder (Dioptric Adjustment)
1. Turn on the camcorder and keep the LCD panel closed.
2. Pull out the viewfinder.
3. Adjust the dioptric adjustment lever.
Attaching the Lens Cap
1. Attach the cord to the lens cap.
2. Pass the grip belt through the loop on the cord.
Press the buttons on the lens cap when attaching/removing it. Hook the lens cap on the grip belt while you are recording, and place it over the lens when you have finished.
Fastening the Grip Belt
Hold the camcorder with your right hand and adjust the belt with your left.
Adjust the grip belt so that you can reach the zoom lever with your index finger, and the start/stop button with your thumb.
18
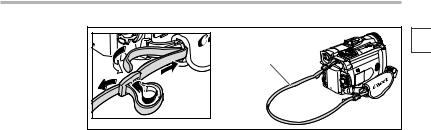
Attaching the Shoulder Strap
Pass the ends through the strap mount and adjust the length of the strap.
SS-900 Shoulder strap
E 
|
|
Preparations |
Functions Basic |
|
- |
19
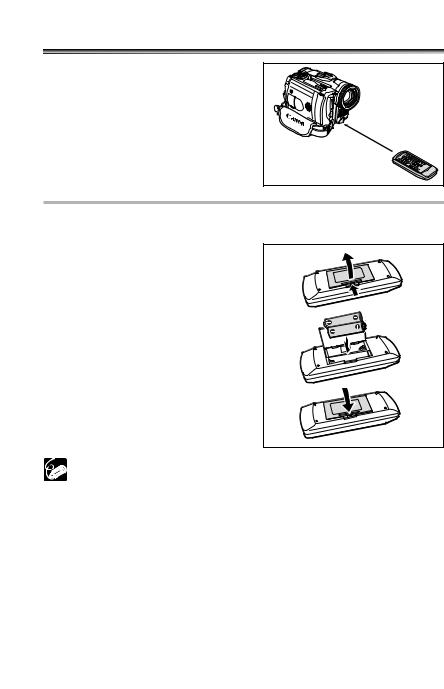
Using the Wireless Controller
Point it at the camcorder’s remote sensor when you press the buttons.
Inserting Batteries
The wireless controller operates with two AA (R6) batteries.
1. Open the battery cover.
2. Insert the batteries following the + and – markings.
3. Close the battery cover.
Camcorder and wireless controller are equipped with 2 remote sensor modes (  79). If the wireless controller does not work, check if camcorder and wireless controller are set to the same mode.
When the camcorder cannot be operated with the wireless controller, or when it can only be operated in very close range, replace the batteries. Make sure to replace both batteries at the same time.
The wireless controller may not work properly when the remote sensor is subjected to strong light sources or direct sunlight.
20
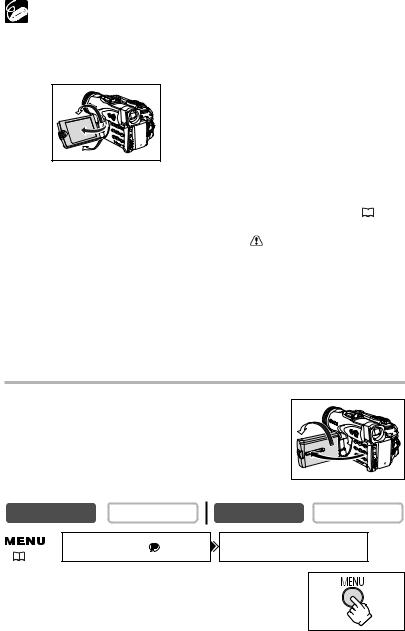
Setting the Time Zone, Date and Time
Set the time zone, date and time when you first start using your camcorder, or when
you have replaced the backup battery.
Setting the Time Zone/Daylight Saving Time
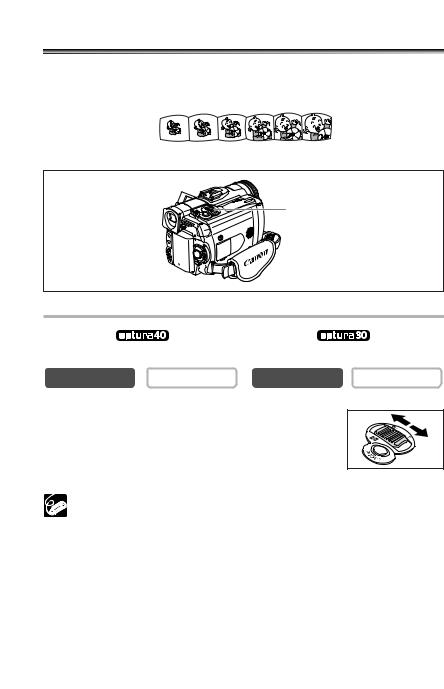
CAMERA |
PLAY (VCR) |
|
|
CARD CAMERA |
CARD PLAY |
||
|
|
|
|
|
|
|
|
|
|
|
|
|
|
|
|
|
SYSTEM |
|
|
|
T.ZONE/DST•••N.Y. |
|
|
( |
37) |
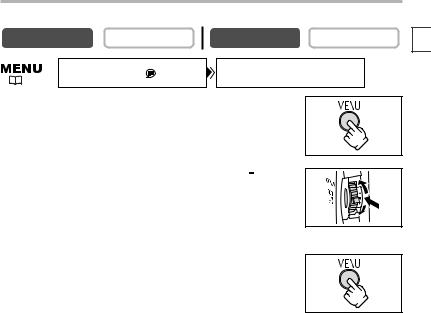
1.Press the MENU button to open the menu.
2.Turn the SET dial to select [SYSTEM] and press the
SET dial.
3. Turn the SET dial to select [T.ZONE/DST] and press the SET dial.
The time zone setting appears (see table on the next page). The default setting is New
York.
4.Turn the SET dial to select the setting option that represents your time zone and press the SET dial.
To adjust for daylight saving time, select the time zone with the U next to the area.
Setting the Date and Time
|
|
CAMERA |
PLAY (VCR) |
|
|
CARD CAMERA |
CARD PLAY |
||
|
|
|
|
|
|
|
|
|
|
|
|
|
|
|
|
|
|
|
|
|
|
|
SYSTEM |
|
|
|
D/TIME SET•••JAN. 1,2004 |
|
|
( |
|
37) |
|
|
|
|
|
12:00 PM |
|
|
|
|
|
|
|||||
5. Turn the SET dial to select [D/TIME SET] and press the SET dial.
The year display starts to flash.
6. Turn the SET dial to select the year, and press the SET dial.
•The next part of the display starts flashing.
•Set the month, day, hours and minutes in the same way.
E 
|
|
Preparations |
Functions Basic |
|
- |
21
7. Press the MENU button to close the menu and to start the clock.
16 |
|
|
|
|
|
|
|
|
|
|
|
|
|
|
|
|
|
|
|
|
1 |
|
4 |
|
|
|
|
|
|
|
|
|
|
|
|
|
|
|
|
|
|
|
|
|
|
|
|
|
19 |
20 |
|
|
|
|
|
|
|
|
|
|
|
|
|
|
18 |
|
|
24 |
2 |
|
|
|
|
|
|
|
|
|
|
|
|
|
|
|
|
|
|
|
|
|
|
|
|
|
|
|
17 |
|
|
|
|
|
3 |
|
|
6 |
7 |
|
9 |
10 |
|
|
|
|
|
|
|
|
|
|
|
|
|||||
15 |
|
|
|
|
|
|
|
|
|
|
|
|
|||
|
|
|
|
|
|
|
|
|
|
|
8 |
|
|
|
|
|
|
21 |
|
|
|
|
|
|
5 |
|
|
|
|
|
|
|
|
|
|
|
|
|
|
|
|
|
|
|
|
||
|
|
|
|
|
|
|
|
|
|
|
|
|
|
|
|
14 |
|
|
|
23 |
|
|
|
|
|
|
|
|
|
|
|
|
|
|
|
|
|
|
|
|
|
|
|
|
|
12 |
|
|
|
|
|
|
|
|
|
|
|
|
|
|
|
|
|
|
|
|
22 |
|
|
|
|
|
|
|
|
|
|
|
11 |
|
|
|
|
|
|
|
|
|
|
|
|
|
|
|
|
|
|
|
|
|
|
|
|
|
|
|
|
|
|
|
13 |
14 15 |
16 17 18 19 |
20 21 |
22 |
23 24 |
1 |
2 |
3 |
4 |
5 |
6 |
7 |
8 |
9 |
10 |
11 12 13 |
No. |
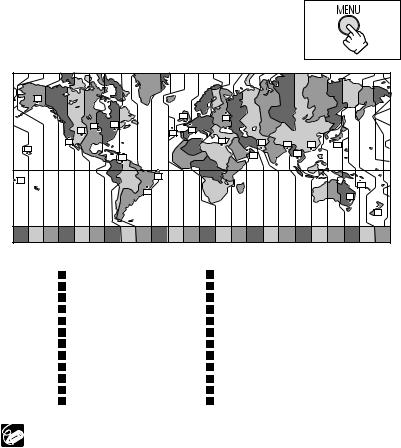
Time zone |
No. |
Time zone |
|
LONDON |
|
WELLGTN (Wellington) |
|
PARIS |
|
SAMOA |
|
CAIRO |
|
HONOLU. (Honolulu) |
|
MOSCOW |
|
ANCHOR. (Anchorage) |
|
DUBAI |
|
L.A. (Los Angeles) |
|
KARACHI |
|
DENVER |
|
DACCA |
|
CHICAGO |
|
BANGKOK |
|
N.Y. (New York) |
|
H. KONG (Hong Kong) |
|
CARACAS |
|
TOKYO |
|
RIO (Rio de Janeiro) |
|
SYDNEY |
|
FERNAN. (Fernando de Noronha) |
|
SOLOMON |
|
AZORES |
Once you have set time zone, date and time, you do not need to reset the clock each time you travel to another time zone. Just set the time zone to the one of your destination, and the camcorder automatically adjusts the clock.
22
Displaying Date and Time during Recording
You can display the date and time in the lower left corner of the screen.
CAMERA |
PLAY (VCR) |
CARD CAMERA |
CARD PLAY |
DISPLAY SETUP/ |
D/T DISPLAY••OFF |
|
|
( 37) |
|
|
|
E 
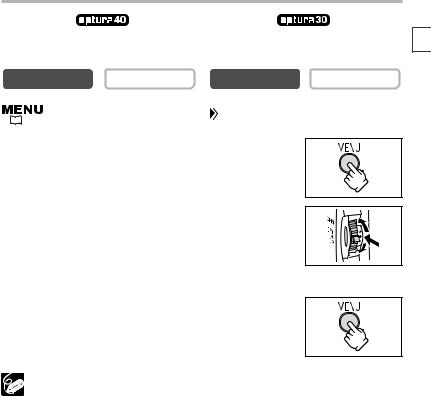
1.Press the MENU button to open the menu.
2.Turn the SET dial to select [DISPLAY SETUP/ ] and press the SET dial.
3.Turn the SET dial to select [D/T DISPLAY] and press the SET dial.
4.Turn the SET dial to select [ON].
5.Press the MENU button to close the menu.
|
|
Preparations |
Functions Basic |
|
- |
23
Recording Movies on a Tape
Before You Begin Recording
Make a test recording first to check if the camcorder operates correctly. Before you make important recordings, clean the video heads ( 147).
147).
Recording
1.Remove the lens cap.
2.Set the camcorder to CAMERA mode.
Set the POWER switch to CAMERA and the TAPE/CARD switch to b.
3.Push the OPEN button at the LCD panel and open the LCD panel.
4.Press the start/stop button to begin recording.
Press the start/stop button again to pause recording.
q |
w |
r |
e |
When You Have Finished Recording
1.Turn the POWER switch to OFF.
2.Close the LCD panel and return the viewfinder into its initial position.
3.Replace the lens cap.
4.Unload the cassette.
5.Disconnect the power source.
24
Wait until the tape counter stops completely before you start recording.
When you do not remove the cassette, you can record the next scene without producing any noise or blank sections between the recordings even if you turn
the camcorder off. |
E |
|
Bright light may make it difficult to use the LCD screen. In such case, use the |
|
|
|
|
|
viewfinder instead. |
|
|
|
You can rotate the LCD panel. Make sure to open the LCD panel at 90 degrees before rotating it.
When recording near loud sounds (such as fireworks, drums or concerts), |
|
|
|
|||
sound may become distorted or may be recorded not in the actual sound level. |
|
|
||||
This is not a malfunction. |
|
|
|
|||
OPTURA40: The audio recording level can also be adjusted manually ( |
|
|
60). |
|
|
|
|
|
|
||||
|
|
|
||||
The camcorder will shut off after 5 minutes when left in record pause |
Recording |
FunctionsBasic |
||||
mode to protect tape and video heads. “ AUTO POWER OFF” appears |
||||||
|
|
|||||
20 seconds before shutoff. To continue recording, turn the POWER |
|
|
|
|||
switch to OFF and then back to CAMERA. |
|
|
|
|||
About the LCD and viewfinder screen: The screens are produced with |
|
|
||||
extremely high-precision manufacturing techniques, with more than |
|
- |
||||
99.99% of the pixels operating to specification. Less than 0.01% of the pixels may occasionally misfire or appear as black or green dots. This has no effect on the recorded image and does not constitute a malfunction.
Allowing the Subject to Monitor the LCD Screen
You can rotate the LCD panel so that the screen faces in the same direction as the lens. The viewfinder switches on allowing you to use the viewfinder while the subject can monitor the screen.
The image appears mirror reversed (LCD MIRROR ON). However, you can choose to display the image as it is being recorded (LCD MIRROR OFF).
CAMERA |
PLAY (VCR) |
CARD CAMERA |
CARD PLAY |
DISPLAY SETUP/ |
LCD MIRROR•••ON |
|
|
( |
37) |
1. Press the MENU button to open the menu.
25
2. Turn the SET dial to select [DISPLAY SETUP/ ] and press the SET dial.
3. Turn the SET dial to select [LCD MIRROR] and press the SET dial.
4. Turn the SET dial to select [OFF].
5. Press the MENU button to close the menu.
When [LCD MIRROR] is set to [ON], only tape or card operation and self-timer displays appear on the LCD screen (all displays appear on the viewfinder screen).
Screen Displays during Recording
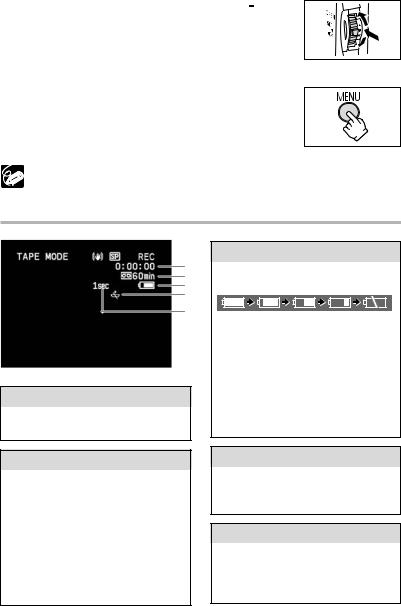
q w e r
t
q Time code
Indicates the recording time in hours, minutes and seconds.
w Remaining tape
Indicates the remaining time of the tape in minutes. “b“ moves during recording. “b END“ flashes when the tape reaches the end.
•When the time left is less than 15 seconds, the remaining tape time may not appear.
•Depending on the type of the tape, the indication may not be displayed correctly.
e Remaining battery charge
The battery symbol indicates the charge status of the battery pack.
•“k“ starts flashing in red when the battery pack is empty.
•When you attach an empty battery
pack, the power may turn off without displaying “k“.
•The actual battery charge may not be indicated accurately depending on the condition under which battery pack and camcorder are used.
r When “j” flashes
“j“ flashes in red when the lithium button battery is not installed, or when it runs out.
t Recording reminder
The camcorder counts from 1 to 10 seconds when you start recording. This is helpful to avoid scenes that are too short.
26
Reviewing and Searching when Recording
REC SEARCH – button/ |
|
|
|
v (record review) button |
|
E |
|
REC SEARCH + button |
|
|
|
|
|
|
|
|
|
|
|
Record Review
CAMERA |
PLAY (VCR) |
CARD CAMERA |
CARD PLAY |
In record pause mode, this function allows you to review the last few seconds of your recording to check if it has been recorded properly.
Press and release the c (record review) button.
The camcorder rewinds the tape, plays back the last few seconds, and returns to record pause mode.
Record Search
CAMERA |
PLAY (VCR) |
CARD CAMERA |
CARD PLAY |
In record pause mode, this function allows you to play back the tape (forward or reverse) to locate the point where you wish to begin recording.
Press and hold the REC SEARCH + button (forward) or – button (reverse).
• Release the button at the point you wish to begin recording.
• The camcorder returns to record pause mode.
|
|
Recording |
Functions Basic |
|
- |
27
Zooming
The camcorder automatically switches between optical zooming and digital zooming.
Image resolution is slightly lower with the digital zoom.
Zoom in  T
T
W Zoom out
Zoom lever
Optical Zoom
|
|
|
|
|
14× optical zoom |
|
12× optical zoom |
||
CAMERA |
PLAY (VCR) |
|
CARD CAMERA |
CARD PLAY |
|
||||
|
|
|
|
|
Move the zoom lever toward W to zoom out (wideangle). Move it toward T to zoom in (telephoto).
Press the zoom lever slightly for a slow zoom. Press harder for a faster zoom.
You can also use the T and W buttons on the wireless controller. However, you cannot control the zoom speed.
28
Digital Zoom
|
|
|
|
|
|
|
|
|
|
|
|
|
|
56×/280× digital zoom |
|
|
48×/240× digital zoom |
||||
|
|
(56× in CARD CAMERA mode) |
|
|
(48× in CARD CAMERA mode) |
|||||
|
|
CAMERA |
PLAY (VCR) |
|
|
CARD CAMERA |
CARD PLAY |
|||
|
|
|
|
|||||||
|
|
|
|
|
|
|
|
|
|
|
|
|
|
|
|
|
|
|
|
|
|
( |
|
37) |
|
CAMERA SETUP |
|
|
D.ZOOM•••••••56X |
|
|
|
|
|
|
|
|
|
|
|
|
||
|
|
|
|
|
|
|
|
|
||
1.Press the MENU button to open the menu.
2.Turn the SET dial to select [CAMERA SETUP] and
press the SET dial.
3. Turn the SET dial to select [D.ZOOM] and press the SET dial.
4.Turn the SET dial to select a setting option.
5.Press the MENU button to close the menu.
Digital zoom cannot be used in the night modes.
Digital zoom cannot be used when the multi-image screen is selected.
A zoom indicator appears for 4 seconds. It extends in light blue when the digital zoom is set to 56x (OPTURA40) or 48x (OPTURA30), and extends further in dark blue when set to 280x (OPTURA40) or 240x (OPTURA30).
Keep at least 3.3 ft. (1 m) to the subject. At wide-angle, you can focus on a subject as close as 0.39 in. (1 cm).
E 
|
|
Recording |
Functions Basic |
|
- |
29
Tips for Making Better Videos
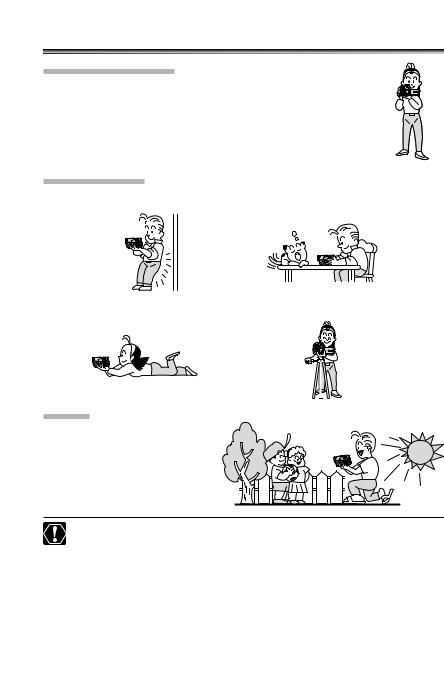
Holding the Camcorder
For maximum stability, grip the camcorder in your right hand and keep your right elbow pressed against your body. If necessary, support the camcorder with your left hand. Be careful that your fingers do not touch the microphone or lens.
For More Stability
Lean against a wall |
Put the camcorder on a table |
Lie on your elbow |
Use a tripod |
|||
|
|
|
|
|
|
|
|
|
|
|
|
|
|
|
|
|
|
|
|
|
|
|
|
|
Lighting
When recording outdoors, we recommend recording with the sun at your back.
When using a tripod, do not leave the viewfinder exposed to direct sunlight as it may melt (due to concentration of the light by the lens).
Do not use tripods with fastening screws longer than 0.2 inch (5.5 mm) as it may damage the camcorder.
30
 Loading...