


The Bose® 251TM Environmental Speakers
Owner’s Guide

For your records…
Serial numbers are located on the label on the back of each 251TM environmental speaker.
Serial numbers: |
|
|
and |
||
Dealer name: |
|
|
|
|
|
Dealer phone: |
|
|
Purchase date: |
|
|
We suggest you keep your sales slip and warranty card together with this ownerÕs guide.
DECLARATION OF CONFORMITY
We, the offerer:
Bose¨ Corporation, The Mountain, Framingham, MA 01701-9168 USA acknowledge our sole responsibility, that the product:
Kind of equipment: Loudspeaker
Type designation: 251TM Environmental Speakers
in accordance with EMC Directive 89/336/EEC and Article 10(1) of the Directive, is in compliance with the following norm(s) or document(s):
Technical regulations: EN50081-1, EN50082-1
Accredited by:
Bose Corporation, The Mountain, Framingham, MA 01701-9168 USA
15 Jan. 2000
Bose Products B.V. |
Nic Merks |
Nijverheidstraat 8, 1135 GE Edam |
Vice President Europe |
The Netherlands |
ManufacturerÕs authorized EU |
|
representative |
2

Contents
Where to find…
Setting Up |
|
Before you begin ........................................................................................................... |
4 |
Unpacking the carton ................................................................................................... |
4 |
Tools required ............................................................................................................... |
4 |
Selecting the location for your speakers ...................................................................... |
5 |
Installing Your 251TM Speakers |
|
Choosing the speaker wire ........................................................................................... |
6 |
Installing the mounting brackets ................................................................................... |
6 |
Attaching the speakers to the brackets ........................................................................ |
8 |
Making the connections ................................................................................................ |
9 |
Maintaining Your 251TM Speakers |
|
Troubleshooting .......................................................................................................... |
12 |
Warranty period .......................................................................................................... |
12 |
Customer service ........................................................................................................ |
12 |
Cleaning your speakers .............................................................................................. |
12 |
Protecting the speaker wire ........................................................................................ |
12 |
Product Information |
|
Technical information .................................................................................................. |
13 |
Bose¨ Corporation .................................................................................... |
inside back cover |
3
Setting Up
Before you begin…
Thank you for purchasing Bose¨ 251TM environmental speakers. These high-performance outdoor speakers are engineered to provide sound quality far beyond that of other environmental speakers. The 251 environmental speakers are designed to withstand natureÕs elements Ð so you can be confident they will perform for years to come.
Unpacking the carton
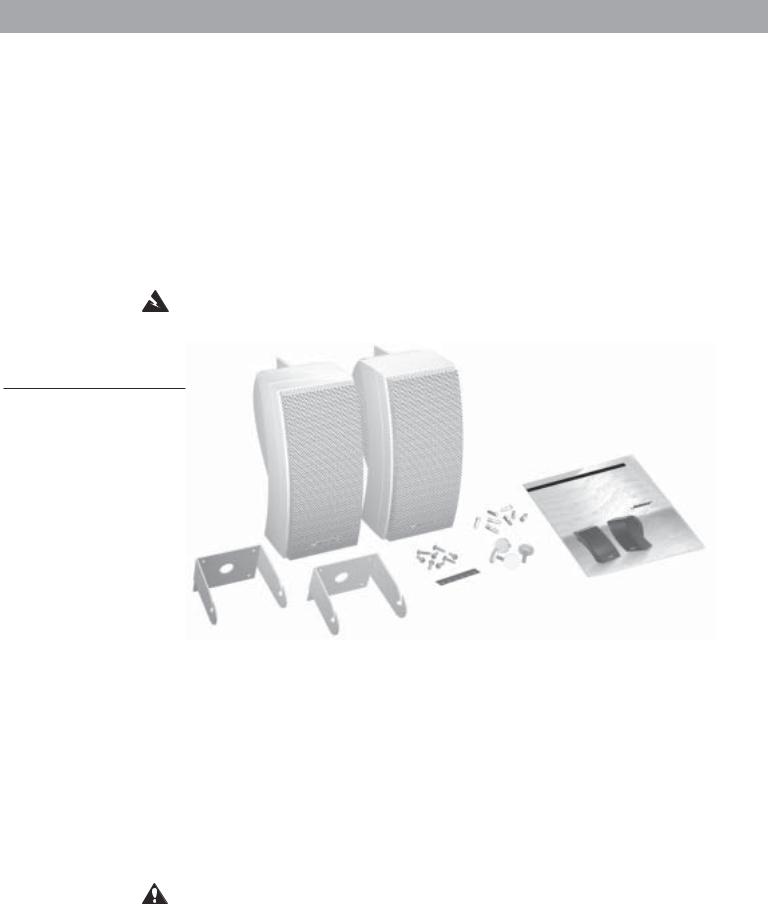
Carefully unpack your speakers and save all packing materials for possible future use. Check that your system contains the parts identified in Figure 1. Do not attempt to use your speakers if any part of them appears damaged. Instead, notify Bose Corporation or your authorized Bose dealer immediately.
WARNING: To avoid danger of suffocation, keep the plastic bags out of the reach of children.
Figure 1
Packaging contents:
¥Two 251 speakers
¥Two mounting brackets
¥Mounting hardware (8 screws and 8 plastic anchors)
¥Six rubber feet
¥Four knobs
¥One owner's guide
Tools required
You need the following items to complete this installation:
¥Speaker wire (see ÒWire recommendationsÓ on page 13)
¥Phillips-head screwdriver (#2)
¥A drill with the following bits:
-A 3Ú32 inch diameter (2,5 mm) bit is preferred, or you can use a 1Ú8 inch diameter (3,0 mm) bit. For concrete, a 1Ú4 inch (6,0 mm) diameter masonry bit can be used.
¥Eye and ear protection
¥Dust mask
CAUTION: Failure to follow the instructions in this ownerÕs guide voids all warranties on your speakers. If you are unsure of your ability to complete this process, consult a professional installer. Please read this ownerÕs guide completely before beginning installation.
4

Setting Up
Selecting the location for your speakers
For best results, mount both speakers on the same wall, facing the listening area. Make sure they do not face each other. (Outdoors, if you are not using an existing wall, consider the length of your listening area as your Òwall.Ó)
The 251TM speakers should be placed at least 7 feet (2 m) apart.
Please consider the following before mounting your speakers:
¥Measure the length of speaker wire you need to connect each speaker to your receiver or amplifier. To determine the wire gauge you will need, refer to the ÒWire recommendationsÓ on page 13.
¥It is important that the speaker wire not be tripped over, pinched, or pulled. Determine the best route to protect the wire.
CAUTION: Do not mount on surfaces that are not sturdy enough, or that have hazards concealed behind them, such as plumbing or electrical wire. If you are unsure about installing these speakers, contact a qualified professional installer.
¥Regardless of where you place your speakers, make sure they cannot fall and cause injuries.
¥Bose¨ 251 speakers are not magnetically shielded. Keep them at least 9 inches (23 cm) from any video screen or monitor.
Note: This product is not intended for use in areas where it will be subject to high vibration.
If you are unsure about installing these speakers, contact a qualified professional installer.
Figure 2
Speaker placement guidelines
7 ft (2 m)
minimum space between
speakers
5
Installing Your 251TM Speakers
Choosing the speaker wire
Be sure to use the proper gauge (thickness) of speaker wire. Standard zip cord (2-conductor, 18-gauge wire found at electrical and hardware stores) works for most applications. If your speakers will be more than 30 feet (9 m) from the receiver or amplifier, see the ÒWire recommendationsÓ under ÒTechnical InformationÓ on page 13. Or check with your authorized Bose¨ dealer.
If you decide to run the speaker wire through a wall or underground, check your local building code requirements, or contact an electrical installer before proceeding.
Note: Be sure to cut enough wire to reach from the receiver to each speaker.
CAUTION: Before making any connections, turn off your receiver or amplifier and unplug it from the outlet (the AC power mains).
Installing the mounting brackets
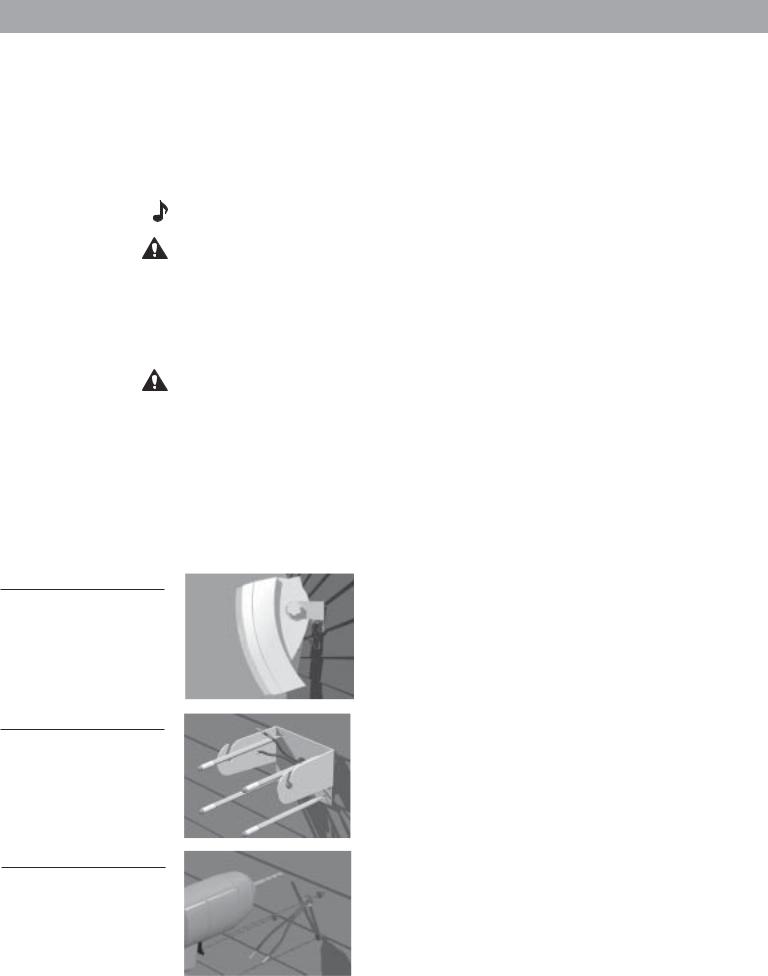
Figure 3
251 environmental speaker mounted onto the exterior of a house
Figure 4
Marking four holes on the exterior of a house
The 251TM speakers should be mounted using the supplied brackets. They can be mounted onto the exterior of a house or onto a deck railing or table. If you choose not to use the supplied brackets, be sure to position your 251 speakers on a sturdy surface.
CAUTION: If you do not use the supplied brackets, choose a level surface for the speakers. Vibration can cause the speakers to move, so it is important that you install the supplied rubber feet before using the speakers on a surface. Refer to ÒAttaching the rubber feetÓ on page 11.
Installing the brackets onto the exterior of a house
The 251 speakers should be mounted in a vertical position to achieve the best musical performance. Figure 3 illustrates how the mounted speaker will look once the installation is complete. To begin, mark four holes to indicate where you want to install the speaker bracket (Figure 4). For wood, drill four starter holes using a 3Ú32 inch (2,5 mm) drill bit (Figure 5). For cement, drill four starter holes using a 1Ú4 inch (6,0 mm) drill bit (Figure 5).
Figure 5
Drilling four holes on the exterior of a house
6

Installing Your 251TM Speakers
Installing the mounting brackets (cont.)
Installing the brackets onto the exterior of a house (cont.)
For mounting onto wood, install the supplied screws using a Phillips-head screwdriver (Figure 6A). For concrete use, first install the supplied plastic inserts. Then, using a Phillips-head screwdriver, install the screws (Figure 6B).
Figures 6A and 6B |
A. |
B. |
Installing the hardware
A.Wood
B.Concrete
3⁄32 inch (2.25 mm) |
|
1⁄4 inch (6.35 mm) |
1 1⁄2 inch (2.25 mm) |
|
1 1⁄2 inch (2.25 mm) |
|
||
|
3⁄32 inch (2.25 mm) |
|
1⁄4 inch (6.35 mm) |
|
||
1 1⁄2 inch (2.25 mm) |
|
1 1⁄2 inch (2.25 mm) |
|
Figure 7
251 environmental speaker mounted onto a deck railing or t
Installing the brackets onto a deck railing or table
The 251TM speakers should be mounted in a vertical position to achieve the best musical performance. Figure 7 illustrates how the mounted speaker will look once the installation is complete. To begin, mark four holes to indicate where you want to install the speaker bracket (Figure 8). Then, drill four starter holes using a 3Ú32 inch (2,5 mm) drill bit (Figure 9).
Figure 8
Marking four holes on a deck railing or table
Figure 9
Drilling four holes on a deck railing or table
7
Installing Your 251TM Speakers
Installing the mounting brackets (cont.)
Installing the brackets onto a deck railing or table (cont.)
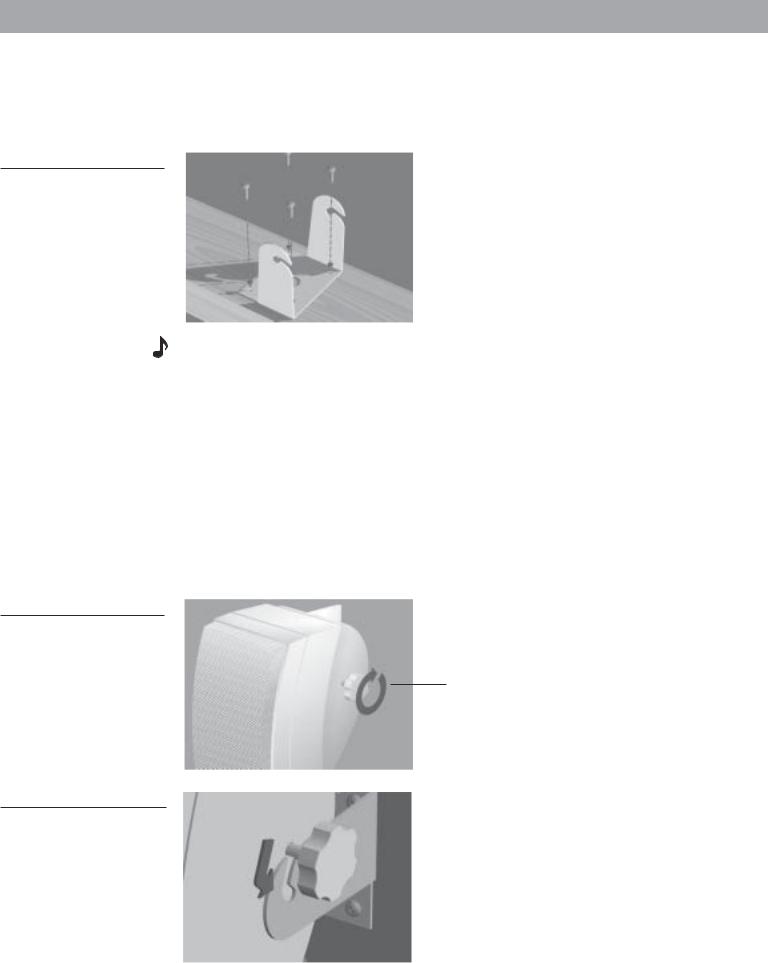
Finally, install the four screws using a Phillips-head screwdriver (Figure 10).
Figure 10
Installing the bracket onto a deck railing or table
Note: If you are mounting your 251TM speakers on a deck railing or table, you will need to rotate the Bose logo. Refer to ÒRotating the Bose logoÓ on page 11 for instructions on how to do this.
Attaching the speakers to the brackets
Once the brackets are installed, carefully follow these steps to attach the speakers to the brackets. First, insert the knobs into each side of the speakers. Be sure to turn each knob two full rotations (Figure 11). Then, carefully slide the speakers into the brackets (Figure 12). Finally, temporarily tighten the speaker in a position that will allow you to easily connect the speaker wire (Figures 13A and 13B).
Figure 11
Installing the knobs
two full rotations
Figure 12
Sliding the speakers into the brackets
8
 Loading...