


MONTE CARLO TCM 169
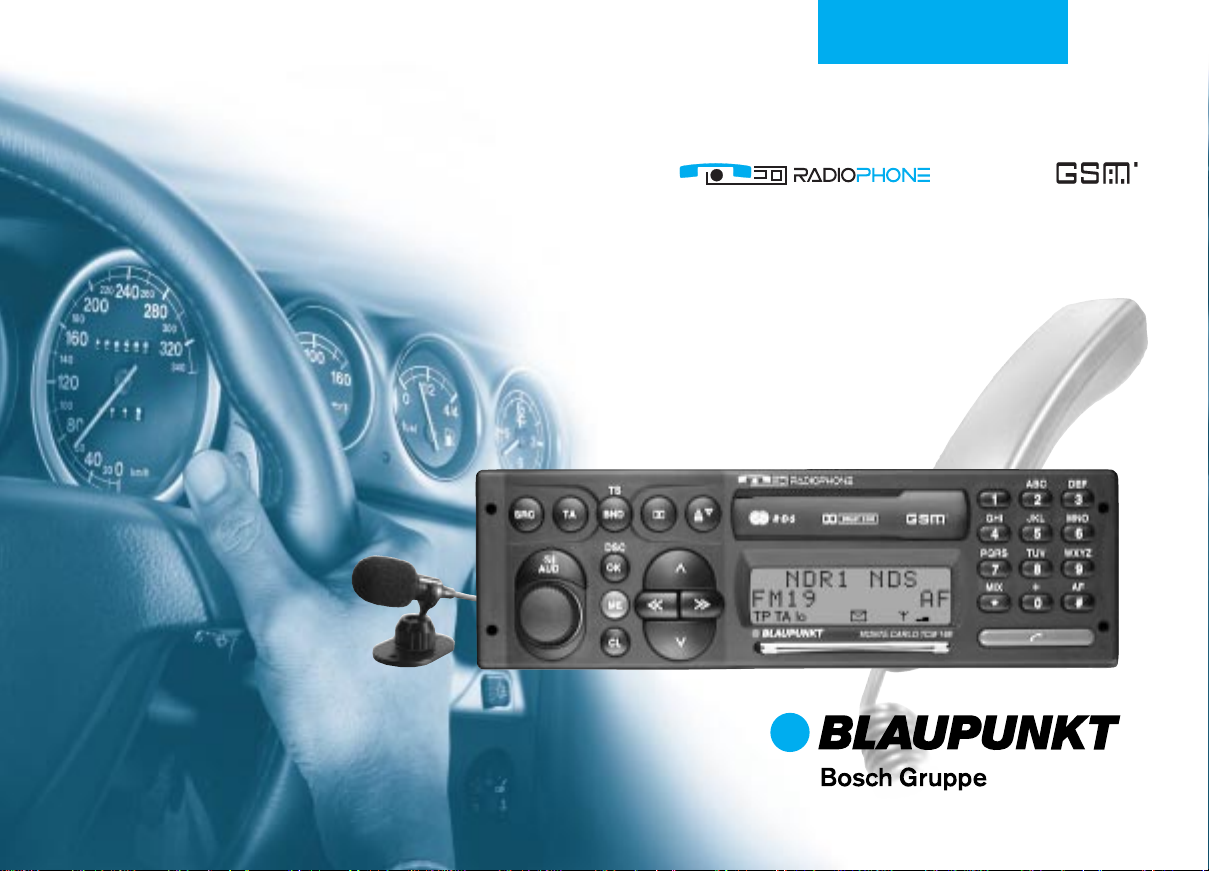
Radiophone / Cassette
Monte Carlo TCM 169
Operating instructions
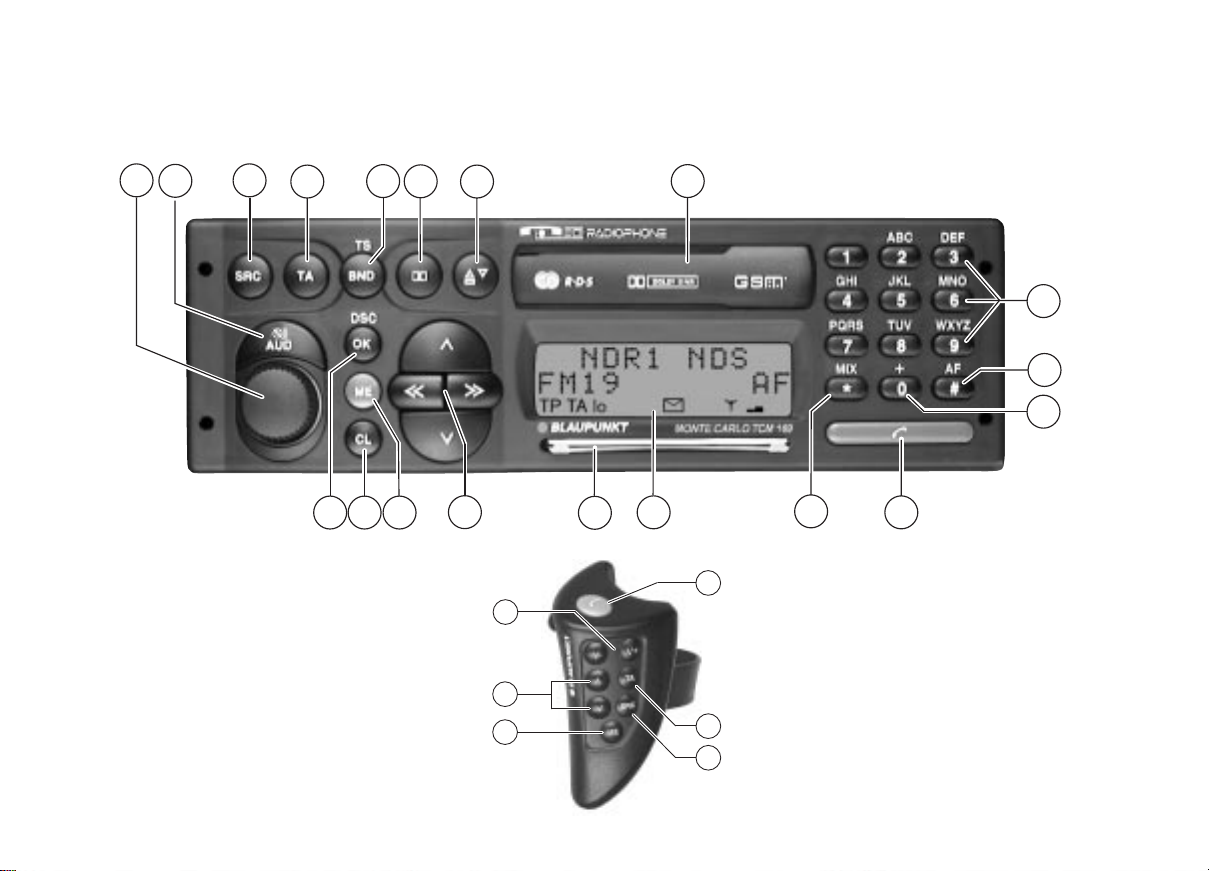
Refer to the Quick Reference for an explanation of the operating elements
2
1
3
4
6
5
7
8
9
10
11
17
1819
2
16
16
17
15
1
14
12
4
3
13
Remote control RCT 07 (optional)
12

Contents Radio, Cassette, Changer (Option)
Important information.................. 69
Safety standards................................... 69
General information .............................. 69
Effects of radio frequency energy ..... 69
Safety information................................. 69
Traffic safety...................................... 69
Using the telephone while driving ..... 70
Using the telephone in critical areas. 70
Emergency calls ................................ 70
Installation............................................. 71
Notes on connecting a CD changer,
an amplifier or the infrared remote
control:............................................... 71
Accessories .......................................... 71
Guarantee............................................. 72
International telephone information...... 72
KeyCard and SIM card ................. 73
Basic information .................................. 73
Second KeyCard/SIM card ............... 73
Wrong KeyCard................................. 73
Starting up the Radiophone.................. 73
Resuming equipment operation after
the power has been disconnected ... 73
Selecting the language for the display 73
Removing the KeyCard/SIM card......... 74
Train KeyCard/SIM cards ..................... 74
DSC learn mode ................................... 75
Displaying the radio pass data ............. 75
Optical warning of anti-theft
protection .............................................. 75
Care of your KeyCard/SIM-Card .......... 75
Quick reference ............................ 76
Select operating mode................. 82
Audio mode........................................... 82
Radio operation with RDS ........... 82
AF - Alternative Frequency................... 82
REG - regional programme .................. 82
Selecting a waveband .......................... 83
Station tuning........................................ 83
Seek tuning
Manual tuning with << / >>................ 83
Entering the frequency directly............. 83
Scrolling through the broadcasting
networks (FM only) ............................... 84
Storing radio stations............................ 8 4
Automatically storing the stations with
the strongest reception using
Travelstore............................................ 84
Recalling stored radio stations ............. 85
Selecting the seek-tuning sensitivity .... 85
Switching from stereo to mono
FM only) ................................................ 85
/ ............................... 83
Traffic programme station
reception with RDS-EON ............. 86
Switching traffic announcement
priority on/off ......................................... 86
Adjusting the volume for traffic
announcements and the beep tone .. 86
Beep tone ............................................. 86
Switching off the beep tone............... 86
Automatic seek-tuning start.................. 86
Operating the cassette deck ....... 87
Inserting the cassette ........................... 87
Ejecting the cassette ............................ 87
Fast forward/rewind .............................. 87
Selecting titles with S-CPS................... 87
Changing the track (Autoreverse) ........ 8 7
Tape equalisation ................................. 88
Dolby B NR*.......................................... 88
Listening to the radio while fast
forwarding/rewinding the tape with RM
(Radio Monitor) ..................................... 88
Care instructions................................... 88
CD changer operation (optional) 89
Switching CD changer operation on..... 89
Selecting the CD and the track ............ 89
MIX........................................................ 89
Programming with DSC ............... 90
Overview of the DSC default
settings.................................................. 94
DEUTSCH
Radio
Telefon
ENGLISH
Radio
Telephone
67

Contents Telephone
Operating the telephone.............. 95
General information .............................. 96
Emergency calls ................................ 96
PIN code
(Personal Identification Number).......... 96
Inserting the SIM card/
entering your PIN code......................... 9 6
Reactivating the SIM card .................... 96
Making your first telephone call............ 97
GSM emergency calls .......................... 97
Quick reference ............................ 98
Using the telephone................... 101
GSM network service area ................. 101
Switching to telephone mode ............. 101
Save telephone numbers and names 101
Dialling a telephone number............... 102
Manual ................................................ 102
Using speed-dialling . . . ..................... 102
. . . directly from the memory bank: 102
. . . directly from the SIM card
memory bank: ........................... 102
. . . from the telephone book ........... 102
Redial function .................................... 103
Answering/ending a call ..................... 103
Notepad .............................................. 103
Save telephone numbers from the
notepad............................................ 103
Call waiting (2nd caller) ...................... 104
Broker’s call/hold ................................ 104
Conference calls................................. 105
Making telephone calls using the
handset (special accessory)............... 105
68
International calls................................ 105
What to do before leaving for
a foreign country ............................. 105
How to place telephone calls in
foreign countries.............................. 106
How to receive calls ........................ 106
How to place calls to a stationary
telephone in the host country.......... 106
Phone book menu ...................... 107
How to enter a name/text ................... 108
Start the entry.................................. 108
Entering letters/characters .............. 108
Capital and small letters.................. 108
Moving the cursor in the entry
text box ............................................ 108
Inserting/Deleting characters .......... 108
Finding an entry by name...................109
Show my phone number..................... 110
Prevent access ................................... 110
Check capacity ................................... 110
Add entry ............................................ 111
Finding an entry by position ............... 111
Programming with DSC ............. 112
Programming in the setup menu .... 113
Ringing tone volume ....................... 114
Hands-free volume.......................... 114
Handset volume .............................. 114
Automatic answer............................ 114
Automatic redial .............................. 114
Operating mode............................... 114
Extended menu ............................... 114
Ringing tone .................................... 115
SMS tone......................................... 115
My phone number ........................... 115
Call meter format............................. 115
AOC parameters (Advice of Charge) 115
Set charge parameters.................... 116
Audible call timer.............................116
PIN code.......................................... 116
Alter access code............................ 117
Master clear..................................... 117
External alarm ................................. 117
Hands-free channel.........................118
TA during call .................................. 118
Overview of the basic factory
settings in the set-up menu............. 118
Programming in the Call Menu ....... 119
Call mailbox.....................................120
Received SMS messages ............... 120
Selecting the message.................... 120
Reading / Clearing messages......... 120
Sending SMS messages................. 121
Network selection............................ 122
Cell Broadcast ................................. 123
Call meters ...................................... 124
Call forwarding ................................ 124
Call barring ...................................... 124
Phone lock....................................... 125
Fixed dial numbers..........................125
Closed user group........................... 126
Overview of the basic factory settings
in the call menu .................................. 126
Glossary...................................... 127
Specifications............................. 128
Index............................................ 129

Important information
Safety standards
The mobile telephone has been manufactured in accordance with all of the applicable RF safety standards and recommendations determined by the government offices
and organisations responsible (e.g. the VDE
standard DIN-0848).
General information
The telephone function of your Radiophone
is based on the GSM radio telephone standard. This standard was developed for use
in Europe and many other countries.
Using the mobile Radiophone, you can
make the same telephone calls as you can
with a cellular phone.
This assumes that the GSM radio network
is available at your location and that you
have access privileges and a valid SIM card.
This SIM card must be inserted into the unit
(if necessary, refer to the information in the
section on “KeyCard and SIM card”).
Effects of radio frequency energy
Your Radiophone is both a transmitter and
a receiver. It generates minimum amounts
of energy in the radio frequency range. While
it is in use, the GSM system keeps a constant check on both the frequency and the
power.
Warnings that using mobile telephones may
be hazardous to your health have recently
been a topic of public discussion. For years
now, research on the effects of radio frequency energy emitted by FM technology
has concentrated on possible adverse effects to your health. Scientists have also
begun researching the latest radio technologies such as GSM. According to the research results and by complying with the
corresponding safety standards, it is safe to
say that this product can be used without
reservations.
When the Radiophone is installed properly
in your vehicle, using it is even safer than
using a portable cellular phone.
If you should still be concerned about the
effects of radio frequency energy, there is a
lot you can do personally to ensure that you
are exposed to a minimum of these radio
waves. Of course, it will help to reduce your
call time to a minimum but it is especially
important to heed the following tips on using this equipment.
Safety information
Traffic safety
Traffic safety always has the highest priority. As the driver of a motor vehicle, it is your
responsibility to pay attention to the traffic
situation at all times. Never use your car
radio in a way that could distract you.
Please keep in mind that you travel a distance of 14 m per second at a speed of only
50 km/h.
Should the traffic situation become particularly demanding, we advise you not to use
the radio.
Always make sure that you are still able to
hear any warning signals coming from outside of your vehicle, such as police or fire
engine sirens, so that you can react accordingly.
Consequently, you should always select a
moderate volume for playing your car radio
while you are driving.
69
DEUTSCH
Radio
Telefon
ENGLISH
Radio
Telephone
Important information
Using the telephone while driving
Please observe all laws and regulations regarding the use to mobile telephones in
motor vehicles.
• Concentrate fully on your driving.
• Stop at a safe place before using the
telephone.
• If otherwise unavoidable:
Use only hands-free operation if you
have to use the telephone while you
are driving.
Traffic safety always has the highest priority.
Using the telephone in critical areas
Always switch off the mobile telephone in
areas where it is forbidden to use a mobile
telephone or if this equipment could cause
electromagnetic interference or otherwise
dangerous situations.
Using the telephone can result in interference with the correct functioning of medical
equipment which is not sufficiently shielded, particularly near the antenna. Please
consult a doctor or the manufacturer of the
medical device if you have any questions.
Other electronic equipment can also be affected by electromagnetic interference.
If you are in an area where there is danger
of explosion, e.g. petrol stations, chemical
factories or other places where blasting work
is being done, switch your telephone off.
Switching off the telephone:
• Press
“TELEPHONE OFF” will appear in the dis-
play.
Reactivate the telephone:
• Press
Emergency calls
As with every other mobile telephone, the
Radiophone operates using a combination
of mobile radio and cross-country networks,
radio signals and functions programmed by
the user. As a result, there is no guarantee
that your call will always go through. Never
depend exclusively on a mobile telephone
or similar equipment under life-threatening
circumstances (e.g. in medical emergencies).
The telephone interface of the Radiophone
is only able to make and receive calls when
it is activated and located in an area served
by the radio network and when the signal is
strong enough.
Emergency calls may not be possible on all
mobile telephone networks or only if certain
for approx. 2 seconds.
briefly.
network services and/or certain performance
features are active. Contact the local network operators for more detailed information.
Under certain circumstances, some networks require that a valid SIM card is inserted into the unit.
In the event that certain functions (incoming call barring, call number barring, closed
user group, AOC, system barring, keypad
barring, etc.) are activated, it may be necessary to deactivate them before placing an
emergency call.
Please read this instruction manual for further information and consult your local network operator.
When placing an emergency call, be sure
to supply all the necessary information as
accurately as possible. Remember that your
mobile telephone may be the only means of
communication at the scene of an accident.
Do not hang up until you are told to do so.
Also read the information in the section on
“Telephone operation – GSM emergency
calls”.
70
Important information
Installation
Have the Radiophone installed in your vehicle and serviced by a trained service technician only. Faulty installation or servicing
can be dangerous and will result in the expiry of your guarantee.
If the vehicle is not adequately shielded
against radio frequency signals, electronic
fuel injection systems, electronic ABS systems, electronic cruise control systems or
other electronic equipment may experience
malfunctions.
This equipment must not be operated without a suitable externally mounted GSM or
combination antenna. The equipment including the GSM or combination antenna must
be installed by an authorised Bosch service
centre only.
To ensure trouble-free operation, the positive power supply line must be connected
via the ignition and the permanent +12 V
lead.
Do not ground the speaker outputs!
Notes on connecting a CD changer, an
amplifier or the infrared remote control:
If installation conditions are unfavourable,
connecting such accessories as a CD
changer, an amplifier or infrared remote
control may, in rare cases, lead to interference with the operation of the telephone.
This may result in interference noise, deterioration of transmission quality or connections being cut off. In this case, please check
the wiring or contact one of our authorised
service centres.
Accessories
Use Blaupunkt-approved accessories and
spare parts only.
You can use the following Blaupunkt products with this car radio:
Amplifier:
All Blaupunkt amplifiers.
Changer:
CDC-A06/-A08 or -A072 (direct connection)
CDC-A05, -F05, -A071 require an adapter
cable.
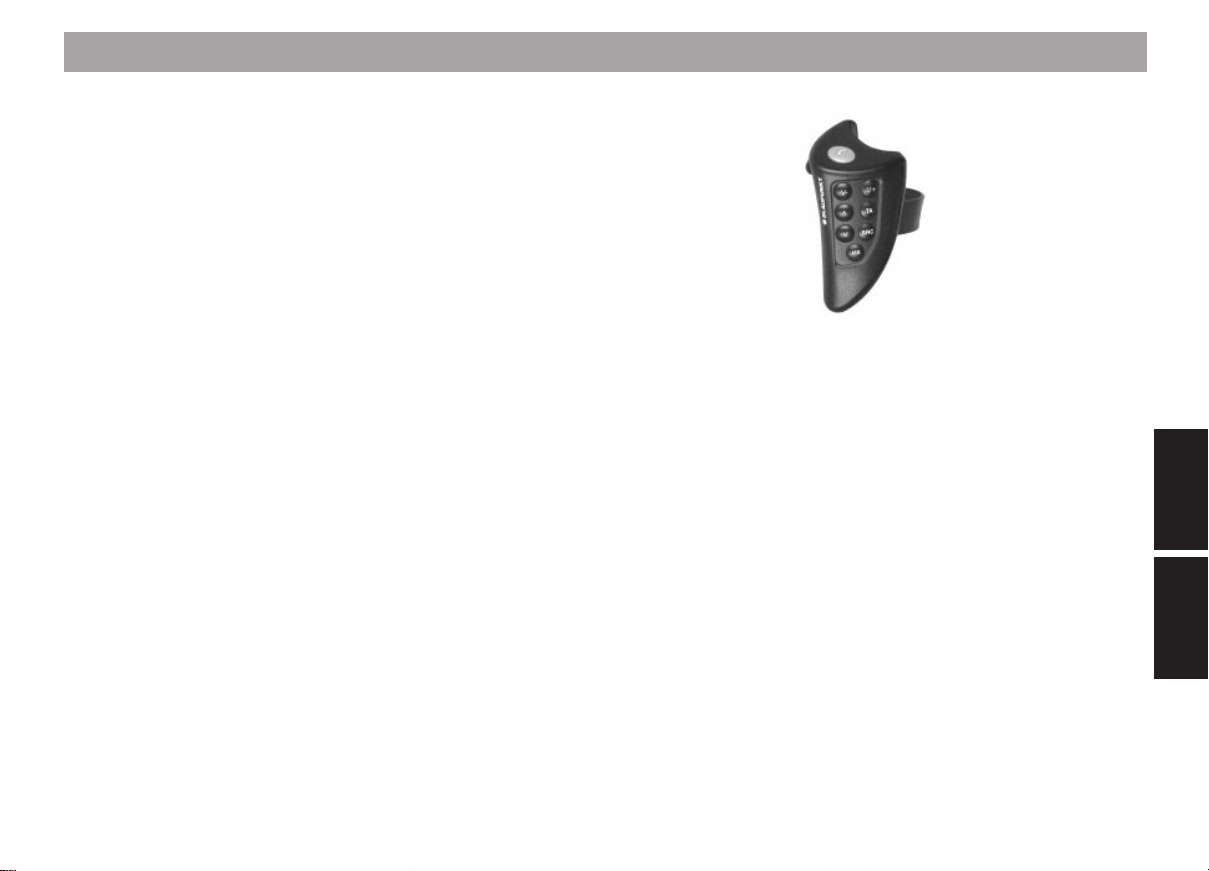
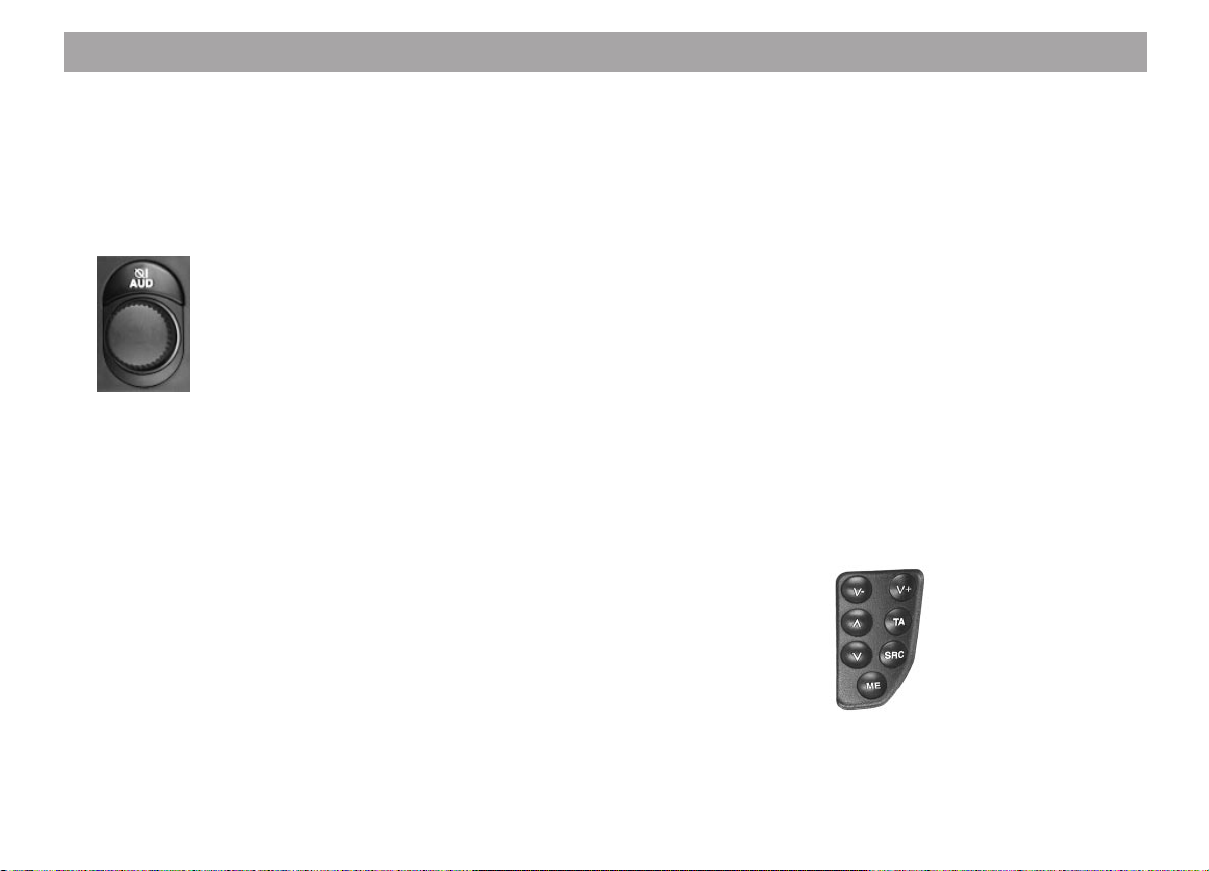
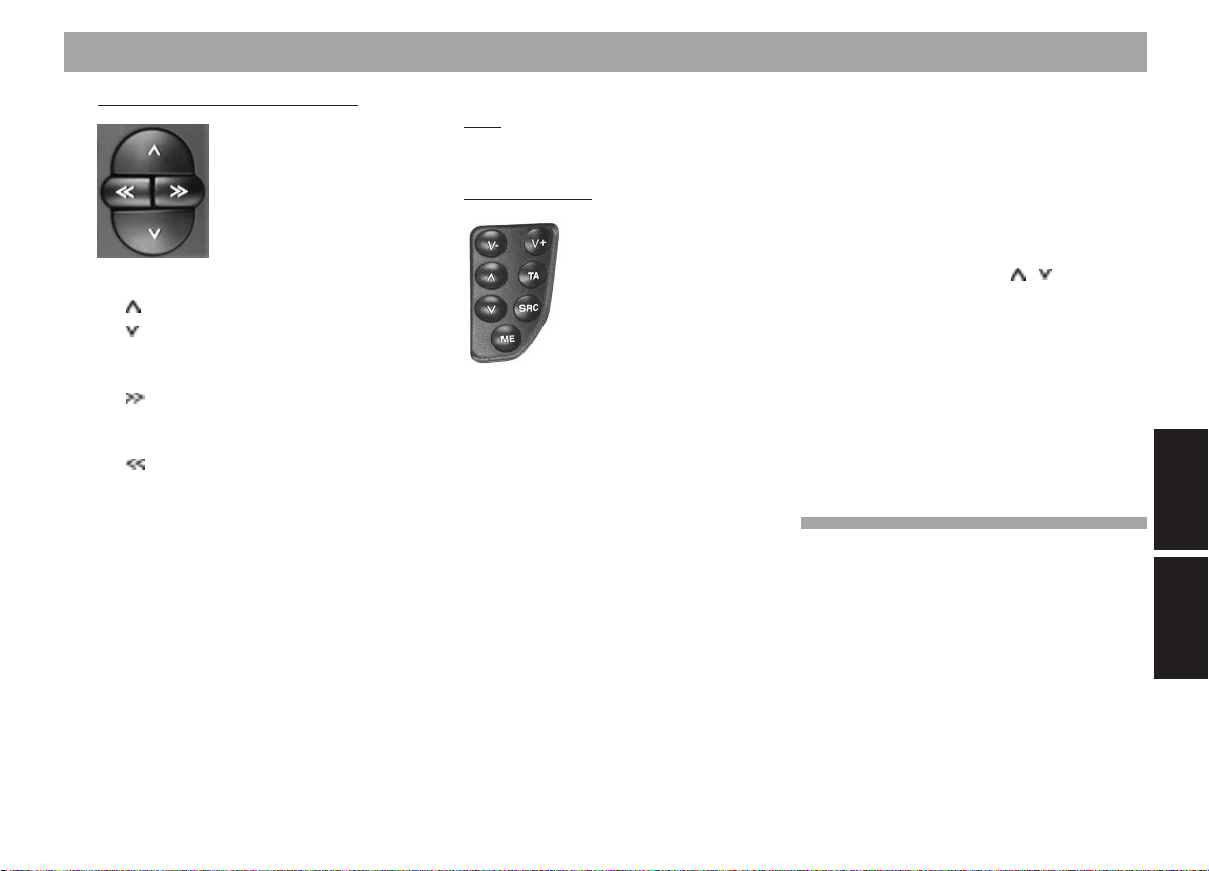
Remote control:
Using the infrared remote
control RCT 07
7 607 570 510 you can
conveniently control all of
the most important functions of your Radiophone
from the steering wheel.
The operating functions
are described in the Quick
References.
Handset
Using the Blaupunkt handset 7 607 570 512
it is possible to place telephone calls with or
without the hands-free function.
The system will switch automatically from
hands-free to handset operation when the
handset is removed from the cradle.
Warning:
There is a relatively strong magnet built into
the handset.
Keep away anything which will react to magnetic influence, e.g. diskettes, bank cards,
etc. Important data may be deleted.
DEUTSCH
Radio
Telefon
ENGLISH
Radio
71
Telephone

Important information
Guarantee
The scope of the guarantee is determined
by the laws in the country where the unit
was purchased.
Regardless of the legal guarantee regulations, Blaupunkt affords a 12-month guarantee.
If you have any questions about the guarantee, please contact your dealer. Your cash
register receipt is a valid guarantee coupon.
International telephone information
Have you got any questions on the operation of this equipment or do you require more
information?
Give us a call!
You will find the international telephone and
fax number on the last page of this manual.
72
KeyCard and SIM card
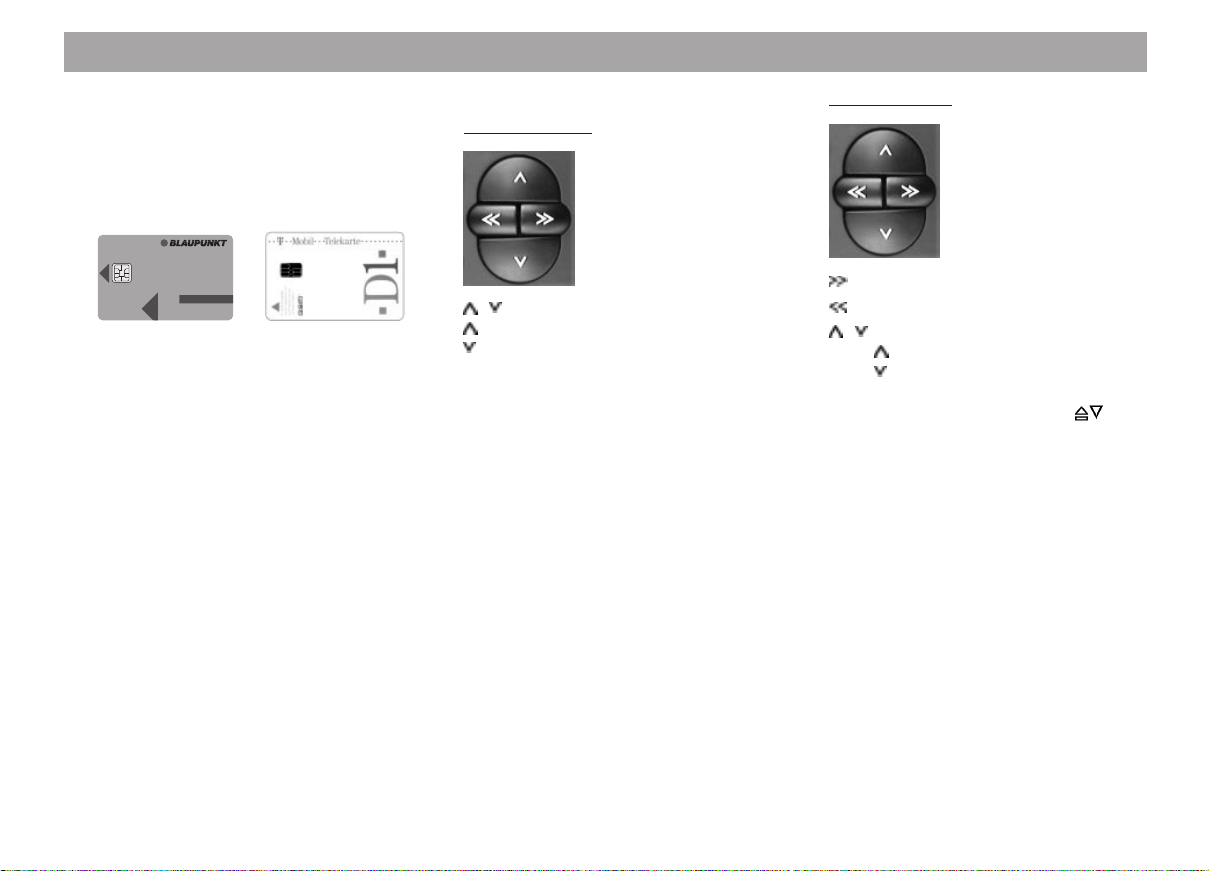
KeyCard
Basic information
One KeyCard is included with the Radiophone.
The car radio can also be operated with a
second “trained” KeyCard or with one of up
to 30 trainable SIM cards.
Using the KeyCard it is possible to activate
the following operating modes:
Radio, tape deck, CD changer (optional),
AUX, telephone emergency call.
Using the SIM card it is possible to activate
all operating modes.
The SIM card also incorporates the anti-theft
functions.
If necessary (in the event of loss or damage), it is possible to purchase a KeyCard
or SIM card from an authorised dealer.
Second KeyCard/SIM card
If you use a second KeyCard or a SIM card,
the settings will be transferred from the first
KeyCard.
The following personal settings will remain
stored for two KeyCards and the first two
SIM cards:
Station presets, treble, bass, balance and
fader, Loudness on/off, TA (traffic announcement volume), FIX volume.
The two KeyCards and the first two SIM
cards will store the last setting selected for
the waveband, bass/treble, fader/balance,
station settings, station presets, FIX volume.
When you insert your KeyCard or one of the
first two SIM cards, you will find that the
equipment switches onto the basic settings
you have already programmed.
Wrong KeyCard
If a KeyCard from another radio is inserted
into the unit, “KEYCARD ERROR” will appear in the display. Please do not try to operate the equipment.
After approx. 8 sec. the radio will switch off
automatically.
If the wrong KeyCard is inserted four times,
the waiting time will increase to one hour.
If you attempt to insert a different kind of
card (e.g. telephone or credit card), “CHECK
KEYCARD” or “PRÜFE KEYCARD” will appear in the display for approx. 2 sec.
Remove the wrong card and replace it with
a valid KeyCard or SIM card.
Starting up the Radiophone
• Switch the unit on (press 1).
Important!
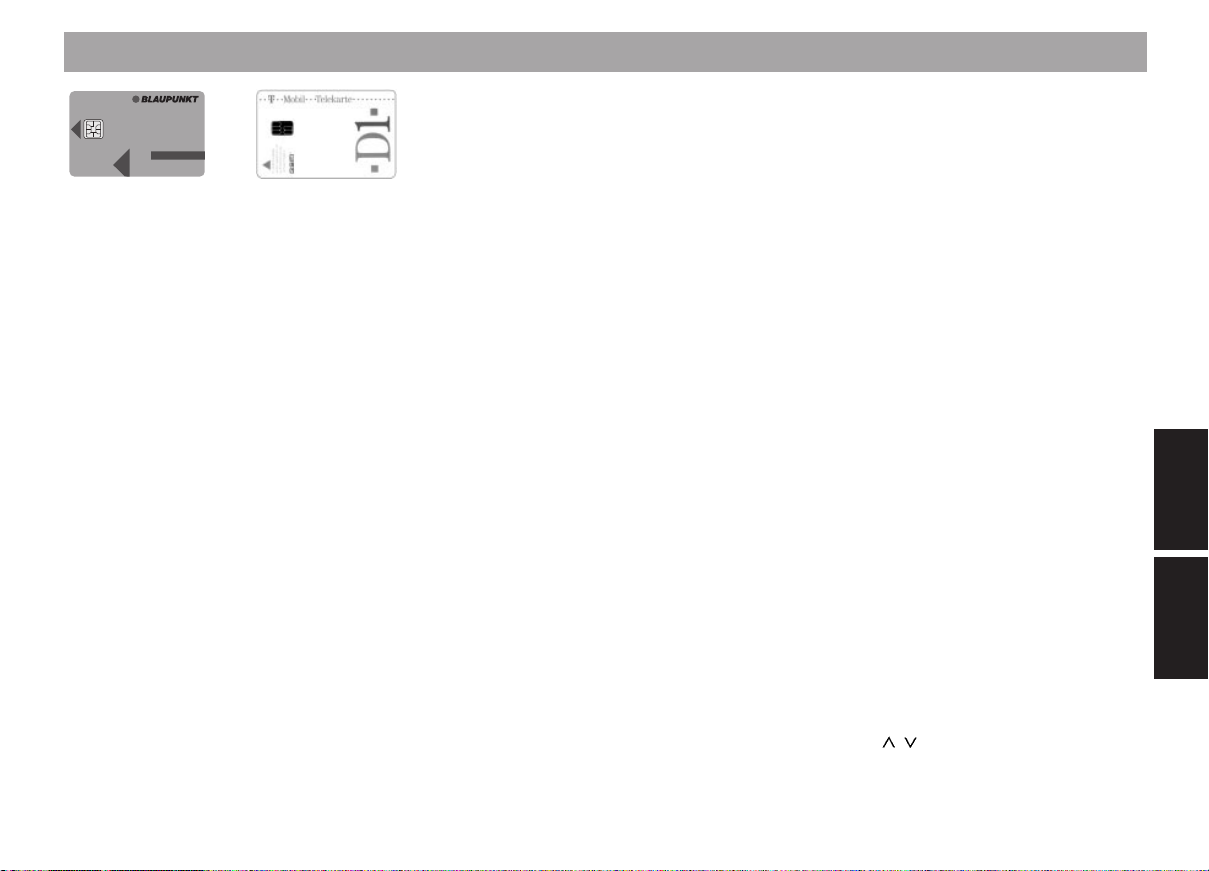
The Card tongue must protrude - then
insert the KeyCard included with the
Radiophone into the slot with the contact surface facing up.
Do not try to insert the KeyCard when
the tongue is retracted as this may
damage the KeyCard mechanism.
The Radiophone is now ready for operation.
Resuming equipment operation after
the power has been disconnected
If the Radiophone is disconnected from the
battery (e.g. during repairs) and then reconnected, a trained KeyCard or the master SIM
card is required to resume equipment operation and to reactivate the other trained SIM
cards.
Selecting the language for the display
At the factory the texts for the display are
set to English.
You can display the texts in other languages if you wish.
• Press DSC/OK.
• Press
in the display.
/ until “LANGUAGE” appears
73
DEUTSCH
Radio
Telefon
ENGLISH
Radio
Telephone
KeyCard and SIM card
• Press DSC/OK and << / >> to select
the language.
• Press DSC/OK and CL one after the
other.
Removing the KeyCard/SIM card
Never forcibly pull out the card!
You may destroy it.
• First push the card in gently towards
the unit.
The KeyCard/SIM card will eject slightly so
that you can remove it.
• Remove the card.
When you remove the card for the first time,
“LEARN CARD” will appear in the display.
Now you can train additional cards (refer to
“Train SIM cards”).
After this process has ended, the Radiophone will switch off when the card has been
removed.
Train KeyCard/SIM cards
In the initial programming process you can
easily train the second KeyCard and up to
30 SIM cards.
In order to do this the Radiophone must be
switched on and the original KeyCard inserted.
• Remove the original KeyCard and insert the first SIM card.
“NAME?“ will appear in the display.
If you like, you can enter a name of up to 8
characters. Please refer to “How to enter a
name/text”.
If you would like to skip this function or after
you have entered the name:
• Press OK.
The first SIM card has been programmed.
“TERMINATE? PRESS OK” will appear in
the display. Now you can programme additional cards.
To finish the programming process:
• Press OK.
The SIM card trained first assumes the additional function of master SIM card. Other
SIM cards can only be trained using either
the master SIM card or the KeyCard.
There are two basic ways in which you can
train other SIM cards:
a) Training or replace KeyCard/
SIM card using DSC
DSC – LEARN CARD
One KeyCard or up to 30 SIM cards
can be trained or replaced as additional cards.
• Insert the first KeyCard (included
with the Radiophone) into the unit
and switch the unit on.
• Press DSC/OK and press
select “LEARN CARD”.
• Press DSC/OK briefly.
“CHANGE CARD” will appear in the
display.
• Remove the first KeyCard and insert
the new card (KeyCard or SIM card).
After insertion of a SIM card only: The
display shows “NAME?”.
If you wish, you can now enter a name
of up to 8 characters.
If necessary, refer to the section on
“How to enter a name/text”.
• Press DSC/OK.
• Enter the PIN code and press DSC/
OK.
After “CODE OK”, the display will
show, for example, “SIM CARD 23 ACCEPTED” (i.e. the 23rd SIM card has
been trained).
The Radiophone can now be operated
using the new cards.
A maximum of two KeyCards and 30
SIM cards can be trained in this way.
/ to
74

KeyCard and SIM card
If you attempt to program a third KeyCard, the KeyCard which was not part
of the programming process will automatically become invalid.
If 30 SIM cards have been programmed, it will be necessary to delete
old access authorizations before new
cards can be trained.
Note:
If the Radiophone is disconnected from
the battery (during repairs, for example) and then re-connected, a KeyCard
or the master SIM card is required to
switch the equipment back on and reactivate the other trained SIM cards.
b) Training new cards after removing
the KeyCard or master SIM card
If this function is activated in the DSC
learn mode, it is possible to train another SIM card each time the KeyCard/
master SIM card is removed. This
function is useful if you want to train
several cards one after the other (fleet
management).
c) Deleting SIM card authorisations
The authorisation for SIM cards can be
deleted using the CARD LIST in the
DSC menu. The master SIM card can
be deleted with a KeyCard only.
DSC learn mode
With this function you can select whether
you want to train additional SIM cards using
the DSC menu only or each time after removing the KeyCard or the master SIM card
as well.
For operating instructions refer to “Programming with DSC – LEARN MODE”.
Displaying the radio pass data
Using the KeyCard supplied with your set
you can have the radio pass data such as
the model name, product number (7 6...) and
serial number indicated in the display.
Please refer to the section on “Programming
with DSC – READ KEYCARD”.
Optical warning of anti-theft
protection
KeyCard tongue flashes
When the vehicle has been parked and the
KeyCard or SIM card removed, the KeyCard
tongue can be switched to flash to provide
additional anti-theft protection.
For this function to operate properly it is
necessary that the positive power supply line
and the permanent +12 V lead are connected as described in the installation instructions.
Be sure that “KEYCARD LED ON” has been
selected in the DSC mode.
If necessary, refer to the section on “Programming with DSC – KEYCARD LED”.
Switching off the flashing light
The flashing light can be switched off by
pushing in the KeyCard tongue gently until
it locks.
If you would like to deactivate the flashing
tongue altogether, select the “KEYCARD
LED OFF” item in the DSC menu:
Care of your KeyCard/SIM card
In order to ensure that the card always functions correctly, the contacts must be free of
any foreign particles. Avoid direct skin contact.
Do not subject the cards to direct sunlight.
If necessary, clean the card contacts using
a cotton swab dipped in rubbing alcohol.
DEUTSCH
Radio
Telefon
ENGLISH
Radio
Telephone
75
Quick reference for operating the radio, tape deck and CD changer (optional)
1 On/off
Volume
To switch the Radiophone on, press
the knob (volume control).
A valid KeyCard or SIM card must be
inserted in the unit already or within
the next 15 seconds.
Switching the unit on/off with the
KeyCard:
If the equipment has been switched on
by pressing knob 1, then it can be
switched off and on again with the
KeyCard or SIM card.
This assumes that the program has
been switched to “MENU” under
“LEARN MODE” in the DSC menu.
Note:
Be sure to read the information in the
section on “KeyCard/SIM card antitheft protection system”.
Switching the unit on/off via the ignition:
If the equipment has been connected
properly, it can be switched on and off
with the vehicle ignition.
When the ignition has been switched
off, the unit will emit a double beep to
remind you to remove the KeyCard/
SIM card before leaving your vehicle.
If you switch off the ignition during a
telephone call, the Radiophone will remain switched on until you have completed the call.
Switching the radio on when the ignition is switched off
When the ignition is switched off (card
is inserted) the equipment will continue
to function as follows:
After you hear the double beep, press
the knob. The equipment will switch
back on. After one hour’s playing time,
the Radiophone will switch off automatically to prevent the car battery
from going dead.
Operation in combination with an
ignition timer
If the ignition timer has been activated
in the DSC mode, the Radiophone will
switch off as programmed after the ignition is switched off (refer to the section on “Programming with DSC - IGNITION TIMER”.
Altering the volume
Turn the knob to alter the volume. The
setting will appear in the display.
When the Radiophone is switched on,
it will play at a preset volume (VOLUME FIX).
VOLUME FIX can be altered as desired (refer to “Programming with DSC
- VOLUME FIX”).
The volume can also be altered using
the remote control (optional) by pressing V- / V+.
76
Quick reference for operating the radio, tape deck and CD changer (optional)
/ AUD
2
Press AUD once:
Alter treble and bass settings using the
rocker switch.
Treble +
Treble –
Bass –
Bass +
Press AUD twice:
Alter balance (left/right) and fader
(front/rear) settings.
Fader front
Fader rear
Balance left
Balance right
The settings will be indicated in the
display. The last setting made will be
stored automatically.
Switch off AUD: Press AUD for a third
time.
If no changes are made for a period of
8 seconds, the AUD setting will end
automatically.
Switching Loudness on/off:
Press AUD for approx. 1 sec. (beep).
The current setting will appear briefly
in the display (ON/OFF).
For more detailed information refer to
“Programming with DSC - LOUDNESS”.
3 SRC (Source)
You can switch between the operating
modes for radio, cassette and changer
(option) or an auxiliary unit.
You can switch from the telephone
menu back to the last operating mode
selected.
This assumes that you are not talking
on the telephone or trying to place a
call.
4 TA (Traffic Announcement = priority
for traffic messages)
If “TA” appears in the display, you will
be able to tune into radio stations
which broadcast traffic information
only.
Switch priority on/off: press TA.
5 TS / BND
Switch between the memory levels/
wavebands FM, TS (Travelstore), MW
and LW.
Additional Travelstore function
Store the nine radio stations with the
strongest reception signals using Travelstore: Press BND until you hear a
beep or until “TRAVELSTORE” appears in the display.
6
Dolby B NR*
Cassettes recorded with Dolby B NR
will be played back in the best quality
possible if “DOLBY” appears in the
second line.
* Noise reduction system manufactured under li-
cence by Dolby Laboratories. The word Dolby
and the double-D symbol are trademarks of Dolby Laboratories.
7
Eject cassette
Press the button until the cassette
ejects.
Track switch
Press the button briefly to switch cassette playback to the other track (side)
of the tape.
DEUTSCH
Radio
Telefon
ENGLISH
Radio
Telephone
77

Quick reference for operating the radio, tape deck and CD changer (optional)
8 Cassette loading slot
Insert the cassette (side A or 1 facing
up, open side to the right).
9 Selection buttons
Radio mode
Entering the frequency directly
You can enter an FM frequency directly using the selection buttons:
First press “0” and then enter the desired frequency, starting with the first
digit. It is only possible to enter frequencies between 87.5 and 108. Omit
the decimal point in the entry. Press
CL to abort the entry, press OK to confirm the entry. Once all of the digits
have been entered, the entry will be
confirmed automatically.
Storing radio stations
You can use the buttons to store the
following number of radio stations for
the different wavebands:
FM 19
TS (FM-Travelstore) 9
MW 9
LW 9
To store – During radio operation
press one of the selection presets until
you hear a beep. If you want to store
the station on a two-digit preset, first
press “1” and then press the second
digit within 2 sec. until you hear a
beep.
Recalling stored radio stations – Select the desired waveband (select “FM”
or “TS” in the FM range) and press the
corresponding button.
Activate the presets from 10 to 19 by
pressing “1” briefly first and then
pressing the second button within two
seconds.
Tape mode
It is possible to set or correct the
number of titles to be skipped for SCPS (Super Cassette Program
Search) or fast forward.
CD changer mode (optional)
CDs 1 to 10 can be selected directly
on the 12-key keypad (0 = CD 10).
: AF / #
Alternative Frequency for RDS opera-
tion: When “AF” appears in the display
the radio will automatically use RDS to
find for the best reception frequency
for the programme you are listening to.
Switching AF on/off: Press AF briefly.
Switching the regional function on/off:
Press AF for approx. 2 seconds
(beep), “REGIONAL ON” or “REGIONAL OFF” will appear briefly in the first
line in the display.
When the regional function is switched
on “REG” will appear in the display on
the right.
; + / 0
Press this button before you enter a
radio station frequency directly.
78
Quick reference for operating the radio, tape deck and CD changer (optional)
= MIX /
*
Radio operation
Switch seek-tuning sensitivity:
Press button briefly.
If “lo” is displayed, the radio will only
pick up strong, local stations (normal
sensitivity).
If “lo” does not light up, the radio will
also pick up weaker, more distant stations (high sensitivity).
CD changer operation (optional)
MIX CD
The tracks of a CD will be played back
in random order.
The following CDs will also be selected
at random.
MIX OFF
The MIX function is switched off.
Press MIX until the desired function
appears in the display.
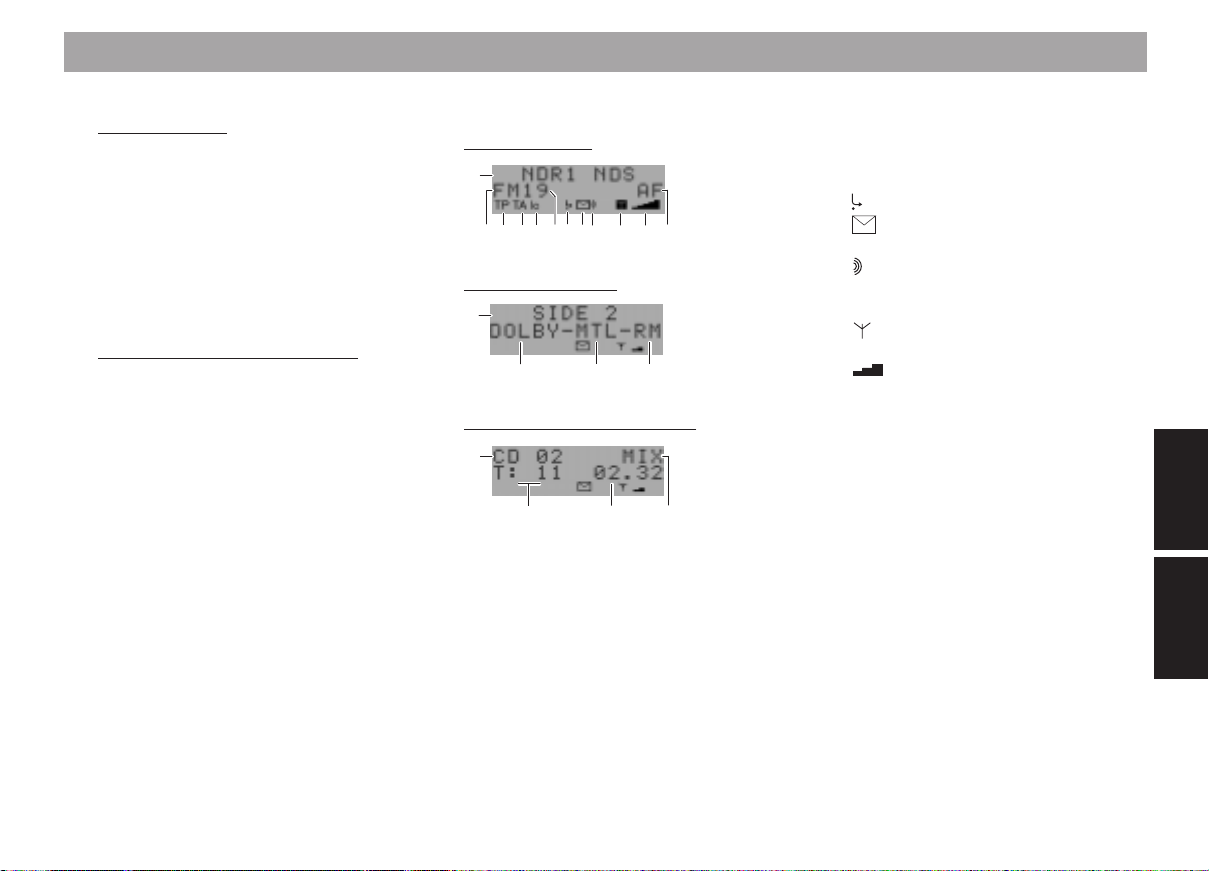
> Display
Radio operation
a
d
e
fhg
i
k
j
n
m
l
Cassette operation
b
o
p q
Changer operation (optional)
c
r
a) NDR1 NDS - Station name
b) Side 2 - Side 2 of the cassette
c) CD 02 - CD number
d) FM - Radio waveband
e) TP - Radio station broadcast-
f) TA - Traffic announcement pri-
s
t
ing traffic information (is
currently being received)
ority
g) lo - Seek tuning sensitivity
h) 19/T9 - Indicates on which button
the station currently playing is stored (1-19)/Trav-
elstore (1-9)
i) - Call forwarding is active
j) - Indicates that a SMS
message is stored
k) - Also appears when a
voice message has been
received
l) - Connection with GSM
radio network
m) - GSM field strength indi-
cator
n) AF - Alternative frequency for
RDS
o) DOLBY - Dolby B NR
p) MTL - Metal or CrO2 cassettes
are currently playing
q) RM - Radio Monitor (listen to
radio during tape fast for-
ward or rewind)
r) T: 11 - CD track number
s) 02 . 32 - CD time (time played)
t) MIX - CD track random play
DEUTSCH
Radio
Telefon
ENGLISH
Radio
Telephone
79
Quick reference for operating the radio, tape deck and CD changer (optional)
? Anti-theft card protection system
In order to operate the radio equipment it is necessary to first insert the
KeyCard included with the unit or a
KeyCard you have trained accordingly
or a programmed SIM card.
KeyCard
Please read the information in the section on “Anti-theft card protection system” carefully.
Flashing card tongue
If the radio has been switched off and
the KeyCard or SIM card removed, the
card tongue will flash as additional
theft protection if the corresponding
setting has been activated.
For more detailed information, please
refer to “Programming with DSC”.
It is possible to switch off the flashing
light by pressing the card tongue in
gently until it locks into place.
@ Rocker switch
Radio operation
/ Seek tuning
Upwards
Downwards
<< / >> Up or down in increments
(for FM only when AF is switched
off)
For FM only:
<< / >> Scroll through the station broad-
casting network when AF is
switched on
e.g. NDR 1, 2, 3, 4, N-JOY.
Tape operation
Fast forward
Fast rewind
/ Select title (S-CPS)
Forwards
Back
Stop this function by pressing or
the opposite button.
80
Quick reference for operating the radio, tape deck and CD changer (optional)
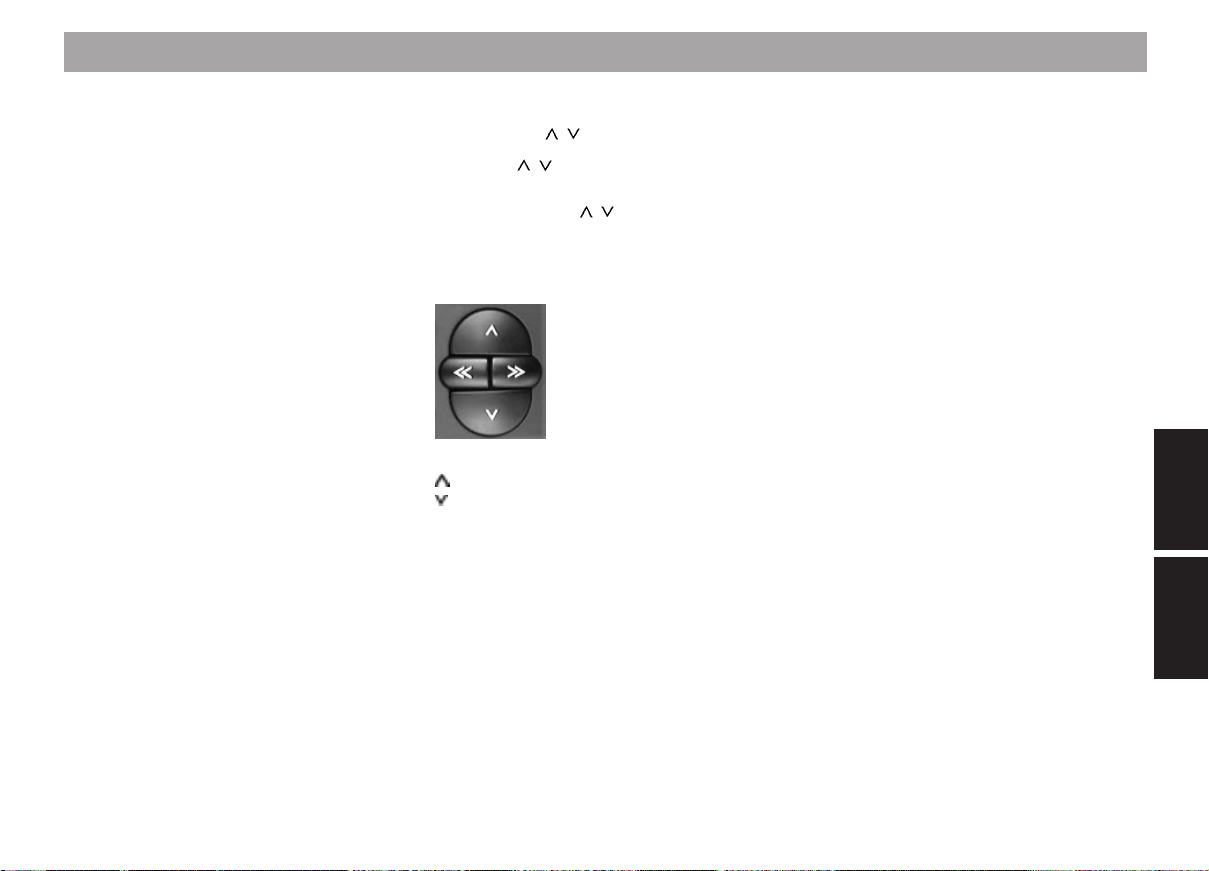
CD changer operation (optional)
Select CD
Up
Down
Select track
Up: Press briefly.
CUE - fast forward (audible): Hold
button pressed down.
Down: Press two or more times
one after the other.
Restart the same track: Press
once briefly.
REVIEW - fast reverse (audible):
Hold button pressed down.
Additional rocker switch functions:
Additional settings possible with
AUD 2
DSC mode C
The corresponding function must be
activated.
A ME
Unit:
Telephone functions only.
Remote control:
During radio operation it is possible to
recall stored radio stations in ascending order.
During CD changer operation, the CDs
are selected in ascending order.
B CL (CLEAR)
Press this button to quit the currently
active menu item in the DSC mode.
Any changes made will not be stored.
Press CL again to quit the DSC mode.
Cancels direct frequency entry.
C DSC / OK
DSC (Direct Software Control)
Use DSC to adjust the programmable
basic settings.
OK
Press to store the altered settings.
Activate DSC: Press the button briefly.
Select function: Press
/ .
Display setting adjustments: Press
DSC/OK.
Alter settings: Press << / >>.
Store: Press OK.
Quit DSC: Press CL.
If you quit DSC by pressing CL before
you press OK, any changes made to
the settings will not be stored.
For more information refer to “Programming with DSC”.
DEUTSCH
Radio
Telefon
ENGLISH
Radio
81
Telephone

Select operating mode
Radio operation with RDS (Radio Data System)
Audio mode
(Radio, tape deck, CD changer (optional),
auxiliary source)
During audio operation you can use SRC to
switch between radio, cassette and changer (option) or an auxiliary sound source.
When in telephone mode, you can switch
back to the audio source used last by pressing SRC.
Telephone operation has priority. As a result, you cannot switch to audio mode unless you are not currently talking on the telephone or trying to place a call.
• Press SRC repeatedly until the functions of the audio source you wish to
listen to appear in the display.
You cannot select tape or CD changer operation unless a cassette/magazine containing CDs has already been inserted.
If an empty magazine has been inserted,
“NO CD” will appear in the display.
An auxiliary source can only be selected if
a Blaupunkt changer has not been connected to the system. “AUXILIARY SOURCE
ON” must be set in the DSC menu.
The Radio Data System offers you added
convenience when listening to FM radio stations.
More and more radio stations have begun
to broadcast RDS information along with
their regular programmes.
As soon as a programme has been identified, the station name including a regional
identifier, if applicable, will appear in the display, for example, NDR1 NDS (regional programme in Lower Saxony, Germany).
When RDS is activated, the preset buttons
become programme buttons. You now know
exactly which programme you have tuned
into, making it easy to find the desired station quickly.
RDS also offers other advantages:
AF - Alternative Frequency
The AF (Alternative Frequency) function
makes sure that the radio always automatically tunes into the strongest frequency of
the currently selected programme.
If this function has been activated “AF” will
appear in the display.
In order to switch this function on or off,
• press AF/# briefly.
While searching for the strongest reception
signal, the radio may switch to mute briefly.
If “SEARCH” appears in the display when
switching on the radio or recalling one of the
stored frequencies, the unit is automatically
searching for an alternative frequency.
“SEARCH” will disappear from the display
when the alternative frequency has been
found or after the frequency band has run
through completely.
If the reception quality of the selected programme becomes poor:
• Tune into a different station.
REG - regional programme
Certain radio programmes are split up at
times into regional programmes offering local information. The 1st programme broadcast by NDR, for example, offers programmes with different contents in the northern states of Germany including SchleswigHolstein, Hamburg and Lower Saxony at
certain times of the day.
If you are listening to one regional programme and move to an area where another linked regional programme becomes
stronger, the unit will switch to that programme.
82
Radio operation with RDS (Radio Data System)
If you wish to continue listening to the first
programme, switch REGIONAL ON by
• pressing AF/# for approximately 1 second until “REGIONAL ON” appears in
the first line.
When the regional function has been
switched on “REG” will replace “AF” in the
display.
If you leave the service area of the regional
programme you are currently tuned into, or
if you would like to take advantage of the
full RDS service, switch to “REGIONAL
OFF”.
• Press AF/# for approximately 1 second
until “REGIONAL OFF” appears.
Selecting a waveband
You can select between the following wavebands:
FM 87.5 - 108 MHz
MW 531 - 1602 kHz
LW 153 - 279 kHz
• Use BND to select the waveband.
Press repeatedly if necessary.
Station tuning
Seek tuning /
• Press / ; the car radio will automati-
cally search for the next station.
If you hold down / (also applies to remote control operation), seek tuning will
speed up in upwards or downwards direction.
Seek tuning
Up
Down
<< / >> Up/Down in increments (for FM only
when AF is switched off)
Manual tuning with << / >>
You can also tune in a station manually.
Important:
AF must be switched off (i.e. the “AF” or
“REG” symbol does not light up in the display).
If necessary, deactivate this function:
• Press AF/#.
Manual tuning:
• Press << / >>; the frequency will
change in degrees in the downwards
or upwards direction.
If you hold down the right or left part of the
rocker switch, the frequency scan will speed
up in the corresponding direction.
Entering the frequency directly
For FM or FMT, it is possible to enter the
station frequency directly.
Start your entry
• by pressing 0.
• Then enter the frequency, beginning
with the first digit. You need not enter
a decimal point.
Press CL to cancel this process or OK to
confirm your selection.
DEUTSCH
Radio
Telefon
ENGLISH
Radio
Telephone
83

Radio operation with RDS (Radio Data System)
Scrolling through the broadcasting networks (FM only)
You can use the << / >> buttons to tune into
stations in your reception area.
If it is possible to receive several programmes in the same broadcasting network,
you can scroll through them in the forwards
direction by pressing >>, or backwards using the << button, e.g. NDR 1, 2, 3, 4, NJOY.
You must have tuned into these stations at
least once previously and “AF” must be active (lights up in the display).
Start Travelstore, for example:
• Press BND for 2 seconds; the system
starts to run through the frequency
band.
If “AF” does not light up,
• press AF/#.
This fulfils the requirements for selecting
stations with << / >> .
Storing radio stations
You can store the following number of stations on the selection buttons for each of
the individual wavebands:
FM 19
TS (FM-Travelstore) 9
MW 9
LW 9
• Use BND to select the desired wave-
band.
• Select a radio station using the rocker
switch (automatically with
ually with << / >>).
• Press the desired selection button for
approx. 1 sec. until you hear a beep.
If you want to store the radio station on a
two-digit preset,
• press button 1 briefly and the second
button within 2 sec. until you hear a
beep.
You have now stored the radio station.
The station preset will appear in the display.
Note:
If you attempt to store a station which is already stored, the number of the corresponding selection button and the memory bank
will flash in the display briefly if you are using the same memory bank.
/ or man-
Automatically storing the
stations with the strongest
reception using Travelstore
You can automatically store the nine most
powerful FM stations of your current reception area sorted according to their signal
strength. This function is particularly convenient during longer trips.
• Press BND/TS for 2 seconds.
“TRAVELSTORE” will flash in the display.
The nine FM stations with the best reception will be stored automatically in the FMT
(FM Travelstore) memory bank. When this
procedure has been completed, the radio
will switch to the station with the best reception stored on selection button 1.
If desired, stations can also be stored manually on the Travelstore memory bank (refer to “Storing radio stations”).
84

Radio operation with RDS (Radio Data System)
Recalling stored radio stations
You can recall any stored radio station at
the touch of a button.
• Press BND/TS repeatedly until the desired waveband appears in the display.
• Press the corresponding selection button briefly.
If you wish to recall a station stored on a
two-digit preset (e.g. preset 19) first press 1
and then 9 within the next 2 seconds.
Selecting the seek-tuning sensitivity
You can alter the automatic seek-tuning
sensitivity.
If “lo” is displayed, the radio will only pick up
strong, local stations.
If “lo” is switched off, the radio will also pick
up weaker, more distant stations.
To switch the seek tuning sensitivity:
• Press
The sensitivity level can be selected separately for both modes. (Please refer to the
section on “Programming with DSC – DXLEVEL / LO-LEVEL”).
.
*
Switching from stereo to mono
(FM only)
Every time the radio is switched on, stereo
playback will be activated automatically.
The unit will gradually switch to mono if the
reception deteriorates beyond a certain
point.
DEUTSCH
Radio
Telefon
ENGLISH
Radio
85
Telephone
 Loading...