


AUSTIN CD41
AUSTIN CD41
PWR
OPEN
T
U
N
/
T
R
K
SENS
SC/PS
AUD
XBASS
RPT
MIX
TS
200 WATTS
V
O
L
654321
BND
CD
DISP
AUSTIN CD41
MUTE
High-Power FM/AM/CD Receiver with Detachable Face
Autoradio FM/AM à lecteur CD, de forte puissance et à face amovible
Receptor FM/AM/Reproductor de CD de Alta Potencia y con Panel Extraíble
Rádio FM/AM/CD de Alta Potência com Painel Removível
Robert Bosch Corporation
Sales Group —
Blaupunkt Division
2800 South 25th Avenue,
Broadview, Illinois 60155
www. blaupunkt. com
ENGLISH
FRANÇAIS
ESPAÑOL
PORTUGUÊS
FCC WARNING Precautions Handling the Front Panel
This equipment has been tested and found to comply with
the limits for a Class B device, pursuant to Part 15 of the FCC
Rules. These limits are designed to provide reasonable protection aga hinst harmful interference in a residential installation. This equipment generates, uses, and can radiate radio
frequency energy, and, if not installed and used in accordance
with instructions, may cause harmful interference with radio
communications. However, there is no guarantee that radio
interference will not occur in particular installation. If this equipment does cause harmful interference to radio or television
reception, which can be determined by turning the equipment
off and on, the user is encouraged to consult the dealer or an
experienced radio/TV technician for help.
You are cautioned that any changes or modifications not expressly approved in this manual could void your authority to
operate this equipment.
Features
• Detachable Flip Down Front Panel
• Built-in Power Amplifier
(max. output : 50W × 4ch)
• 4-ch F & R Preamp Output
• 2-ch Subwoofer Preamp Output
• FM/AM PLL Synthesizer Tuner
• 30 Station Preset Memory
• Travel Store / Scan Tuning
• X-Bass System
• Station Name, Disc Name Store / Station Call
• Auxiliary-input
• Optional IR Remote Control
• CD Changer Control
(IDCA09, CDCA08 & CDCA071*)
* CDCA071 requires adaptor # 7607 898 093 available
separately.
• Avoid installing the unit where it would be subject to high
temperatures, such as in direct sunlight or a hot air stream
from the heater, or where it would be subject to dust, dirt, or
excessive vibration.
• Do not turn on the unit if the temperature inside the car is
very high. Always cool down the unit before usage. Parking
your car in direct sunlight will result in a temperature rise.
• If the unit does not turn on, check the connections first. Then
check whether the fuse at the back of the unit is blown.
• Carefully read this manual before using the unit. If you encounter any problems that are not covered in this manual,
please consult the dealer where you purchased the unit or
the dealer nearest to you.
• This unit has been designed specifically for playback of
compact discs bearing the
be played.
• Do not use non-conventional discs such as heart-shaped,
octagonal discs, etc. The player could be dameged.
mark. Other discs cannot
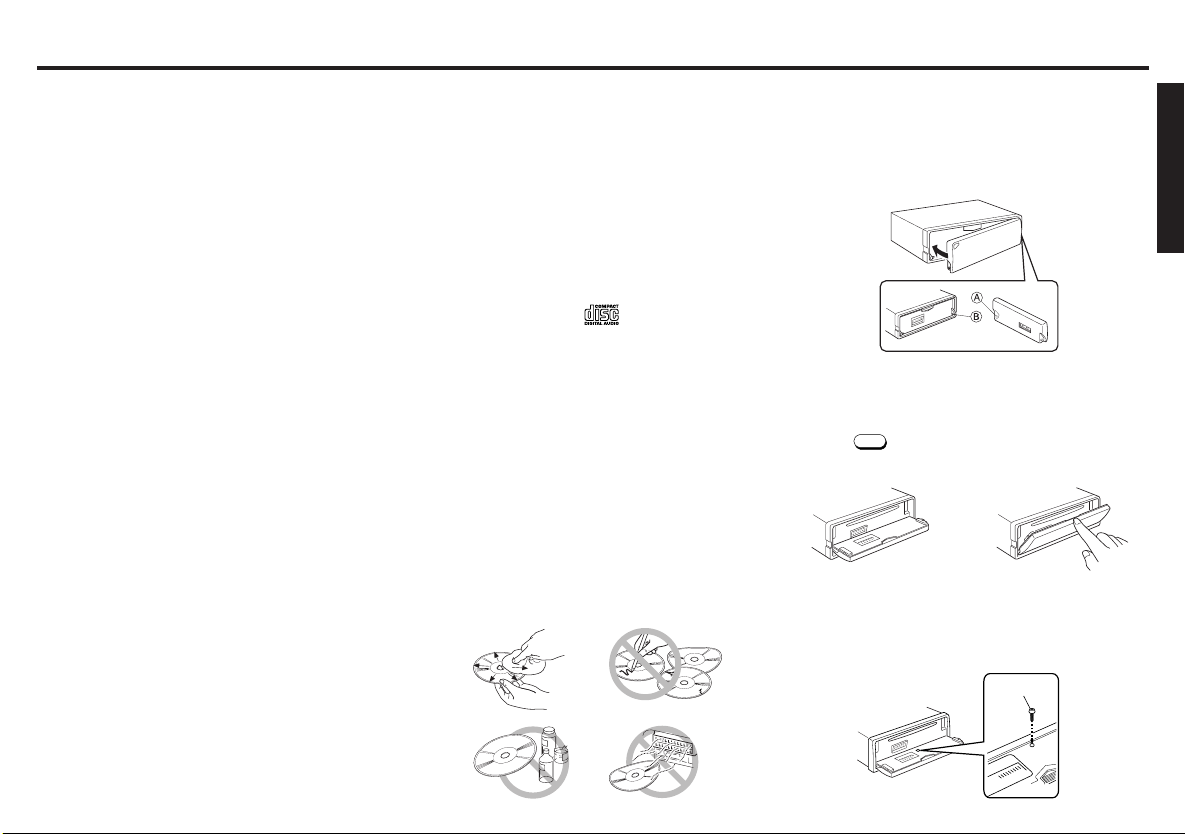
Handling Compact Discs
• Be careful when removing a compact disc after the playback is completed because the disc may be extremely hot.
• Do not use non-conventional discs such as heart-shaped,
octagonal discs, etc. The player could be damaged.
• Do not expose compact discs to direct sunlight or any heat
source.
• Check all compact discs before playing, and discard cracked,
scratched or warped discs.
• Wipe dirty or damp discs outward from the centre with a
soft cloth.
• Do not use any solvents such as commercially available
cleaners, antistatic spray, or thinner to clean the compact
discs.
Attaching the Front Panel
Place the right hand side of the front panel so that the parts
A of the front panel are engaged with the parts B of the unit
as shown below. Then push the left hand side of the front
panel until it is securely locked.
Front Panel Open / Close
Panel open Panel close
Press the
Security / Retailer Display
Bolt the front panel with the locking screw (See page 10) in
the inner cover as shown below, to protect the front panel
from robbery and from getting lost.
OPEN
. Raise the front panel with your
finger until it locks in place.
Locking screw
ENGLISH
FRANÇAIS
ESPAÑOL
PORTUGUÊS
E-1
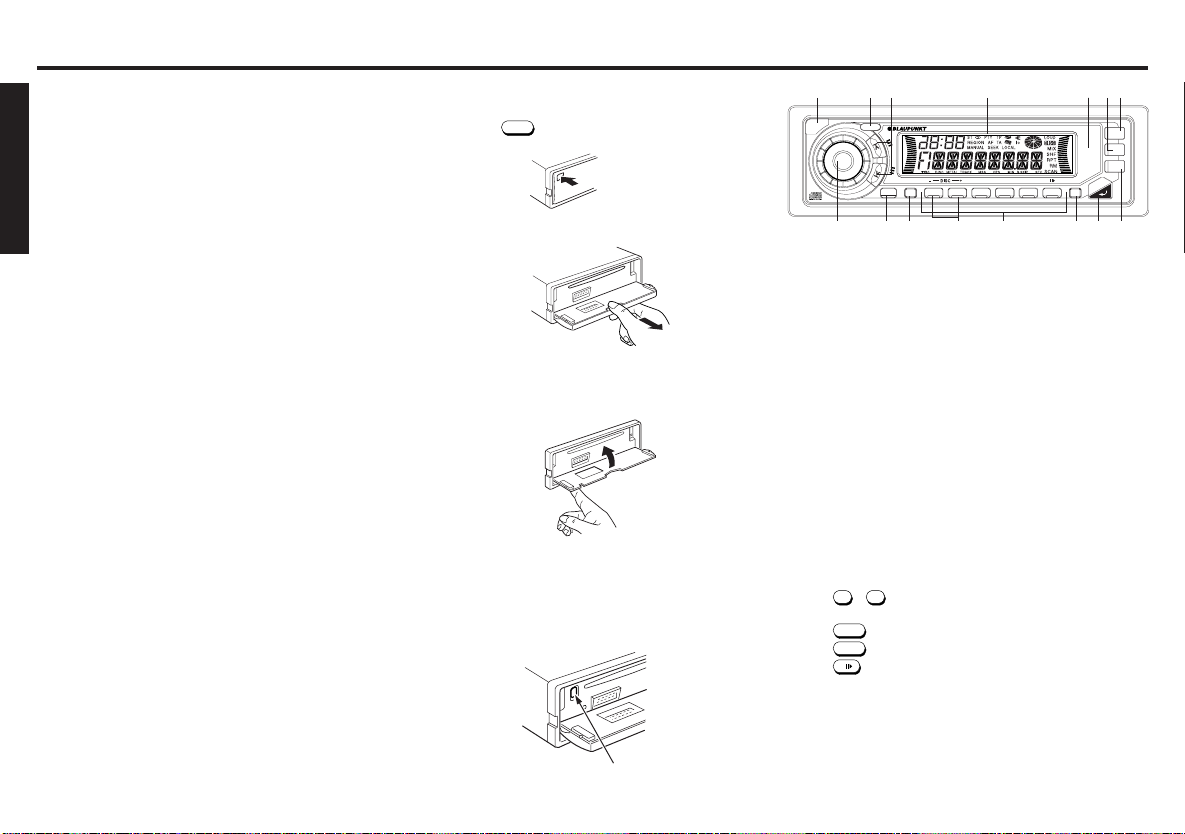
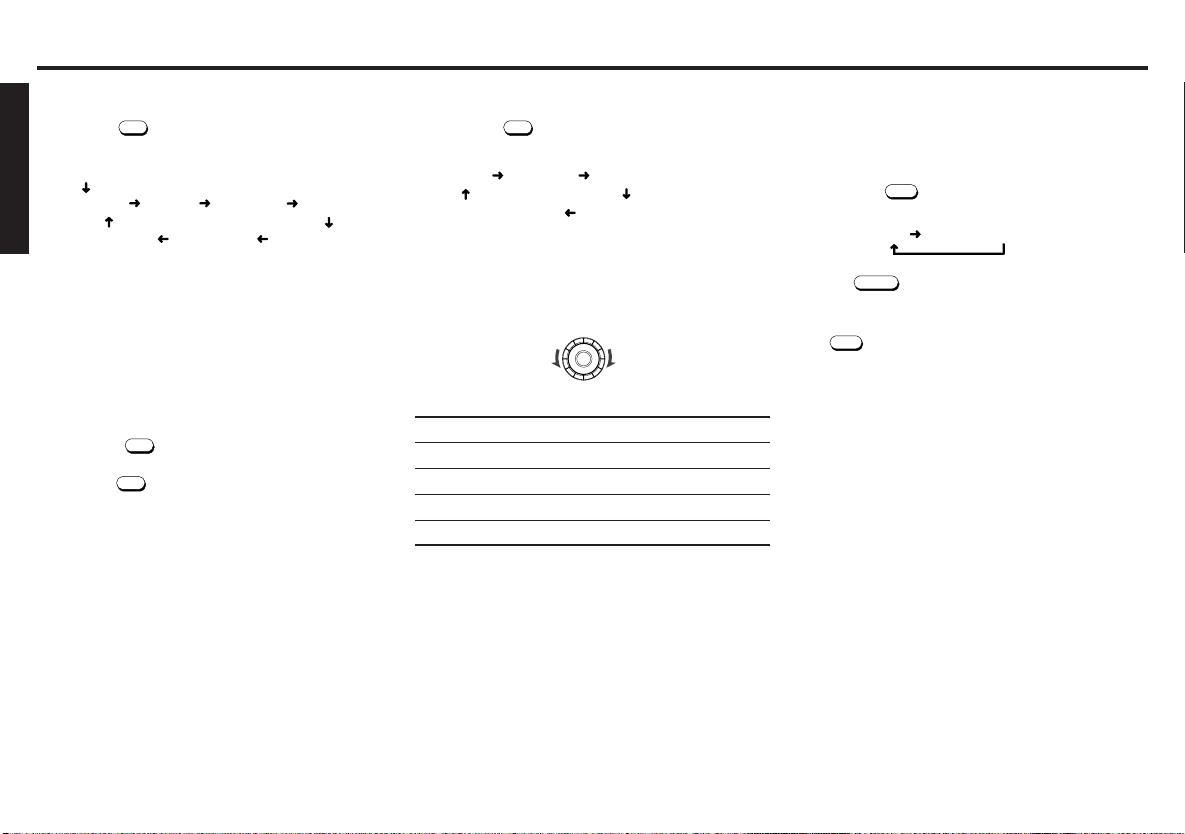
Identification of Controls
PWR
OPEN
T
U
N
/
T
R
K
SE
NS
SC/PS
AUD
XBASS
RPT
MIX
TS
200 WATTS
V
O
L
654321
BND
CD
DISP
AUSTIN CD41
MUTE
Notes
• Be sure to use this unit with the front panel closed.
The unit is automatically switched off when the front panel
is left open for about 10 minutes.
• Do not handle the unit roughly when opening/closing the
front panel.
• Do not put any object or use it like a tray when the front
ENGLISH
panel is open in a lying position.
• Do not press OPEN button when closing the front panel.
• Do not put much force to the operation buttons or the display window as it may cause damage or deform the unit.
• Connectors on the unit and front panel are vital parts transmitting the signal. Do not touch, push and scratch them.
• Be careful not to pinch your fingers or hands when opening
and closing the front panel.
• Do not press hard on the front panel when affixing it to the
unit. No more than light to moderate pressure should be
needed.
FRANÇAIS
• Make sure there is no dust or dirt on the electrical terminals
on the back of the front panel as this could cause intermittent operation or other malfunctions.
• Clean with alcohol & swabs.
ESPAÑOL
Detaching the Front Panel
1. Press the
OPEN
firmly to open the flip down front panel.
2. Pull the front panel toward your direction to remove it.
3. Close the inner cover.
Do not leave inner cover in the down position unless the
front panel is in place.
Ejecting the CD
Press the recessed button located to the left behind the Front
Panel.
12
3
1314 712
1 OPEN button
Open the flip down front panel.
2 PWR button
Turns the power of the unit on or off.
3 TUN/TRK button
Used to tune in to the desired station.
4 LCD Display window
5 CD button
Select the operating source (CD, CD changer or AUX).
6 BND/TS button
Selects the AM/FM Band & Travel store.
7 DISP button
Mode selector. Clock adjustment. Display priority setting.
8 MUTE/SENS button
Muting the sound. Switches the seek sensitivity between
local and distance.
9 XBASS button
Boosting the bass sound.
10 PRESET MEMORY button
11
4
15
10
During radio reception :
1
- 6; For Preset memory
During CD mode :
4/MIX
; For Mix play (Mix & Mix all during CDC)
5/RPT
; For Repeat play
6/
; For Pause
5
6
89
PORTUGUÊS
E-2
EJECT button
General Operations
11 DISC SELECT button
Select the desired CD in CDC (CD changer) mode.
12 SC/PS button
Scan tuning. Preset scan tuning. Scan play in CD/CDC
mode.
13 AUD button
Audio control selector; Bass, Treble, Loudness, Balance
& Fader.
14 Dial
Adjusts the volume level/bass/treble/balance/fader.
Storing the station names. Select alfa-numeric characters.
15 Infrared Sensor (behind acrylic facia)
Permits wireless remote control of AM/FM/CD and CD
changer with optional credit card style remote. See Dealer
for Details.
Turning the power On/Off
Press the
Tip
When you turn on the unit, “HELLO” will be displayed then
“WELCOME” will momentarily be displayed before actual
power on.
When you turn off the unit, “SEE YOU” will be displayed then
“GOOD-BYE” will momentarily be displayed before actual
power off.
You can edit these messages. (See “Turn on/off message
edit”)
PWR
to turn on or off the unit.
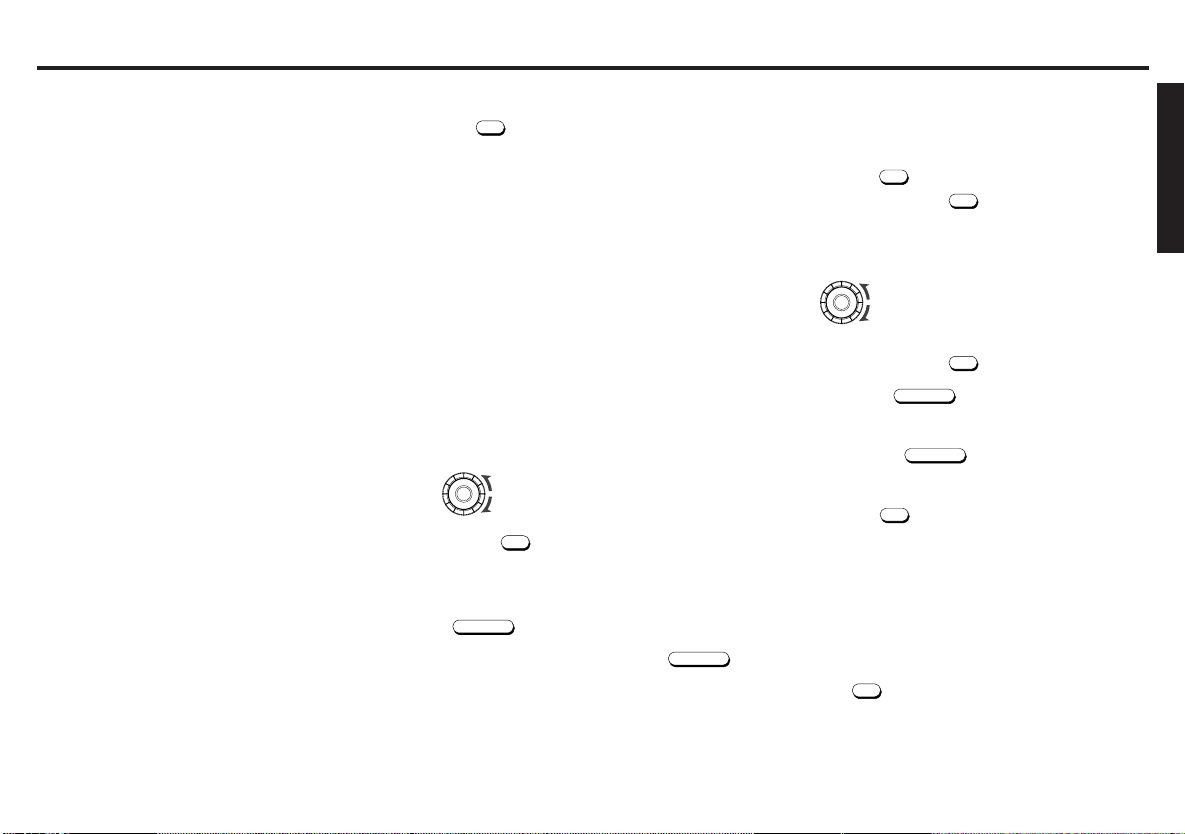
Volume Level Control and Memory
Rotate the dial to adjust the volume.
It is also possible to set the maximum volume for when the
power is switched on by following the procedure explained
below.
1. Turn the dial until it is set at the required volume.
Volume down
Volume up
MUTE / SENS
PWR
for two or more seconds. The power will
.
MUTE / SENS
again.
2. Press the
be switched off and the current volume level recorded.
Muting the sound
Press
“ MUTE ” appears on the display window.
To restore the previous volume level, press
Setting the Clock
The clock uses a 12-hour display system. (factory set)
1. Turn the ignition key to the ON position.
2. Press the
3. Repeatedly press the
PWR
to turn on the unit.
DISP
to display “ CLOCK 12 ”.
4. Rotate the dial within 5 seconds to select the 12 or 24-
hour time mode. Each time you rotate the dial, the mode
changes or toggles as follows :
CLOCK 24
CLOCK 12
5. Repeatedly press the
A.
Press the
B. Rotate the dial to set the hour digit.
C. Press the
D. Rotate the dial to set the minute digit.
6. Press the
ting mode.
Note
If you make no button input or dial operation in 20 seconds,
the Clock setting mode will turn off automatically.
Ignition-off Clock Recall
The display will illuminate showing the time and then automatically shut off after 5 seconds.
Press the
tion.
DISP
DISP
while the ignition switch is in the “ OFF ” posi-
DISP
to display “ CLK ADJ ”.
MUTE / SENS
within 5 seconds to flash the hour digit.
MUTE / SENS
to flash the minute digit.
momentarily to complete the Clock set-
ENGLISH
FRANÇAIS
ESPAÑOL
E-3
PORTUGUÊS
Mode Selector
Each time the
over as shown below;
Priority
STN CALL LEVEL 1
ENGLISH
Display priority setting
Display Priority can be set for the following items;
Radio mode
• Frequency and Station Name, plus during
CDC (CD changer) mode
• Disc No, Track No, Track time and Disc name.
FRANÇAIS
Example
To set Station Name to the Display Priority.
1. Press the
appears in the display window.
2. Hold the
“ NO NAME” or a previously assigned station name blinks
once to indicate that Station Name is selected for the Display Priority.
After 5 seconds, the display mode will automatically re-
ESPAÑOL
turn to the Display Priority showing either “NO NAME” or
the station name.
Tip
Frequency Display is initially set to the Display Priority,
and Station Name (“NO NAME”) is set to the “Temporary” indicator.
DISP
is pressed, the display window will change
Temporary
(NO NAME)
CLOCK 12 MESSAGE
DISP
CLK ADJ
DISP
three times, and the temporary display
pressed for more than 2 seconds.
METER 1
Adjusting the Sound Characteristics
1. Press the
as follows;
BASS 0 TREBLE 0 LOUD OFF (LOUDNESS)
AUD
R0 F0 (FADER)
to select the desired adjustment mode
L0 R0 (BALANCE)
2. Rotate the dial to adjust the selected item.
Adjust within 3 seconds after selecting the item. After 3
seconds, the dial reverts to volume control. Use the following tables as a guide for adjusting the settings in each
mode.
Adjustment Range
BASS BASS -5 BASS +5
TREBLE TREBLE -5 TREBLE +5
LOUDNESS LOUD OFF LOUD ON
BALANCE L9 R0(Full left) L0 R9(Full right)
FADER R9 F0(Full rear) R0 F9(Full front)
Tip
Settings for BASS, TREBLE, LOUDNESS and XBASS can
be made to each of the following modes independently:
FM, AM, CD Changer and AUX.
Switching the Source (Selecting auxiliary
input)
You can connect the auxiliary equipment (Portable cassette
player, MP3 player, etc.) to this radio via optional AUX-IN cable.
(See page 11)
Each time the
change over as shown below;
Press the
CD
is pressed, the operation source will
CD
CD changer or AUX
BND / TS
to return to tuner mode.
Note
If the CD button is pressed when no CD has been loaded
into the unit, The CD mode will skip to the CD changer mode
or AUX mode.
Also, if the CD changer is not connected, the system will move
across to the AUX mode regardless of whether auxiliary equipment is connected or not (“MP3/AUX” will be displayed.)
It is not possible to switch to the AUX mode when the CD
changer is connected.
Remote Control (Optional)
You can operate your receivers basic AM, FM, CD & CDC
features via an optional IR Remote Control. Optional Credit
Card type remotes are available. See dealer to order RC823
Credit Card remote.
PORTUGUÊS
E-4
 Loading...