


10:01AM 11/23 00:30
10:01AM 11/23 EXT 11
INTERCOM TO 
 PAGE
PAGE
10:01AM 11/23 EXT 11
INTERCOM TO 12
10:01AM 11/23 EXT 11
TRANSFER LINE #1 TO 12
10:01AM 11/23 EXT 12
TRANSFER FROM 11
Telephone operation
Call transfer
Transfer a call and speak to the receiving party
While on a call:
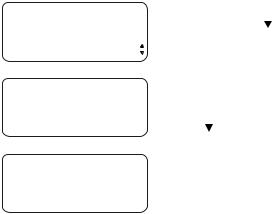
1.Press [INTERCOM]. The outside call will automatically be put on hold, and you will see INTERCOM TO XX, with XX being the destination extension number.
2.Press the one-touch button for the extension to which you’re transferring the call.
-OR-
Dial the extension number to which you’re transferring the call. You will see the extension number in the third line of the display.
3.When the other party answers by pressing [INTERCOM], you can announce the call.
4.Press [TRANSFER].
5.Hang up.
 NOTE: If you do not dial an extension number within 10 seconds, the transfer is automatically canceled. The call is still on hold. Press the corresponding LINE key to resume the call.
Answer a transferred call
When you hear a long transfer ring, pick up the handset or press the [LINE] button of the call to use the speakerphone or headset.
24

Intercom operation
Intercom overview
This 1080 telephone is fully compatible with any AT&T Four-Line Small Business System Speakerphone 1070 or 1040 phones you may have installed. You can use a total of 16 1080/1070/1040 phones together as extensions in your phone system.
Each individual phone in your telephone system MUST be assigned a unique extension number for the intercom feature to work. See EXTENSION NUMBER on page 32 of the installation guide for instructions.
This intercom features both a single-phone page and a system-wide page (PAGE ALL).
A single-phone page alerts only one phone. A system-wide page (PAGE ALL) alerts all system phones. Any phone with the Do Not Disturb (DND) feature activated will not receive a page.
An intercom call rings at the destination extension with a repeating double-ring pattern.
A single-phone page automatically activates the speakerphone on the receiving phone. You can deactivate the speakerphone by lifting the handset.
 NOTE:
NOTE:
1.If a line is in use, pressing [INTERCOM] will place the line on hold and activate the intercom (page 26).
2.If you subscribe to DSL service, please read DSL users beginning on page 6 of installation guide for information about minimizing problems with this phone caused by DSL signals.
Basic intercom operations
Operation: |
Function: |
|
|
|
|
INTERCOM |
Lets any two extensions connected to line 1 ring |
|
|
each other (page 26). |
|
|
|
|
PAGE |
Lets you announce over the speaker of the desti- |
|
|
nation phone (page 29). |
|
|
|
|
PAGE ALL |
Lets you announce to all phones in the system at |
|
|
the same time (system-wide page) (page 31). |
|
|
|
|
CONFERENCE |
Lets you connect an intercom call with an |
|
|
outside line (page 33). |
|
25

10:01AM 11/23 EXT 11
INTERCOM TO 
 PAGE
PAGE
10:01AM 11/23 EXT 11
INTERCOM TO 12
Intercom operation
Intercom
Use this feature for calls between system phones.
Make an intercom call with the handset
1.If One-touch preference is set to INTERCOM (page 35), skip to step 2.
-OR-
If One-touch preference is set to TELEPHONE (page 30 of the installation guide), press
[INTERCOM].
2.Press the one-touch button for the destination party, then lift the handset. The screen will diplay INTERCOM TO XX, with XX being the destination extension.
If the extension you called is idle or set to Do Not Disturb, you will hear long beeps. If the other extension is on a call, you will hear a busy signal.
 NOTE: The intercom call is automatically canceled if you do not press a one-touch button within 10 seconds.
26

10:01AM 11/23 EXT 11
INTERCOM TO 
 PAGE
PAGE
10:01AM 11/23 EXT 11
INTERCOM TO 12
Intercom operation
Intercom
Make an intercom call with the speakerphone or headset
With the handset in the telephone base:
1.If One-touch preference is set to INTERCOM, skip to step 2.
-OR-
If One-touch preference is set to TELEPHONE, press [INTERCOM]. The phone will automatically activate the intercom call in
the mode (headset or speakerphone) you programmed (see AUTOMATIC MODE on page 39 of the installation guide).
2.Press the one-touch button. The screen will display INTERCOM TO xx, with XX being the destination extension.
If the destination extension is idle or set to Do Not Disturb, you will hear long beeps. If the other extension is busy, you will hear a busy signal.
 NOTE: The intercom call is automatically canceled if you do not press a one-touch button within 10 seconds.
27

10:01AM 11/23 EXT 12
INTERCOM FROM 11
Intercom operation
Intercom
Answer an intercom call
When you receive an intercom call, you will hear a repeating double-ring pattern and your screen will display INTERCOM FROM with the extension number of the caller. Answer the intercom call by lifting the handset, or by pressing [INTERCOM],  SPEAKER] or [HEADSET] to take the call hands-free.
 NOTE: If you press [INTERCOM] to answer the call, the phone will automatically use the mode (speakerphone or headset) you programmed as the automatic mode (see AUTOMATIC MODE on page 39 of the installation guide).
End an intercom or page call
To end the intercom or page call, press [INTERCOM].
-OR-
Hang up or press  SPEAKER] or [HEADSET] again.
28

10:01AM 11/23 EXT 11
INTERCOM TO 
 PAGE
PAGE
10:01AM 11/23 EXT 11
PAGING 

INTERCOM
10:01AM 11/23 EXT 11
PAGE 12
Intercom operation
Voice page
Page a specific extension (single-phone page)
Sends your voice to the speaker of the destination phone. The person you’ve called may be able to respond just by talking. See AUTO MUTE on page 35 of the installation guide.
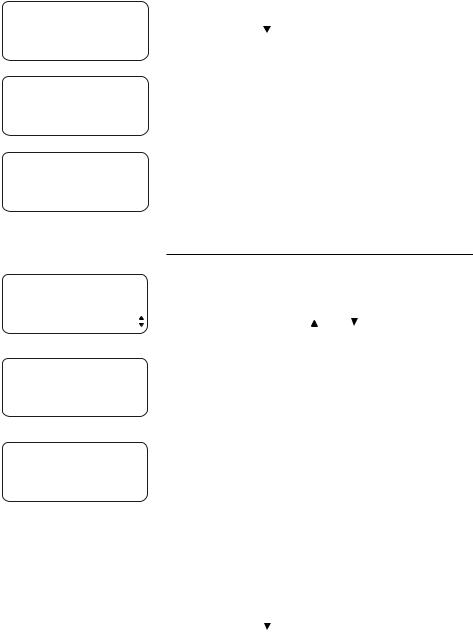
1.Press [INTERCOM].
2.Press [ENTER] to select PAGE.
3.Enter the destination extension number (11-26).
4.Your telephone will display PAGE and the called extension number. Now the speakerphone on the destination telephone is activated automatically.
To end the page:
• Press [INTERCOM] on either telephone.
 NOTES:
•Refer to page 32 of the installation guide to get more information on extension numbers.
•Pressing [INTERCOM] while on an external call will initiate a call transfer (page 23).
•If the destination telephone is in the Do Not Disturb mode, on an intercom call or on an outside call, your telephone will sound a busy signal.
•The auto-mute feature may be set to ON on the destination telephone to protect privacy (page 35 of the installation guide). The person at the
destination extension will have to press [MUTE] to re-activate the microphone (page 19).
29

10:01AM 11/23 EXT 12
PAGE FROM 11
Intercom operation
Voice page
Answer a single-phone page
Auto-mute off
When your extension receives a page, the phone beeps and the speakerphone is automatically activated. Answer the call simply by speaking.
If you are on the headset, you can answer the page by pressing [HEADSET] and speaking through the microphone of the headset.
Auto-mute on
The [MUTE] light will be on. Lift the handset or press [MUTE] to temporarily de-activate automute and answer the page.
30

. . . |
10:01AM 11/23 EXT 11
INTERCOM TO  PAGE ALL
10:01AM 11/23 EXT 11
PAGE ALL
Intercom operation
Voice page
Page all (system-wide page)
Sends your voice to the speakers of all phones in the system.
1.Press [INTERCOM] then [ ] to show PAGE ALL.
2.Press [ENTER]. The screen will display PAGE ALL.
Once the page is automatically answered, speak and your voice will be heard at all idle extensions in your phone system.
Page-all shortcut
1.Press [INTERCOM], then press [#].
2.Your telephone will display PAGE ALL. You will be heard at all idle extensions.
 NOTES:
•Pressing [INTERCOM] while on an external call will initiate a call transfer (page 23).
•If a system telephone is in the Do Not Disturb (DND) mode, on an external or intercom call, the system-wide page will not be heard there.
•During a page all, the people at all extensions will be able to hear you, but you are not able to hear them.
•During a page all, if [ENTER] is pressed on any system telephone, the system-wide page will be terminated and the person on that telephone will join the intercom call with you.
To end the page all:
• Press [INTERCOM] on your telephone.
31

10:01AM 11/23 EXT 12
PAGE ALL FROM 11 [ENTER]: ANSWER
10:01AM 11/23 EXT 12
INTERCOM FROM 11
Intercom operation
Voice page
Answer a system-wide page
 NOTE: Only one extension can answer a systemwide page.
When you receive a system-wide page, your phone beeps and the screen shows PAGE ALL FROM xx, with XX being the originating extension number.
1.Press [ENTER] to answer the page. The screen displays INTERCOM FROM XX, where XX is the calling extension number.
2.Press [INTERCOM] to end the call on either telephone.
32

10:01AM 11/23 EXT 11
PAGING 

INTERCOM
10:01AM 11/23 EXT 11
PAGE 12
Intercom operation
Voice page
Room monitor
Make a single-page call to a system phone to monitor the sounds from that room. To use the room monitor feature, the destination telephone automute feature must be turned off (page 35 of the installation guide).
1.Press [INTERCOM].
2.Press [ENTER] to select PAGE.
3.Enter the destination extension number (11-26).
4.After your telephone displays PAGE XX, press [MUTE]. The destination telephone will beep, then activate its speakerphone automatically. Now, you can monitor the room of the destination telephone without being heard.
To end room monitoring, press [INTERCOM] on your telephone.
Make an intercom conference call
Someone at a system phone having a twoway conversation on an outside line can invite
someone at an extension to join the conversation. Follow the directions under Conference calls
on page 22, making sure to establish the nonintercom call first.
 NOTE: You cannot put an intercom conference call on hold.
33
One-touch setup and operation
One-touch overview
 NOTE: The one-touch buttons are also used
to place intercom calls. See Intercom operation beginning on page 25 for details.
This telephone has 32 one-touch locations (speed dial locations) where you can store phone numbers you wish to dial using fewer keys than usual. You can store up to 24 digits in each location. The steps used to dial numbers stored in one-touch locations vary according to how you programmed the one-touch preference. See
PREFERENCE on the next page and To dial a onetouch number on page 38 for more details.
The first 16 locations can be accessed using only the one-touch buttons. To access the remaining 16 locations, press [LOWER] and then the onetouch button for the desired location.
You may wish to write the names or telephone numbers of the one-touch entries on the directory card, using the light gray spaces for the first 16 locations and the dark gray spaces for the second 16 locations (page 8).
one-touch buttons
16 one-touch locations |
(all light gray spaces) |
16 lower one-touch locations
(all dark gray spaces)
34

ONE TOUCH
 TELEPHONE PREFERENCE
One-touch setup and operation
One touch
Assign the buttons on the right side of the phone, the one-touch keys, as intercom or outside call shortcut keys, and enter and view the outside phone numbers.
Preference
Assign the one-touch keys as intercom or outsidecall shortcut keys.
1.Press [ENTER].
2.Press [ENTER] again to enter the ONE TOUCH menu.
3.Press [ ] or [ ] until you see PREFERENCE.
4.Press [ ] or [ ] to highlight INTERCOM or TELEPHONE. INTERCOM is the default setting.
5.To move to the next feature, press [ ].
-OR-
To exit setup, press and hold [ENTER].
35

One-touch setup and operation
One-touch storage
PROGRAM
(ENTER NUMBER) PAUSE
1.Press [ENTER]. The screen displays ONE TOUCH.
2.Press [ENTER].
3.Press [ ] or [ ] repeatedly until you see
PROGRAM.
4.Press [ENTER]. The screen includes (ENTER NUMBER).
5.Use the dial pad to enter up to 24 digits.
-OR-
•To copy the most recently dialed number from redial, press [(AUTO) REDIAL]. Only the last number dialed from this extension can be copied to a one-touch location. The other numbers on the redial list cannot be copied.
•If you need to store a two-second dialing pause for accessing banking or long distance
services, press [ ] or [ ], scroll to PAUSE, then press [ENTER]. A P will appear on the screen.
•If you need to store a signal for switching to
temporary tone dialing, press [ ] or [ ] until you see TONE, then press [ENTER]. A T will appear on the screen.
•If you need to store a flash signal for using the service supplied by your telephone
company, press [ ] or [ ] until you see FLASH, then press [ENTER]. An F will appear on the screen.
•To erase the last digit, press [ ] to scroll to DELETE CHAR then press [ENTER].
-OR-
Press [REMOVE].
•To cancel programming, scroll to CANCEL and then press [ENTER].
continued on next page
36

One-touch setup and operation
One-touch storage
continued from previous page
6.Press the desired one-touch key to store the telephone number in the normal location.
-OR-
Press [LOWER], then the desired one-touch key to store the telephone number in the lower location.
 NOTES:
•If the desired one-touch key location was empty, the screen will display SAVED! If there is already a telephone number in it, the screen will display REPLACE SPD? You can replace the current entry by pressing [ENTER], or keep the current
entry by pressing [ ] or [ ] until you see NO REPLACE? Press [ENTER]. Then choose another one-touch key location.
•Only the last number dialed from this extension can be copied to a one-touch location. The other numbers in the redial stack cannot be copied.
•Press and hold [ENTER] to exit one-touch setup.
37

One-touch setup and operation
To dial a one-touch number
This phone comes with one-touch preference preset to INTERCOM.
 NOTE: To change the one-touch preference, see
PREFERENCE on page 35.
If one-touch preference is set to INTERCOM:
1. Lift the handset.
-OR-
Press [ SPEAKER].
-OR-
Press [HEADSET] and listen for the dial tone.
2. Press the one-touch button.
-OR-
Press [LOWER], then press the one-touch button for the destination number you want to call. The screen displays the number as it is dialed.
If one-touch preference is set to TELEPHONE:
You do not need to go off hook and listen for a dial tone before dialing a one-touch number. You can simply:
Press the one-touch button.
-OR-
Press [LOWER], then press the one-touch button for the desired number to call.
The screen displays the number as it is dialed using the speakerphone or headset as programmed for automatic mode. (See Automatic mode on page 39 of the installation guide.)
38

VIEW |
SPD#15 |
5550100 |
|
CANCEL |
|
Normal location: SPD# 1-16
Lower Location: SPD# 17-32
One-touch setup and operation
To view or delete a one-touch number
To view a one-touch number
1.Press [ENTER].
2.Press [ ] or [ ] until you see ONE TOUCH. Press
[ENTER].
3.Press [ ] or [ ] until you see VIEW. Press
[ENTER].
4.Press the desired one-touch key to view the telephone number stored in the normal location.
-OR-
Press [LOWER], then the desired one-touch key to view the telephone number stored in the lower location.
-OR-
Press [ ] or [ ] to view the entries. 5. Press and hold [ENTER] to exit.
To delete a one-touch number
When a one-touch telephone number is displayed, press [REMOVE] to delete it. Once deleted, an entry cannot be retrieved. Press and hold [ENTER] to exit.
39

|
One-touch setup and operation |
|
To modify a one-touch number |
|
1. When a one-touch telephone number is displayed, |
|
press [ ] or [ ] to highlight MODIFY. |
VIEW |
SPD#01 |
5550100 |
2. Press [ENTER]. |
MODIFY |
3. Press the dialpad keys to enter up to 24 digits. |
|
|
|
• You can include a pause while modifying a |
|
dialing sequence which requires one during |
|
actual dialing. Press [ ] or [ ] until you see |
|
PAUSE, then press [ENTER] when storing a |
|
pause. The screen will display P. Each pause |
|
counts as one digit. Continue storing the |
|
number as usual. |
|
• Store a signal for switching to temporary |
|
tone dialing, required for some special services, |
|
if you have dial pulse (rotary) service. Press [ ] |
|
or [ ] until you see TONE, then press [ENTER]. |
|
A T will appear on the screen. All numbers |
|
entered after this will send touch tone signals |
|
during dialing. |
|
• You can store the flash signal required by |
|
some special services as part of a dialing |
|
sequence. Press [ ] or [ ] until you see FLASH, |
|
then press [ENTER]. An F will appear on the |
|
screen. Continue storing the number as usual. |
|
• To erase the last digit, scroll to DELETE CHAR |
|
and then press [ENTER]. |
|
-OR- |
|
Press [REMOVE]. |
|
• To copy the most recently dialed number |
|
from redial, press [(AUTO) REDIAL]. Only the |
|
last number dialed from this extension can |
|
be copied to a one touch location. The other |
|
numbers in the redial shack cannot be copied. |
|
• To cancel programming, scroll to CANCEL and |
|
then press [ENTER]. |
|
continued on next page |
40

One-touch setup and operation
To modify a one-touch number
continued from previous page
4.Press the desired one-touch key to store the telephone number in a location.
-OR-
Press [LOWER], then the desired one-touch key to store the telephone number in the lower location.
5.Press [ ] or [ ] to select CANCEL. Press [ENTER] to exit the VIEW feature. To move to the next feature, press [ ].
-OR-
Press and hold [ENTER] to exit.
 NOTE: If the desired one-touch key location was empty, the screen will display SAVED! If there is a telephone number in it, the screen will display REPLACE SPD? You can replace the current entry by pressing [ENTER], or keep the current entry by pressing [
 ] or [ ] until you see NO REPLACE? Press [ENTER], then choose another one-touch key location.
41

Pat Williams 

 5550100
Directory
Directory overview
This 1080 telephone can store up to 200 names and phone numbers in the directory. Names can have up to 16 characters and numbers can have 24 digits. Because directory entries are stored in alphabetical order, you may wish to enter names with the last name first.
To enter directory mode, press [DIR].
If there are already 200 stored entries, the screen includes FULL! If you try to view directory entries when there are no entries, the screen displays (EMPTY).
To work with the directory, press [DIR]. The screen will display menu choices on the bottom line.
To exit directory mode at any time, press [DIR].
Menu structure
Use the navigation keys ([ ], [ ], [
 ], [ ] and [ENTER] ) to move through the menus.
The menu structure for the directory is shown below.
VIEW ENTRIES |
ADD ENTRY |
DIAL |
ENTER NAME |
MODIFY |
DONE |
COPY TO 1-TOUCH |
CANCEL |
CANCEL |
ENTER NUMBER |
|
DONE |
|
PAUSE |
|
TONE |
|
FLASH |
|
CANCEL |
42

DIRECTORY
VIEW ENTRIES
DIRECTORY
ADD ENTRY

 (ENTER NAME)
DONE
Pat Williams 

DONE
Directory
Store a name and number in the directory
1.Press [DIR] to begin working with the directory.
2.Press [ ] until the screen includes ADD ENTRY.
3.Press [ENTER]. The screen includes ENTER NAME.
4.Use the dial pad keys and the chart below to enter the letters, digits or symbols you wish to store. Press the key repeatedly until the desired character you want is shown on the screen. For example, press [2] once for “A,” twice for “B,” three times for “C,” four times for “a,” five times for “b,” six times for “c,” and seven times for “2.” Press [ ] to move to the next character or
space. Press [ ] to backspace. The name will appear on screen as you enter it.
PRESS |
ONCE |
TWICE |
3 |
4 |
5 |
6 |
7 |
8 |
9 |
|
|
|
TIMES |
TIMES |
TIMES |
TIMES |
TIMES |
TIMES |
TIMES |
1 |
space |
, |
- |
' |
& |
. |
( |
) |
1 |
2 |
A |
B |
C |
a |
b |
c |
2 |
|
|
3 |
D |
E |
F |
d |
e |
f |
3 |
|
|
4 |
G |
H |
I |
g |
h |
i |
4 |
|
|
5 |
J |
K |
L |
j |
k |
l |
5 |
|
|
6 |
M |
N |
O |
m |
n |
o |
6 |
|
|
7 |
P |
Q |
R |
S |
p |
q |
r |
s |
7 |
8 |
T |
U |
V |
t |
u |
v |
8 |
|
|
9 |
W |
X |
Y |
Z |
w |
x |
y |
z |
9 |
* |
* |
|
|
|
|
|
|
|
|
0 |
0 |
|
|
|
|
|
|
|
|
##
5.When you have finished entering the name, press [ ] or [ ] to show DONE. Press [ENTER] to enter the phone number. The screen displays the name you entered and ENTER NUMBER.
continued on next page
43
Pat Williams

 (ENTER NUMBER)
DONE
Pat Williams 5550100 

DONE
Pat Williams 5550100
SAVED!
DIRECTORY
ADD ENTRY
Pat Williams 5550100 

PAUSE
Directory
Store a name and number in the directory
continued from previous page
6.Use the dial pad keys to enter the desired phone number.
-OR-
Press [(AUTO) REDIAL] to copy the last number dialed at this extension onto the screen. Press
[ ] to backspace.
7.When you have finished entering the number, press [ ] or [ ] to show DONE. Press [ENTER] to store the name and number in the directory. The screen briefly displays the name and number and Saved! Then the screen will automatically return to include ADD ENTRY.
 NOTE: You can exit the directory at any time without storing the entry by pressing [DIR].
Store a pause in a directory number
You can include a pause in a number stored in the directory. You may need a pause in a directory number to allow access to some banking or telephone company features.
1.When you reach the place in the dialing sequence where you wish to enter a pause, press [ ] until you see PAUSE in the display.
2.Press [ENTER] to store a two-second pause. A P will appear in the phone number. Then continue entering the number. Each pause counts as one digit. If you want to save the number in the directory, press [ ] to reach DONE and then press [ENTER] to save.
44

Pat Williams 5550100 

TONE
Pat Williams 5550100 

FLASH
Directory
Store a name and number in the directory
Store a temporary tone signal in a directory number
If you have dial pulse (rotary) service, you can store tone signals in a directory number. You may need tone signals to use bank-by-phone and other services.
1.When you reach the place in the dialing sequence where you wish tone dialing to begin, press [ ] until the screen displays TONE.
2.Press [ENTER]. All digits entered after this will send tone signals.
3.If you want to save the number in the directory, press [ ] to reach DONE and then press
[ENTER] to save.
Store a FLASH in a directory number
You can store the flash needed to access some custom-calling services in a directory number.
1.When you reach the place in the dialing sequence where you wish to enter a flash, press [ ] until the screen displays FLASH.
2.Press [ENTER] to store the flash, then continue entering the number. Each flash counts as one digit.
3.If you want to save the number in the directory, press [ ] to reach DONE and then press
[ENTER] to save.
45
DIRECTORY
VIEW ENTRIES
Andrew 5556789
Barbara 5559876
Directory
Review directory entries
1.Press [DIR] and then [ENTER] to begin working with the directory entries.
2.Press [ ] or [ ] to scroll through the directory entries.
-OR-
Press the dial pad key for the first character of the entry you wish to review until the character you are looking for is displayed. Then press [ ] or [ ] to scroll through the entries beginning with this character. If there is no entry for
the desired character, the screen will display NO ENTRIES FOR “X” (where X refers to the displayed character).
 NOTE: You can exit the directory at any time without storing the entry; simply press [DIR].
46

Pat Williams 5550100
Pat Williams 5550100
MODIFY
Pat 

DONE
Pat 5554321 

DONE
Pat 5554321
SAVED !
Directory
Edit a directory entry
When any directory entry is displayed, to edit the entry:
1.Press [ENTER].
2.Press [ ] or [ ] to scroll to MODIFY. Press [ENTER] to edit the name.
3.Press [ ] to move the cursor to the left or [ ] to move the cursor to the right. Press [REMOVE] to erase characters. Press the dial pad keys to enter the correct name (page 43).
4.Press [ ] or [ ] to display DONE. Press [ENTER] to edit the number.
5.Press [ ] to move the cursor to the left or [ ] to move the cursor to the right. Press [REMOVE] to erase digits. Press the dial pad keys to enter the correct number.
•To copy the most recently dialed number from the redial log, press [(AUTO) REDIAL].
•To enter a two-second dialing pause (a P appears on the screen) for accessing banking
or long distance services, press [ ] or [ ] to scroll to PAUSE. Press [ENTER].
•To switch to tone dialing (a T appears on the
screen) temporarily, press [ ] or [ ] to scroll to TONE. Press [ENTER].
•To flash the line (an F appears on the screen) if you need to use the service supplied by your
telephone company, press [ ] or [ ] to scroll to FLASH. Press [ENTER].
6.Press [ ] or [ ] to display DONE. Press [ENTER] to save the entry and return to directory review mode.
7.Press [DIR] to exit the directory.
 NOTE: If press [ ] to display CANCEL before [ENTER] is pressed in step 4 or 6 above, the telephone will not store the entry you modified.
47

Pat Williams 5550100
DIAL
Pat Williams 5550100
REMOVED!
Directory
Dial and remove an entry from the directory
Dial a number from the directory
1.Find the entry for the number you wish to call by following the directions under Review directory entries on page 46.
2.Press [ENTER]. The screen displays DIAL.
3.Press [ENTER].
-OR-
Pick up the handset.
-OR-
Press  SPEAKER] or [HEADSET].
The phone will automatically select an idle line and dial the call unless you choose a specific line to dial the call by pressing the [LINE] button, the call will then be dialed in the mode (speakerphone or headset) you programmed (see Automatic mode on page 39 of the installation guide).
 NOTE: While reviewing the numbers in the redial stack, if you want to place a new call other than the displayed number, you need to press and hold [ENTER] or wait for 30 seconds to return to idle.
Remove a name and number from the directory
1.Find the entry for the number you wish to call by following the directions under Review directory entries on page 46.
2.When the desired entry is displayed, press [REMOVE]. The screen includes REMOVED! The screen automatically advances to the next directory entry.
 NOTE: Once an entry is removed from the directory, it cannot be restored.
48
DIRECTORY
END OF LIST
DIRECTORY
REMOVE ALL?
DIRECTORY
ALL REMOVED !
Directory
Remove all entries from the directory
1.Press [DIR] to begin working with the directory.
2.Press [ENTER] to select VIEW ENTRIES.
3.Press [ ] or [ ] until the screen shows END OF LIST.
4.Press [REMOVE]. The screen display include
REMOVE ALL?
5.Press [REMOVE] again within three seconds to confirm the command and remove all directory entries. The screen will display ALL REMOVED!
 NOTE: Once the entries are removed from the directory, they cannot be restored.
To save an entry to a one-touch key
Pat Williams |
1. |
Find the entry for the desired number by |
|
|
following the directions under Review |
||
5550100 |
|
directory entries on page 46. |
|
|
|
||
COPY TO 1-TOUCH |
2. |
Press [ENTER] then [ ] or [ ] until you see |
|
|
|
COPY TO 1-TOUCH. |
|
Pat Williams |
3. |
Press [ENTER] to begin to save the number. |
|
4. |
Press the one-touch button for the location |
||
5550100 |
|||
PRESS 1-TOUCH |
|
where you want to save the number. |
|
|
-OR- |
||
|
|
||
|
|
Press [LOWER], then press the one-touch |
|
Pat Williams |
|
button. |
|
5550100 |
5. |
The screen automatically returns to the |
|
|
|||
SAVED! |
SPD#01 |
directory record just reviewed. |
|
|
|||
|
6. |
Press [DIR] to exit. |
 NOTE: If the desired one-touch key location was empty, the screen will display SAVED! If there is a telephone number in it, the screen will display REPLACE SPD? You can replace the current entry by pressing [ENTER], or keep the current entry by pressing [
 ] or [ ] until you see NO REPLACE? Press [ENTER], then choose another one-touch key location.
49

Caller ID operation
Caller ID operation
About caller ID
This telephone has a Caller ID feature that works with caller identification service provided by your local telephone company. There is a fee for this service, and it may not be available in all areas. This telephone can provide information only if both you and the caller are in areas offering caller identification service, and if both telephone companies use compatible equipment.
When you use this telephone with caller ID service, you can see who’s calling before you answer the call. If you subscribe to caller ID with call waiting, a combined service available through many local telephone companies, you can see who’s calling even when you are on another call. This service may be called by different names (such as caller ID with visual call waiting) by different local telephone companies and may not be available in all areas.
 NOTE: You must subscribe to combined caller ID with call waiting as a single service to see caller ID information for a call waiting call. Check with your telephone company for its availability.
The format of telephone numbers displayed will depend on the home and local area codes you set (See the Area codes section on page 42 of the installation guide for explanations and setting instructions of area codes):
•If the call came from within your home area code, the screen displays only the seven-digit number (without an area code).
•If the call came from one of your local area codes, the screen displays 10 digits (area code plus the seven-digit number).
•If the call did not come from any of the area codes you set.
a.Phone numbers with 10 or more digits will automatically have a 1 inserted and displayed before the number;
b.Phone numbers with fewer than 10 digits will be displayed without a 1.
50
 Loading...