


 Loading...
Management
Software
AT-S82
User’s Guide
For the AT-GS950/8 Layer 2 Gigabit Ethernet WebSmart Switch
Version 1.1.0
613-000375 Rev. B
Copyright © 2007 Allied Telesis, Inc.
All rights reserved. No part of this publication may be reproduced without prior written permission from Allied Telesis, Inc.
Allied Telesis is a trademark of Allied Telesis, Inc. Microsoft and Internet Explorer are registered trademarks of Microsoft Corporation. Netscape Navigator is a registered trademark of Netscape Communications Corporation. All other product names, company names, logos or other designations mentioned herein are trademarks or registered trademarks of their respective owners.
Allied Telesis, Inc. reserves the right to make changes in specifications and other information contained in this document without prior written notice. The information provided herein is subject to change without notice. In no event shall Allied Telesis, Inc. be liable for any incidental, special, indirect, or consequential damages whatsoever, including but not limited to lost profits, arising out of or related to this manual or the information contained herein, even if Allied Telesis, Inc. has been advised of, known, or should have known, the possibility of such damages.

Contents
Preface .............................................................................................................................................................. |
7 |
Where to Find Web-based Guides ..................................................................................................................... |
8 |
Contacting Allied Telesis .................................................................................................................................... |
9 |
Online Support ............................................................................................................................................. |
9 |
Email and Telephone Support...................................................................................................................... |
9 |
Warranty....................................................................................................................................................... |
9 |
Returning Products ...................................................................................................................................... |
9 |
Sales or Corporate Information.................................................................................................................... |
9 |
Management Software Updates................................................................................................................... |
9 |
Chapter 1: Getting Started ............................................................................................................................ |
11 |
Starting a Management Session ...................................................................................................................... |
12 |
Saving Changes ............................................................................................................................................... |
14 |
Quitting a Management Session ...................................................................................................................... |
15 |
Chapter 2: Basic Switch Parameters ........................................................................................................... |
17 |
Configuring the IP Address, Subnet Mask, Gateway Address, and BOOTP or DHCP .................................... |
18 |
Disabling or Enabling Ping Blocking................................................................................................................. |
20 |
Enabling or Disabling 802.1X Forwarding Control............................................................................................ |
21 |
Changing the Administrator’s Password........................................................................................................... |
22 |
Rebooting the Switch........................................................................................................................................ |
23 |
Resetting the Switch and Retaining the IP Address ......................................................................................... |
24 |
Returning the AT-S82 Management Software to the Factory Default Values .................................................. |
25 |
Downloading New Firmware............................................................................................................................. |
26 |
Chapter 3: Port Configuration ...................................................................................................................... |
27 |
Configuring Port Parameters ............................................................................................................................ |
28 |
Chapter 4: Trunking ...................................................................................................................................... |
31 |
Trunking Overview............................................................................................................................................ |
32 |
Trunking Guidelines ................................................................................................................................... |
32 |
Trunking Algorithm..................................................................................................................................... |
32 |
Configuring the Trunking Algorithm .................................................................................................................. |
34 |
Setting up the Trunk ......................................................................................................................................... |
35 |
Chapter 5: Port Mirroring .............................................................................................................................. |
37 |
Port Mirroring Overview.................................................................................................................................... |
38 |
Configuring Port Mirroring ................................................................................................................................ |
39 |
Chapter 6: VLANs .......................................................................................................................................... |
41 |
VLAN Features ................................................................................................................................................. |
42 |
Increased Performance.............................................................................................................................. |
42 |
Improved Manageability............................................................................................................................. |
42 |
Increased Security ..................................................................................................................................... |
42 |
VLAN Overview ................................................................................................................................................ |
44 |
VLAN Name ............................................................................................................................................... |
44 |
VLAN Identifier........................................................................................................................................... |
44 |
VLAN Port Members .................................................................................................................................. |
44 |
3
Contents |
|
Tagged Port Members ......................................................................................................................... |
45 |
Untagged Port Members...................................................................................................................... |
45 |
Incoming and Outgoing Tagged and Untagged Frames ............................................................................ |
45 |
Incoming Frames ................................................................................................................................. |
45 |
Outgoing Frames ................................................................................................................................. |
45 |
Guidelines for Creating a VLAN ................................................................................................................. |
46 |
Working with VLANs ......................................................................................................................................... |
47 |
Creating a VLAN......................................................................................................................................... |
47 |
Displaying all VLANs .................................................................................................................................. |
48 |
Modifying a VLAN....................................................................................................................................... |
49 |
Deleting a VLAN ......................................................................................................................................... |
49 |
Protected Ports VLAN....................................................................................................................................... |
50 |
Chapter 7: Class of Service .......................................................................................................................... |
53 |
Class of Service Overview ................................................................................................................................ |
54 |
Mapping Ports to Egress Queues............................................................................................................... |
54 |
Scheduling.................................................................................................................................................. |
55 |
Mapping Priorities to Queues............................................................................................................................ |
57 |
Setting Up the Schedule ................................................................................................................................... |
58 |
Assigning Priority to Ports................................................................................................................................. |
59 |
Chapter 8: Spanning Tree Protocol (STP) ................................................................................................... |
61 |
Spanning Tree Overview .................................................................................................................................. |
62 |
Bridge Priority and the Root Bridge ............................................................................................................ |
62 |
Path Costs and Port Costs................................................................................................................... |
63 |
Port Priority .......................................................................................................................................... |
65 |
Forwarding Delay and Topology Changes........................................................................................... |
65 |
Hello Time and Bridge Protocol Data Units (BPDUs) .......................................................................... |
66 |
Point-to-Point and Edge Ports.............................................................................................................. |
67 |
Spanning Tree and VLANs......................................................................................................................... |
69 |
Configuring Spanning Tree ............................................................................................................................... |
71 |
Configuring STP Port Settings .......................................................................................................................... |
74 |
4

Figures
Figure 1. |
Login Dialog Box .................................................................................................................................................. |
12 |
Figure 2. Main Page ............................................................................................................................................................ |
13 |
|
Figure 3. |
Save Configuration Page ..................................................................................................................................... |
14 |
Figure 4. |
Basic Switch Information Page............................................................................................................................. |
18 |
Figure 5. |
Administrator Password Page .............................................................................................................................. |
22 |
Figure 6. Reboot Page ........................................................................................................................................................ |
23 |
|
Figure 7. Reset Page........................................................................................................................................................... |
24 |
|
Figure 8. Reset System Page.............................................................................................................................................. |
25 |
|
Figure 9. Download Firmware Page .................................................................................................................................... |
26 |
|
Figure 10. Download Status Message................................................................................................................................. |
26 |
|
Figure 11. |
Port Configuration Page ..................................................................................................................................... |
28 |
Figure 12. |
Trunking Algorithm Page.................................................................................................................................... |
34 |
Figure 13. |
Port Trunking Page ............................................................................................................................................ |
35 |
Figure 14. |
Port Trunking Configuration Page ...................................................................................................................... |
35 |
Figure 15. |
Port Mirroring Page ............................................................................................................................................ |
39 |
Figure 16. 802.1Q Static VLAN Page.................................................................................................................................. |
47 |
|
Figure 17. VLAN Detail Page .............................................................................................................................................. |
47 |
|
Figure 18. Current VLANs Page.......................................................................................................................................... |
49 |
|
Figure 19. Protected Ports VLAN Example ......................................................................................................................... |
50 |
|
Figure 20. |
Protected Port Page for Figure 19...................................................................................................................... |
50 |
Figure 21. |
Protected Port Page ........................................................................................................................................... |
51 |
Figure 22. CoS Priority to Queue Page ............................................................................................................................... |
57 |
|
Figure 23. Output Scheduling Page .................................................................................................................................... |
58 |
|
Figure 24. |
CoS Port Priority Assignment Page.................................................................................................................... |
59 |
Figure 25. |
Point-to-Point Ports ............................................................................................................................................ |
67 |
Figure 26. Edge Port ........................................................................................................................................................... |
68 |
|
Figure 27. |
Point-to-Point and Edge Port.............................................................................................................................. |
68 |
Figure 28. VLAN Fragmentation.......................................................................................................................................... |
69 |
|
Figure 29. Switch Spanning Tree Settings Page................................................................................................................. |
71 |
|
Figure 30. STP Port Settings Page ..................................................................................................................................... |
74 |
|
5
Figures
6

Preface
This guide contains instructions on how to use the AT-S82 management software to manage the AT-GS950/8 Smart Switch switch.
This preface contains the following sections:
“Where to Find Web-based Guides” on page 8
“Contacting Allied Telesis” on page 9
7

Preface
Where to Find Web-based Guides
The installation and user guides for all Allied Telesis products are available in portable document format (PDF) on our web site at www.alliedtelesis.com. You can view the documents online or download them onto a local workstation or server.
8

AT-S82 Management Software User’s Guide
Contacting Allied Telesis
Online Support
Email and
Telephone
Support
Warranty
Returning
Products
Sales or
Corporate
Information
Management
Software Updates
This section provides Allied Telesis contact information for technical support as well as sales and corporate information.
You can request technical support online by accessing the Allied Telesis Knowledge Base from the following website: www.alliedtelesis.com/ support. You can use the Knowledge Base to submit questions to our technical support staff and review answers to previously asked questions.
For Technical Support via email or telephone, refer to the Allied Telesis web site: www.alliedtelesis.com. Select your country from the list displayed on the website. Then select the appropriate menu tab.
For hardware warranty information, refer to the Allied Telesis web site: www.alliedtelesis.com/support/warranty.
Products for return or repair must first be assigned a return materials authorization (RMA) number. A product sent to Allied Telesis without an RMA number will be returned to the sender at the sender’s expense.
To obtain an RMA number, contact the Allied Telesis Technical Support group at our web site: www.alliedtelesis.com/support/rma. Select your country from the list displayed on the website. Then select the appropriate menu tab.
You can contact Allied Telesis for sales or corporate information through our web site: www.alliedtelesis.com. To find the contact information for your country, select Contact Us -> Worldwide Contacts.
New releases of management software for our managed products are available from either of the following Internet sites:
Allied Telesis web site: www.alliedtelesis.com
Allied Telesis FTP server: ftp://ftp.alliedtelesis.com
To download new software from the Allied Telesis FTP server from your workstation’s command prompt, you must have FTP client software. Additionally, you must log in to the server. The user name is “anonymous” and your email address is the password.
9
Preface
10
Chapter 1
Getting Started
This chapter provides information and instructions on how to access the AT-S82 management software by starting a web browser management session. This chapter contains the following sections:
“Starting a Management Session” on page 12
“Saving Changes” on page 14
“Quitting a Management Session” on page 15
11
Chapter 1: Getting Started
Starting a Management Session
You establish a local management session with the AT-GS950/8 switch by connecting an Ethernet cable to one of the eight ports on the front panel of the switch.
To start a management session, perform the following procedure:
1.Start a web browser.
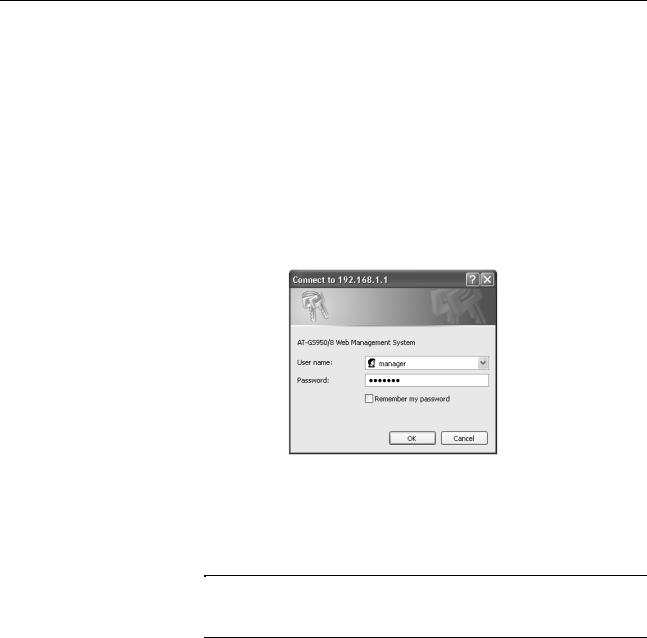
2.In the URL field of the web browser, enter the default IP address of the switch: 192.168.1.1
The AT-S82 management software displays the login dialog box shown in Figure 1.
Figure 1. Login Dialog Box
3.Enter the administrator’s default name, manager.
4.Enter the administrator’s default password, friend.
Note
To change the administrator’s password, refer to “Changing the
Administrator’s Password” on page 22.
12

AT-S82 Management Software User’s Guide
The main page, which by default displays the Basic Switch Information page, is shown in Figure 2.
Figure 2. Main Page
13
Chapter 1: Getting Started
Saving Changes
The management software applies the changes you make when you click the Apply button on any web page. However, the management software does not automatically save the changes you make to the configuration file. You can save your changes to the configuration file each time that you change a parameter, or save the changes after you are done with all your changes and before you exit the web browser.
Note
If you do not save changes using the Save Configuration page, your changes are lost when the switch is rebooted.
To save your configuration changes, perform the following procedure:
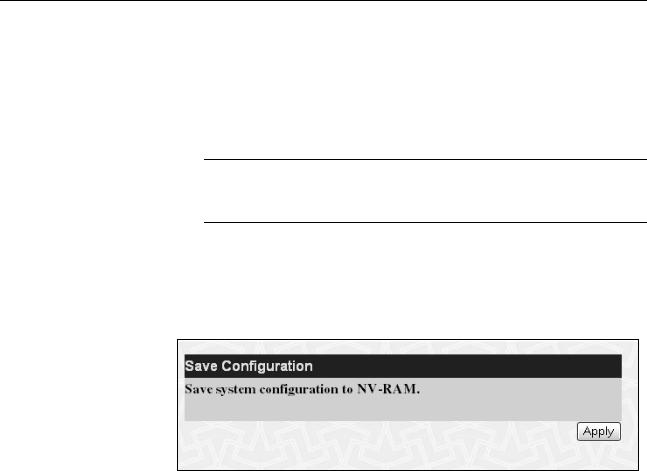
1.From the main menu, select Save Configuration.
The Save Configuration page is shown in Figure 3.
.
Figure 3. Save Configuration Page
2. Click Apply.
14

AT-S82 Management Software User’s Guide
Quitting a Management Session
To quit a management session, close the web browser.
15
Chapter 1: Getting Started
16

Chapter 2
Basic Switch Parameters
This chapter contains the following sections:
“Configuring the IP Address, Subnet Mask, Gateway Address, and BOOTP or DHCP” on page 18
“Disabling or Enabling Ping Blocking” on page 20
“Enabling or Disabling 802.1X Forwarding Control” on page 21
“Changing the Administrator’s Password” on page 22
“Rebooting the Switch” on page 23
“Resetting the Switch and Retaining the IP Address” on page 24
“Returning the AT-S82 Management Software to the Factory Default Values” on page 25
“Downloading New Firmware” on page 26
17
Chapter 2: Basic Switch Parameters
Configuring the IP Address, Subnet Mask, Gateway Address, and BOOTP or DHCP
Caution
Allied Telesis strongly recommends that you record the MAC address of this switch, as shown on the Basic Switch Information Page (Figure 4) before you configure or enable the BOOTP or DHCP options of the Get IP From parameter. After you enable either option, contact your network administrator for the IP address from the BOOTP or DHCP server that corresponds to the switch’s MAC address.
This procedure explains how to assign an IP address, subnet mask, and gateway address to the switch.
To set the switch’s IP configuration, perform the following procedure:
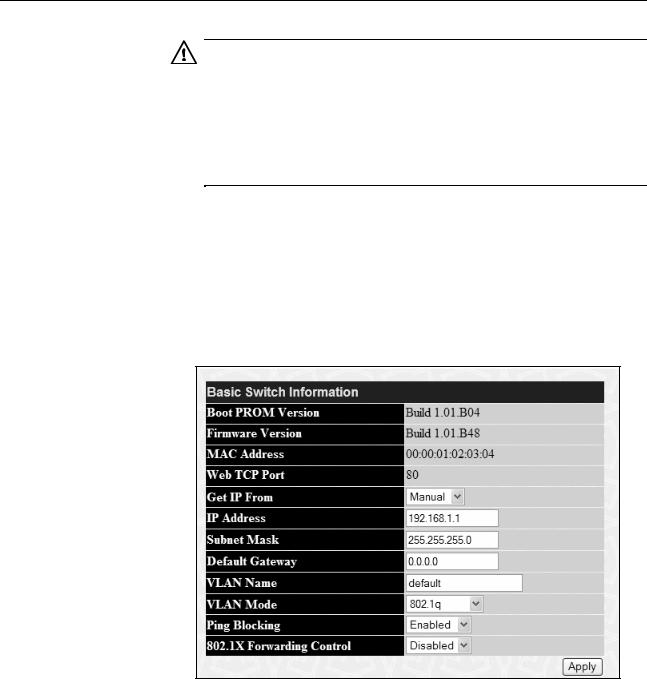
1.From the main menu, select Basic Switch Information. The Basic Switch Information page is shown in Figure 4.
Figure 4. Basic Switch Information Page
2.To set the switch’s IP address, in the Get IP From field, choose one of the following from the list:
Manual - Allows you to enter static IP address information:
18

AT-S82 Management Software User’s Guide
a.In the IP Address field, enter the IP address. The default is 192.168.1.1.
b.In the Subnet Mask field, type the subnet mask for the switch. The default is 255.255.255.0.
c.In the Default Gateway field, type the IP address of the default gateway. There is no default gateway assigned.
BOOTP - Enables BOOTP so that the switch gets its IP address from a BOOTP server. When you choose this selection, the IP Address, Subnet Mask, and Default Gateway fields are not available.
DHCP - Enables DHCP so that the switch gets its IP address from a DHCP server. When you choose this selection, the IP Address, Subnet Mask, and Default Gateway fields are not available.
3. Click Apply to implement your changes.
Note
For BOOTP and DHCP options: In order to save this new configuration, you must contact the switch using its newly acquired IP address in order to perform steps 4 and 5 below. If the switch is rebooted or power cycled before you save the configuration, the IP address is reset to the factory default value of 192.168.1.1 and Manual mode.
4.To save the settings to the configuration file, from the main menu, select Save Configuration.
The Save Configuration page is shown in Figure 3 on page 14.
5.Click Apply.
19

Chapter 2: Basic Switch Parameters
Disabling or Enabling Ping Blocking
You can allow the switch to respond to ping requests by setting the Ping Blocking parameter. The default setting is enabled, which means that the switch does not respond to ping requests.
To disable or enable ping blocking, perform the following procedure:
1.From the main menu, select Basic Switch Information.
The Basic Switch Information page is shown in Figure 4 on page 18.
2.For Ping Blocking, choose one of the following:
Enabled
The switch does not respond to ping requests. This is the default.
Disabled
The switch responds to ping requests. Allied Telesis recommends that you choose this setting.
3.Click Apply to implement your changes.
4.To save the settings to the configuration file, from the main menu, select Save Configuration.
The Save Configuration page is shown in Figure 3 on page 14.
5.Click Apply.
20
AT-S82 Management Software User’s Guide
Enabling or Disabling 802.1X Forwarding Control
This procedure describes how to enable or disable 802.1x forwarding control. The default setting is disabled. When you disable this feature, 802.1x packets are not forwarded. If this feature is enabled, these packets are forwarded to their destination which might be a switch running an authentication protocol.
To disable or enable 802.1X forwarding control, perform the following procedure:
1.From the main menu, select Basic Switch Information.
The Basic Switch Information page is shown in Figure 4 on page 18.
2.For 802.1X Forwarding Control, choose one of the following:
Enabled
The switch does not respond to ping requests. This is the default.
Disabled
The switch responds to ping requests.
3.Click Apply to implement your changes.
4.To save the settings to the configuration file, from the main menu, select Save Configuration.
The Save Configuration page is shown in Figure 3 on page 14.
5.Click Apply.
21
Chapter 2: Basic Switch Parameters
Changing the Administrator’s Password
To reset the administrator’s password, perform the following procedure:
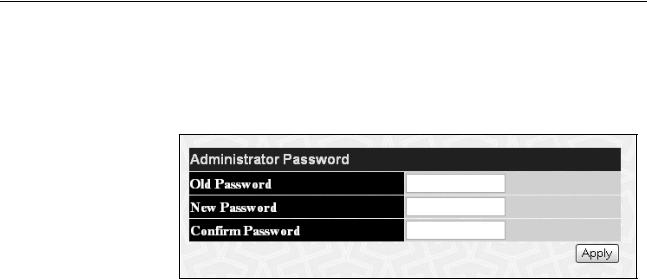
1.From the main menu, select Administrator Password. The Administrator Password page is shown in Figure 5.
Figure 5. Administrator Password Page
2.In the Old Password field, type the old password.
3.In the New Password field, type the new password.
4.In the Confirm Password field, retype the new password.
5.Click Apply to implement your changes.
6.To save the settings to the configuration file, from the main menu, select Save Configuration.
The Save Configuration page is shown in Figure 3 on page 14.
7.Click Apply.
22

AT-S82 Management Software User’s Guide
Rebooting the Switch
This procedure reboots the switch and reloads the AT-S82 management software from flash memory. You might reboot the device if you believe it is experiencing a problem. Rebooting the device does not change any of the device’s parameter settings.
Caution
The switch does not forward network traffic during the reboot process. Some network traffic may be lost.
To reboot the switch, perform the following procedure:
1.From the main menu, select Reboot. The Reboot page is shown in Figure 6.
Figure 6. Reboot Page
2.Click Reboot.
The switch immediately begins to reload the AT-S82 management software. This process takes approximately one minute to complete. You can not manage the device during the reboot. After the reboot is finished, you can log in again if you want to continue to manage the switch.
23
Loading...