


 Loading...
AT-GS950/24
Gigabit Ethernet Smart Switch
How to Start a WEB Management Session
613-001499 Rev B
Copyright ♥ 2011 Allied Telesis, Inc.
All rights reserved. No part of this publication may be reproduced without prior written permission from Allied Telesis, Inc.
Allied Telesis and the Allied Telesis logo are trademarks of Allied Telesis, Incorporated. All other product names, company names, logos or other designations mentioned herein are trademarks or registered trademarks of their respective owners.
Allied Telesis, Inc. reserves the right to make changes in specifications and other information contained in this document without prior written notice. The information provided herein is subject to change without notice. In no event shall Allied Telesis, Inc. be liable for any incidental, special, indirect, or consequential damages whatsoever, including but not limited to lost profits, arising out of or related to this manual or the information contained herein, even if Allied Telesis, Inc. has been advised of, known, or should have known, the possibility of such damages.

How to Start an AT-GS950/24
WEB Management Session
This document contains the procedures to start you Web management session on the AT-GS950/24 switch. The following topics are discussed:
“Establishing a Remote Connection to the Web Browser Interface” on page 4
“Web Browser Tools” on page 8
“Configuration of IP Address, Subnet Mask and Gateway Address” on page 9
“IP Access List Configuration” on page 11
“DHCP Client Configuration” on page 18
“System Management Information” on page 21
“User Name and Password Configuration” on page 23
“User Interface Configuration” on page 26
“System Information Display” on page 28
“Pinging a Remote System” on page 37
“Pinging a Remote System” on page 37
“Returning the AT-S109 Management Software to the Factory Default Values” on page 43
“Quitting a Web Browser Management Session” on page 44
Note
To permanently save your new settings or any changes to the configuration file, select Save Configuration to Flash from the main menu on the left side of the page.
3
How to Start an AT-GS950/24 WEB Management Session
Establishing a Remote Connection to the Web Browser Interface
The AT-GS950/24 switch is shipped with a pre-assigned IP address of 192.168.1.1.
After your initial login, you may want to assign a new IP address to your switch. To manually assign an IP address to the switch, refer to “Configuring an IP Address, Subnet Mask and Gateway Address” on page 10. To configure the switch to obtain its IP configuration from a DHCP server, refer to “Enabling and Disabling the DHCP Client” on page 14.
Whether you use the pre-assigned IP address or assign a new one, you must set your local PC to the same subnet as the switch.
To start a web browser management session, do the following procedure:
1.Start your web browser.
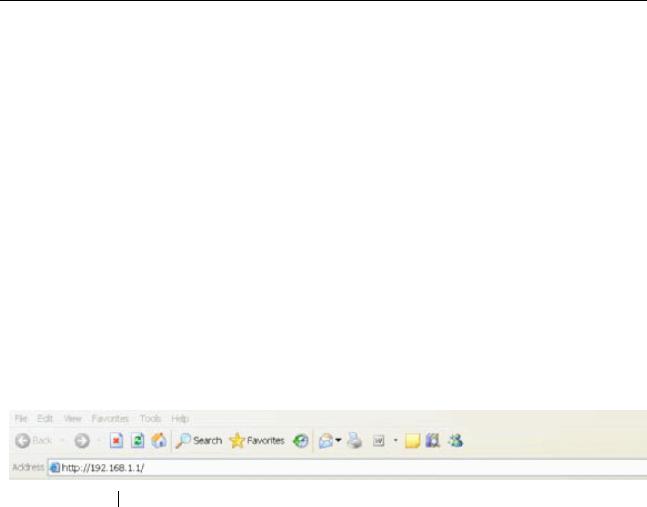
2.In the URL field of the browser, enter 192.168.1.1 which is the default IP address of the switch. See Figure 1.
Switch’s IP Address
Figure 1. Entering a Switch’s IP Address in the URL Field
4

How to Start an AT-GS950/24 WEB Management Session
The AT-S109 Management Software displays the login dialog box, shown in Figure 2.
Figure 2. Management Login Dialog Box
3.Enter the AT-S109 management login user name and password.
The default user name is “manager” and the default password is “friend.”
4.Press OK.
The login name and password are case-sensitive.
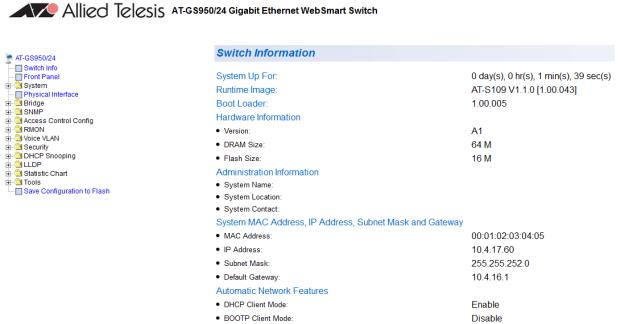
The switch Home Page is displayed. See Figure 3 on page 6 for an example of the AT-S109 Home Page.
To change the user name and password, refer to “Configuring System Administration Information” on page 19.
5
How to Start an AT-GS950/24 WEB Management Session
Figure 3. AT-S109 Home Page
The main menu appears on the left side and is common for all of the management pages discussed in this manual. It consists of the following folders and web pages:
Switch Info.
Front Panel
System
Physical Interface
Bridge
SNMP
Access Control
RMON
Voice VLAN
Security
LLDP
Statistics Chart
Tools
Save Configuration
6
How to Start an AT-GS950/24 WEB Management Session
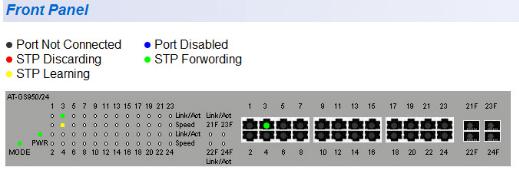
5.To see the front panel of the switch, select Front Panel from the main menu on the left side of the page.
The AT-S109 Management software displays the front of the switch. Ports that have a link to an end node are green. Ports without a link are grey. The AT-GS950/24 switch front panel page is shown in Figure 4.
Figure 4. AT-GS950/24 Front Panel Page
A web browser management session remains active even if you link to other sites. You can return to the management web pages anytime as long as you do not quit the browser.
7

How to Start an AT-GS950/24 WEB Management Session
Web Browser Tools
You can use the web browser tools to move around the management pages. Selecting Back on your browser’s toolbar returns you to the previous display. You can also use the browser’s bookmark feature to save the link to the switch.
8
How to Start an AT-GS950/24 WEB Management Session
Configuration of IP Address, Subnet Mask and Gateway Address
This procedure explains how to change the IP address, subnet mask, and gateway address of the switch. Before performing the procedure, note the following:
A gateway address is only required if you want to remotely manage the device from a management station that is separated from the switch by a router.
To configure the switch to automatically obtain its IP configuration from a DHCP server on your network, go to “DHCP Client Configuration” on page 18.
To change the switch’s IP configuration, perform the following procedure:
1.From the main menu on the left side of the page, click the System folder.
The System folder expands.
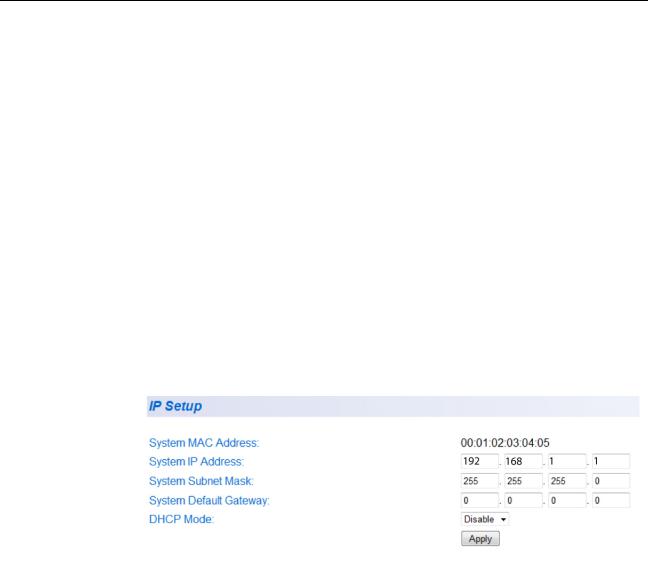
2.From the System folder, select IP Setup. The IP Setup Page is displayed. See Figure 5.
Figure 5. IP Setup Page
3.Change the IP configuration parameters by observing or entering new information in the following fields:
System MAC Address - This parameter displays the MAC address of the switch. You cannot change this parameter.
System IP Address - Displays the current IP address of the switch. To change the IP address, enter a new IP address. When DHCP is enabled, you cannot change this parameter.
System Subnet Mask - Displays the current subnet mask of the switch. To change the subnet mask, enter a new subnet mask. When DHCP is enabled, you cannot change this parameter.
9
How to Start an AT-GS950/24 WEB Management Session
System Default Gateway - Displays the default gateway of the switch. To change the default gateway, enter a new gateway. When DHCP is enabled, you cannot change this parameter.
DHCP Mode - For information about setting this parameter, refer to “DHCP Client Configuration” on page 18.
4. Click Apply.
Note
Changing the IP address ends your management session. To resume managing the device, enter the new IP address of the switch in the web browser’s URL field, as shown in Figure 1 on page 4.
5.After you log on to the switch with the new IP address, select Save Configuration to Flash from the main menu on the left side of the page to save the new IP address to memory.
Caution
If you do not select Save Configuration to Flash, the IP address will revert to its original setting when you power cycle or reboot the switch.
10
How to Start an AT-GS950/24 WEB Management Session
IP Access List Configuration
Create an IP
Access List
When the IP Access List feature is enabled, remote access to the AT-S109 management software is restricted to the IP addresses entered into the IP Access List.
The procedures in this section describe how to enable or disable the IP Access List feature and how to add or remove IP addresses from the list. See the following sections:
“Create an IP Access List” on page 11
“Delete an IP Address List Entry” on page 13
Note
To modify IP address that has already been created, it must first be deleted and them re-created using the following procedures.
To create a list of accessible IP addresses, perform the following procedure:
1.From the main menu on the left side of the page, click the System folder.
The System folder expands.
2.From the System folder, select IP Access List. The IP Access List
Page is displayed. See Figure 6.
.
Figure 6. IP Access List Page
3.Enter an IP address in the IP Address field using a xxx.xxx.xxx.xxx format.
4.Click Add.
The IP address is added to the IP Access List table in the Accessible IP column.
11

How to Start an AT-GS950/24 WEB Management Session
Note
You can add up to 10 IP address to the IP Access List table.
12
Delete an IP
Address List
Entry
How to Start an AT-GS950/24 WEB Management Session
5.From the IP Restriction Status field, select one of the following choices from the pull-down menu:
Enable - This selection restricts the access to the AT-S109 management software to the IP addresses in the table listed under
Accessible IP.
Disable - This selection allows unrestricted access to the AT-S109 management software.
6.Click Apply.
Access to the management software is now restricted to those IP addresses listed in the IP Access List table.
7.From the main menu on the left side of the page, select Save Configuration to Flash to permanently save your changes.
To delete an IP address from the IP Access List, perform the following procedure:
1.From the main menu on the left side of the page, click the System folder.
The System folder expands.
2.From the System folder, select IP Access List.
The IP Access List Page is displayed. See Figure 6 on page 11.
3.Select Delete next to the IP address that you want to remove. The IP address is removed from the IP Access List table. If you
remove the last IP address from the table, the IP Restriction Status field is set to Disable.
4.From the main menu on the left side of the page, select Save Configuration to Flash to permanently save your changes.
13
How to Start an AT-GS950/24 WEB Management Session
System Time
Manually Setting
System Time
The procedures in this section describe how to configure the system time by manually entering the time or through SNTP and how to configure the daylight savings time feature. See the following sections:
“Manually Setting System Time” on page 14
“Setting SNTP” on page 15
“Setting Daylight Savings Parameters” on page 16
To set the system time manually, perform the following procedure:
1.From the main menu on the left side of the page, click the System folder.
The System folder expands.
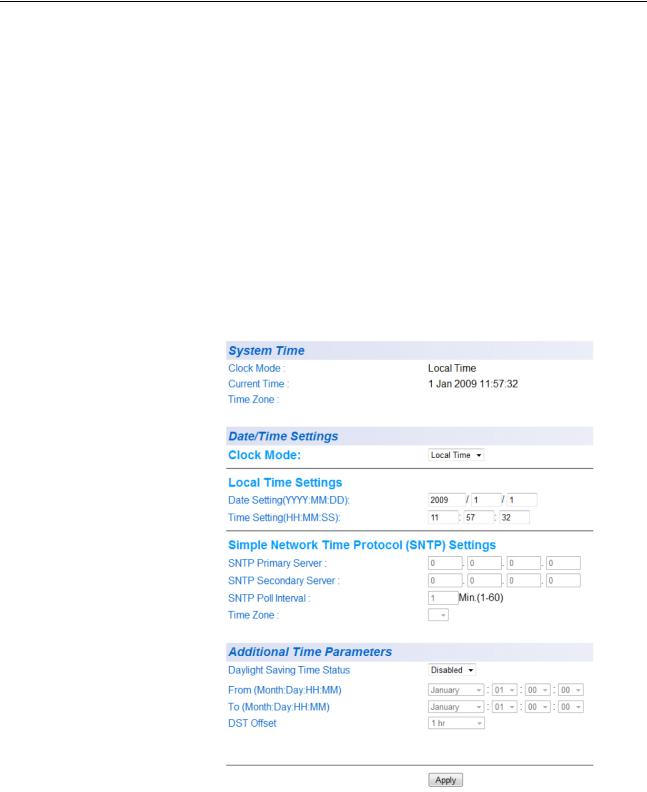
2.From the System folder, select System Time. The System Time Page is displayed. See Figure 7.
Figure 7. System Time Page
14
Loading...