


DM5

ALESIS
DM5
Reference Manual

DM5 Reference Manual 1
INTRODUCTION
Thank you for purchasing the Alesis DM5 18 Bit Drum Module. To take full
advantage of the DM5’s functions, and to enjoy long and trouble-free use, please read
this user’s manual carefully.
HOW TO USE THIS MANUAL
This manual is divided into the following sections describing the various modes of
the DM5. Though we recommend you take time to read through the entire manual
once carefully, those having general knowledge about drum modules and MIDI
should use the table of contents to reference specific functions while using the
instrument.
Chapter 1: Setting Up. Deals with the necessary preparation before playing,
including connections to external devices.
Chapter 2: Your First Session with the DM5. This section provides a brief tour of the
DM5, shows you how to audition the various sounds of the DM5, and points out the
various performance features.
Chapter 3: Connections. Details rear panel connections (like MIDI, footpedals and
the serial interface), proper hook-up procedures, plus application examples.
Chapter 4: Overview. Covers the structure of sound sources within the DM5, how to
read and navigate through the LCD display pages, how to edit parameters, and how
to store edited Drum Sets.
Chapter 5: MIDI Functions. Explains how to edit MIDI parameters.
Chapter 6: External Triggering. Describes all external trigger functions.
Appendices. MIDI basics, trouble-shooting, maintenance and service information,
and the MIDI Implementation Chart.
Conventions
The buttons, knobs, and rear panel connectors and switches are referred to in this
manual just as their names appear on the DM5, using all capital letters and in
brackets (Example: [DRUM SET] button, [ ] and [ ] buttons, [VALUE] knob, etc.).
When something important appears in the manual, an icon (like the one on the left) will
appear in the left margin. This symbol indicates that this information is vital when operating
the DM5.
✪

2 DM5 Reference Manual

Index
DM5 Reference Manual 3
CONTENTS
1: SETTING UP................................................................................. 5
Unpacking and Inspection.......................................................................................5
AC Power ..............................................................................................................5
Line Conditioners and Protectors.................................................................5
About Audio Cables ...............................................................................................6
Basic Audio Hookup...............................................................................................6
MIDI Hookup.........................................................................................................7
External Triggers Hookup.......................................................................................8
2: YOUR FIRST SESSION WITH THE DM5 ...........................................9
Powering Up..........................................................................................................9
Playing the Demo Sequence.........................................................................9
What’s a Drum Set? ................................................................................................10
Playing the DM5.....................................................................................................10
Auditioning Internal Programs....................................................................10
Selecting the MIDI Channel.........................................................................10
Choosing Voices in a Drum Set....................................................................11
Storing an Edited Drum Set.........................................................................12
Naming a Drum Set....................................................................................12
Recalling the Factory Drum Sets ..................................................................12
3: CONNECTIONS .............................................................................. 13
MIDI......................................................................................................................13
Example 1: Using a MIDI Keyboard.............................................................14
Example 2: Using a MIDI Sequencer.............................................................15
Example 3: Using Two or More DM5 Modules..............................................17
External Triggers....................................................................................................18
Footswitch Hookup ................................................................................................22
4: OVERVIEW...................................................................................23
Basic and Definitions ..............................................................................................23
The Voice...................................................................................................23
Random Voices...........................................................................................23
About the Edit Buffer..................................................................................23
MIDI Note Range .......................................................................................24
DM5 Polyphony .....................................................................................................24
Reading The Display...................................................................................25
Function Buttons ........................................................................................26
/ Buttons ...........................................................................................26
Multi-Page Functions..................................................................................26
The Store button.........................................................................................27
The Note Chase Button ...............................................................................27
The Preview Button ....................................................................................27
Drum Note Selection...............................................................................................27
Function Buttons ....................................................................................................28
Voice .........................................................................................................28
Tune..........................................................................................................28
Mix............................................................................................................29
Output.......................................................................................................29
Drum Set....................................................................................................31

Index
4 DM5 Reference Manual
Ext Trig......................................................................................................31
Group........................................................................................................31
MIDI..........................................................................................................32
Copying a Note’s Parameters to Another..................................................................32
5: MIDI FUNCTIONS ......................................................................... 33
Drum Set Root Note................................................................................................33
MIDI Channel ........................................................................................................34
MIDI Thru/Out......................................................................................................34
Local Control..........................................................................................................35
Program Change Enable..........................................................................................35
Program Change Table............................................................................................37
Saving Data via MIDI..............................................................................................37
Receiving Data From Another MIDI Device..............................................................38
6: EXTERNAL TRIGGERING ................................................................ 39
Overview...............................................................................................................39
About Trigger Parameters.......................................................................................40
Trigger Selection.....................................................................................................43
Trigger Note Assignment........................................................................................44
Gain.......................................................................................................................44
Velocity Curve .......................................................................................................44
Crosstalk................................................................................................................46
Decay ....................................................................................................................47
Noise.....................................................................................................................47
Footswitch Mode....................................................................................................47
Understanding Hi Hat Pedal Mode..............................................................48
Tips On Triggering From Acoustic Drums................................................................49
Output Sensitivity.......................................................................................49
Mounting...................................................................................................49
Trigger Placement.......................................................................................49
Muffling.....................................................................................................51
Mounting Hardware and Configuration.......................................................51
APPENDIX A: TROUBLE-SHOOTING.................................................... 53
Trouble-Shooting Index...........................................................................................53
Re-initializing.........................................................................................................53
Checking Software Version .....................................................................................53
Maintenance/Service..............................................................................................53
Cleaning ....................................................................................................53
Maintenance...............................................................................................54
Obtaining Repair Service.............................................................................54
APPENDIX B: MIDI SUPPLEMENT..................................................... 55
MIDI Basics............................................................................................................55
MIDI Hardware......................................................................................................55
MIDI Message Basics ..............................................................................................56
Channel Messages: Mode Messages.............................................................56
Channel Messages: Voice Messages .............................................................56
System Common Messages .........................................................................58
MIDI IMPLEMENTATION CHART ................................................. 59

Setting Up: Chapter 1
DM5 Reference Manual 5
CHAPTER 1
SETTING UP
UNPACKING AND INSPECTION
Your DM5 was packed carefully at the factory. The shipping carton was designed to
protect the unit during shipping. Please retain this container in the highly unlikely
event that you need to return the DM5 for servicing.
The shipping carton should contain the following items:
• DM5 with the same serial number as shown on shipping carton
• AC Power Supply Adapter
• This instruction manual
• Alesis warranty card
It is important to register your purchase; if you have not already filled out your warranty
card and mailed it back to Alesis, please take the time to do so now.
AC POWER HOOKUP
The DM5 comes with a power adapter suitable for the voltage of the country it is
shipped to (either 110 or 220V, 50 or 60 Hz). With the DM5 off, plug the small end of
the power adapter cord into the DM5’s [POWER] socket and the male (plug) end into
a source of AC power. It’s good practice to not turn the DM5 on until all other cables
are hooked up.
Alesis cannot be responsible for problems caused by using the DM5 or any associated
equipment with improper AC wiring.
LINE CONDITIONERS AND PROTECTORS
Although the DM5 is designed to tolerate typical voltage variations, in today’s world
the voltage coming from the AC line may contain spikes or transients that can
possibly stress your gear and, over time, cause a failure. There are three main ways
to protect against this, listed in ascending order of cost and complexity:
• Line spike/surge protectors. Relatively inexpensive, these are designed to
protect against strong surges and spikes, acting somewhat like fuses in that they
need to be replaced if they’ve been hit by an extremely strong spike.
• Line filters. These generally combine spike/surge protection with filters that
remove some line noise (dimmer hash, transients from other appliances, etc.).
• Uninterruptible power supply (UPS). This is the most sophisticated option. A
UPS provides power even if the AC power line fails completely. Intended for
computer applications, a UPS allows you to complete an orderly shutdown of a
computer system in the event of a power outage, and the isolation it provides
from the power line minimizes all forms of interference—spikes, noise, etc.
✪
✪

Chapter 1: Setting Up
6 DM5 Reference Manual
ABOUT AUDIO CABLES
The connections between the DM5 and your studio are your music’s lifeline, so use
only high quality cables. These should be low-capacitance shielded cables with a
stranded (not solid) internal conductor and a low-resistance shield. Although quality
cables cost more, they do make a difference. Route cables to the DM5 correctly by
observing the following precautions:
• Do not bundle audio cables with AC power cords.
• Avoid running audio cables near sources of electromagnetic interference such as
transformers, monitors, computers, etc.
• Do not place cables where they can be stepped on. Stepping on a cable may not
cause immediate damage, but it can compress the insulation between the center
conductor and shield (degrading performance) or reduce the cable’s reliability.
• Avoid twisting the cable or having it make sharp, right angle turns.
• Never unplug a cable by pulling on the wire itself. Always unplug by firmly
grasping the body of the plug and pulling directly outward.
• Although Alesis does not endorse any specific product, chemicals such as Tweek
and Cramolin, when applied to electrical connectors, are claimed to improve the
electrical contact between connectors.
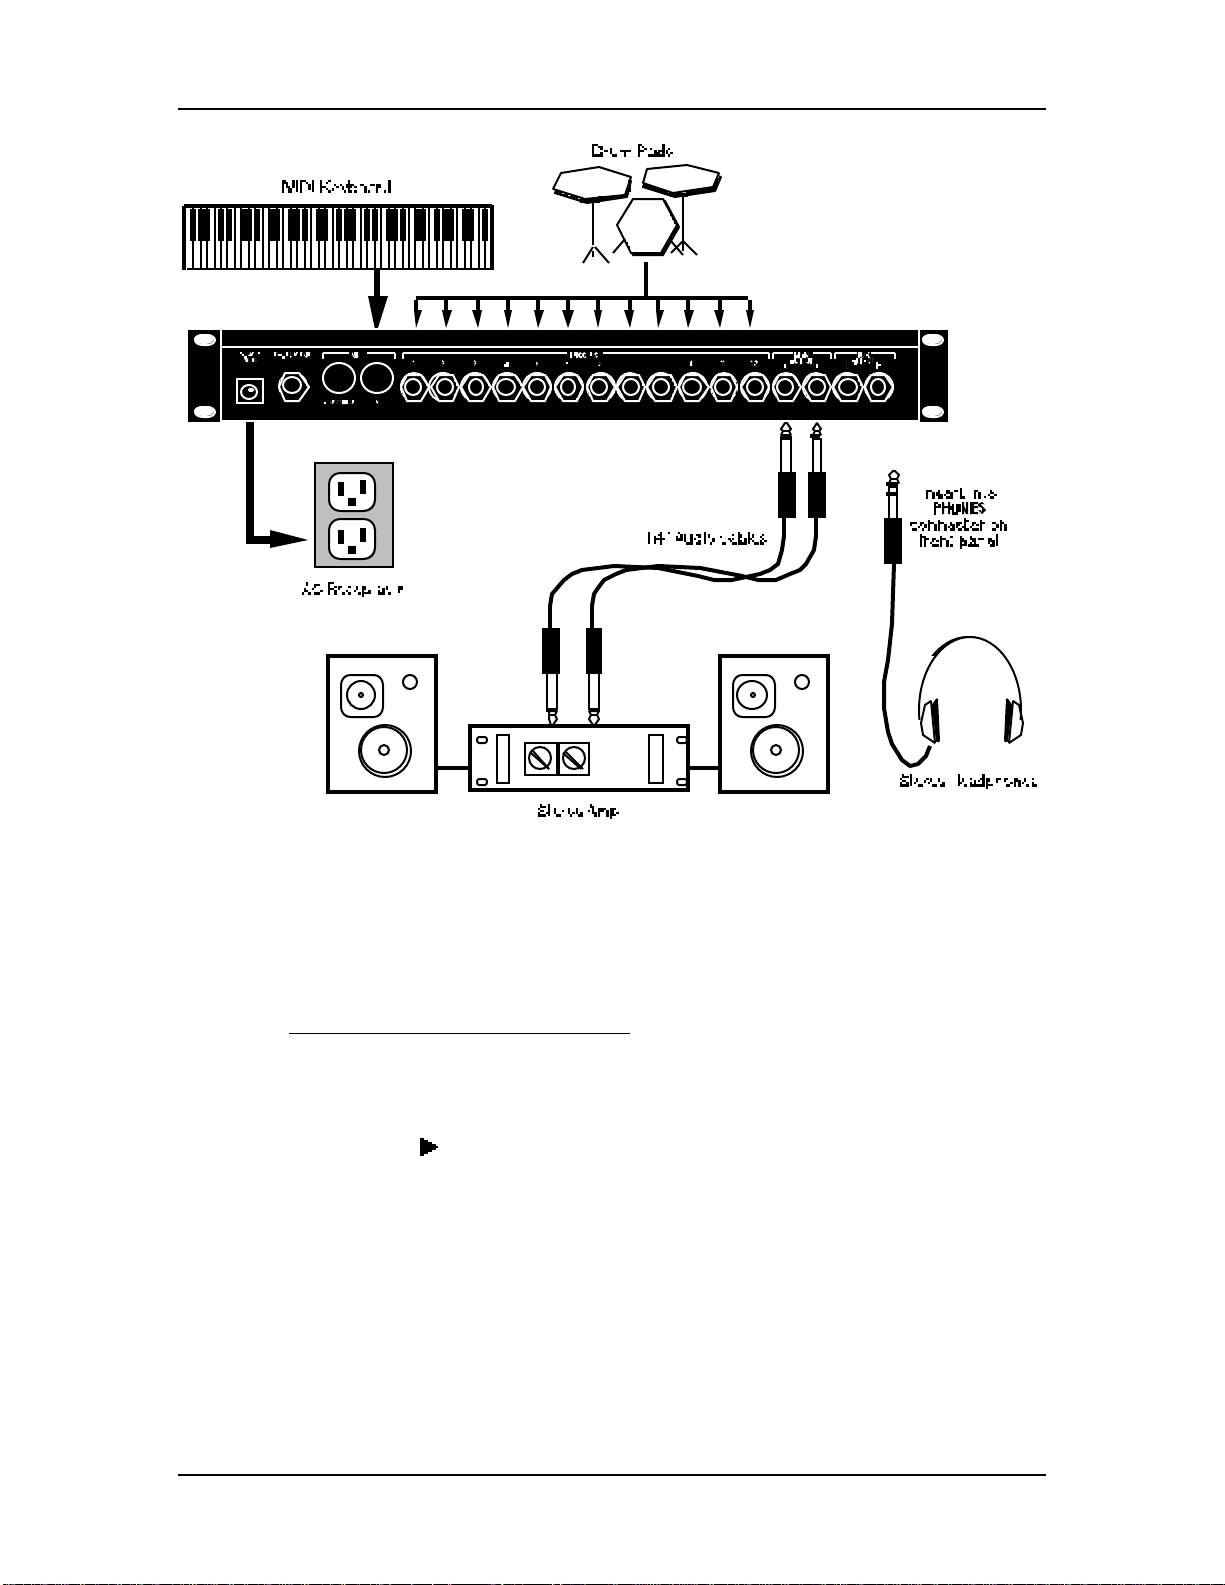
BASIC AUDIO HOOKUP
When connecting audio cables and/or turning power on and off, make sure that all devices in
your system are turned off and the volume controls are turned down.
The DM5 has two Main and two Aux audio outputs on the rear panel, as well as a
headphone output on the front panel. These can provide an amplification system or
mixer with several different audio hookup options:
• Mono. Connect a mono cord from the [MAIN OUTPUT–R] to a mono amplification
system or individual mixer input.
• Stereo. Connect two mono cords from the [MAIN OUTPUT–L] and [MAIN OUTPUT–
R] to a stereo amplification system or two mixer inputs.
• Dual Stereo/Four Individual Outs. Connect two mono cords from the [MAIN
OUTPUT–L] and [MAIN OUTPUT–R] and two mono cords from the [AUX OUTPUT–L]
and [AUX OUTPUT–R] to a dual stereo amplification system, or four mixer inputs.
• Stereo Headphones. Plug a set of high-quality stereo headphones into the front
panel [PHONES] jack.
✪
Setting Up: Chapter 1
DM5 Reference Manual 7
MIDI HOOKUP
If you are using a MIDI keyboard or sequencer, connect its [MIDI OUT] to the DM5’s
[MIDI IN]. If you have another MIDI device you wish to control from the same
keyboard or sequencer, connect the DM5’s [MIDI OUT/THRU] to the other device’s
[MIDI IN]. This also requires that you turn the DM5’s MIDI Thru parameter on.
To turn on the MIDI Thru parameter:
➀ Press the [MIDI] button.
The [MIDI] button will light.
➁ Press the [ ] button twice to select the Thru parameter.
The Thru parameter’s value will flash.
➂ Turn the [VALUE] knob clockwise until the Thru parameter’s value reads “On”.
For more information about MIDI connections, see Chapter 3.
Chapter 1: Setting Up
8 DM5 Reference Manual
EXTERNAL TRIGGERS HOOKUP
Plug all of the triggers you will be using into the rear panel jacks. Since the triggers
are interactive, the DM5 needs to “see” all of the signals simultaneously. Therefore,
you should make sure that all triggers are connected before you begin editing the
External Trigger parameters.
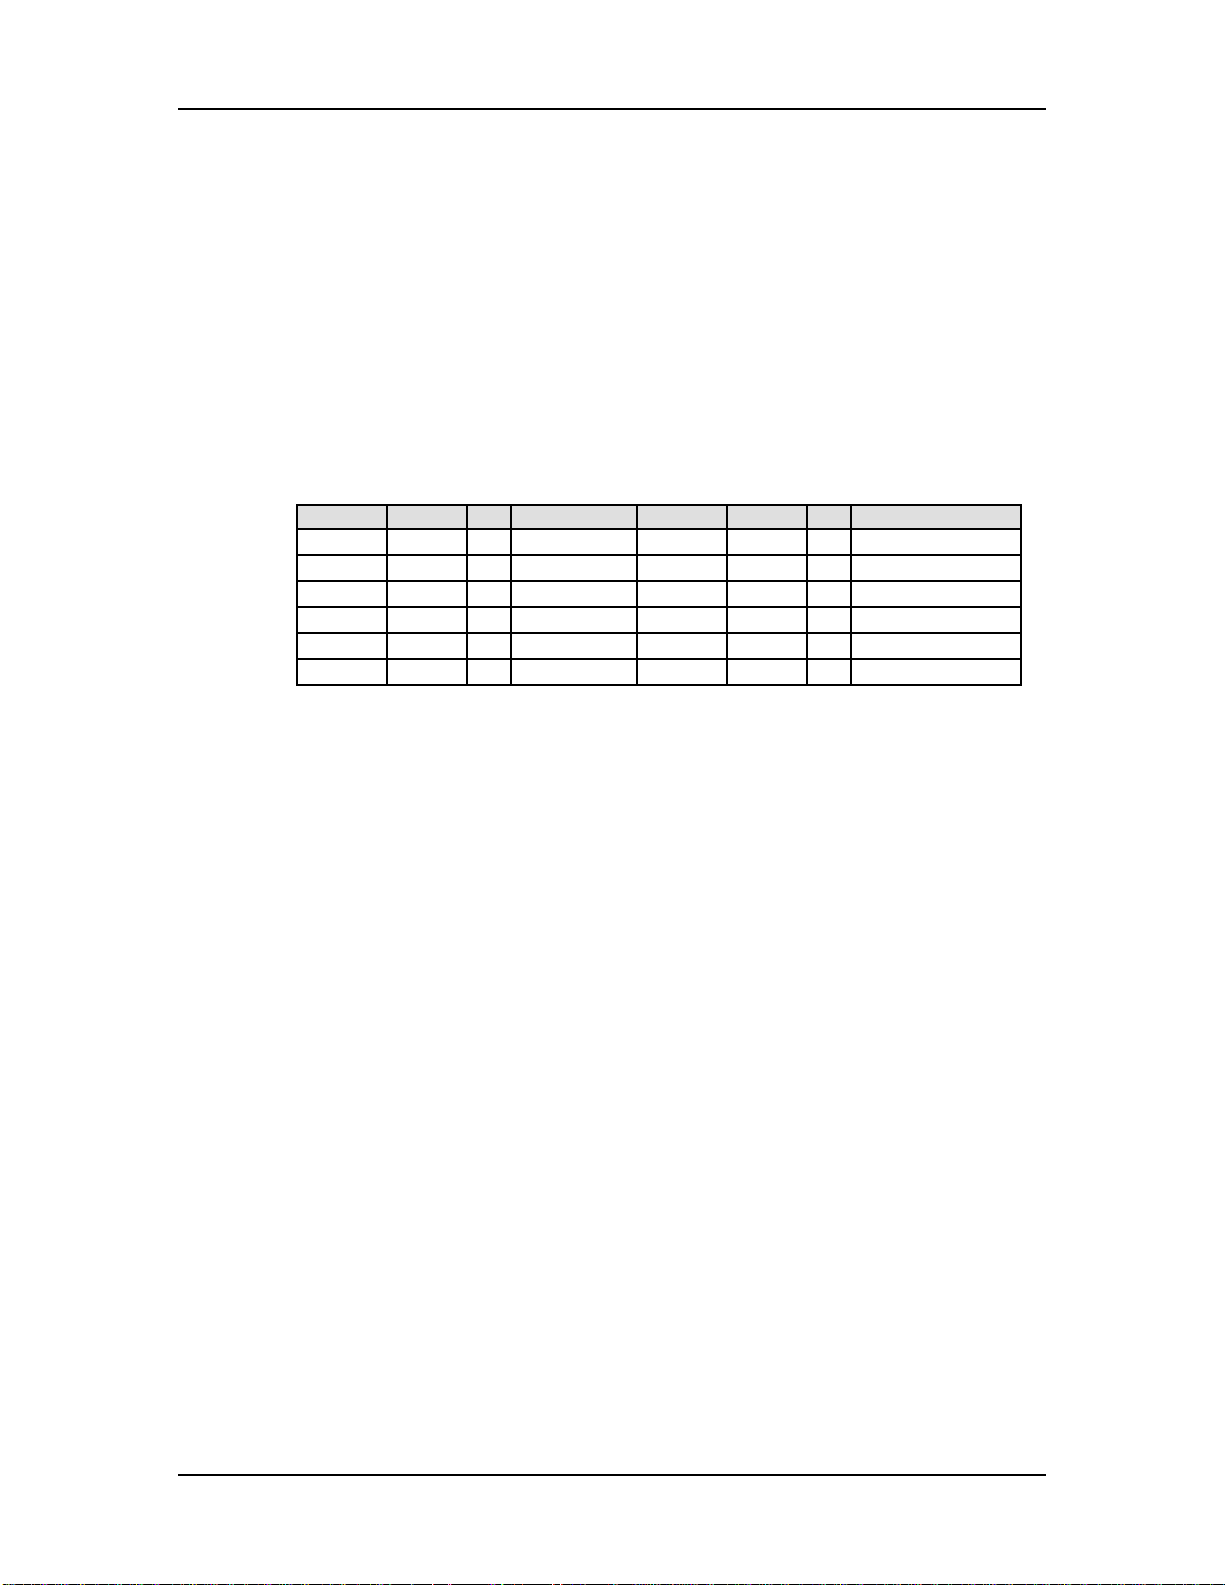
Use the table below as a guide for connecting your trigger inputs. The trigger default
note numbers correspond to these drum sounds. If you are using a Hi-Hat trigger, be
sure to connect its output to Trigger Input [1], as it is already assigned to note Bb1,
which is always the Open Hi-Hat sound (except in Drum Set 18; see below). By
connecting a footswitch, you can have the Hi-Hat trigger play a different note when
the footswitch is pressed (F#1, for example, which is the Closed Hi-Hat sound). For
more information about Footswitch Control, see page 22.
Trigger Note # Sounds Trigger Note # Sound
1 Bb1 46 Hi-Hat 7 Eb2 51 Ride Cymbal
2 C1 36 Bass Drum 8 C#2 49 Crash Cymbal 1
3 D1 38 Snare 9 A2 57 Crash Cymbal 2
4 C2 48 Tom 1 10 D3 62 Conga
5 A1 45 Tom 2 11 F3 65 Hi Timbale
6 F1 41 Tom 3 12 G3 67 Hi Agogo
Note: Drum Set 18 uses a different set of default note numbers. The trigger default
note numbers for all pre set drum sets can be found in the DM5 Factory Drum Set
Reference Chart.
For more information about setting up the External Trigger parameters in the DM5,
see pages 18 through 22, and Chapter 6.
Your First Session With The DM5: Chapter 2
DM5 Reference Manual 9
CHAPTER 2
YOUR FIRST SESSION
WITH THE DM5
POWERING UP
After making your connections, turn on the system’s power using this procedure:
➀ Before turning on the DM5’s power, check the following items:
• Have all connections been made correctly?
• Are the volume controls of the amplifier or mixer turned down?
• Is the volume of the DM5 turned down?
➁ Turn on the [POWER] switch on the DM5 front panel.
Upon power-up, the DM5 will recall the last selected Drum Set, and will display the
page that was last selected.
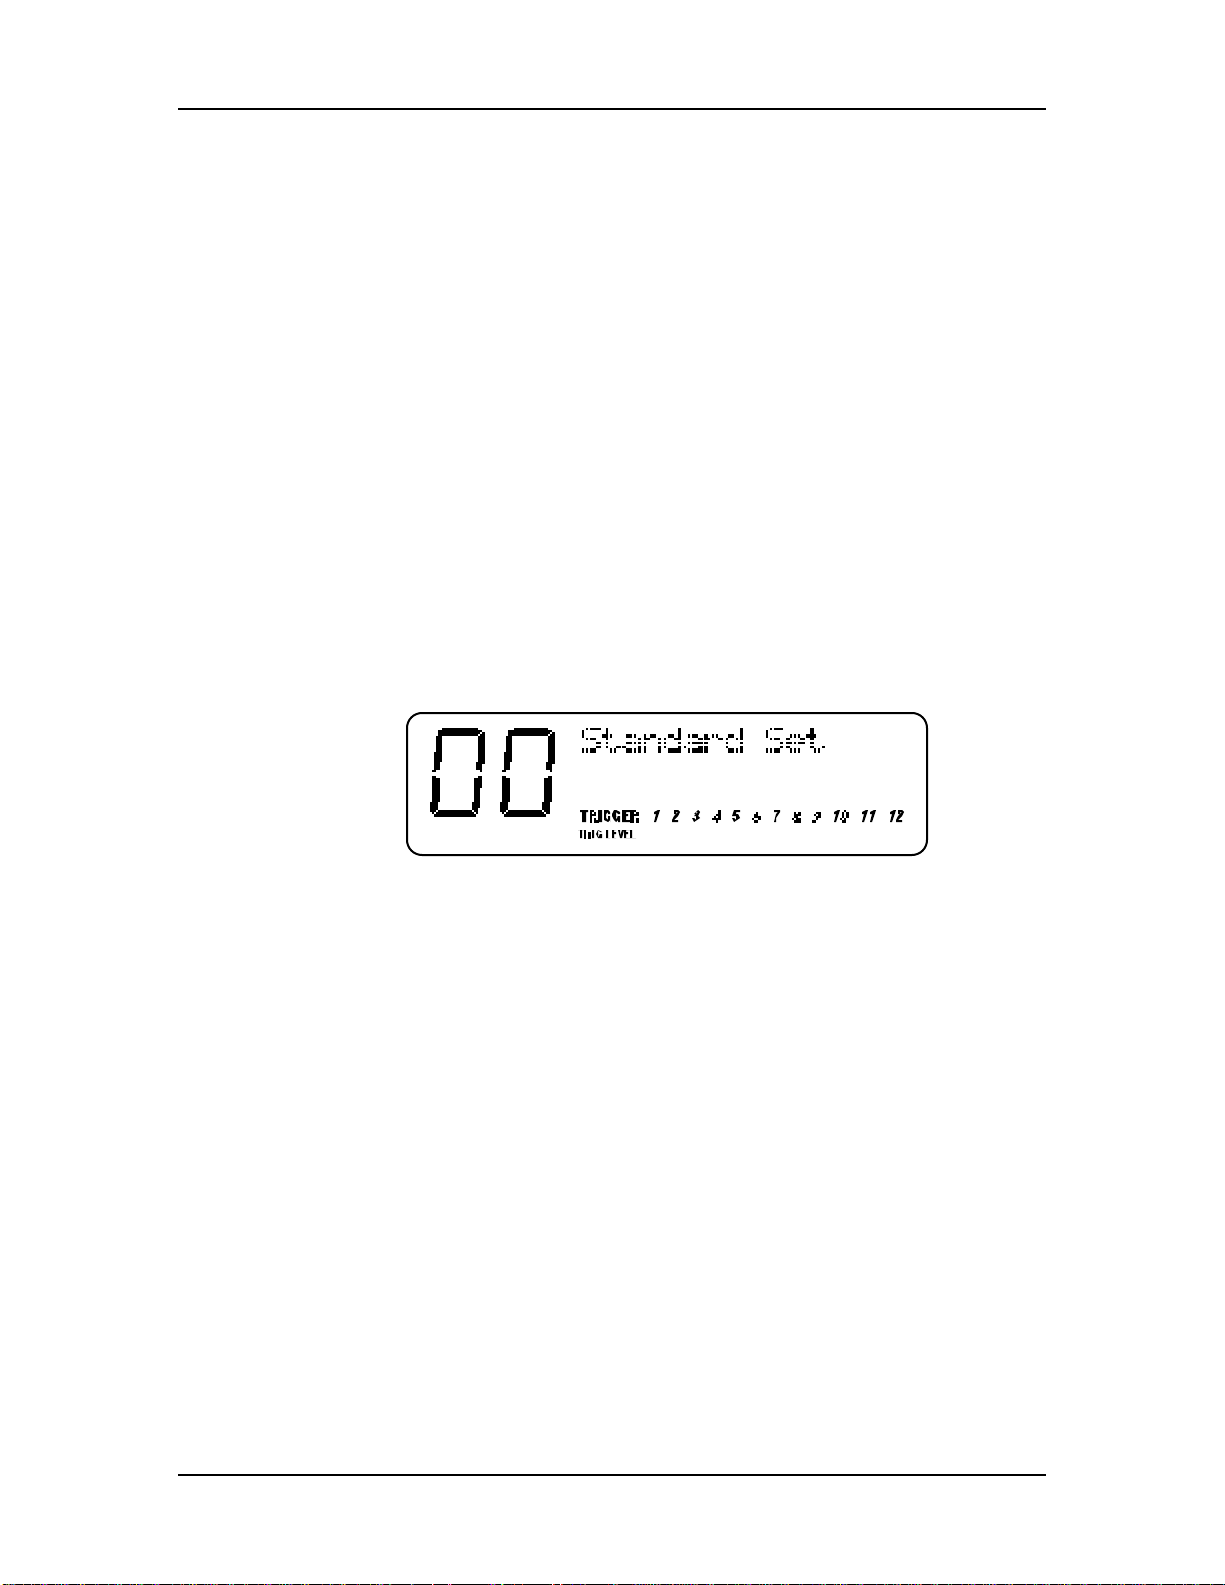
➂ Press [DRUM SET].
The [DRUM SET] button will light. The display should look something like this:
If this Program/Mix has been edited, the display will indicate this by showing a period
“
.
” to the right of the name of the Drum Set.
➃ Turn the DM5’s master [VOLUME] knob fully clockwise.
The best signal-to-noise ratio is achieved when [VOLUME] is set to maximum.
➄ Turn on the power of the amplifier/mixer, and adjust the volume.
PLAYING THE DEMO SEQUENCE
The DM5 has a built-in demo sequence which demonstrates the wide variety of
sounds this amazing instrument is capable of generating. In order to get the full
effect of the demo, we recommend that you connect both the [MAIN OUTPUT-L] and
[MAIN OUTPUT-R] to the inputs of your sound system, or listen on headphones.
To play the demo sequence:
➀ Hold the [DRUM SET] button, and press [PREVIEW].
The display will read: “Playing Demo...”.
➁ Press any button to stop the demo.
There will be no MIDI out messages during the demo, and the external triggers will be
disabled.

Chapter 2: Your First Session With The DM5
10 DM5 Reference Manual
WHAT’S A DRUM SET?
A Drum Set is a stored configuration of drum sounds and their parameters. This
setup of drum sounds and parameters can be stored so that you can get back to it
instantly. When you select a Drum Set, all of its sounds and parameter settings are
recalled to recreate the original kit.
The DM5 provides up to 21 internal Drum Sets. A Drum Set contains 61 notes. Each
note is assigned a voice. Each voice is an actual digital recording, called a sample.
There are 4 megabytes of drum and percussion samples to choose from. The voices
are organized into groups, for easy selection (Kicks, Snare, etc.). Once a note has been
assigned a voice, you may then edit its other parameters. These include Pitch
(transposing the playback pitch of the sample), Volume, Panning, and Output (Main
or Aux).
Each voice is velocity-sensitive: the harder you hit a drum pad (or the [PREVIEW]
button) or the higher the velocity value of the MIDI trigger, the louder the drum
sound assigned to the pad will play. Using Dynamic Articulation™ techniques, the
timbre (tonal content) and pitch will often change as well, just like “real” drums.
PLAYING THE DM5
The DM5 is shipped from the factory with 21 Preset Drum Sets.
AUDITIONING INTERNAL PROGRAMS
➀ Press the [DRUM SET] button.
The [DRUM SET] button will light. You can play the DM5 from a MIDI keyboard or via
the external triggers; the Drum Set will be whatever was selected last (00 – 20).
➁ Select a Drum Set by turning the [VALUE] knob.
The selected Drum Set number and its name will appear in the display.
SELECTING THE MIDI CHANNEL
The DM5 can receive information on any single MIDI channel of the 16 available
channels, or on all 16 MIDI channels.
➀ Press the [MIDI] button.
The [MIDI] button will light. This selects the MIDI parameters for editing. There are 5
different pages of parameters; this is page 1. There are three parameters in this page:
Root, Chan and Thru. The first parameter, Root will be selected (the value beneath it will
be flashing).
➁ Press the [ ] button once to select the Chan parameter (MIDI channel).
The Chan parameter’s value will flash in the display to indicate it is selected for editing.
➂ Use the [VALUE] knob to select a MIDI channel from 01 – 16, or 00 to select all
channels (this is also known as “omni mode”).
The display will change to indicate the currently selected MIDI channel.
For more information about MIDI functions, see Chapter 5.
Your First Session With The DM5: Chapter 2
DM5 Reference Manual 11
CHOOSING VOICES IN A DRUM SET
In this section, we will choose Voices for a Drum Set. There are many other
parameters of a Drum Set we may wish to edit, however. Refer to Chapter 4 for more
information about editing.
There are 61 possible notes in a Drum Set. To select a note, turn on the [NOTE CHASE]
button (it will light). Now, whenever you play a note on your MIDI keyboard, the
corresponding pitch will be displayed. When you want to edit a particular note, just
play it and there it is! You can also select a note from the front panel by pressing the
[ ] button to select the Note value in the display (it will flash) and then turning the
[VALUE] knob to select the note you wish to edit.
➀ Press [DRUM SET] and use the [VALUE] knob to select a Drum Set you wish to edit.
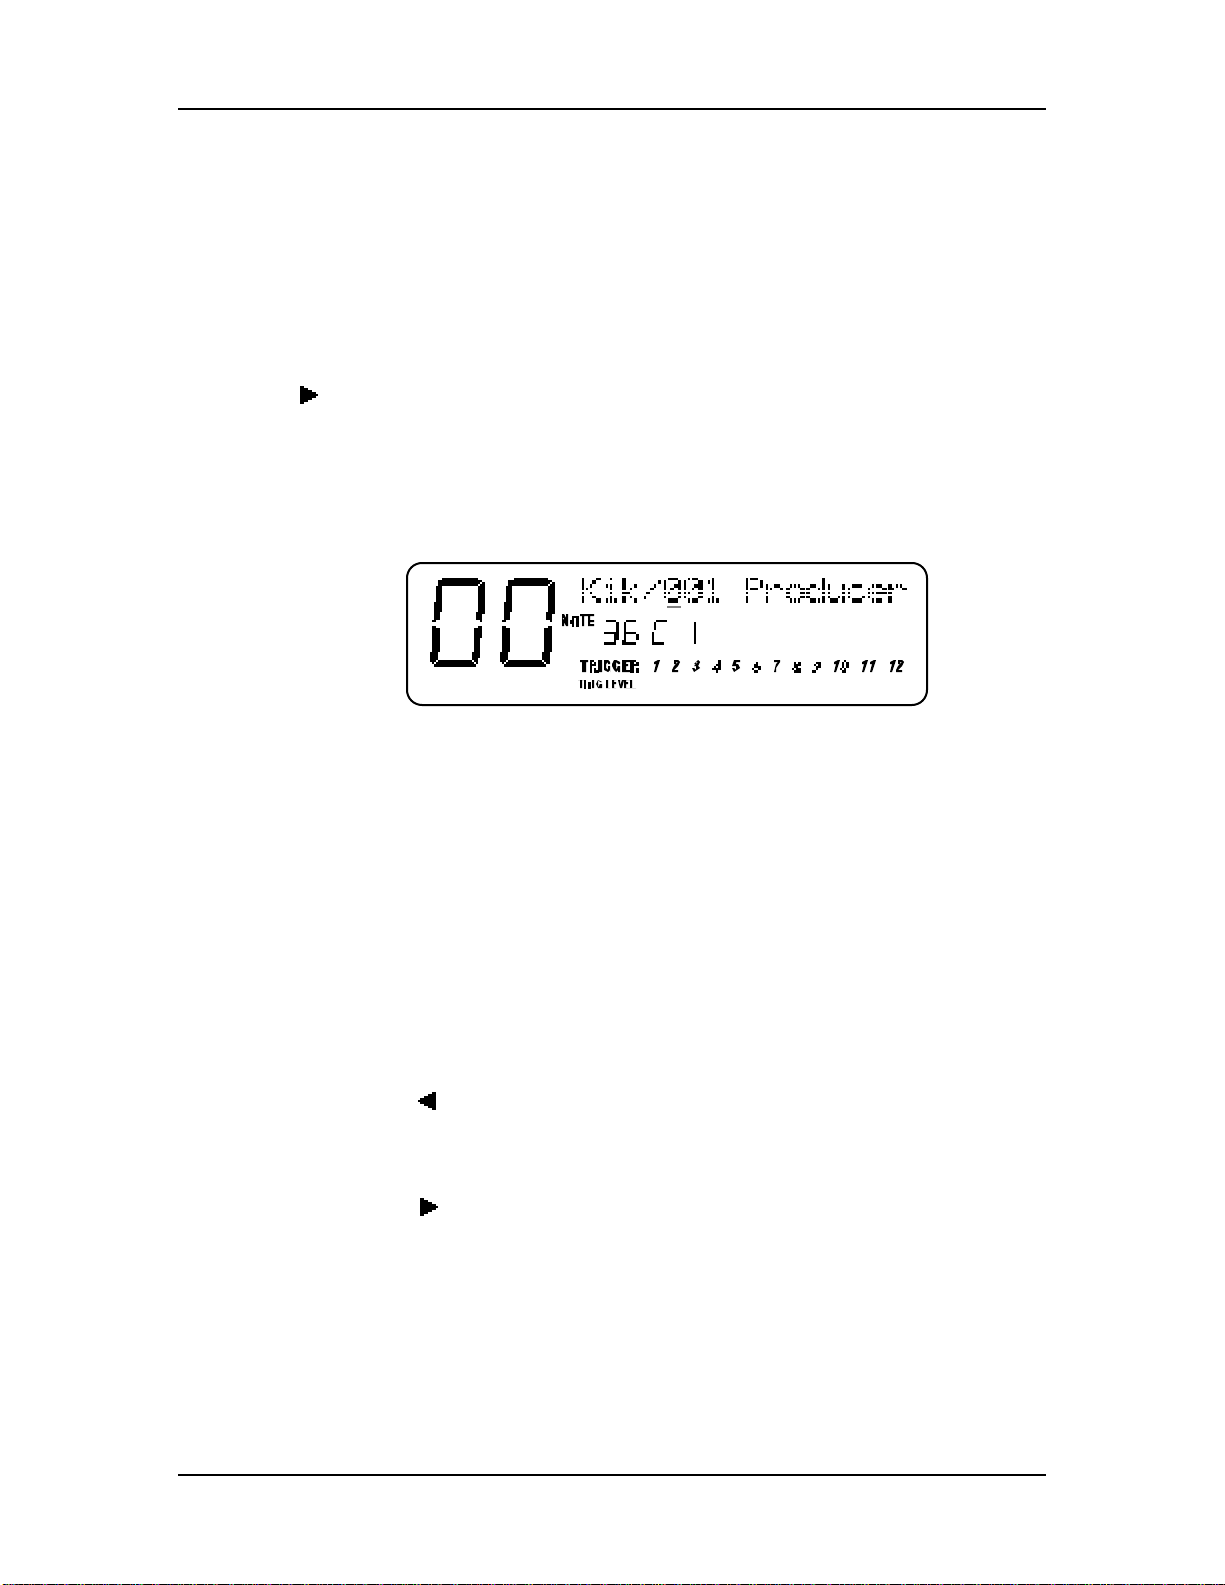
➁ Press [VOICE].
This selects the Voice function. The display will look like this:
In the upper section of the display there will appear two parameters: Voice Family
and Voice Number (a slash / appears between them). The above example shows
Note #36 (C1) is selected, and its assigned Voice is the first sound (001) in the Kick
(Kik) Family . Note that the Voice Number (001) is underlined, indicating that it is
selected for editing (using the [VALUE] knob).
➂ With [NOTE CHASE] turned on (lit), play a note on your MIDI keyboard (or hit a
drum pad) that corresponds to the note you want to change the Voice for.
The selected note’s pitch will appear in the middle of the display. Example: If you played
middle-C, the middle section of the display would read “36 C 1”.
➃ Turn the [VALUE] knob to select a different Voice Number within the current
Voice Group; Tap the [PREVIEW] button to audition the selected drum sound.
Example: If the selected note was assigned to a kick drum, turning the [VALUE] knob
would let you audition the other kick drum sounds available in the Kick Voice Group.
➄ Press the [ ] button once to select the Voice Family parameter.
The cursor will appear beneath the Voice Family parameter.
➅ Turn the [VALUE] knob to select a different Voice Family.
➆ Press the [ ] button once to select the Voice Number parameter again.
➇ Turn the [VALUE] knob to select a Voice within the newly selected Family; Tap the
[PREVIEW] button to audition the selected drum sound.
➈ Repeat steps ➁ through ➇ to select new Voices for other notes in the Drum Set.
Changes you make to a Drum Set are temporary and will be lost if another Drum Set is
selected. To make changes permanent, you must store the Drum Set (see next section).
✪

Chapter 2: Your First Session With The DM5
12 DM5 Reference Manual
STORING AN EDITED DRUM SET
Once you have made changes to a Drum Set, you will need to store it; that is, if you
want to keep the changes you have made. The internal memory is designed to hold
up to 21 (00 – 20) Drum Sets. Once you store over an existing Drum Set, the previous
Drum Set that was stored in that location is gone forever. However, you can recall
any of the 21 original factory preset Drum Sets at any time (see below).
➀ Press [STORE].
The [STORE] button will light. The display will show a Drum Set number identical to the
last Drum Set number selected.
➁ Optional: Use the [VALUE] knob to select a different Drum Set location (00 – 20).
➂ Press [STORE] to save the Drum Set into the selected location.
The display briefly reads: ”DRUMSET STORED!”. The [STORE] button will
turn off.
NAMING A DRUM SET
The Store function has a second page which allows you to change the name of the
Drum Set before storing it.
➀ Press [STORE].
➁ Press the [ ] button once to select page 2 of the Store function .
The Drum Set’s name appears in the display; a cursor appears beneath the first character.
In the bottom left corner of the display, PAGE 2 will have a square around it.
➂ Use the [ ] and [ ] buttons to move the cursor in the display and select a
character for editing.
If you move the cursor beyond either end of the Drum Set’s name, page 1 will be selected.
➃ Turn the [VALUE] knob to change the selected character.
➄ Press [STORE] to save the Drum Set with its new name.
RECALLING THE FACTORY DRUM SETS
The DM5 includes 21 factory-programmed Drum Sets that are useful in a wide range
of applications. These are permanently stored in ROM (Read Only Memory), so even
if you edit one of them or replace one by storing a Drum Set into its memory location,
you can recall any of the original presets whenever you want.
➀ Hold the [DRUM SET] button and press [STORE].
The display will read: “Recall Set Into”.
➁ Turn the [VALUE] knob to select the factory Drum Set to be recalled (00-20) .
➂ Press the [ ] button once and turn the [VALUE] knob to select the Drum Set
memory to recall the Drum Set into.
➃ Press [STORE] to recall the selected factory Drum Set into the selected Drum Set
memory location.
Recalling a preset permanently erases and replaces the Drum Set in the location you select.
Only recall a preset into a Drum Set location you are sure you don’t want to keep.
✪
Connections: Chapter 3
DM5 Reference Manual 13
CHAPTER 3
CONNECTIONS
MIDI
MIDI is an internationally-accepted protocol that allows musical-related data to be
conveyed from one device to another. See the MIDI Supplement in Appendix B if
you are not familiar with how MIDI works.
The MIDI connections on the DM5 provide three different functions. To trigger the
DM5 from a MIDI control device (keyboard, drum pad, guitar or bass controller,
sequencer, etc.), connect the control device’s MIDI OUT to the DM5’s [MIDI IN].
The [MIDI OUT/THRU] connector sends MIDI data from the DM5’s keyboard to other
MIDI devices, but can also send System Exclusive data (see the MIDI supplement in
Appendix B) to a storage device for later recall. You can also convert the signals
generated by the external triggers into MIDI signals to send out to other MIDI
devices (such as a sequencer).
MIDI OUT/THRU MODE
The [MIDI OUT/THRU] connector can be switched to a “Thru” mode so that it carries a
replica (or echo) of the messages appearing at the DM5’s [MIDI IN], allowing you to
trigger other devices from the same controller which is feeding the DM5. Simply
connect the DM5’ [MIDI OUT/THRU] to the other device’s MIDI IN. Note: The [MIDI
OUT/THRU] connector will not send messages originating from the DM5 (via the
external triggers) itself while in MIDI Thru mode.
To turn on MIDI Thru Mode:
➀ Press the [MIDI] button.
The [MIDI] button will light.
➁ Press the [ ] button twice to select the Thru parameter.
The Thru parameter’s value will flash.
➂ Turn the [VALUE] knob clockwise until the Thru parameter’s value reads “On”.

Chapter 3: Connections
14 DM5 Reference Manual
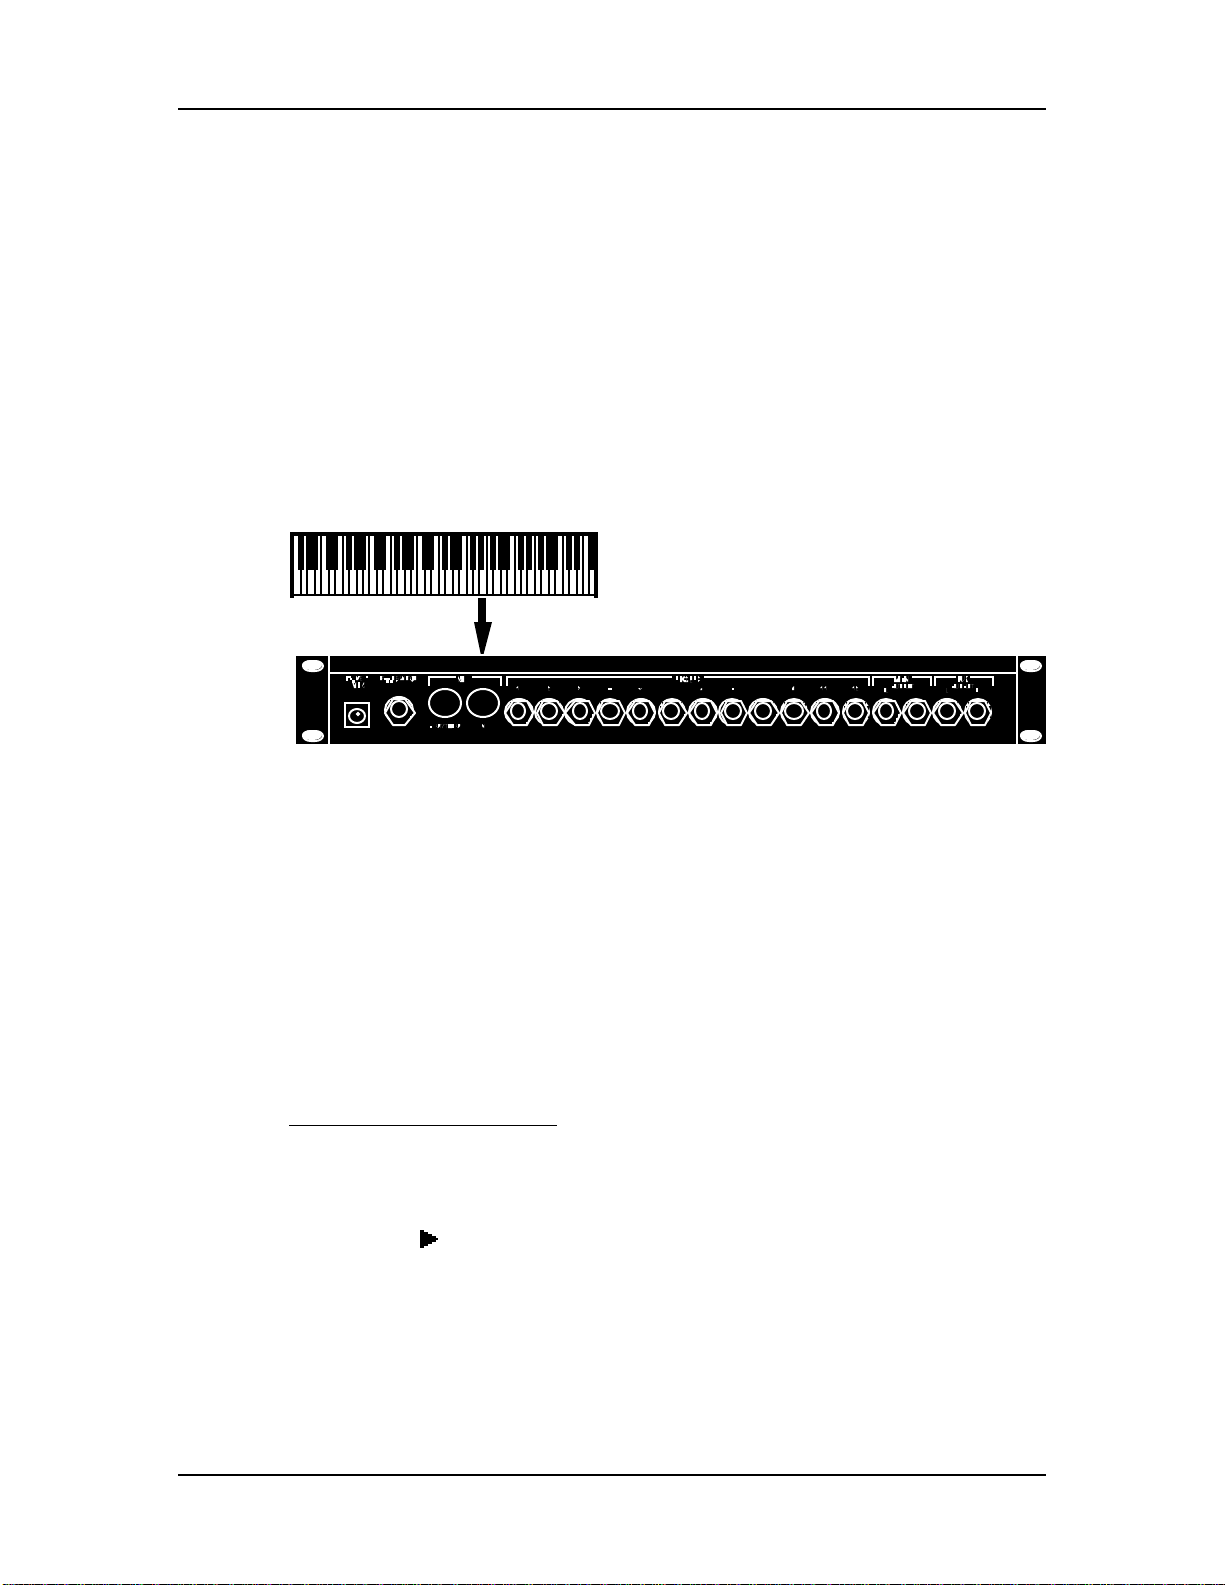
EXAMPLE 1: USING A MIDI KEYBOARD
The DM5 may be “played” from a MIDI keyboard (or some other type of MIDI
controller) by connecting the keyboard’s [MIDI OUT] to the DM5’s [MIDI IN]. This is
illustrated in the diagram on page 17. This connection requires that two MIDI
parameters be set to your satisfaction: MIDI Channel and Root Note.
MIDI Channel
Once connected, you will need to set the MIDI channels on both your keyboard and
the DM5 so that they match. You can choose any of the 16 available channels.
However, if you are also connected to other MIDI devices from your keyboard, you
should consider assigning the DM5 to a MIDI channel that is not already in use. If
you do assign the DM5 to the same channel as another device your keyboard is
connected to, understand that (when the keyboard is set to that channel) both the
DM5 and the other device(s) will be played simultaneously.
Note: If you are not sure which MIDI channel your keyboard is set to, set the DM5 to
MIDI Channel 00 (omni mode); this selects all 16 MIDI channels.
To set the MIDI Channel:
➀ Press the [MIDI] button.
The [MIDI] button will light. This selects the MIDI parameters for editing. There are 5
different pages of parameters; the bottom left corner of the display will indicate that this is
PAGE 1. There are three parameters in this page: Root, Chan and Thru. The first
parameter, Root will be selected (the value beneath it will be flashing).
➁ Press the [ ] button once to select the Chan parameter (MIDI channel).
The Chan parameter’s value will flash in the display to indicate it is selected for editing.
➂ Use the [VALUE] knob to select a MIDI channel from 01 – 16, or 00 to select all
channels (this is also known as “omni mode”).
The display will change to indicate the currently selected MIDI channel.
Root Note
The default (factory setting) for triggering the notes in the DM5 from a MIDI
keyboard is on a 1 to 1 ratio (no transposition). This means when you play a C1, you
are triggering the Voice associated with C1 in the DM5. The DM5 responds to a
“window” of 61 notes, beginning from C1 (note #36) to C5 (note #96). The beginning
(low end) of this note window is called the “Root Note”. By changing the Root Note
parameter in the DM5, you can “shift” the note window up or down, thus changing
the relationship between the MIDI keyboard and the DM5’s Voices.
To set the Root Note:
➀ Press the [MIDI] button.
The [MIDI] button will light. There are 5 different pages of parameters.
➁ If not already selected, press the [MIDI] button repeatedly until PAGE 1 is selected.
In the bottom left corner of the display, PAGE 1 will have a square around it. There are
three parameters in this page: Root, Chan and Thru. The first parameter, Root will be
selected (the value beneath it will be flashing).
➂ Use the [VALUE] knob to set the Root Note parameter anywhere from 00 C-2 to 67
G3.
The display will change to indicate the currently selected Root Note.
Connections: Chapter 3
DM5 Reference Manual 15
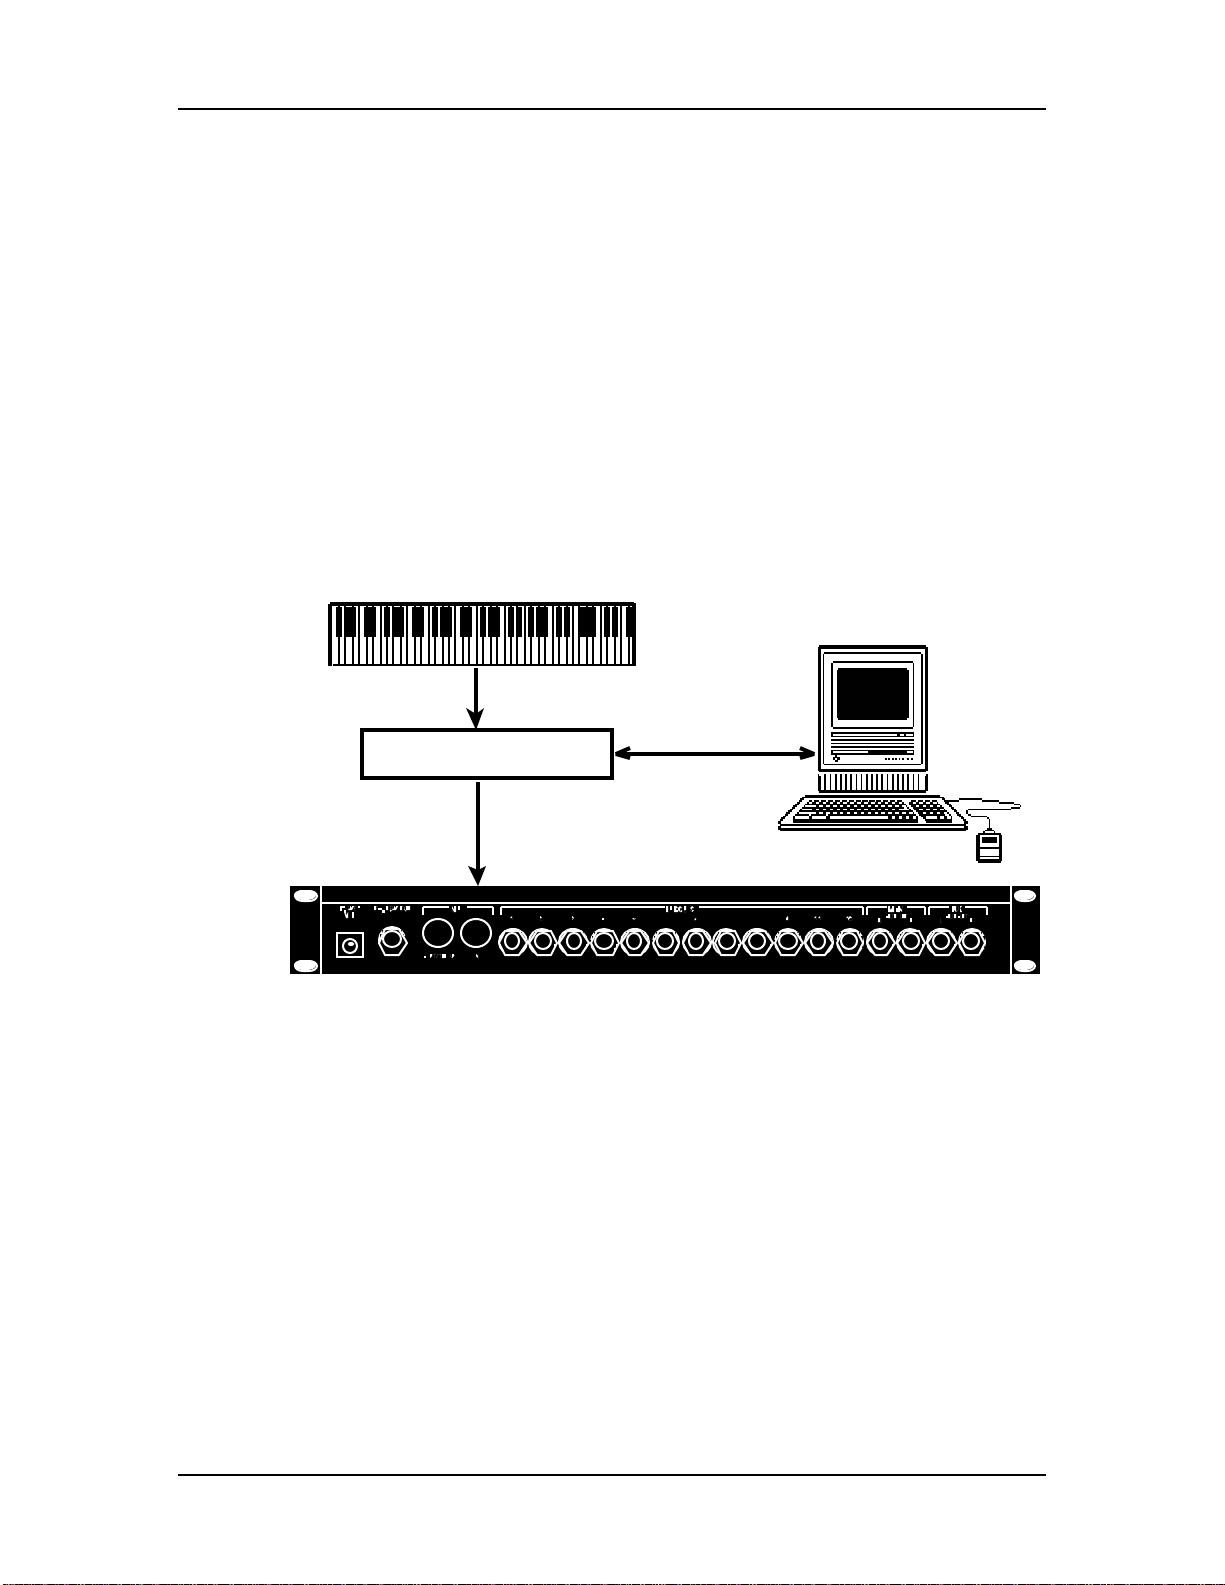
EXAMPLE 2: USING A MIDI SEQUENCER
The DM5 can be used with a MIDI sequencer in one of three ways:
• As a sound module which is “played” by the sequencer (MIDI In only); or,
• As a controller, sending MIDI notes (generated by the external triggers) to the
sequencer to be recorded (MIDI Out only); or,
• As both a controller and a sound module (both MIDI In and Out).
As described in the previous sections, you will need to set your MIDI Channel and
Root Note parameter’s in the DM5 to your liking in order to make use out of either of
these possible setups.
In the illustration below, the DM5 is shown connected to a computer-based
sequencer using a computer MIDI interface.
This allows you to record into the sequencer by playing on your MIDI
keyboard/controller, and have the sequencer play back what you have recorded on
the DM5.
Another way to use a sequencer is to connect both the [MIDI IN] and [MIDI OUT/THRU]
jacks to the computer’s [MIDI Out] and [MIDI In], respectively. This allows you to
record on the sequencer what you play on the DM5 (using the external triggers), and
then play these recordings back. It is important, however, that in this situation you
have the Local parameter turned Off (see next section).
Chapter 3: Connections
16 DM5 Reference Manual
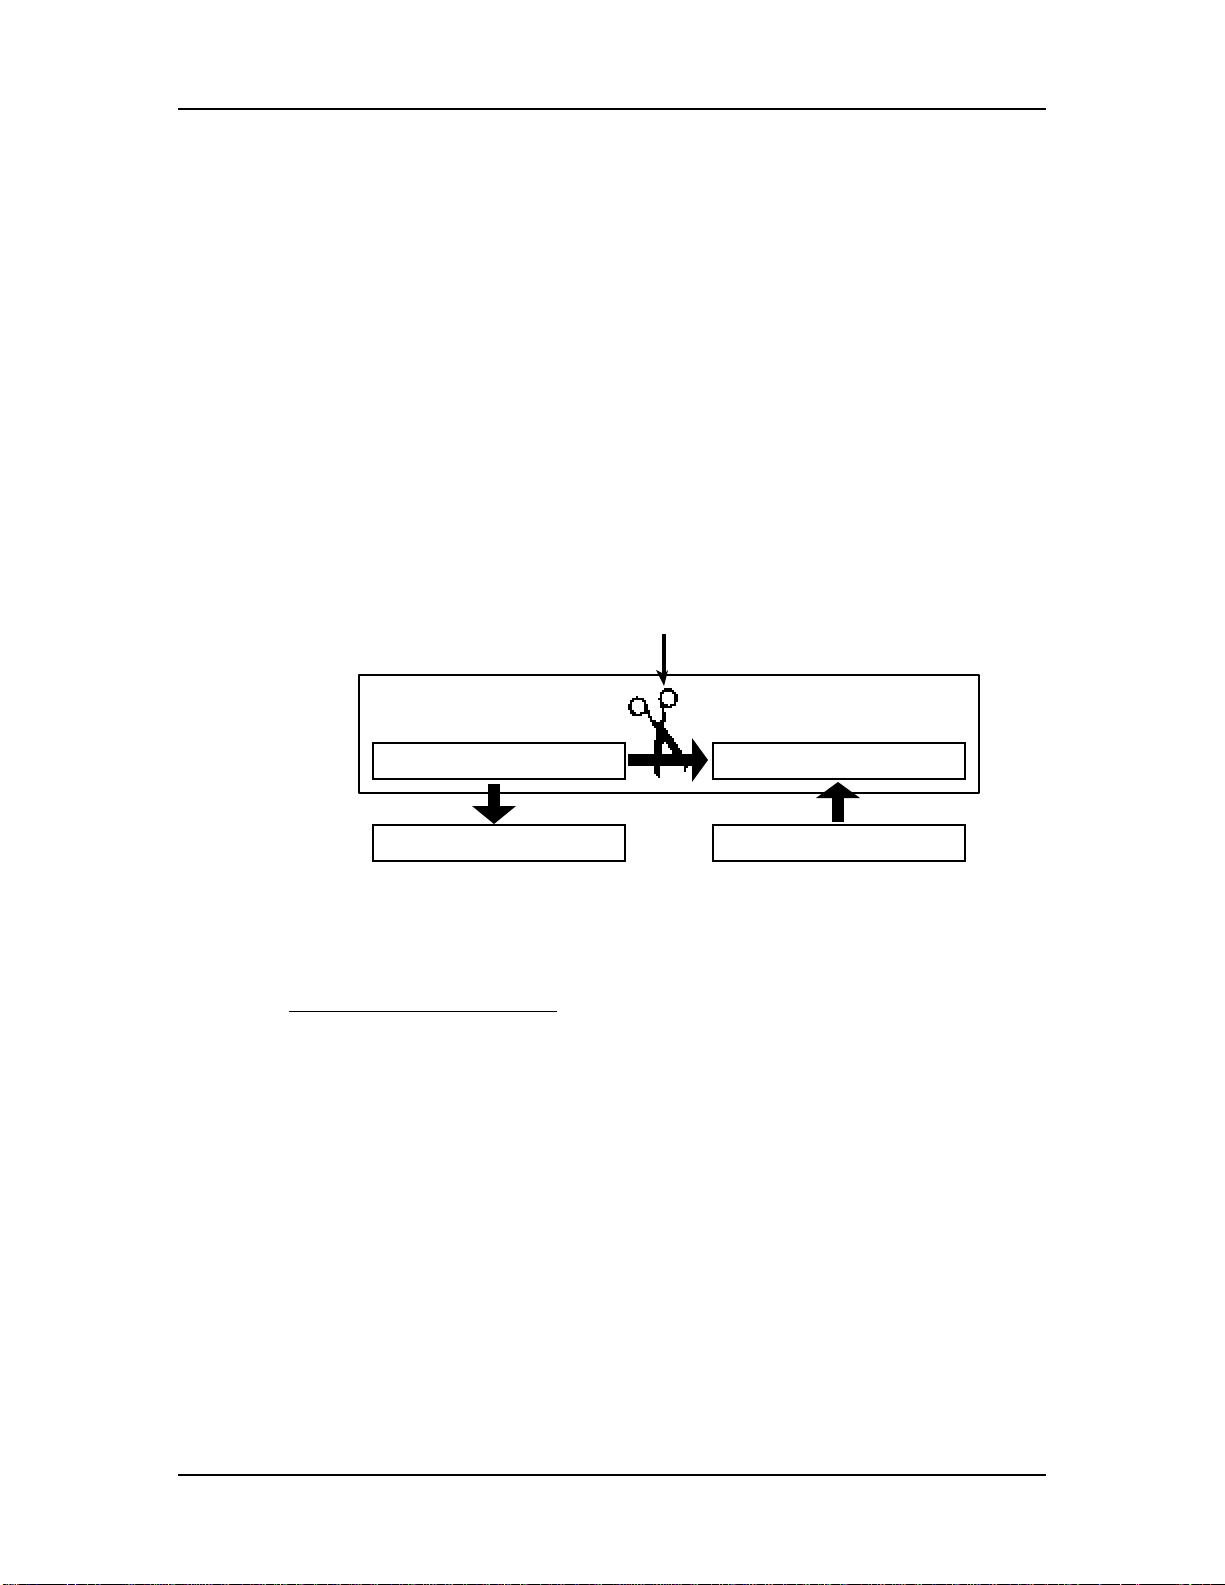
Local Mode
The Local parameter determines whether or not the external triggers will “play” the
internal voices of the DM5 or not. The triggers will generate MIDI note information
when played, which can be recorded onto a MIDI sequencer (as long as the DM5’s
MIDI Thru parameter is turned off; see page 17). In this situation, you may want to
have the sequencer “echo back” the information it receives from the DM5 and
consequently play the DM5’s voices for those notes (the sequencer may have a
different name for this feature, such as “Thru mode”, “Echo”, etc.).
If the sequencer is echoing back what it receives from the DM5, it is not necessary for
the external triggers to directly play the DM5, since this would result in each note
being played twice (once by the trigger and then again when the note is echoed back
by the sequencer).
The solution is to either turn the sequencer’s echoing feature off, or turn the DM5’s
Local parameter off. The latter is a better choice if you intend to use the DM5’s
triggers to record tracks on the sequencer for other MIDI devices (since you wouldn’t
want to hear the DM5 play when you hit the external triggers).
To turn the Local Control off:
➀ Press the [MIDI] button.
The [MIDI] button will light. There are 5 different pages of parameters.
➁ If not already selected, press the [MIDI] button repeatedly until PAGE 2 is selected.
In the bottom left corner of the display, PAGE 2 will have a square around it. There is only
one parameter in this page: Local. It’s current state (on or off) will appear below, and will
be flashing.
➂ Turn the [VALUE] knob counterclockwise to turn the Local Control parameter off.
The display will change to indicate that the Local Control parameter is turned Off.
 Loading...