


LAVATHERM 88800
User manual |
Pro Steam Condenser |
|
Dryer |

2
Dear Customer
Thank you for choosing one of our high-quality products.
With this appliance you will experience the perfect combination of functional design and cutting edge technology.
Convince yourself that our appliances are engineered to deliver the best performance and control - indeed we are setting the highest standards of excellence.
In addition to this you find environmental and energy saving aspects as an integral part of our products.
To ensure optimal and regular performance of your appliance please read this instruction manual carefully. It will enable you to navigate all processes perfectly and most efficiently. To refer to this manual any time you need to, we recommend you to keep it in a safe place. And please pass it to any future owner of the appliance.
We wish you much joy with your new appliance.
The following symbols are used in this user manual:
Important information concerning your personal safety and information on how to avoid damaging the appliance.
General information and tips
Environmental information

Contents 3
Contents
136901070-04-14092007
Operating Instructions |
6 |
|
|
Important safety information |
6 |
|
|
Product description |
11 |
Control panel |
12 |
|
|
What is shown in the display |
12 |
First start-up |
13 |
|
|
Switching machine on / switching light on |
13 |
Setting the language |
13 |
Setting the time |
14 |
Before first use |
14 |
Before first use |
15 |
|
|
Sorting and preparing laundry |
16 |
Opening loading door / loading laundry |
17 |
Pro Steam system |
18 |
Fill steam water tank |
18 |
Water recirculation system |
18 |
Overview of Pro Steam programmes |
20 |
Selecting the programme |
23 |
Select STEAM LEVEL (NIVEAU STOOM) |
23 |
Selecting additional options |
23 |
LONG ANTI-CREASE |
24 |
BUZZER |
24 |
CHILD LOCK |
24 |
SPIN SPEED |
24 |
Setting DELAY (STARTUITSTEL) function |
25 |
Starting the Pro Steam programme |
25 |
Changing a programme |
26 |
Putting in extra items or taking items out before end of programme |
26 |
Pro Steam programme complete / removing laundry |
27 |
Drying |
28 |
Drying programmes overview |
28 |
Selecting the programme |
30 |
Setting DRYNESS (DDROOGTEGRAAD) LEVEL |
30 |
Selecting additional options |
31 |

4 |
|
Contents |
|
|
|
||
DELICATE |
31 |
||
SENSITIVE |
31 |
||
LONG ANTI-CREASE |
32 |
||
BUZZER |
32 |
||
CHILD LOCK |
32 |
||
SPIN SPEED |
32 |
||
|
|
Selecting TIME (TIJD PROGR.) |
33 |
|
|
Selecting DELAY START (STARTUITSTEL) |
33 |
|
|
Starting the drying programme |
33 |
|
|
Changing a programme |
34 |
|
|
Putting in extra items or taking items out before end of programme |
34 |
|
|
Drying programme complete / removing laundry |
34 |
|
Care and cleaning |
36 |
|
|
|
Cleaning fluff filter |
36 |
|
|
Cleaning the door seal |
38 |
|
|
Emptying the condensate tank |
38 |
|
|
Cleaning heat exchanger |
39 |
|
|
Cleaning the water recirculation valve/filter |
41 |
|
|
Cleaning the drum |
41 |
|
|
Clean operating screen and housing |
41 |
|
What to do if ... |
42 |
|
|
|
Troubleshooting by yourself |
42 |
|
|
Changing the bulb for interior lighting |
44 |
Machine settings |
45 |
||
|
LANGUAGE |
45 |
|
|
TIME |
46 |
|
|
BRIGHTNESS |
46 |
|
|
CONTRAST |
46 |
|
|
WATER HARDNESS |
47 |
|
|
FULL TANK WARNING - ON/OFF |
47 |
|
Technical data |
48 |
||
Consumption values |
48 |
||
|
|
|
|
Hints for test institutes |
49 |
||
|
|
|
|
Installation |
49 |
||
Appliance positioning |
49 |
Removing transport safety packaging |
50 |
Contents |
5 |
|
|
Electrical connection |
50 |
Changing door stop |
51 |
Special accessories |
52 |
Environment |
53 |
Packaging material |
53 |
Old appliance |
53 |
Environmental tips |
54 |
Guarantee conditions |
55 |
|
|
Guarantee/Customer Service |
55 |
|
|
European Guarantee |
57 |
Service |
59 |
|
|
www.electrolux.com |
59 |
|
|
Subject to change without notice
136901070-04-14092007

6 Important safety information
Operating Instructions
Important safety information
Only operate the ProSteam programmes with distilled water!
Mains water causes damage to the appliance.
In the interest of your safety and to ensure the correct use, before installing and first using the appliance, read this user manual carefully, including its hints and warnings. To avoid unnecessary mistakes and accidents, it is important to ensure that all people using the appliance are thoroughly familiar with its operation and safety features. Save these instructions and make sure that they remain with the appliance if it is moved or sold, so that everyone using it through its life will be properly informed on appliance use and safety.
General safety
•It is dangerous to alter the specifications or attempt to modify this product in any way.
•This appliance is not intended for use by persons (including children) with reduced physical, sensory or lack of experience and knowledge, unless they have been given supervision or instruction concerning use of the appliance by a person responsible for their safety.
•Make sure that small pets do not climb into the drum. To avoid this, please check into the drum before using.
•Any objects such as coins, safety pins, nails, screws, stones or any other hard, sharp material can cause extensive damage and must not be placed into the machine.
•In order to avoid danger of fires caused by excessive drying, do not use appliance to dry the following items: cushions, quilts and the like (these items accumulate heat).
•Items such as foam rubber (latex foam), shower caps, waterproof textiles, rubber backed articles and clothes or pillows fitted with foam rubber pads should not be dried in the tumble dryer.
•Always unplug the appliance after use, clean and maintenance.

Important safety information |
7 |
|
|
•Under no circumstances should you attempt to repair the machine yourself. Repairs carried out by inexperienced persons may cause injury or serious malfunctioning. Contact your local Service Centre. Always insist on genuine spare parts.
•Items that have been soiled with substances such as cooking oil acetone, petrol, kerosene, spot removers, turpentine, waxes and wax removers should be washed in hot water with an extra amount of detergent before being dried in the tumble dryer.
•Danger of explosion: never tumble dry items that have been in contact with inflammable solvents (petrol, methylated spirits, dry cleaning fluid and the like). As these substance are volatile, they could cause an explosion. Only tumble dry items washed with water.
•Risk of fire: items that have been spotted or soaked with vegetable or cooking oil constitute a fire hazard and should not be placed in the tumble dryer.
•If you have washed your laundry with stain remover you must execute an extra rinse cycle before loading your tumble dryer.
•Please make sure that no gas lighters or matches have accidentally been left in pockets of garments to be loaded into appliance
•When removing from the socket, never pull the mains plug by the cable, instead take a hold of the plug.
•The height adjustable screw feet must never be removed.
•Manifold plugs, couplings and extension cables must not be used. Risk of fire from overheating!
•Do not spray down the appliance with jets of water. Risk of electric shock!
•Do not lean on the open door. The appliance may tip over.
•Once the drying cycle or ProSteam programme has been interrupted, the laundry and drum may be hot. Risk of burns! Take care when removing the laundry.
•Take care when interrupting the ProSteam programme: Do not open the machine door during the steam phase. Hot steam may result in burns. The display shows message to indicate the steam phase.
•The final part of a drying cycle occurs without heat (cool down cycle) to ensure that the items are left at a temperature that ensures that the items will not be damaged.
• Caution – Hot surface:
Do not touch the back of the appliance while it is operating.

8 Important safety information
WARNING!
Never stop a tumble dry before the end of the drying cycle unless all items are quickly removed and spread out so that the heat is dissipated. Risk of fire!
•Risk of electric shock! Do not spray down the appliance with jets of water.
Installation
•Note the "Installation" instructions.
•Important! Appliance must be moved in vertical position for transport.
•This appliance is heavy. Care should be taken when moving it.
•When unpacking the appliance, check that it is not damaged. If in doubt, do not use it and contact the Service Centre.
•All packing and transit bolts must be removed before use. Serious damage can occur to the product and to property if this is not adhered to. See relevant section in the user manual.
•The final part of a tumble dryer cycle occurs without heat ( cool down cycle ) to ensure that the items are left at a temperature that ensures that items will not be damaged.
•Any electrical work required to install this appliance should be carried out by a qualified electrician or competent person.
•Care must be taken to ensure that the appliance does not stand on the electrical supply cable.
•If the machine is situated on a carpeted floor, please adjust the feet in order to allow air to circulate freely.
•After having installed the appliance, check that it is not pressing or standing on its electrical supply cable.
•If the tumble dryer is placed on top of a washing machine, it is compulsory to use the stacking kit (optional accessory).
Use
•The appliance is intended for drying and steam treatment of standard laundry in domestic applications.
•This appliance is designed for domestic use. It must not be used for purposes other than those for which it was designed.
•Only wash fabrics which are designed to be machine dried. Follow the instructions on each garment label.
•Do not dry unwashed items in the tumble dryer.
Important safety information |
9 |
|
|
•Do not overload the appliance. See the relevant section in the user manual.
•Clothes which are dripping wet should not be placed in the dryer.
•Garments which have been in contact with volatile petroleum products should not be machine dried. If volatile cleaning fluids are used, care should be taken to ensure that the fluid is removed from the garment before placing in the machine.
•When using dry-cleaning sets: only use those products which are declared as suitable for the dryer by the manufacturer.
•Clean the micro-fine filter and fine strainer after each drying cycle or ProSteam programme.
•Do not use the machine without a lint filter or with a damaged lint filter. Risk of fire!
•Only fill the water reservoir for steam treatment with distilled water. Do not use tap water or any additives! The condensed water from this appliance’s condensed water container can also be used, if it is filtered first (e. g. with a coffee filter).
•Clean the heat exchanger regularly.
•Never pull the power supply cable to remove the plug from the socket; always take hold of the plug itself.
•Never use the tumble dryer if the power supply cable, the control panel, the working surface or the base are damaged so that the inside of the tumble dryer is accessible.
•With stacked washer and ProSteam appliance: do not place objects on the appliance. These may fall off during operation.
•The lamp cover for the interior light must be screwed down tightly.
•Fabric softeners, or similar products should be used as specified by the fabric softener instructions.
•Caution - hot surface : Do not touch the door light cover surface when the light is switched on.
Child safety
•This machine is not intended for use by young children or infirm persons without supervision.
•Children often do not recognize the hazards associated with electrical appliances. Children should be supervised to ensure that they do not play with the appliance.

10Important safety information
•Make sure that children and small animals cannot climb into the appliance’s drum. Could endanger life! Keep the appliance door shut whenever it is not being used.
•Keep all detergents in a safe place out of children’s reach.
•When discarding the appliance, cut the electrical supply cable and destroy the plug with the remaining cable. Disable to door catch in order to prevent young children from becoming trapped inside the machine while playing.

|
|
|
|
|
|
|
|
|
|
|
|
|
|
|
11 |
||||||||||||||||||||||
|
|
|
|
|
|
|
|
|
|
|
|
|
|
|
|
|
|
|
|
|
|
|
|
|
|||||||||||||
Product description |
|
|
|
|
|
|
|
|
|
|
|
|
|
|
|
|
|
|
|
|
|
|
|
|
|||||||||||||
|
|
|
|
|
|
|
|
|
|
|
|
|
|
|
|
|
|
|
|
|
|
|
|
|
|
|
|
|
|
|
|
|
|
|
|
|
|
2 |
|
|
|
|
|
|
|
|
|
|
|
|
|
|
|
|
|
|
|
|
|
|
|
|
|
|
|
|
|
|
|
|
|
|
|
|
|
|
|
|
|
|
|
|
|
|
|
|
|
|
|
|
|
|
|
|
|
|
|
|
|
|
|
|
|
|
|
|
|
||||||
|
|
|
|
|
|
|
|
|
|
|
|
|
|
|
|
|
|
|
|
|
|
|
|
|
|
|
|
|
|
|
|
|
|
|
|||
|
|
|
|
|
|
|
|
|
|
|
|
|
|
|
|
|
|
|
|
|
|
|
|
|
|
|
|
|
|
|
|
|
|
|
|
|
|
3 |
|
|
|
|
|
|
|
|
|
|
|
|
|
|
|
|
|
|
|
|
|
|
|
|
|
|
|
|
|
|
|
|
|
|
|
|
|
|
|
|
|
|
|
|
|
|
|
|
|
|
|
|
|
|
|
|
|
|
|
|
|
|
|
|
|
|
|
|
|
|
|
|
|||
|
|
|
|
|
|
|
|
|
|
|
|
|
|
|
|
|
|
|
|
|
|
|
|
|
|
|
|
|
|
|
|
|
|
|
|
|
|
|
|
|
|
|
|
|
|
|
|
|
|
|
|
|
|
|
|
|
|
|
|
|
|
|
|
|
|
1 |
|
||||||||
|
|
|
|
|
|
|
|
|
|
|
|
|
|
|
|
|
|
||||||||||||||||||||
|
|
|
|
|
|
|
|
|
|
|
|
|
|
|
|
|
|
|
|
|
|
|
|
|
|
|
|
|
|
|
|
|
|
|
|
|
|
4 |
|
|
|
|
|
|
|
|
|
|
|
|
|
|
|
|
|
|
|
|
|
|
|
|
|
|
|||||||||||
|
|
|
|
|
|
|
|
|
|
|
|
|
|
|
|
|
|
|
|
|
|
|
5 |
|
|||||||||||||
|
|
|
|
|
|
|
|
||||||||||||||||||||||||||||||
|
|
|
|
|
|
|
|
|
|
|
|
|
|
||||||||||||||||||||||||
|
|
|
|
|
|
|
|
|
|
|
|
|
|
|
|
|
|
|
|
|
|
|
|
|
|
|
|
|
|
|
|
|
|
|
|
||
|
|
|
|
|
|
|
|
|
|
|
|
|
|
|
|
|
|
|
|
|
|
|
|
|
|
|
|
|
|
|
|
|
|
|
|
|
|
|
|
|
|
|
|
|
|
|
|
|
|
|
|
|
|
|
|
|
|
|
|
|
|
|
|
|
|
|
|
|
|
|
|
|
|
|
|
6 |
|
|
|
|
|
|
|
|
|
|
|
|
|
|
|
|
|
|
|
|
|
|
|
|
|
|
|
|
|
|
|
|
|
|
|
|
|
|
|
|
|
|
|
|
|
|
|
|
|
|
|
|
|
|
|
|
|
|
|
|
|
|
7 |
|
|||||||||||
|
|
|
|
|
|
|
|
|
|
|
|
|
|
|
|
|
|||||||||||||||||||||
|
|
|
|
|
|
|
|
|
|
|
|
|
|
|
|
|
|
|
|
|
|
|
|
|
|
||||||||||||
8 |
|
|
|
|
|
|
|
|
|
|
|
|
|
|
|
|
|
|
|
|
|
|
|
|
|
|
|
|
|
|
|
|
|
|
|
|
|
|
|
|
|
|
|
|
|
|
|
|
|
|
|
|
|
|
|
|
|
|
9 |
|
|||||||||||||||
|
|
|
|
|
|
|
|
|
|
|
|
|
|||||||||||||||||||||||||
|
|
|
|
|
|
|
|
|
|
|
|
|
|
|
|
|
|
|
|
|
|
|
|
|
|
|
|
|
|
|
|
|
|
|
|
||
|
|
|
|
|
|
|
|
|
|
|
|
|
|
|
|
|
|
|
|
||||||||||||||||||
10 |
|
|
|
|
|
|
|
|
|
|
|
|
|
|
|
|
11 |
|
|||||||||||||||||||
|
|
|
|
|
|
|
|
|
|
|
|||||||||||||||||||||||||||
|
|
|
|
|
|
|
|
|
|
|
|
|
|
|
|
|
|
|
|
|
|
|
|
|
|
|
|
|
|
|
|
|
|
|
|
|
|
|
12 |
|
|
|
|
|
|
|
|
|
|
|
|
|
|
|
|
|
|
|
|
|
|
|
|
|
|
|
|
|
|
|
|
|
|
|
|
|
|
|
|
|
|
|
|
|
|
|
|
|
|
|
|
|
|
|
|
|
|
|
|
|
|
|
|
|
|
|
|
|
|
|
|||
|
|
|
|
|
|
|
|
|
|
|
|
|
|
|
|
|
|
|
|
|
|
|
|
|
|
|
|
|
|
|
|
|
|
|
|
|
|
|
|
|
|
|
|
|
|
|
|
|
|
|
|
|
|
|
|
|
|
|
|
|
|
|
|
|
|
|
|
|
|
|
|
|
|
|
|
|
|
|
|
|
|
|
|
|
|
|
|
|
|
|
|
|
|
|
|
|
|
|
|
|
|
|
|
|
13 |
|
|||||||
|
14 |
|
|
|
|
|
|
|
|
|
|
|
|
|
|
|
|
|
|
|
|
|
|
|
|
|
|
|
|
||||||||
|
|
|
|
|
|
|
|
|
|
|
|
|
|
|
|
|
|
|
|
|
|
|
|
|
|
|
|
|
|
|
|
|
|
|
|
|
|
|
|
|
|
|
|
|
|
|
|
|
|
|
|
|
|
|
|
|
|
|
|
|
|
|
|
|
|
|
|
|
|
|
|
|
|
15 |
|
|
|
|
|
|
|
|
|
|
|
|
|
|
|
|
|
|
|
|
|
|
|
|
|
|
|
|
|
|
|
|
|
|
|
|
|
|
|
1Control panel
2Water recirculation valve/filter
3Filler neck for steam water tank
4Drawer with condensed water container
5Fine strainer (lint filter)
6Lamp for inside light
7Large mesh filter (lint filter)
8Micro-fine filter (lint filter)
9Loading door (reversible)
10Rating plate
11Button for opening door in plinth
12Base door upstream of heat exchanger
13Air slots

12 Control panel
14Drainage hose for water tank
15Screwed feet (with height adjustment)
Control panel
|
|
|
|
|
6 |
|
5 |
4 |
|
|
UIT |
LICHT AAN/ ECLAIRAGE |
|
|
|
|
|
STARTUITSTEL |
|
WOL/ LAINE |
ARRET |
STOOM/ VAPEUR |
|
|
|
|
|
DEPART DIFFERE |
|
ZIJDE/ SOIE |
|
KATOENEN HEMD |
|
|
|
|
|
|
|
KATOEN/ COTON |
CHEMISES COTON |
|
|
|
|
|
|
|
|
SYNTHETISCHE HEMDEN |
|
|
|
|
|
|
|
||
EXTRA DROOG/ |
CHEMISES |
|
|
|
|
|
|
|
|
EXTRA SEC |
|
SYNTHETIQUES |
|
|
|
|
|
|
|
KASTDROOG |
|
KATOEN |
|
|
|
|
|
|
|
PRET A RANGER |
COTON |
|
|
|
|
|
|
|
|
VOCHTIG |
|
SYNTHETISCH |
|
|
|
|
|
|
|
LEGEREMENT |
|
SYNTHETIQUE |
|
|
|
|
|
|
|
HUMIDE |
|
OPFRISSEN/ |
|
|
|
|
|
|
|
SYNTHETISCH |
|
|
|
|
|
|
|
|
|
|
RAFRAICHIR |
|
|
|
|
|
|
|
|
SYNTHETIQUE |
|
WOL/ LAINE |
|
DROOG- |
|
|
|
|
|
EXTRA DROOG |
|
|
|
|
|
|
|
||
|
CASUAL/ SPORT |
|
|
|
|
|
|
||
EXTRA SEC |
|
|
TEGRAAD |
|
|
TIJD PROGR. |
START |
PAUZE |
|
|
BUSINESS/ COSTUMES |
|
OPTIE |
OK |
|||||
KASTDROOG |
|
NIVEAU STOOM |
DEGRE |
DEPART |
PAUSE |
||||
|
OK |
TEMPS |
|||||||
PRET A RANGER |
JEANS |
DEBIT VAPEUR |
DE SECHAGE |
OPTIONS |
|
|
|||
|
|
|
|||||||
VOCHTIG |
|
|
|
|
|
|
|
|
|
|
BEDLINNEN/ DRAPS |
|
|
|
|
|
|
|
|
LEGEREMENT HUMIDE |
|
|
|
|
|
|
|
||
TIJD PROGR./ |
|
LICHTE SPORTKLEDING/ |
|
|
|
|
|
|
|
MINUTERIE |
VETEMENTS DE SPORT |
|
|
|
|
|
|
|
|
|
1 |
|
|
|
2 |
|
|
3 |
|
1Programme knob and ON/OFF (UIT) switch
2Function buttons
3START PAUSE (START/PAUZE) button
4DELAY START (STARTUITSTEL) button
5Status led
6Display
What is shown in the display
1
2
3
4
The display can show the following basic messages:
1Currently set Pro Steam or drying programme name and cycle duration.
2Expected time of cycle end.
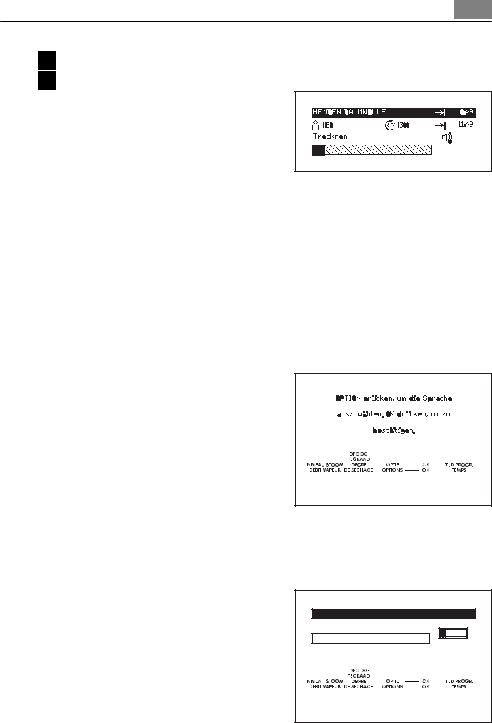
First start-up 13
3Option icon after option selection.
4Visualization of additional functions.
Each time when the cycle is performed, you are informed by animated progress bar about cycle status. In some cases you might be also guide and warn by displayed messages.
First start-up
Switching machine on / switching light on
Turn the programme selector to any programme or turn it to LIGHT. The machine has been switched on. When the loading door is opened, the drum is illuminated.
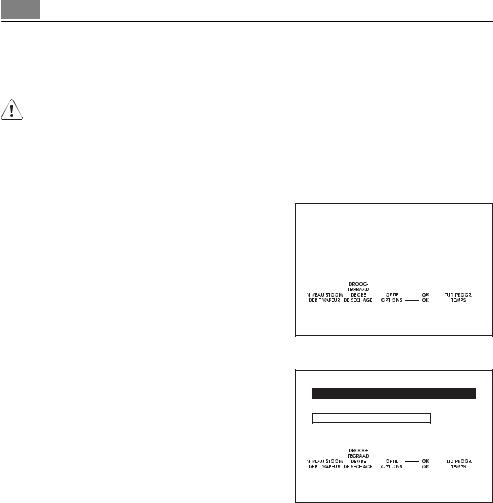
Setting the language
Once the programme knob is set to any pro-
gramme, e. g. COTTON SHIRTS (, the display lights up and should look like the illustration opposite.
The first time the appliance is used a brief in-
troduction is activated in order to help you make the necessary introductory settings.
Short help-text will change into the language
setting view as soon as you press the OPTION or OK button.
If you want to keep the language: press the OK button.
If you want to change the language:
1.Press the OPTION button repeatedly, until the desired language appears in the display.
2.To confirm the choice press the OK button. After this a text appears asking you again to confirm the set language. This step is added to ensure that you did not set a language by
INSTELLINGEN |
|
Terug |
|
TAAL |
|
TIJD |
NED |
14 First start-up
mistake.
To confirm the choice press the OK button again.
In case of mistake or at any time after the first time use a short-cut is provided to avoid going through the SETTINGS. Keeping pressed together the buttons STEAM LEVEL and DRYNESS for about 5 seconds the language setting view appears.
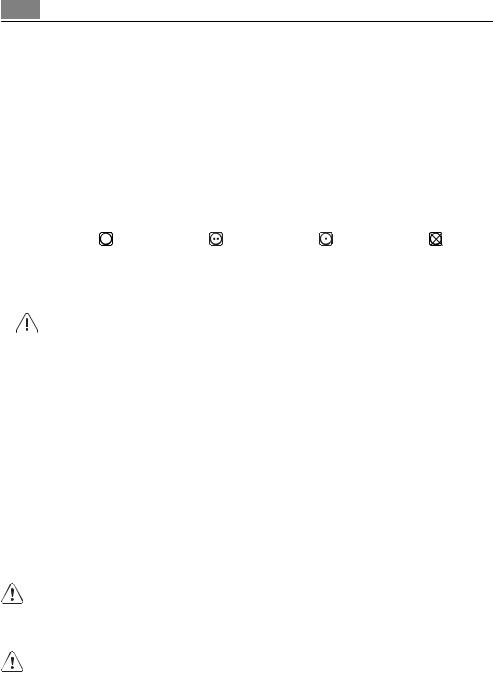
Setting the time
Just after setting the language you are asked to set the time.
Short help-text will change into the time setting view as soon as you press the OPTION or OK button.
So that the time and the end of the programme are correctly displayed, please check the time shown in the display and set the current time if necessary.
To select the time please use OPTION (OPTIE) button to confirm press OK.
See also the chapter " Machine settings".
Press OPTION to set time. Press |
OK to activate it. |
SETTINGS |
|
LANGUAGE |
|
CLOCK |
9:21 |
BRIGHTNESS |
|
Before first use
In order to remove any residues which may have been produced during production, wipe the dryer drum with a damp cloth or carry out a brief drying cycle (30 MIN) with damp cloths in the machine.
1.Turn the programme knob to TIME (TIJD PROGR.).
2.Press the TIME(TIJD PROGR.) button repeatedly until 30' appears in the display.
3.Press the START PAUSE (START/PAUZE) button.

Before first use 15
Before first use
In order to remove any residues which may have been produced during production, wipe the dryer drum with a damp cloth or carry out a brief drying cycle (30 MIN) with damp cloths in the machine.
16
Sorting and preparing laundry
Sorting laundry
•Sort by fabric type:
–Cotton/linen for programmes in COTTONS (KATOEN) (KATOEN) pogramme group.
–Mixtures and synthetics for programmes in SYNTHETICS (KATOENEN) programme group.
•Sorting by care label. The care labels mean:
|
|
|
|
|
|
|
|
|
|
|
|
Drying in the tumble |
|
Dry at normal |
Dry at reduced |
|
Drying in the tumble |
dryer possible in prin- |
|
temperature (choose |
|
||
|
temperature |
|
dryer not possible |
||
ciple |
|
DELICATE option!) |
|
||
|
|
|
|
||
|
|
|
|
|
|
Do not place in the appliance any wet laundry which is not specified on the care label as being suitable for tumble-drying.
This appliance can be used for all wet laundry items which are labelled as suitable for tumble-drying.
•Do not dry new, coloured textiles together with light-coloured laundry items. Textile colours may bleed.
•Do not dry cotton jersey and knitwear with the EXTRA programme. Items may shrink!
•Wool and wool-like textiles can be dried using the WOOL (WOL) programme. Before the drying cycle spin the woollen textiles as well as possible (max. 1200 rpm). Only dry woollen textiles together which are similar or the same with respect to material, colour and weight. Please dry heavy laundry items made of wool separately.
Special notes about Pro Steam
• The following textiles cannot be treated using a Pro Steam programme:
leather, textiles with large metal, wooden or plastic parts, textiles with rusting metal parts, oilskins or wax cotton garments.
• To smooth or freshen laundry with a Pro Steam programme, sort laundry by size, weight, material and colour.
Only smooth textiles together that are similar in terms of size, weight, material and colour.
17
•Do not dry new, coloured textiles together with light-coloured laundry items. Colours may fade (check colour fastness of fabric when damp in an inconspicuous area).
•Do not use dry cleaning sets in combination with Pro Steam programmes.
Preparing laundry
•To avoid laundry becoming tangled: close zips, button up duvet covers and tie loose ties or ribbons (e.g. of aprons).
•Empty pockets. Remove metal items (paper clips, safety pins, etc).
•Turn items with double-layered fabrics inside out (e.g. with cotton-lined anoraks, the cotton layer should be outermost). These fabrics will then dry better.
Special notes about Pro Steam
•Before treating garments with a Pro Steam programme, remove stains by washing or using localized stain removal
Opening loading door / loading laundry
1. Open loading door:
Use force to push against the loading
door (push point - see picture) 2. Load your laundry (do not force it in).
 CAUTION!
Do not jam laundry in between the loading door and rubber seal.
3. Close loading door securely. Lock must audibly lock.

18
Pro Steam system
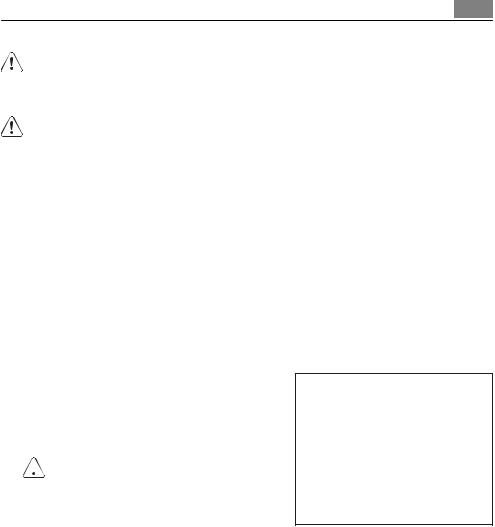
Fill steam water tank
You must fill up the steam water tank before using a Pro Steam programme for the first time. Use the distilled water provided if there is not yet any condensed water from previous drying programmes (see chapter on ‘Care and cleaning, Emptying condensed water container’). If, after a Pro Steam programme is selected, following message The steam water tank is empty. Please fill it and then press START on the display appears, you will need to fill up the steam water tank with distilled water. Otherwise, you will not be able to start any Pro Steam programme.
Pull drawer containing condensed water container out a little 1, then pull the water tank’s filler neck 2
2 |
1 |
|
Important! Only fill the water tank with distilled or fully desalinated water. Do not use tap water or additives! You can also use the condensed water from the tank, as long as you filter it first (use the canister supplied with the filter fitted: see picture opposite).
Fill with distilled water from the canister provided, up to the MAX mark inside the container.
max. |
Push filler neck and drawer with condensed water container back in.
When dry, all textiles not specifically prohibited in the chapter ‘Sorting and preparing laundry’ may be treated with the Pro Steam System. Wet textiles may only be treated if they are labelled as suitable for dry programmes.
Water recirculation system
This system allows you to use for a Pro Steam cycle automatically the condensed water collected in the condense water tank during a drying cycle.
19
The water in the condense water tank will never automatically fill the steam water tank.
The water recirculation system works only if it is supplied by water arising during standard drying cycles.
To activate this system turn the valve in ON position. When the valve is ON the steam water tank will be filled during the next drying cycle. Water will be supplied by the water circuit directly to the steam water tank filling it automatically.
To activate recirculation set valve in ON position. To do that:
1. Pull drawer containing condensed |
1 |
2 |
|
water container out a little. Behind |
|||
|
|
||
the drawer there are two elements: |
ON |
OFF |
|
1 steam water inlet - for manual |
|
|
|
refilling of steam water |
|
|
|
container. |
|
|
|
2 water recirculation system valve/ |
|
|
|
filter. |
|
|
2.turn the valve in ON position. Water will be supplied by the water circuit
directly to the steam water tank filling it automatically during the next drying cycle.
The steam water tank is empty. Please fill it and then press START
If valve is closed (OFF (UIT) position) - recirculation system does not work.

20
Overview of Pro Steam programmes
|
|
Additional functions / |
|
|
|||||
|
loadmax.(weight when dry) |
|
options |
|
|
|
|||
|
|
|
|
|
|
|
|
||
|
LEVELSTEAM(NIVEAU STOOM) |
ANTILONG-CREASE |
BUZZER |
SPINSPEED |
STARTDELAY(STARTUITSTEL) |
|
|
||
|
|
|
1) |
|
|
|
|
|
|
Programmes |
|
|
|
1) |
1) |
|
Application/properties |
|
|
|
|
|
|
|
|
|
|
||
|
|
|
|
|
|
|
|
|
|
COTTON SHIRTS |
|
|
|
|
|
|
For 1- 5 cotton shirts. Min. 80% |
wet, |
|
(KATOENEN |
1.0 kg |
• |
• |
• |
• |
• |
dry |
||
natural fibres (cotton, linen etc). |
|||||||||
HEMD) |
|
|
|
|
|
|
|
||
|
|
|
|
|
|
|
|
||
|
|
|
|
|
|
|
|
|
|
SYNTHETIC SHIRTS |
|
|
|
|
|
|
For 1- 5 synthetic shirts. Max. 20% |
wet, |
|
(SYNTHETISCHE |
1.0 kg |
• |
• |
• |
• |
• |
dry |
||
natural fibres (cotton, linen etc). |
|||||||||
HEMDEN) |
|
|
|
|
|
|
|
||
|
|
|
|
|
|
|
|
||
|
|
|
|
|
|
|
|
|
|
COTTONS (KA- |
|
|
|
|
|
|
For smoothing cotton garments. |
wet, |
|
3.0 kg |
• |
• |
• |
• |
• |
Min. 80% natural fibres (cotton, |
dry |
||
TOEN) |
|||||||||
|
|
|
|
|
|
linen etc). |
|
||
|
|
|
|
|
|
|
|
||
|
|
|
|
|
|
|
|
|
|
EASY CARE |
|
|
|
|
|
|
For smoothing easy-care gar- |
wet, |
|
1.5 kg |
• |
• |
• |
• |
• |
ments. Max. 20% natural fibres |
dry |
||
(SYNTHETISCH) |
|||||||||
|
|
|
|
|
|
(cotton, linen etc). |
|
||
|
|
|
|
|
|
|
|
||
WOOL REFRESH |
1-2 |
|
|
|
|
|
For refresh and odour removal, up |
dry |
|
• |
- |
• |
- |
• |
to two items. Only for dry gar- |
|
|||
(OPFRISSEN WOL) |
items |
|
|||||||
|
|
|
|
|
ments. |
|
|||
|
|
|
|
|
|
|
|
||
CASUAL REFRESH |
|
|
|
|
|
|
For casual refresh like T-shirts, |
dry |
|
(OPFRISSEN |
2.5 kg |
• |
• |
• |
- |
• |
|
||
trousers, skirts etc.2) |
|
||||||||
CASUAL) |
|
|
|
|
|
|
|
||
|
|
|
|
|
|
|
|
||
|
|
|
|
|
|
|
|
|
|
BUSINESS RE- |
|
|
|
|
|
|
For suits, jacket suits and trousers |
dry |
|
FRESH (OPFRISSEN |
2.5 kg |
• |
• |
• |
- |
• |
|
||
refresh |
|
||||||||
BUSINESS) |
|
|
|
|
|
|
|
||
|
|
|
|
|
|
|
|
||
|
|
|
|
|
|
|
|
|
|
1)OPTION(OPTIE) menu
2)for more details please refer to Textile Guide leaflet.
 Loading...